Software or hardware configuration
Before configuring the printer, make sure that the printer is loaded with a paper roll.
To configure the software or hardware, follow these steps:
- To know the current settings, print the diagnostics form.
- Turn on the printer.
- Open the receipt cover.
- While pressing down the paper feed button, close the receipt cover. The printer beeps and prints the diagnostics form.
- Disconnect the power cable from the rear of the printer.
- While pressing down the paper feed button, reconnect the power cable. The printer beeps and prints the Main Menu.

- Press the paper feed button according to the number of clicks presented in the main menu, and then hold the button down for at least one second to validate.
The following is an example of configuring the printer for Emulation.
This option is to set Sync Mode, LPI, Carriage, Asian Mode, Code Page, Special Font, Compress Pitch Font, 48 Character Mode, PDF417 Max Columns, Auto Reset mode, Compatible Top Margin.
To enter into emulation mode, press the Paper Feed button twice as short click and do long press until a beep sound is generated.
By following the above steps, the submenu will appear as follows:
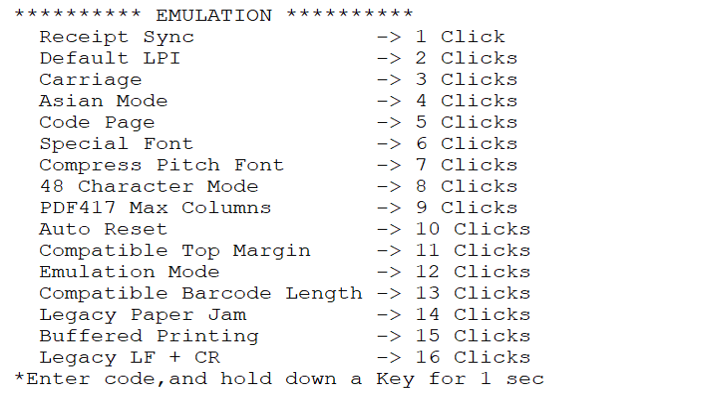
Buffered Printing & Legacy LF + CR are supported in Series ii only.
Printer Configuration form indicates the printer individual information and configurations, as shown in the following examples.
For Series i:

Take note of the following for Legacy Paper Jam:
- Paper Out option is caused by Paper Jam with Paper Exhaust.
- Knife Jam option is caused by Paper Jam with Cutter Error.
- For more information, refer to the 1F 11 command table.
For Series ii:

