SpacePole Display Mount with 2x20 Mount
Introduction
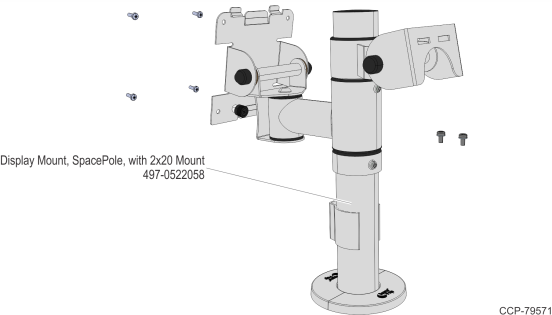
This kit provides the components to install a SpacePole Display Mount with 2x20 Mount.
Kit Contents
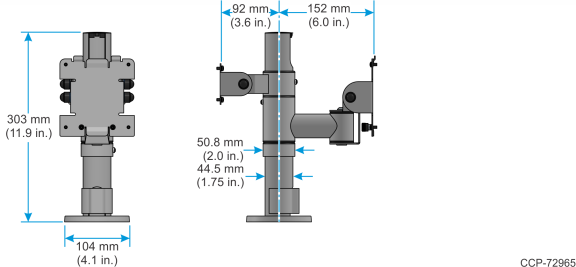
Dimensions
Installation Procedure
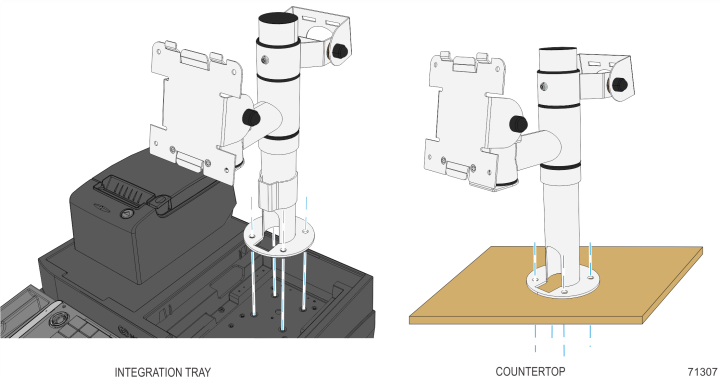
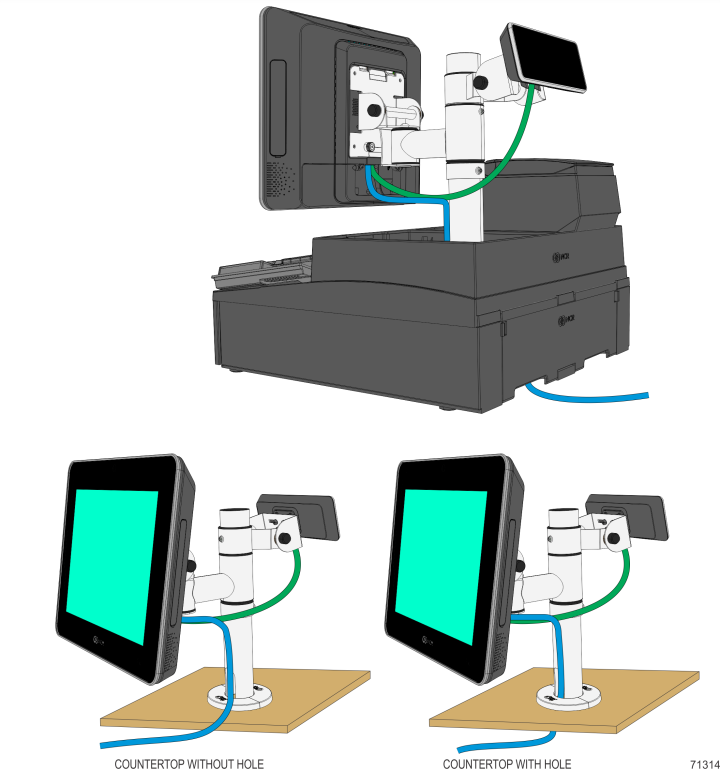
1.For countertop installation, drill four holes for the mounting bolts in the desired location. Use the SpacePole Mount base as a template for locating the holes. Install the SpacePole Display Mount with 2x20 mount and secure with screws (4) or bolts (4) included in the hardware pack or with your preferred fasteners.
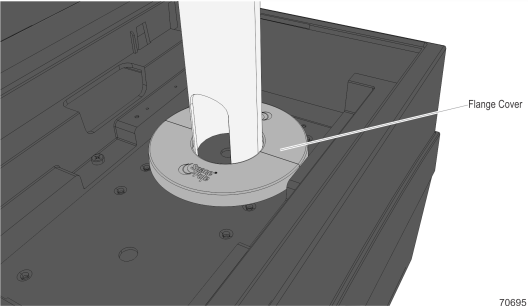
2.Install the Flange Cover.
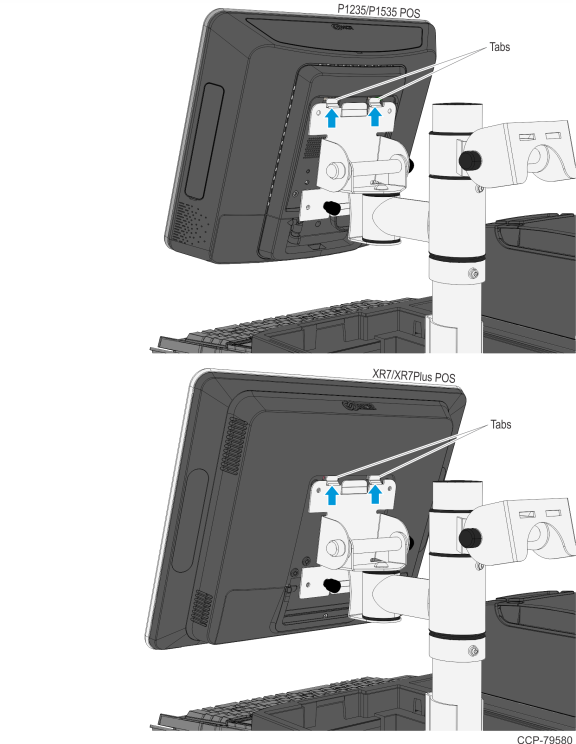
3.Attach the POS main display to the SpacePole arm by sliding the bracket tabs into the head slots.
Note: For XL Displays, connect the cables to the back of the display before mounting the display on the bracket.
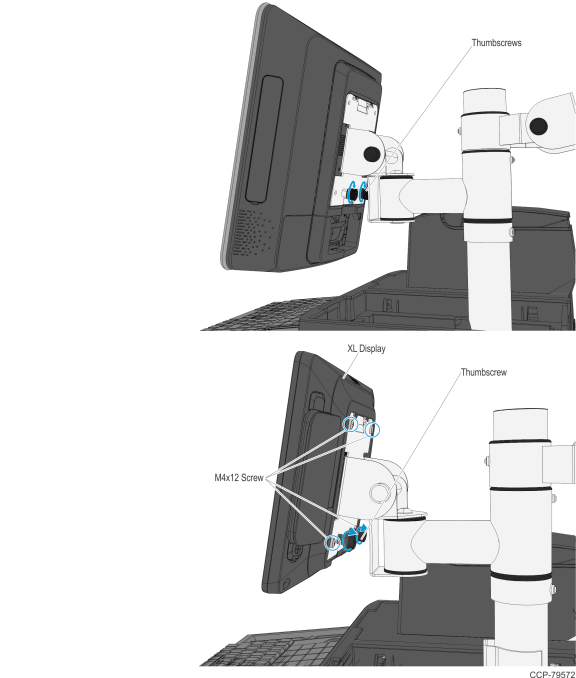
4.Tighten the (2) thumbscrews at the bottom of the bracket to secure the main display. For XL Displays, tighten the (2) thumbscrews and install (4) M4x12 screws to secure the display.
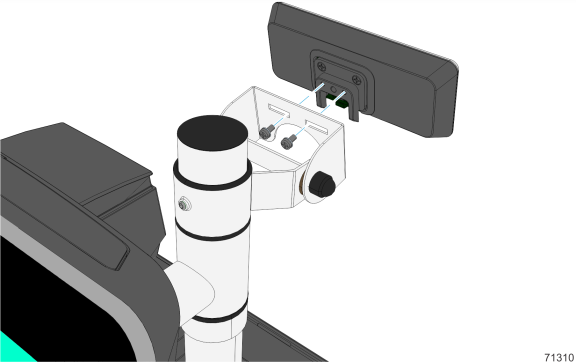
5.Attach the 2x20 customer display to the SpacePole arm and secure with screws (2).
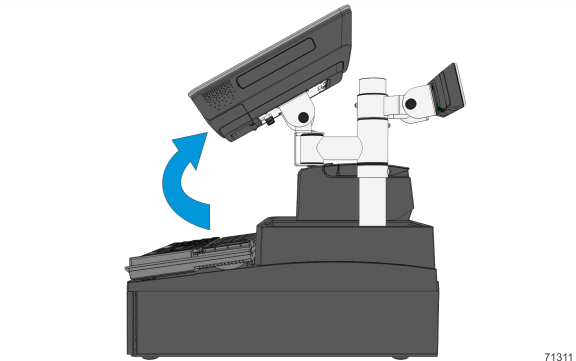
6.Pivot the main display towards the back.
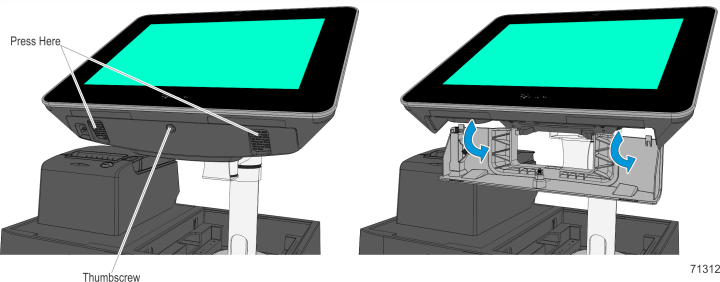
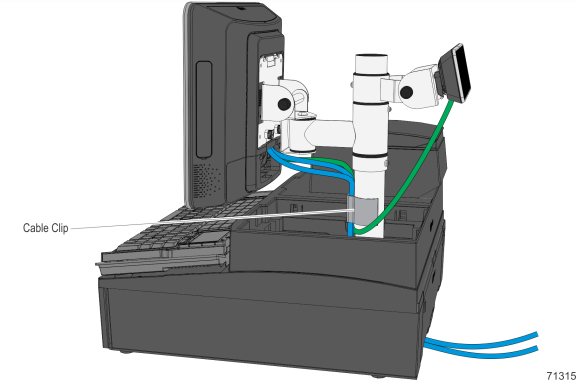
7.Open the Terminal Cable Cover.
NCR P1235 POS (7745)/NCR P1535 POS (7761)
•Loosen the screw on the Terminal Cable Cover. To open, press the indentations in the Cable Cover to unlatch the cover then pivot to open.
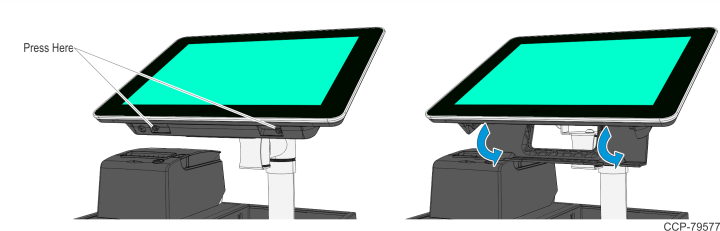
NCR XR7 POS (7702)/NCR XR7 Plus POS (7703)
•Press on the indentations in the Cable Cover to unlatch the cover and then pivot the cover open.
8.Route the customer display cable to the main display and connect to the corresponding connectors. Close the Cable Cover.
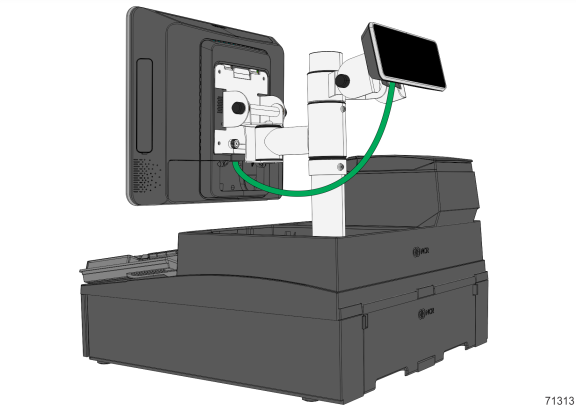
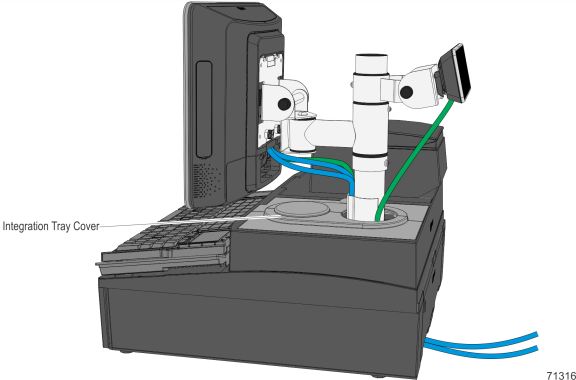
9.Route the cables from the main display down the SpacePole Mount and out of the integration tray or countertop.
10.Install the Cable Clip to secure the cables.
11.Add the integration tray cover.