Wall Mount with Expansion
Introduction
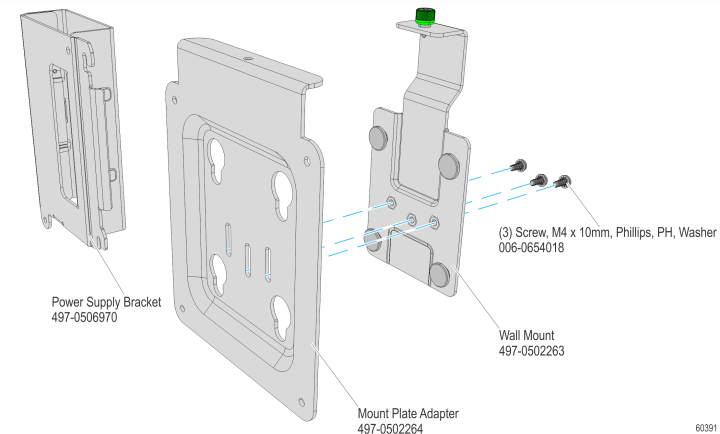
This kit provides a wall mount for the P1535/P1235 with the expansion module.
Installation Procedure
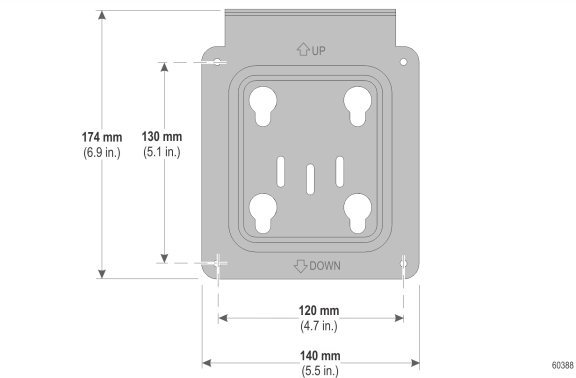
1.Secure the Mount Plate (with UP arrow pointing up) to the vertical surface using lag screws (4). Make sure you install the screws into the studs or that you use hardware of similar strength. Use the bracket as a template to mark the location of the holes or use the dimensions shown below.
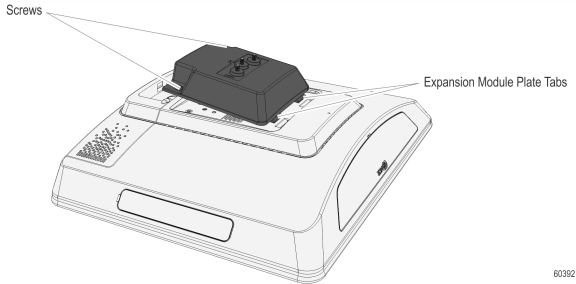
2.Remove the Expansion Module from the terminal.
a.Loosen the screws (2).
b.Pivot the bottom end of the module up and then remove the plate tabs on the top end of the expansion module from the slots in the rear cabinet.
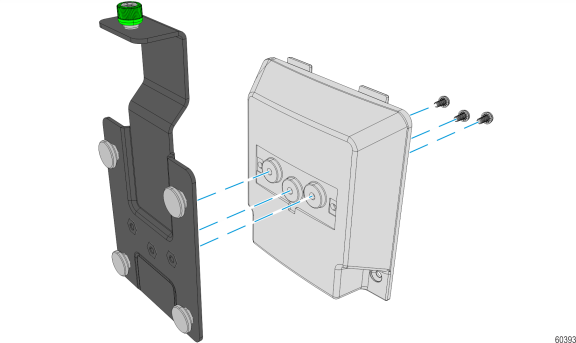
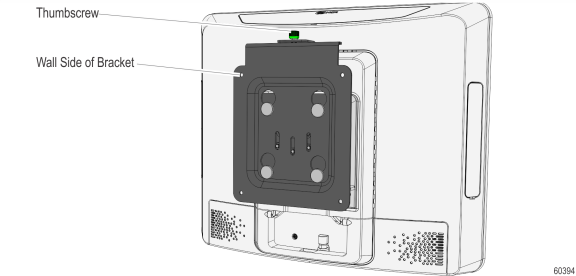
3.Install the Wall Mount Bracket (with the thumbscrew facing up) onto the Expansion Module with the supplied screws (3).
4.Re-install the Expansion Module onto the terminal.
5.Hang the terminal on the Mount Plate.
a.Insert the mushroom studs on the Wall Mount into the elongated slots on the Mount Plate.
b.Slide the terminal down to lock the brackets together.
c.Secure the brackets with the thumbscrew.
Power Supply Bracket
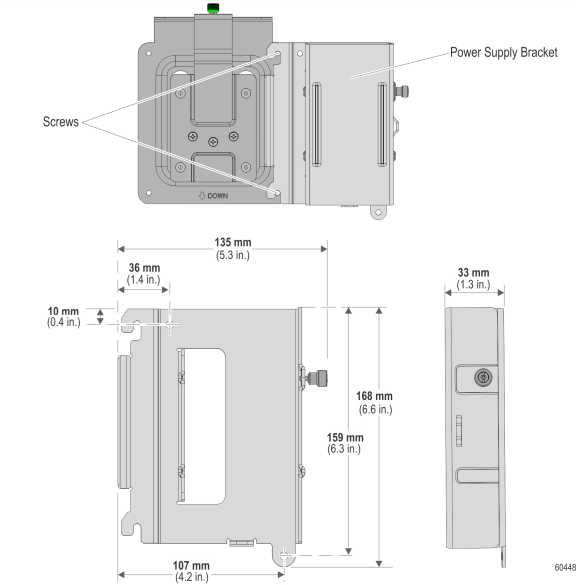
1.Attach the Power Supply Bracket beside the Mount Plate.
a.Loosen the screws (2) of the Mount Plate.
b.Hook the Power Supply Bracket over the screws. Re-tighten the screws.
Note: To install the Power Supply Bracket independently from the Mount Plate, refer to the dimensions or use the bracket as a template to mark the location of the holes.
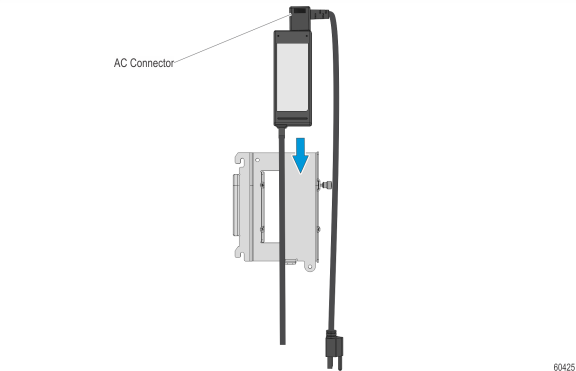
2.Insert the power supply into the bracket (AC Connector on top).
3.Replace the front cover of the bracket.
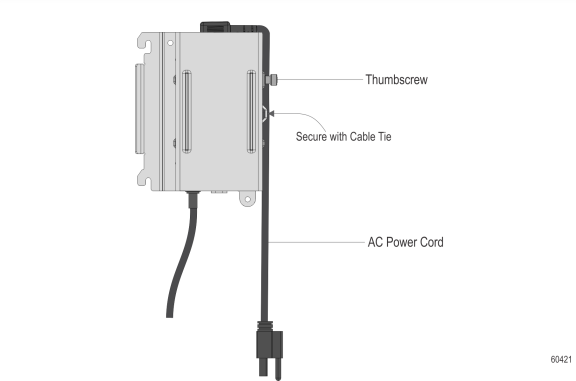
4.Secure the bracket with the thumbscrew and the AC Power Cord with a cable tie.