90W/150W Power Supply
Introduction
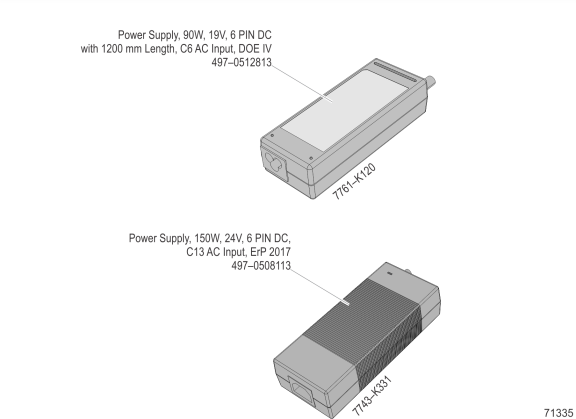
This kit provides a 90W, 19V or 150W, 24V Power Supply.
Kit Content
Installation Procedure
P–Series Stand
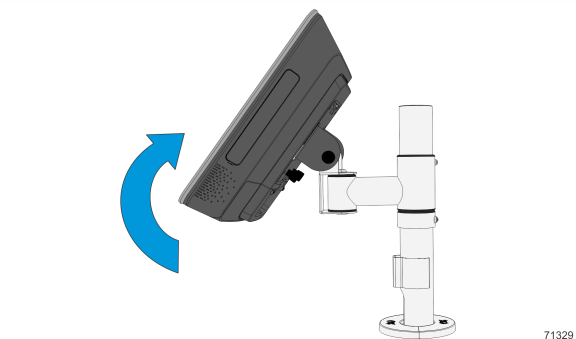
1.Pivot the display toward the back.

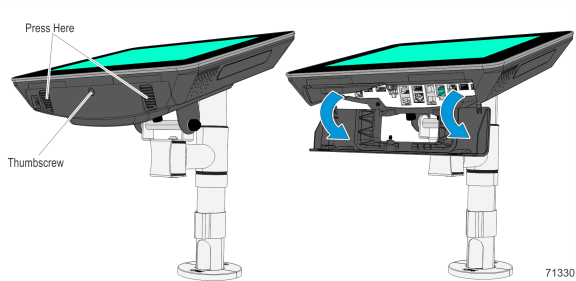
2.Remove the Upper Stand Cover by pivoting it away from the stand. The cover has a simple snap fit connection at the top.
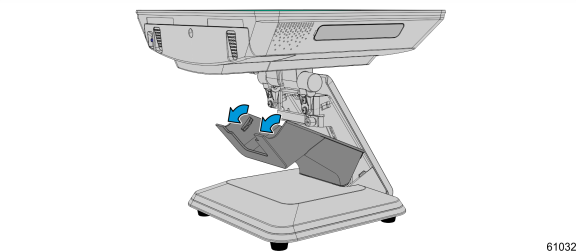
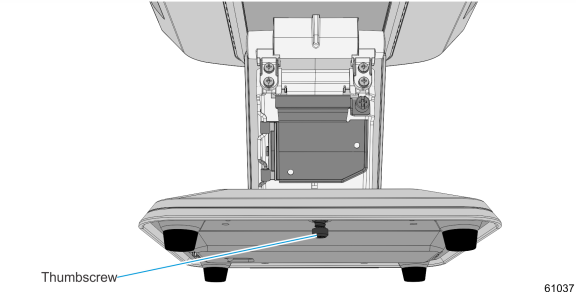
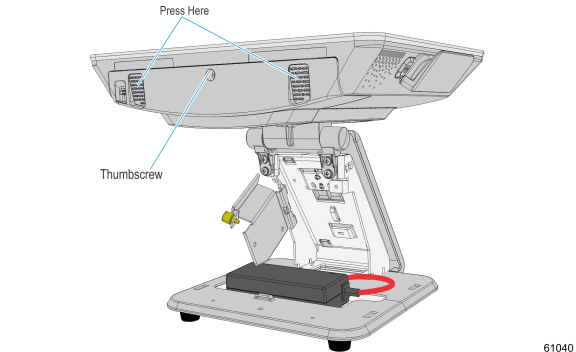
3.Loosen the Thumbscrew that secures the Base Cover.
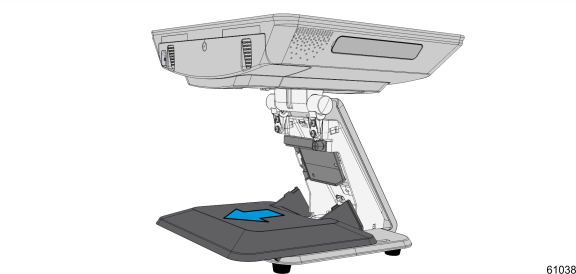
4.Slide the Base Cover toward the front slightly to disengage it from the Base.
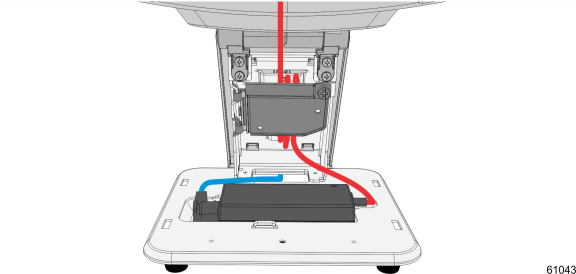
5.Route the AC Power Cord up through the base of the stand.
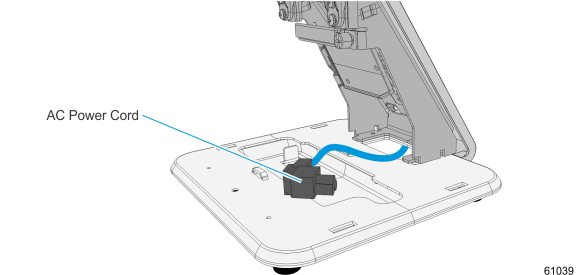
6.Attach the Power Cord to the Power Brick.
7.Install the Power Brick in the Base.
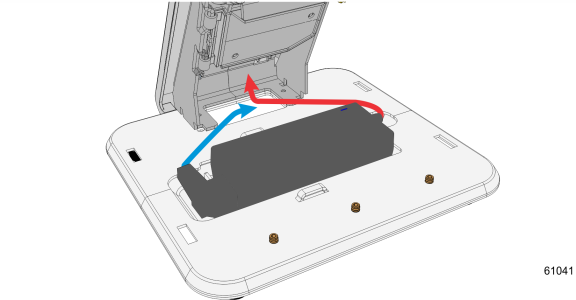
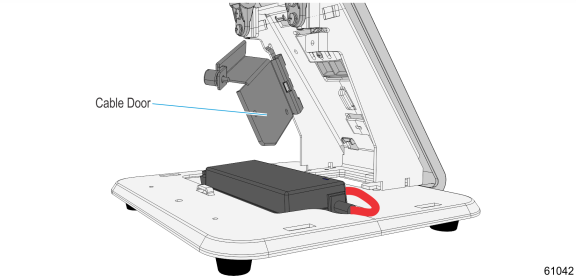
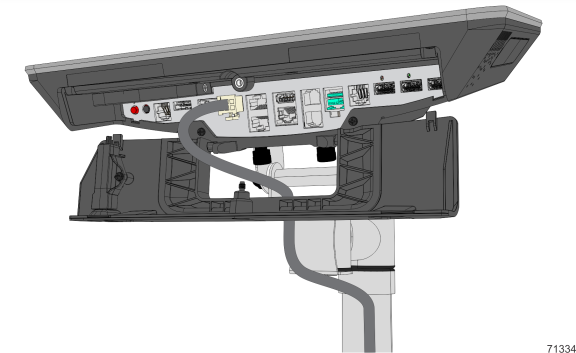
8.Loosen the thumbscrew to open the Cable Door.
9.Loosen the screw on the Terminal Cable Cover. To open, press the indentations on the Cable Cover to unlatch the cover then pivot to open.
10.Route the power cable up through the stand and connect the power supply cable to the Power In connector.
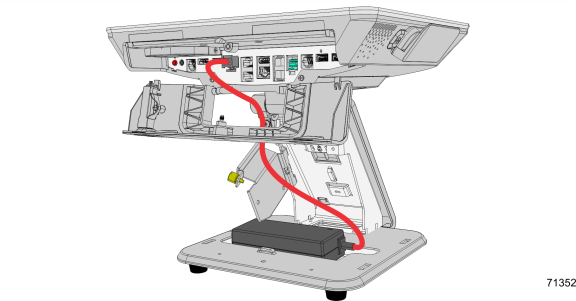
11.Secure the excess power cables with a cable tie and place the cables behind the Cable Door.
12.Close the Cable Door and tighten the thumbscrew to secure the door.
13.Reinstall the Base Cover and tighten thumbscrew to secure cover.
14.Connect the AC Power cord to an AC outlet.
Pole Mount
1.Pivot the display toward the back.
2.Loosen the screw on the Terminal Cable Cover. To open, press the indentations on the Cable Cover to unlatch the cover then pivot to open.
3.Attach the Power Cord to the power supply.
4.Route the power supply cable up through the pole mount and to the display.
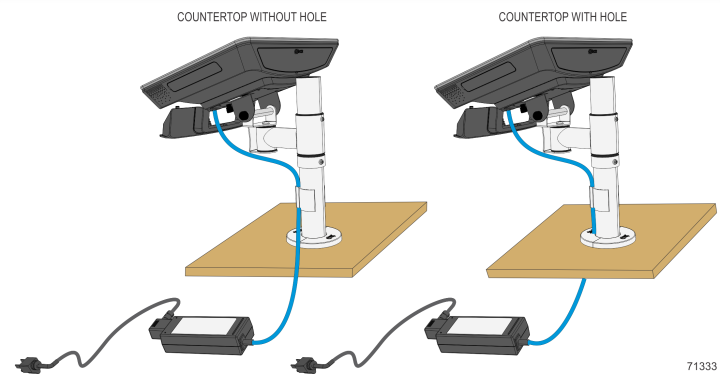
5.Connect the power supply cable to the Power In connector.
6.Close the Cable Cover and tighten thumbscrew to secure cover.
7.Connect the AC Power cord to an AC outlet.