Installing the Equinox 6200M
To install the Ingenico Equinox 6200M PIN Pad, follow these steps:
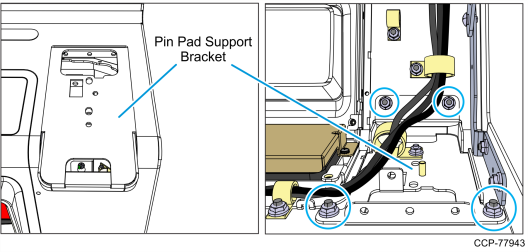
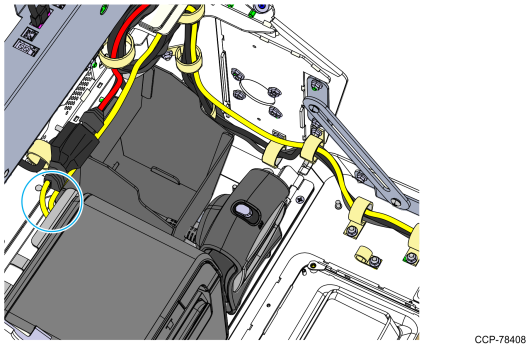
1.If the Small PIN Pad Support Bracket is installed, remove it from the kiosk.
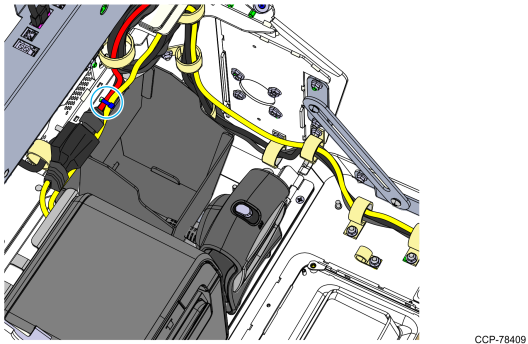
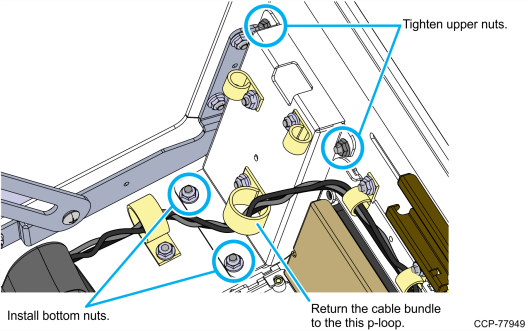
a.Remove the cable bundle from the p-loop indicated in the following image.
b.Remove the two bottom nuts and loosen the two upper nuts, and then slide up the Small PIN Pad Support Bracket to remove it from the unit.
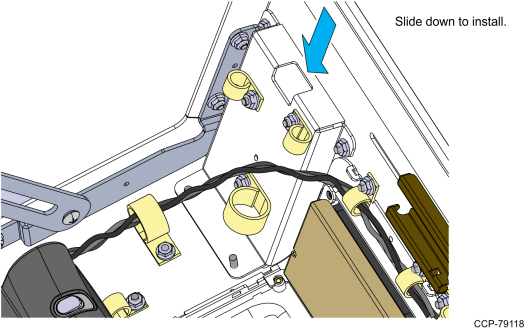
2.Mount the Equinox 6200M bracket onto the Lower Module Door.
a.Slide down the hooks of the Equinox 6200M bracket onto the upper mounting studs.
b.Tighten the two upper nuts and install the two bottom nuts, and then return the cable bundle into the p-loop.
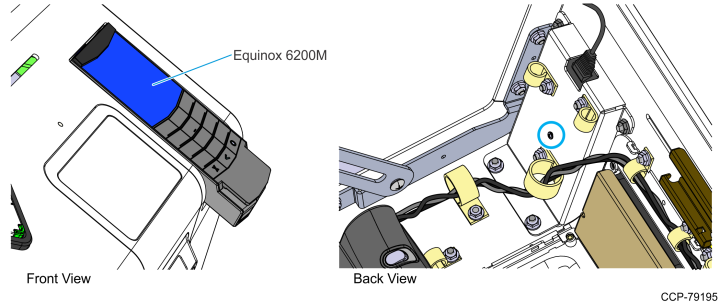
3.Insert the small connector of the Equinox 6200M Cable into the bracket hole.
4.Install the Equinox 6200M on the bracket and secure it with an M2 screw.
Caution: Ensure that the PIN Pad Cable is not pinched.
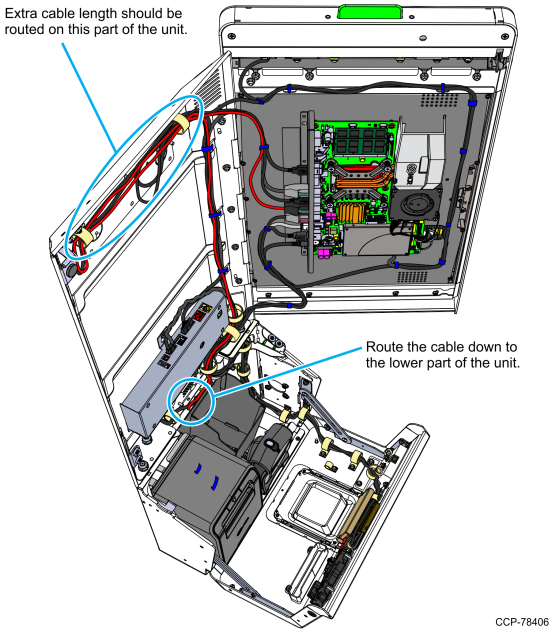
5.Route and connect the Equinox 6200M Powered USB cable to the USB E port of the motherboard.
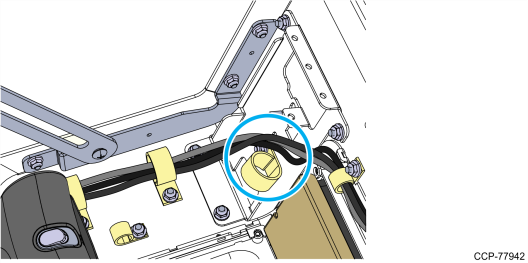
Note: Route and bundle extra cable length on the area indicated in the following image, and then secure the cable with cable ties and p-loops along its route.
6.Connect the Equinox 6200M Cable to its Adapter.
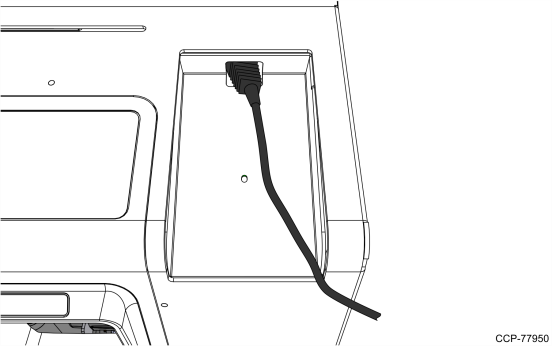
a.Route the Equinox 6200M Cable towards the Printer area.
b.Connect the Equinox 6200M Cable to its Adapter, and then connect the Adapter to the Powered USB cable.
c.Bundle the extra cable length as shown in the following image.
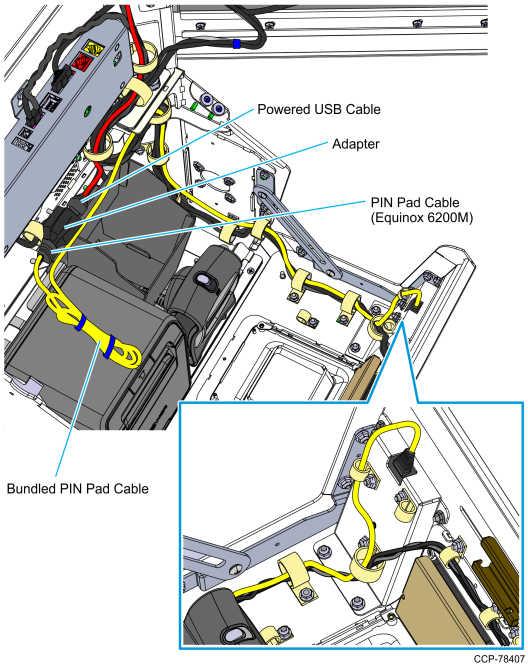
d.Tuck the cable bundle at the back of the printer bracket.
e.Use a cable tie to secure the cable bundle as shown in the following image.