Dual-Sided Primary Terminal
To route and connect cables for the primary terminal of a dual-sided kiosk, follow these steps:
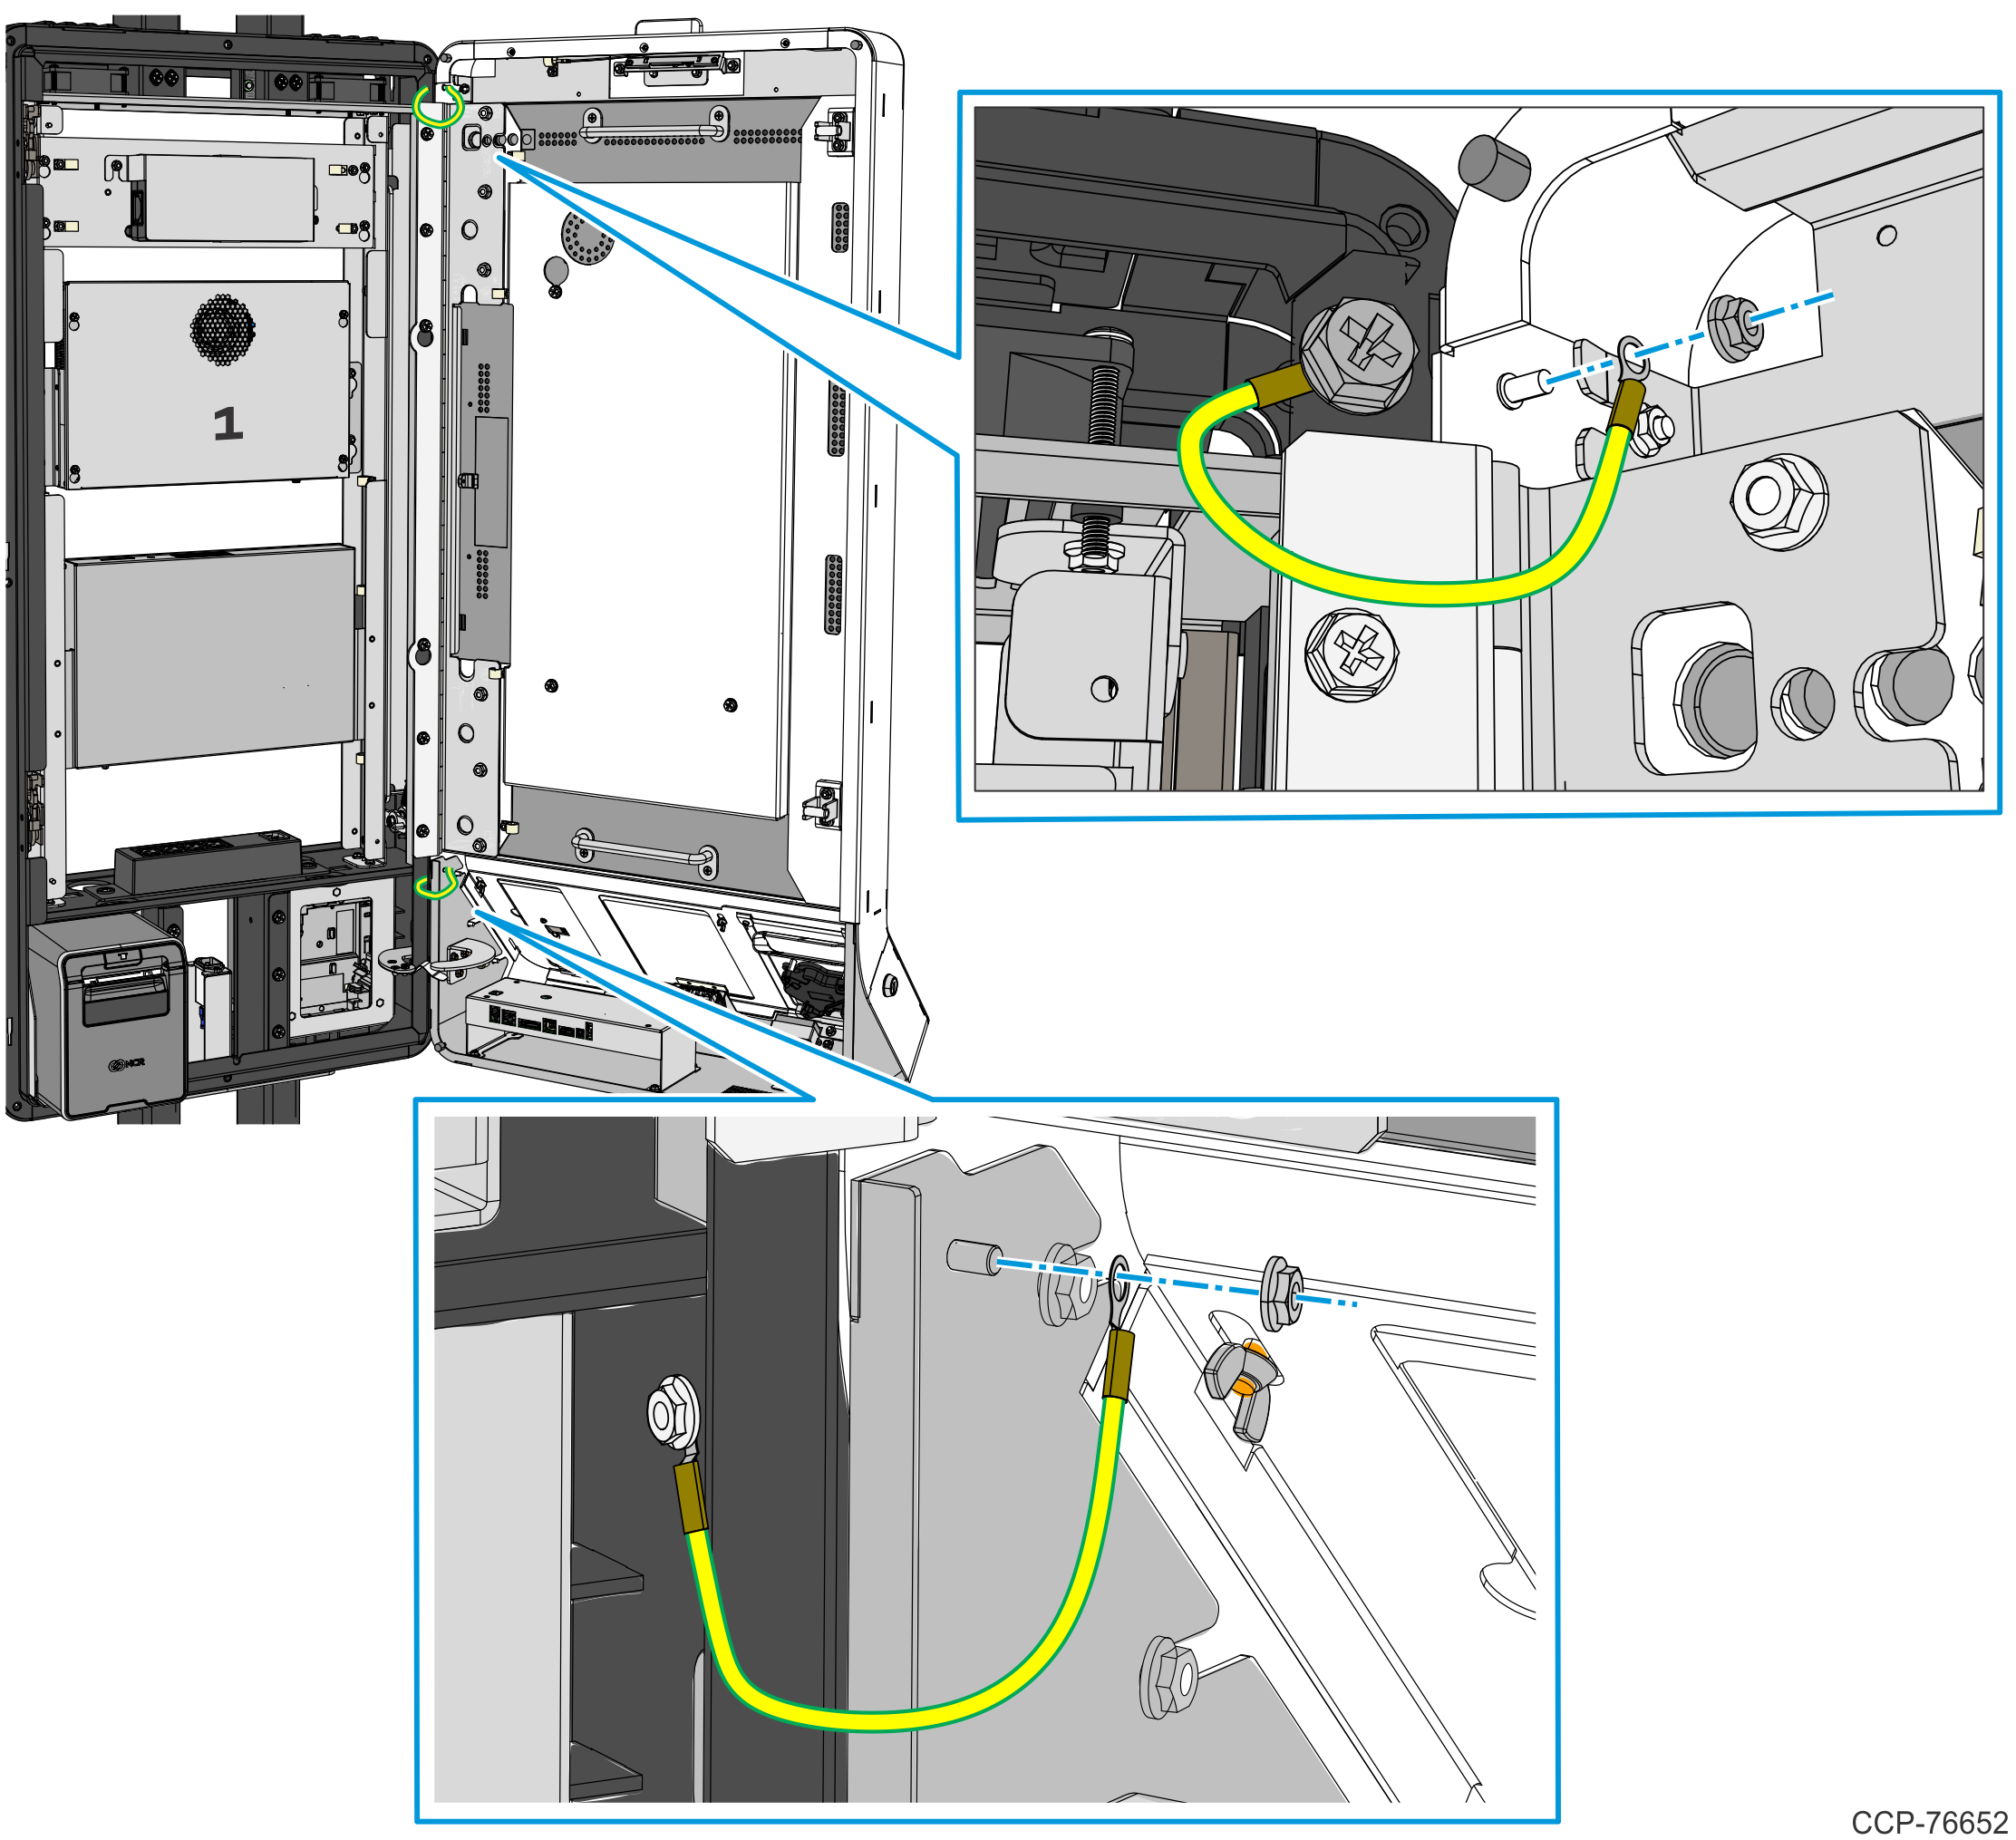
1.Connect the ground cables from the Door to the Main Frame.
•Main Frame to Door Panel – top side
•Main Frame to Door Cabinet – bottom side
a.Insert the terminal ring of the grounding cable into the grounding stud.
b.Secure the grounding cable with a nut.
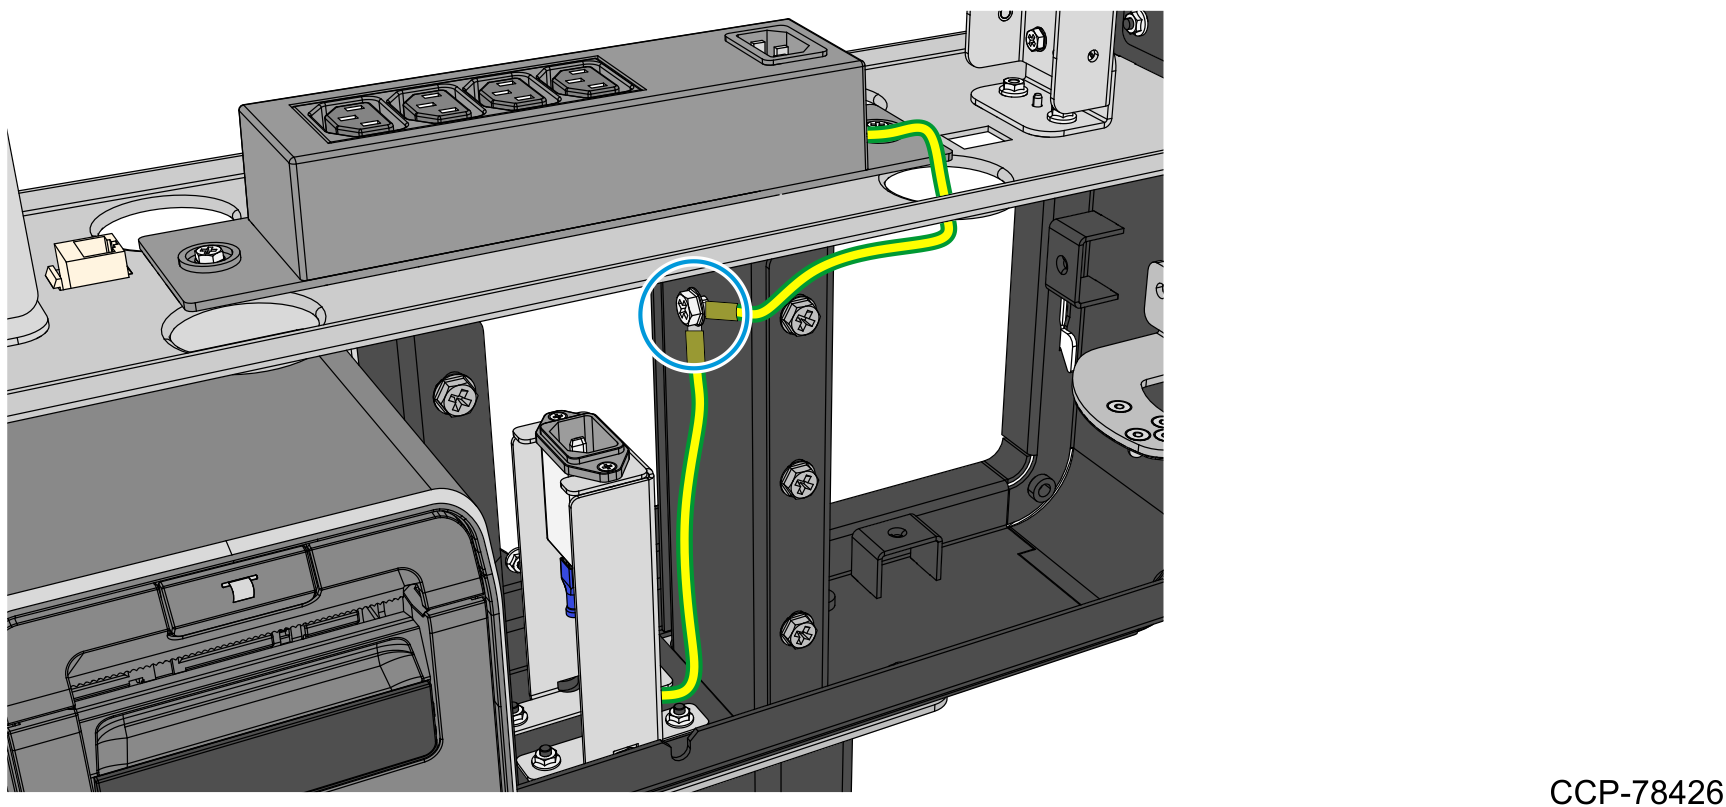
2.Connect the other ends of the Power Strip and the AC Filter ground cables to the kiosk.
• Using an M4 screw, secure the ground cables to the right-hand leg mount.
3.Remove the bundled cables from the bubble wrap.
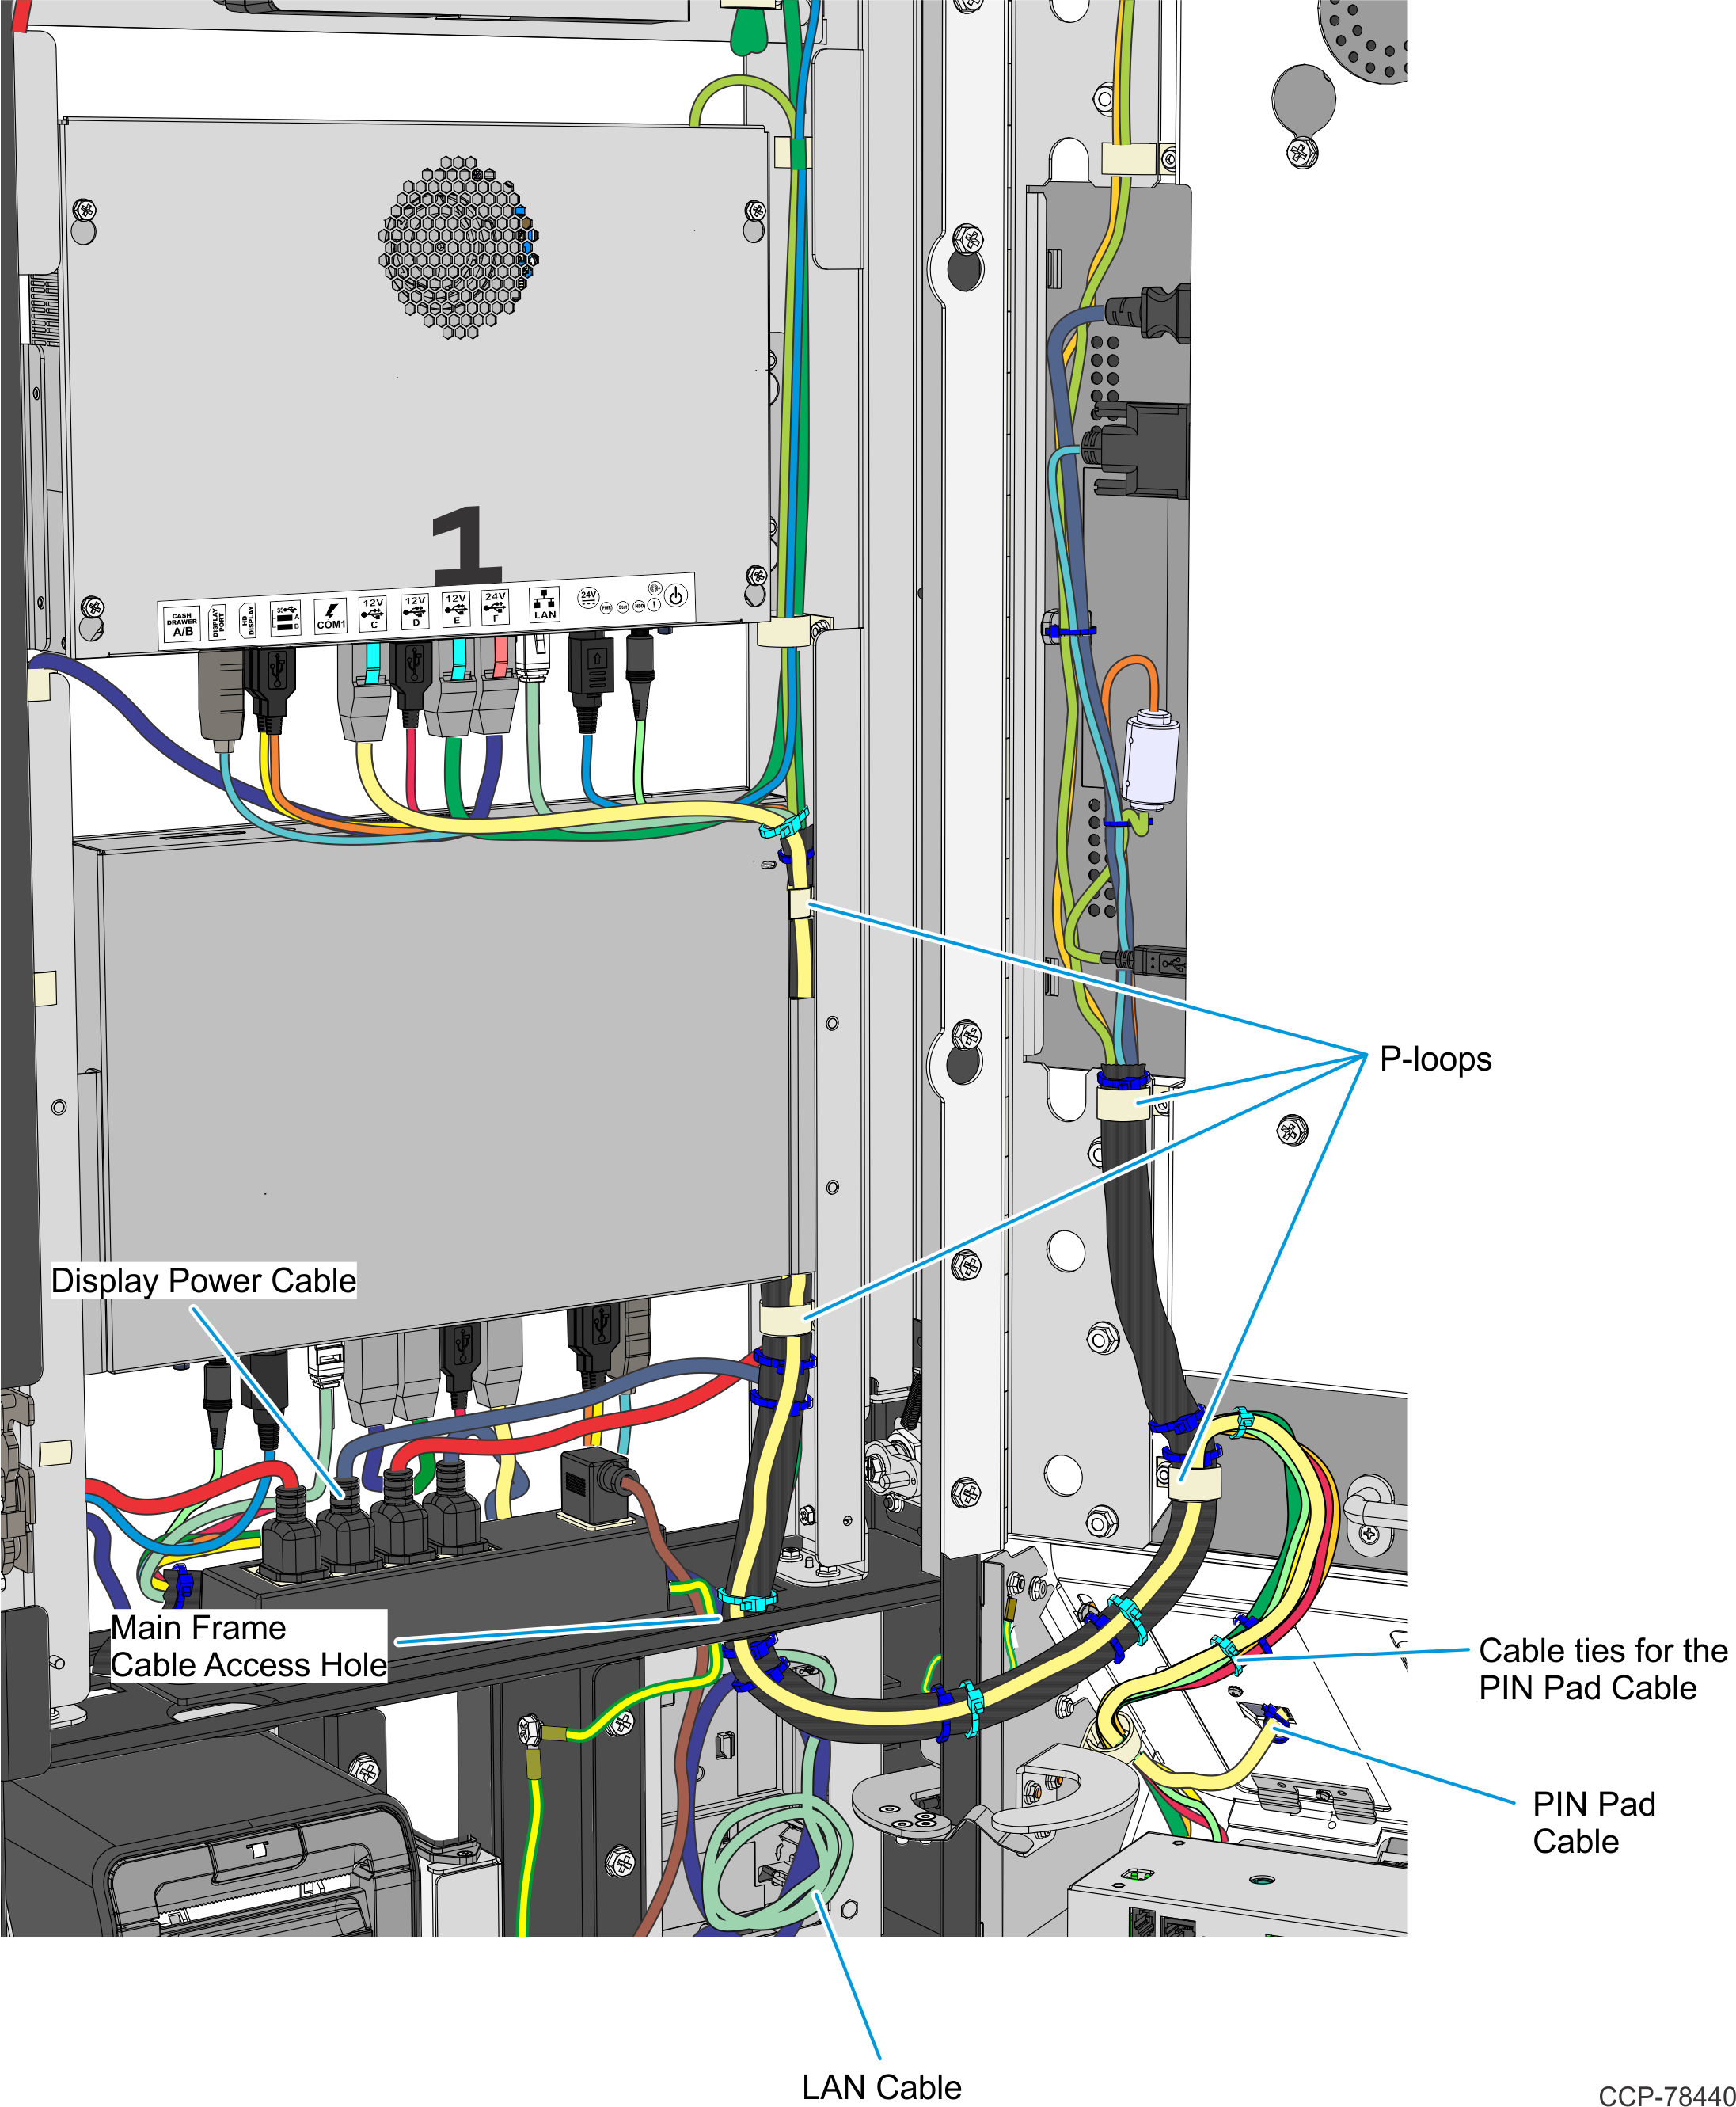
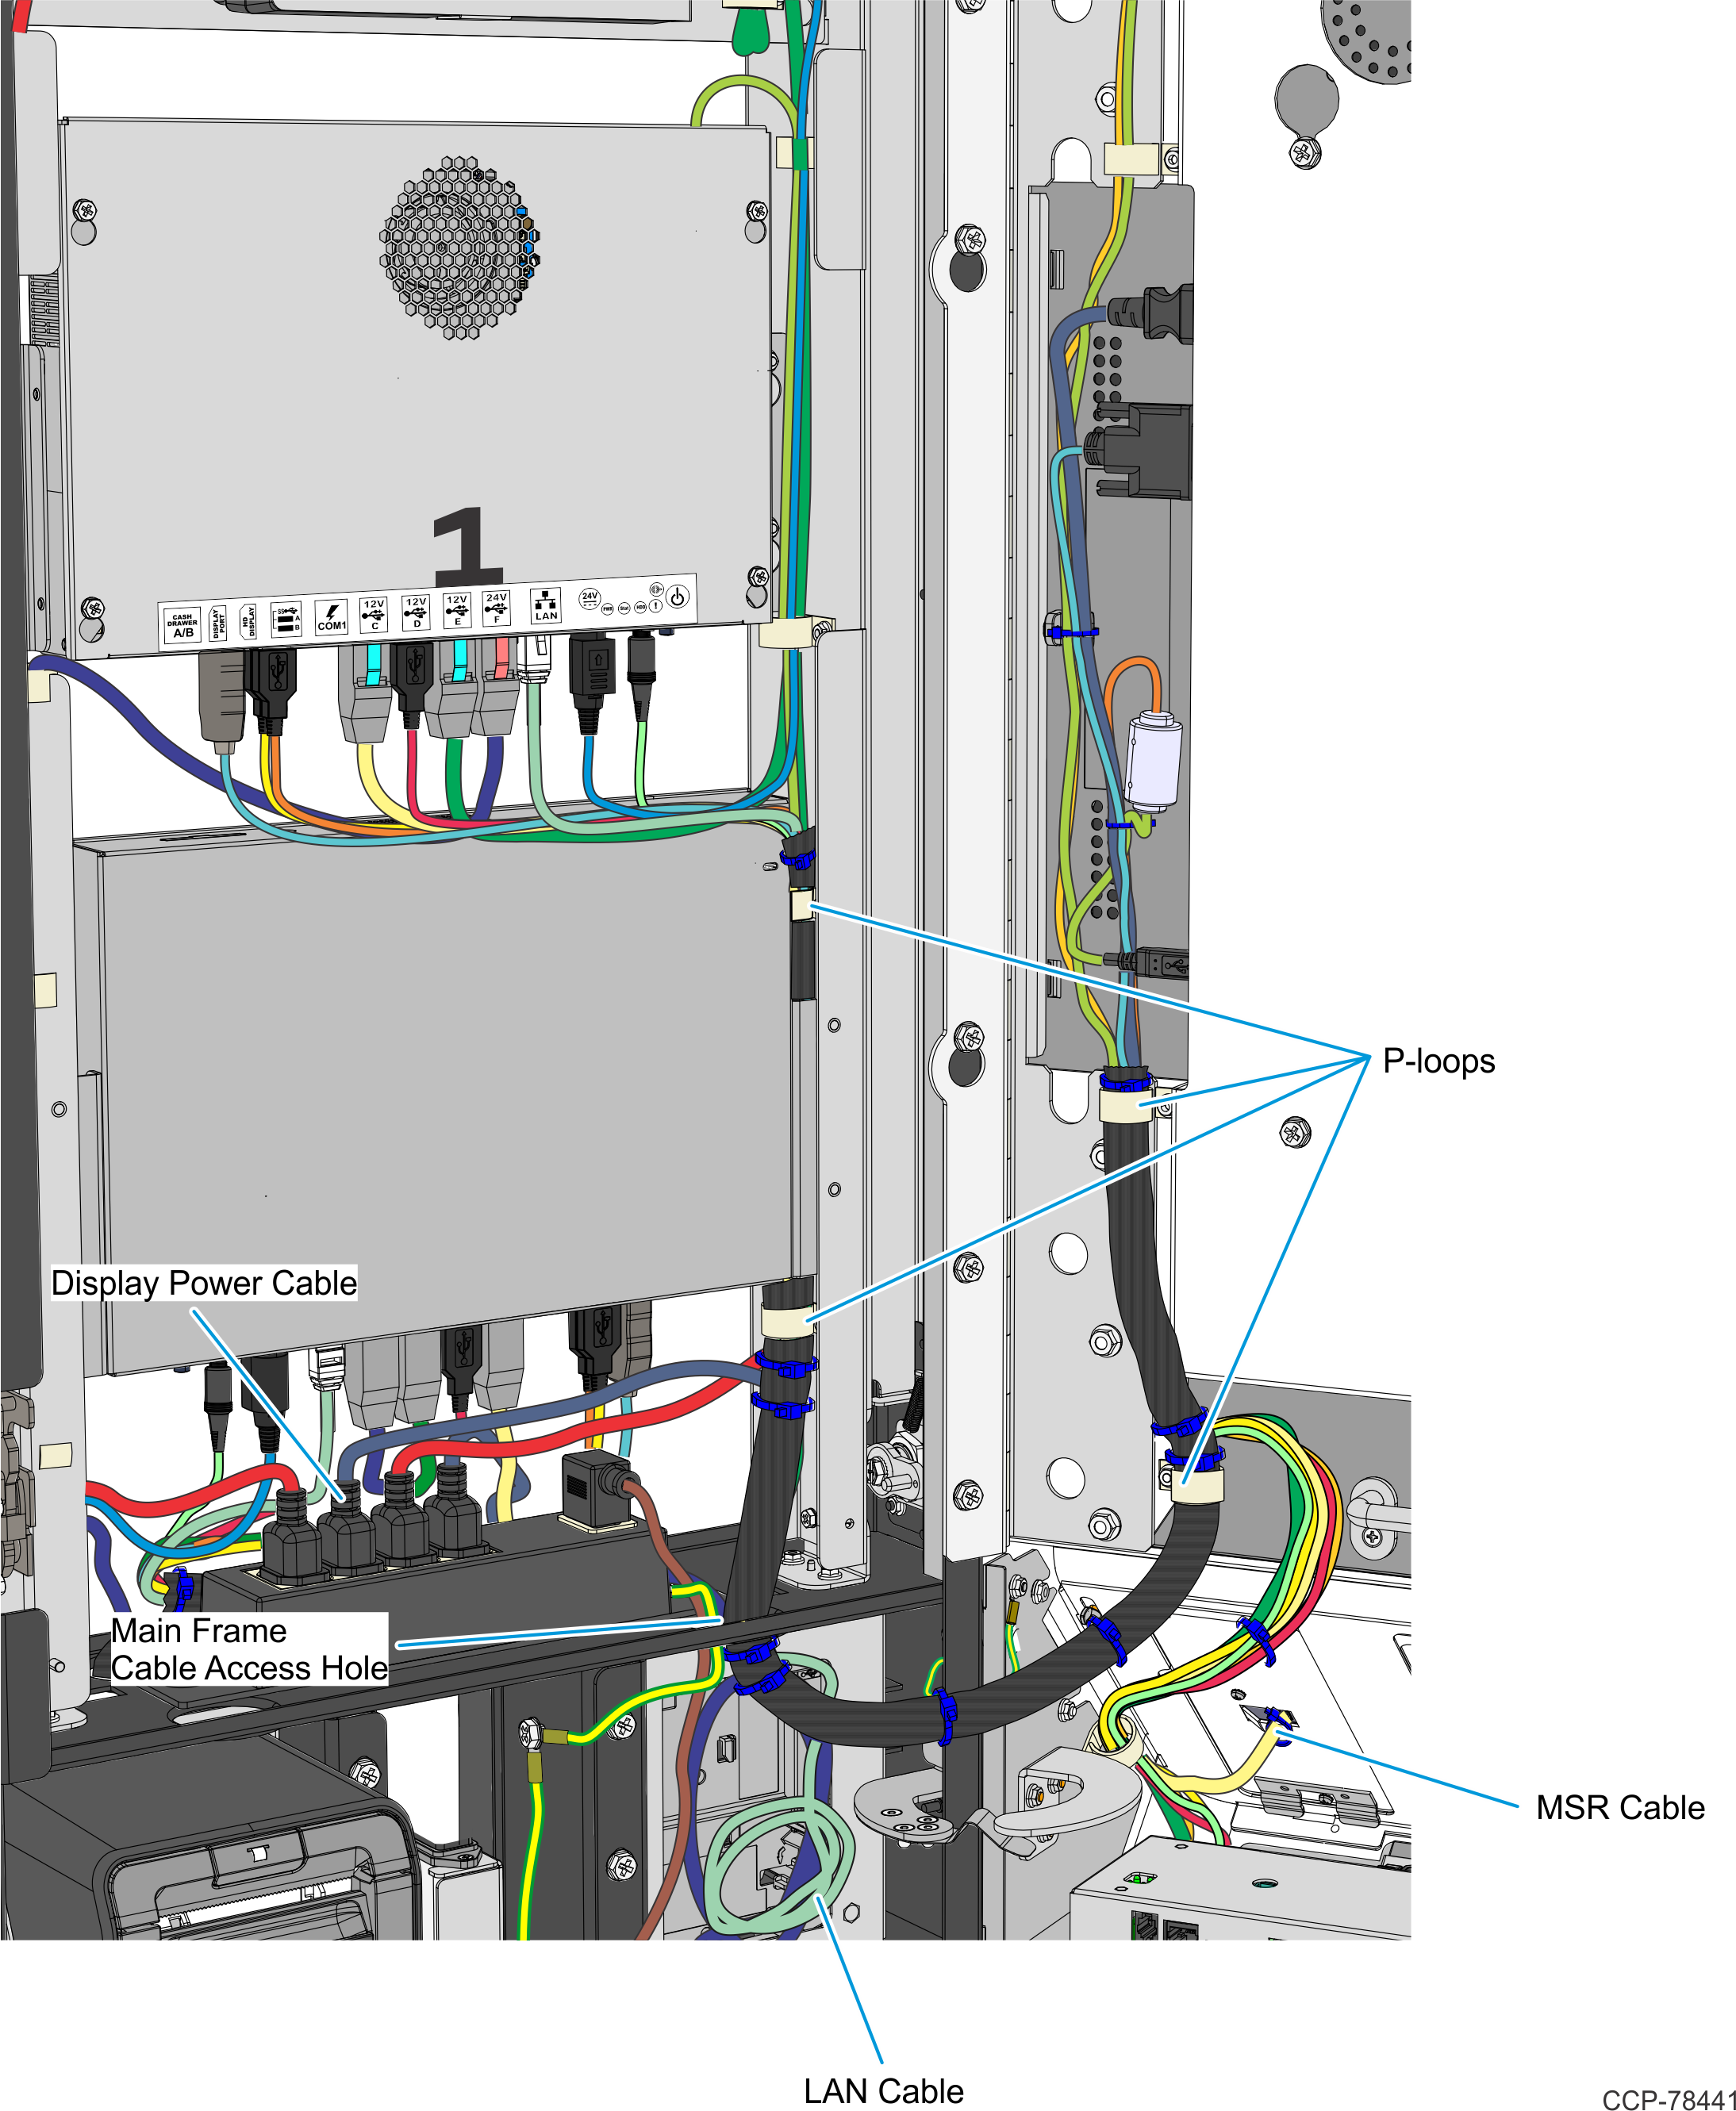
4.Route and connect the internal cables. Refer to the images following this procedure.
a.Insert the bundled cables through the access hole in the Main Frame, but leaving the LAN Cable on the lower right side of the Main Frame.
b.Secure the bundle with p-loops along its route.
c.If PIN Pad is used as a payment device, route the PIN Pad cable to the Ebox, following the route of the bundled cables. Secure the PIN Pad cable with six cables ties along its route.
Note: A payment device may be an MSR or a PIN Pad. For MSR, the MSR cable is already bundled and routed together with other internal cables.
d.Connect the Display Power Cable to the Power Strip.
e.Connect the cables to the Primary Terminal. For a complete list of port assignments, refer to Port Assignments.
Dual–Sided Kiosk with MSR Payment Device
Note: The MSR cable is already bundled and routed together with other internal cables.
Dual–Sided Kiosk with PIN Pad Payment Device