Verifying Kiosk Installation and Cable Routing
After installing all devices and connecting all cables, check if all items in the following checklist are correctly implemented.
Warning: Failure to check the items indicated in this section may damage the kiosk, its devices, or its cables.
1.Ensure that all device connectors are connected to the correct port assignments. For more information, refer to Port Assignments.
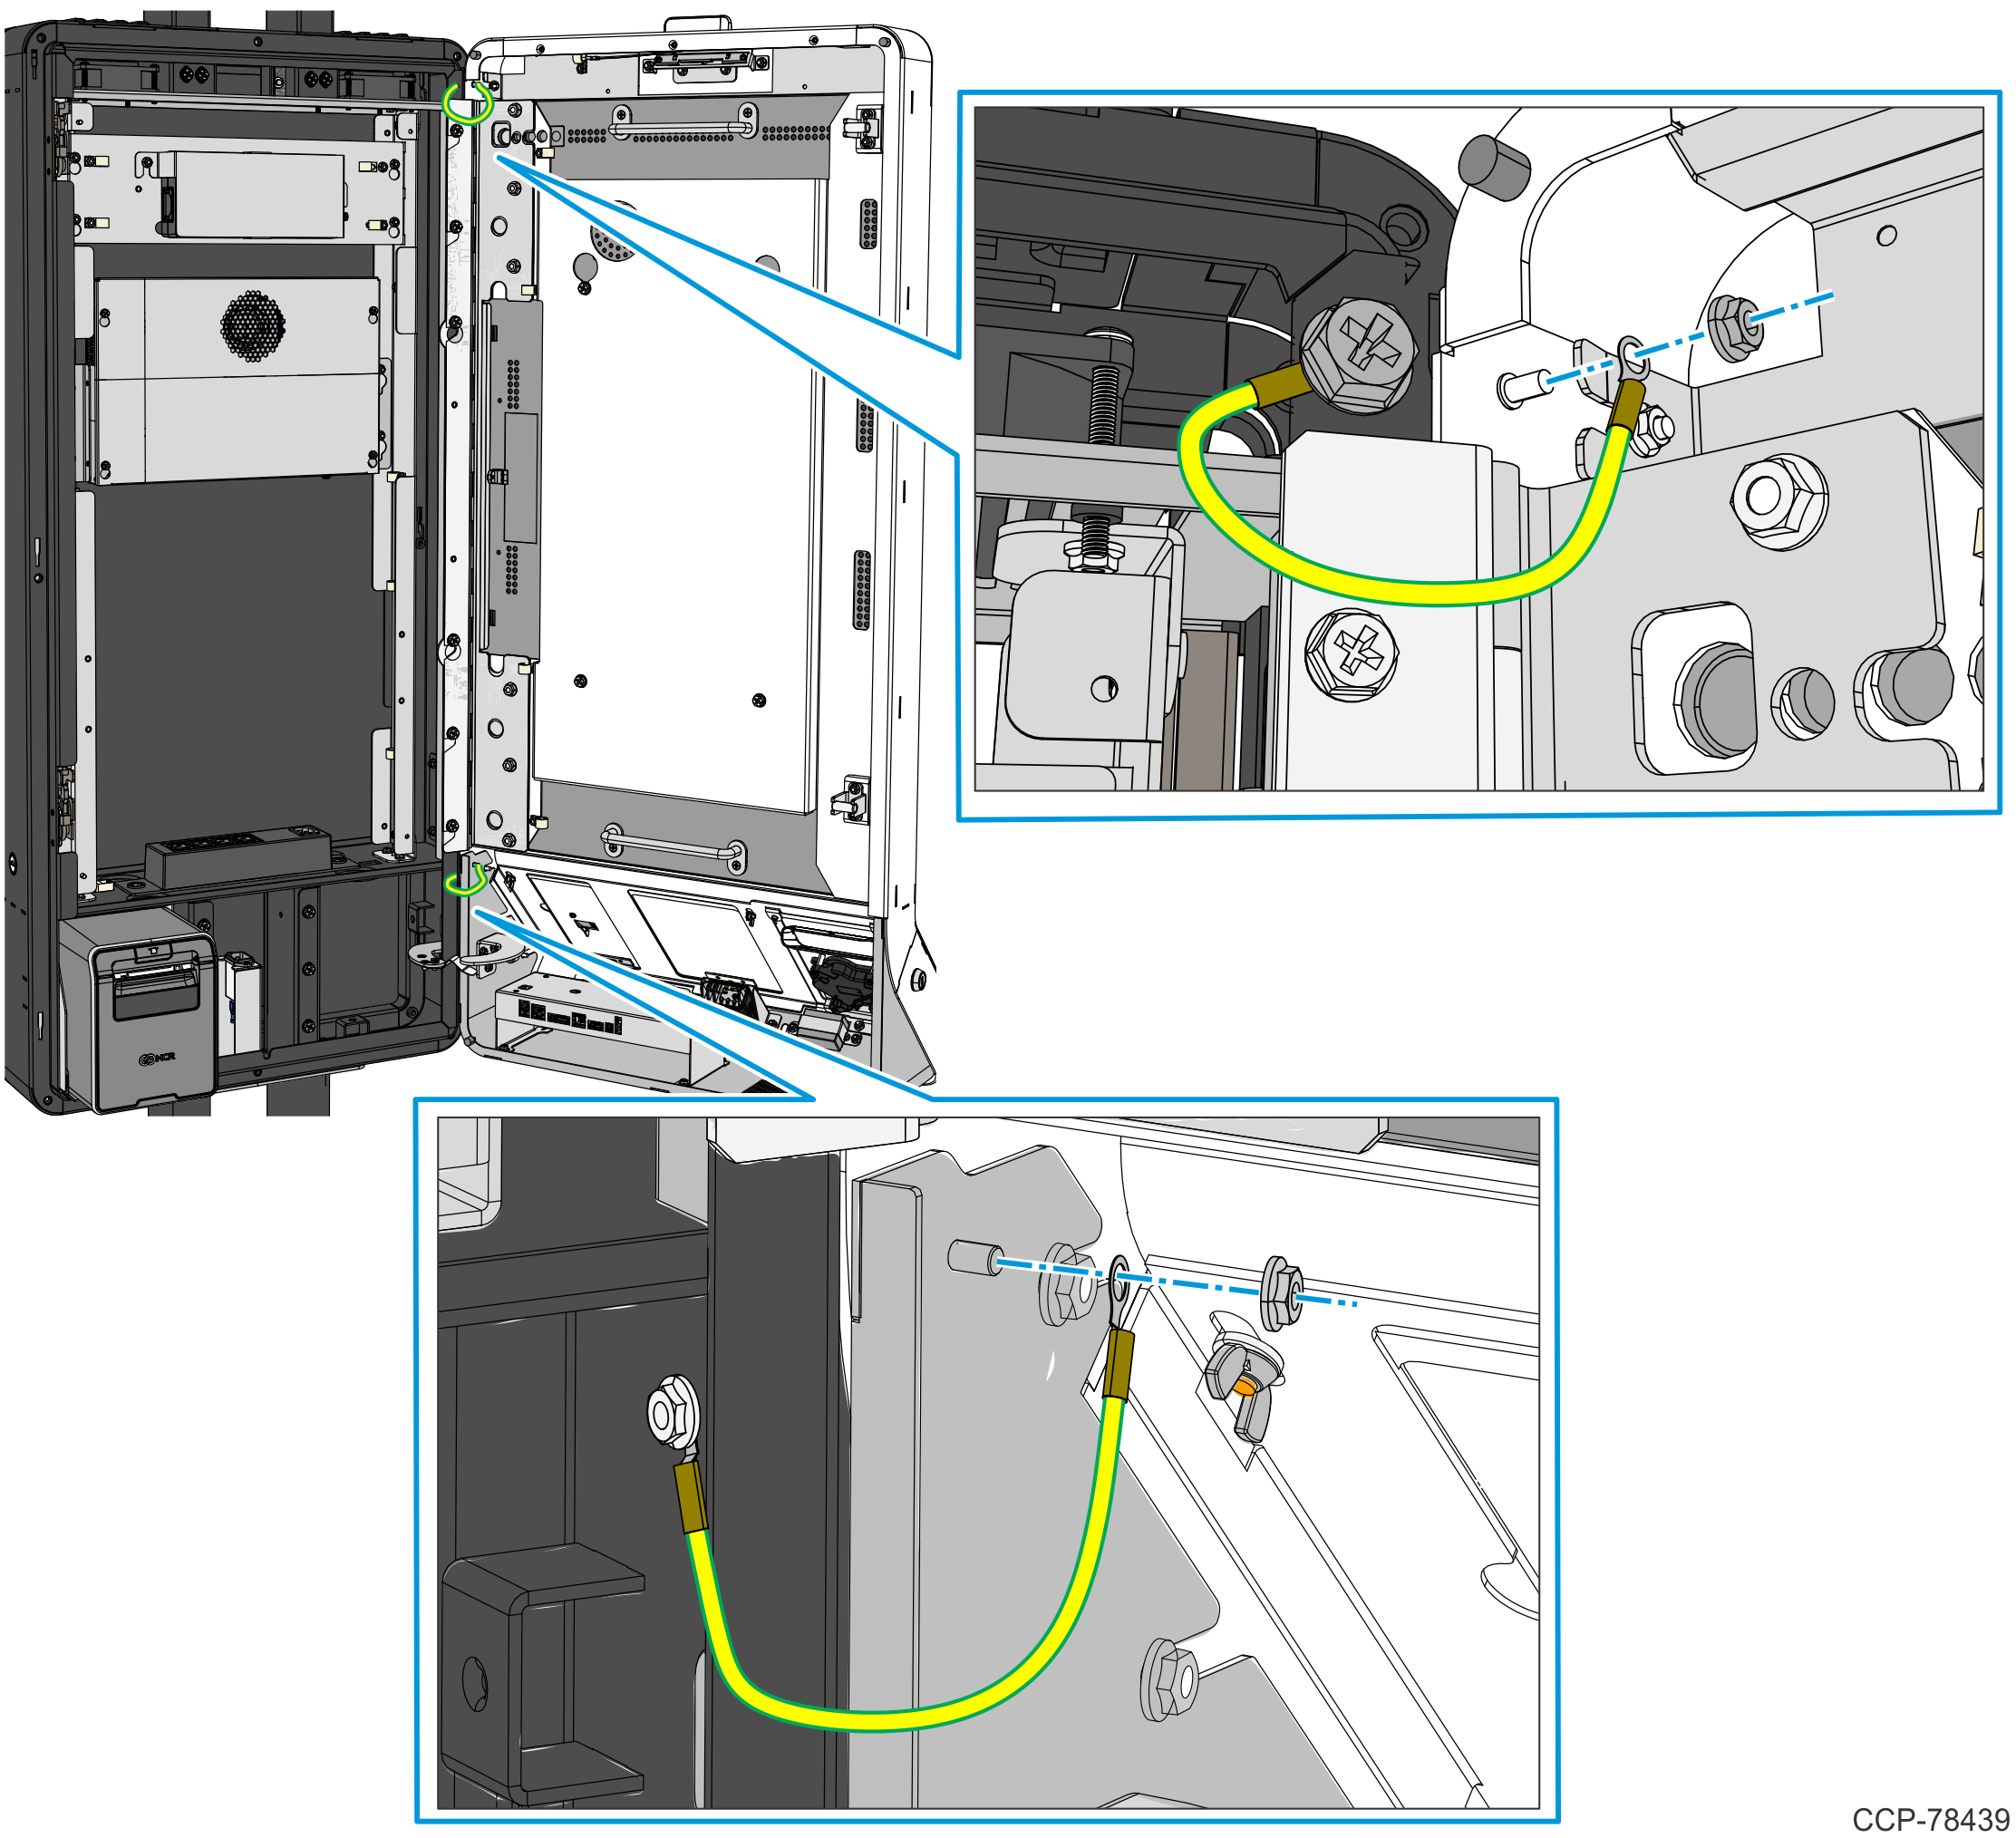
2.Ensure that the following two ground cables are connected.
•Main Frame to Door Panel – top side
•Main Frame to Door Cabinet – bottom side
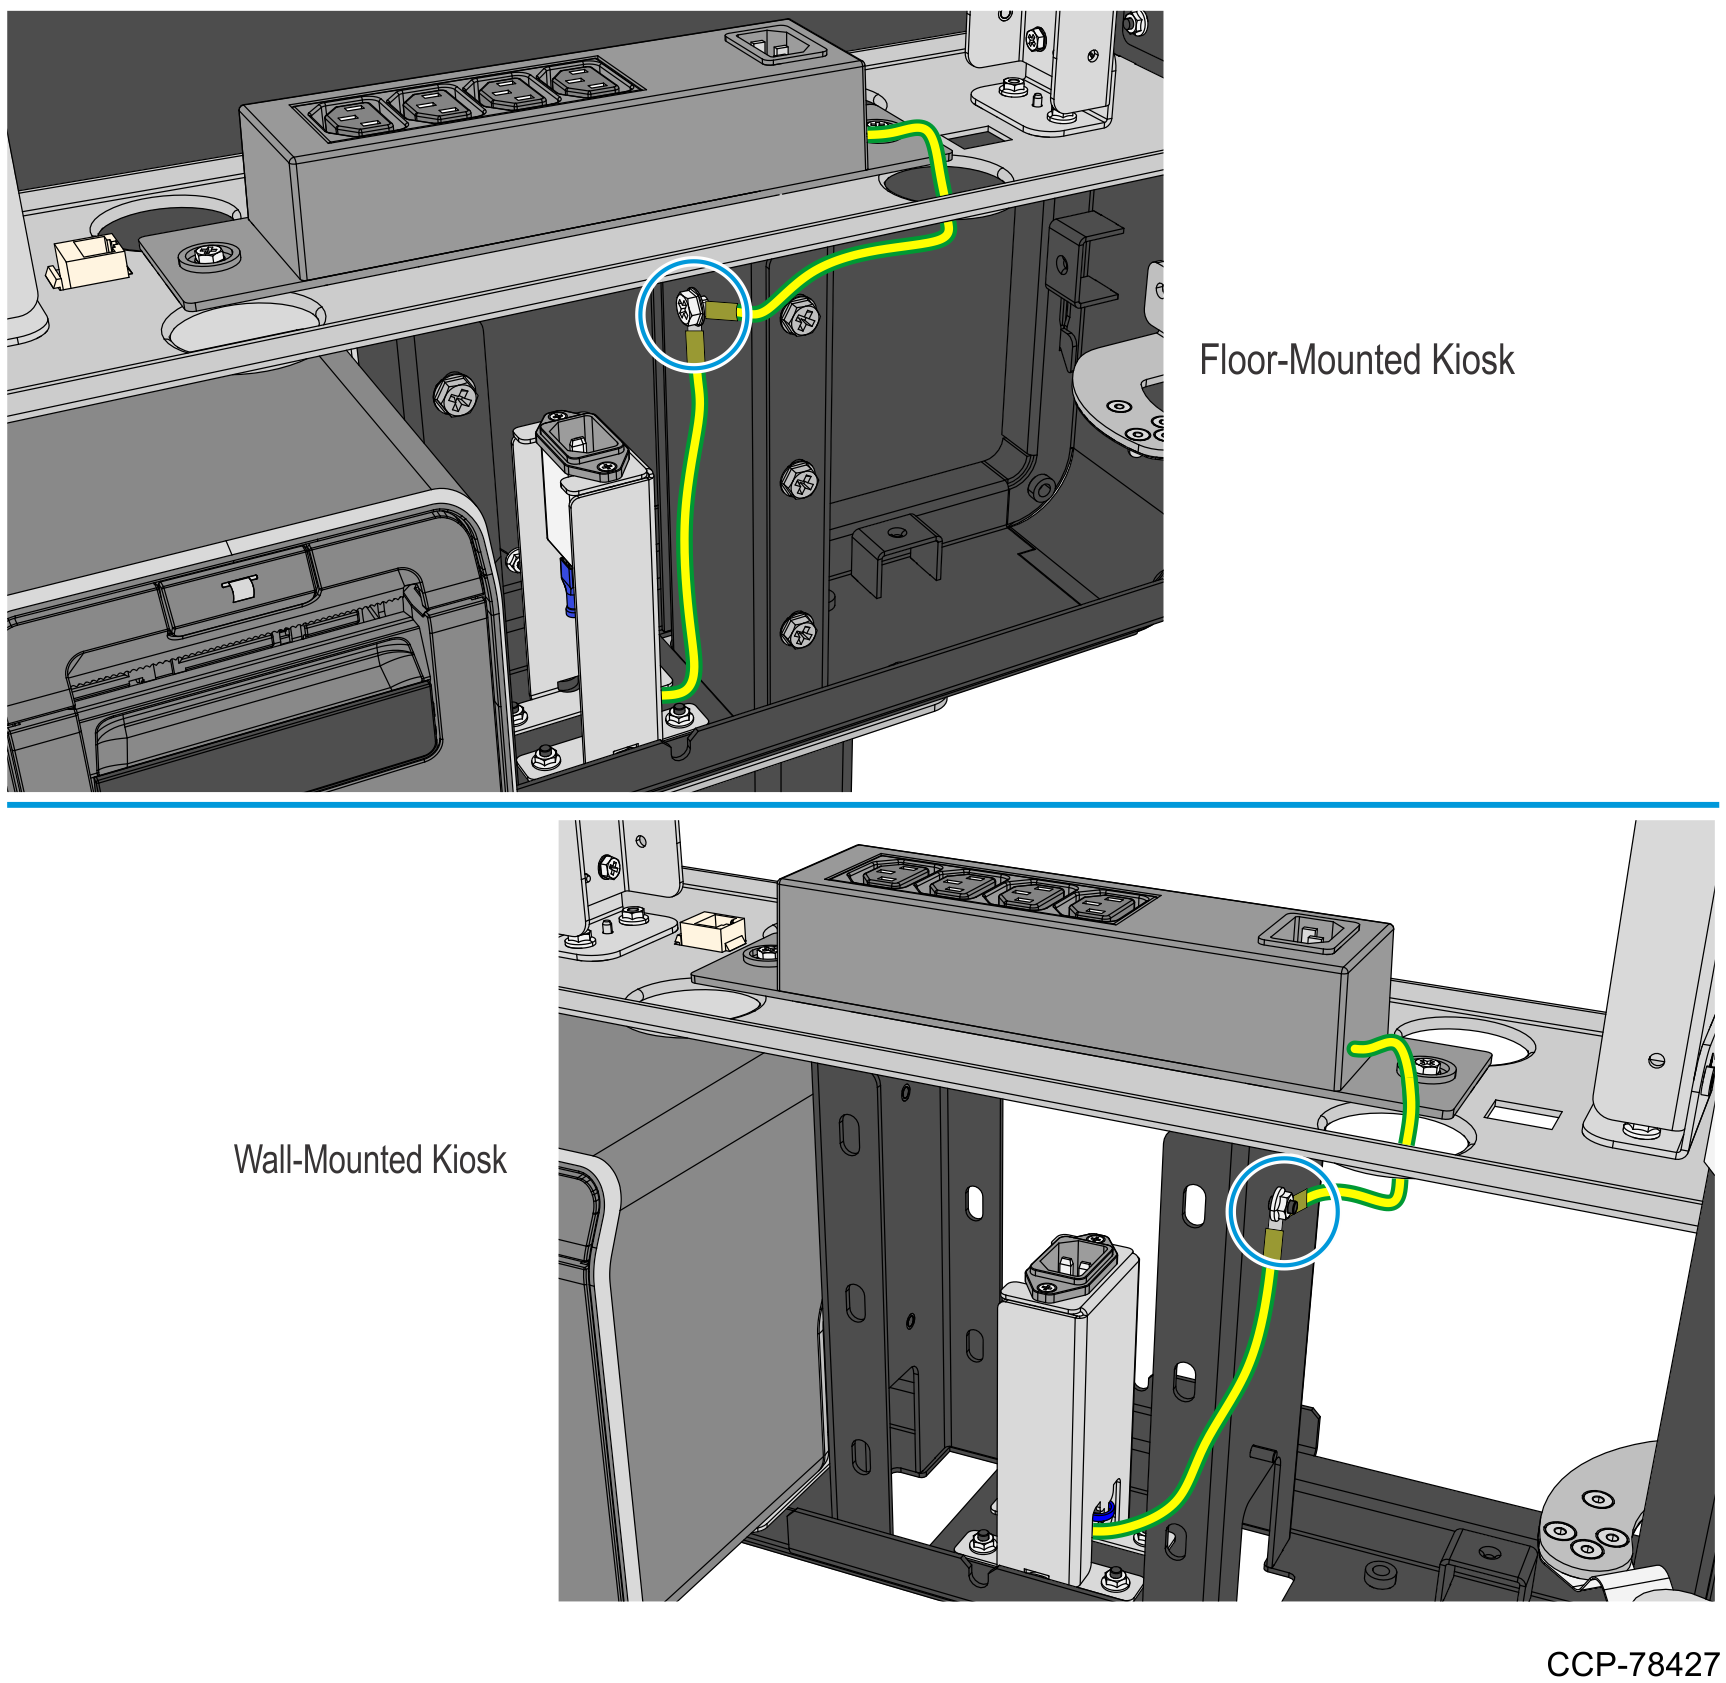
3.Connect the other ends of the Power Strip ground cable and the AC Filter ground cable to the kiosk.
Note: The location of the ground cables depends on kiosk configuration.
4.Ensure that all cables are secure.
•All cable ties are properly installed in recommended locations.
•The cable bundle is properly routed through the p-loops.
•No excess cable lengths are dangling. Bundle and secure them with cable ties.
Note: For details on cable routing, refer to the following sections:
•Routing and Connecting Internal Cables
•Routing the AC Power Cord and LAN Cable
Note: After checking the cable routing, proceed to succeeding steps in this section and complete the verification process.
5.Ensure that all cables are in good condition (no cuts or damages).
6.Ensure that the door can be properly closed.
•No resistance is encountered when the door is closed.
•The door latch is properly working when the door is closed.
7.Ensure that all devices are working when the kiosk is turned on.
8.For record purposes, take a photo that shows the entire cable routing inside the kiosk.