Installation Procedures
1.Mark the screw holes.

a.Using the Wall Mount Bracket as a template, hold it against the wall and mark the four holes. Take note of the "up" arrow indicating the correct orientation of the bracket.
b.Remove the bracket and drill a hole at every marked location.
2.Install a toggle bolt in each hole.
Note: Leave each bolt loose to allow the bracket to slide between the bolt and the wall.
3.Mount the Wall Mount Bracket onto the wall.
a.Position the bracket on the four loose bolts.
b.When the position is confirmed, tighten the four bolts to secure the bracket to the wall.
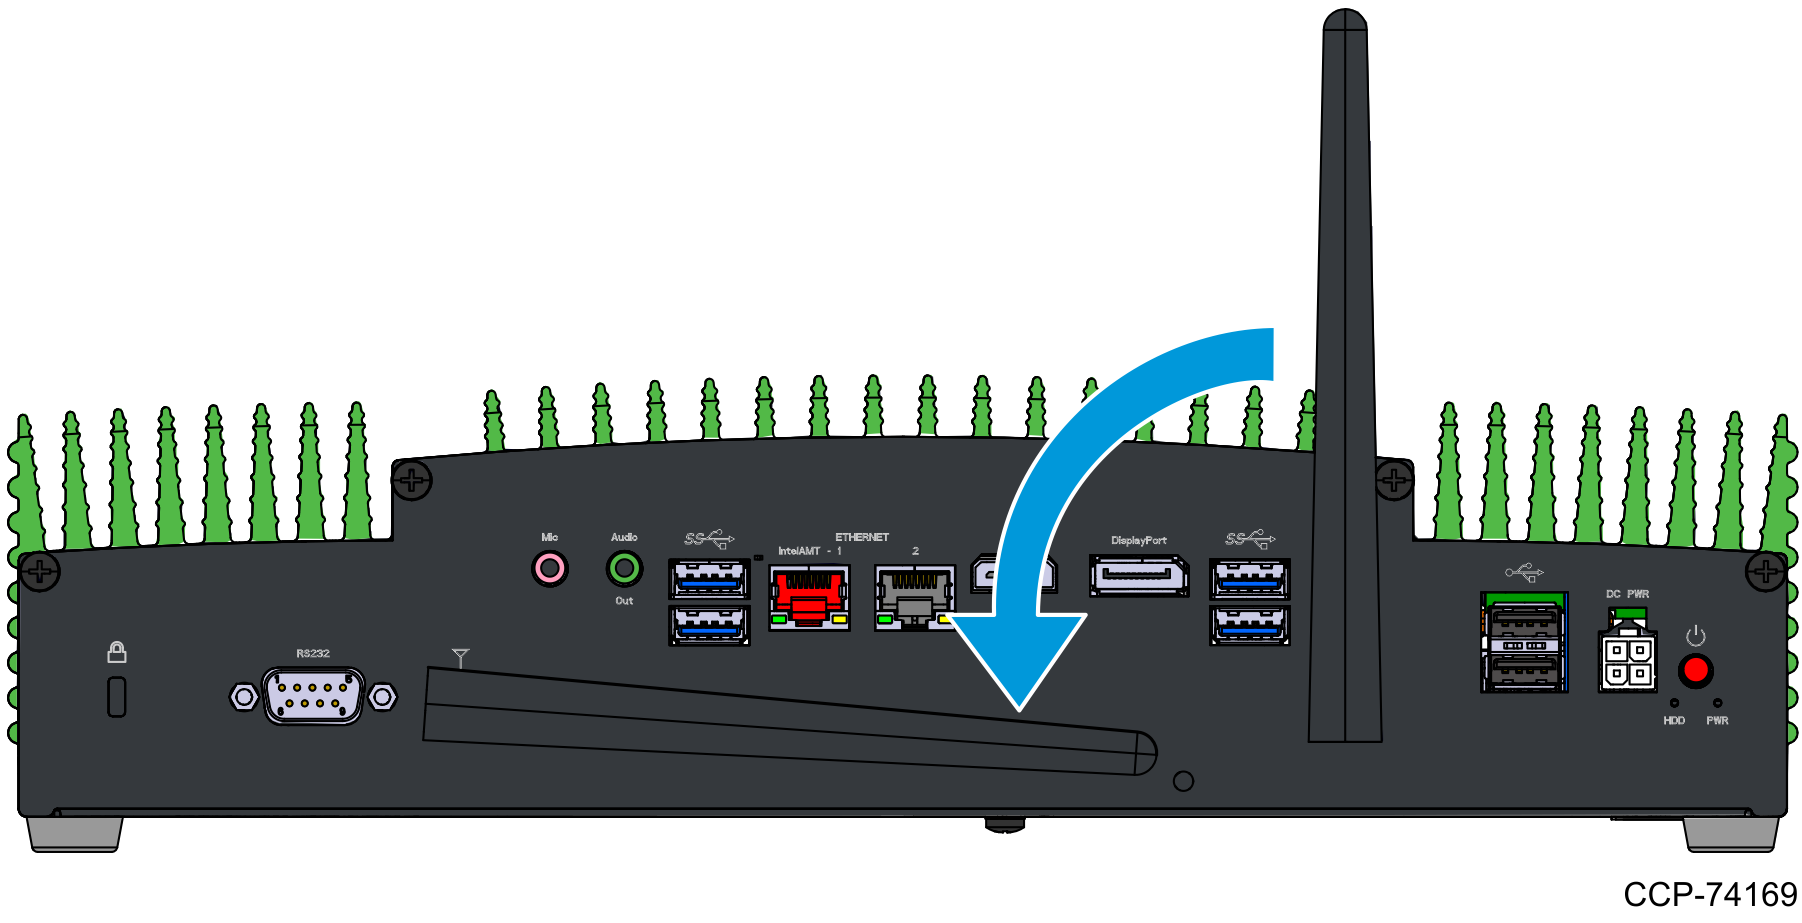
4.If applicable, rotate the antennas so that they are parallel to the N3000.
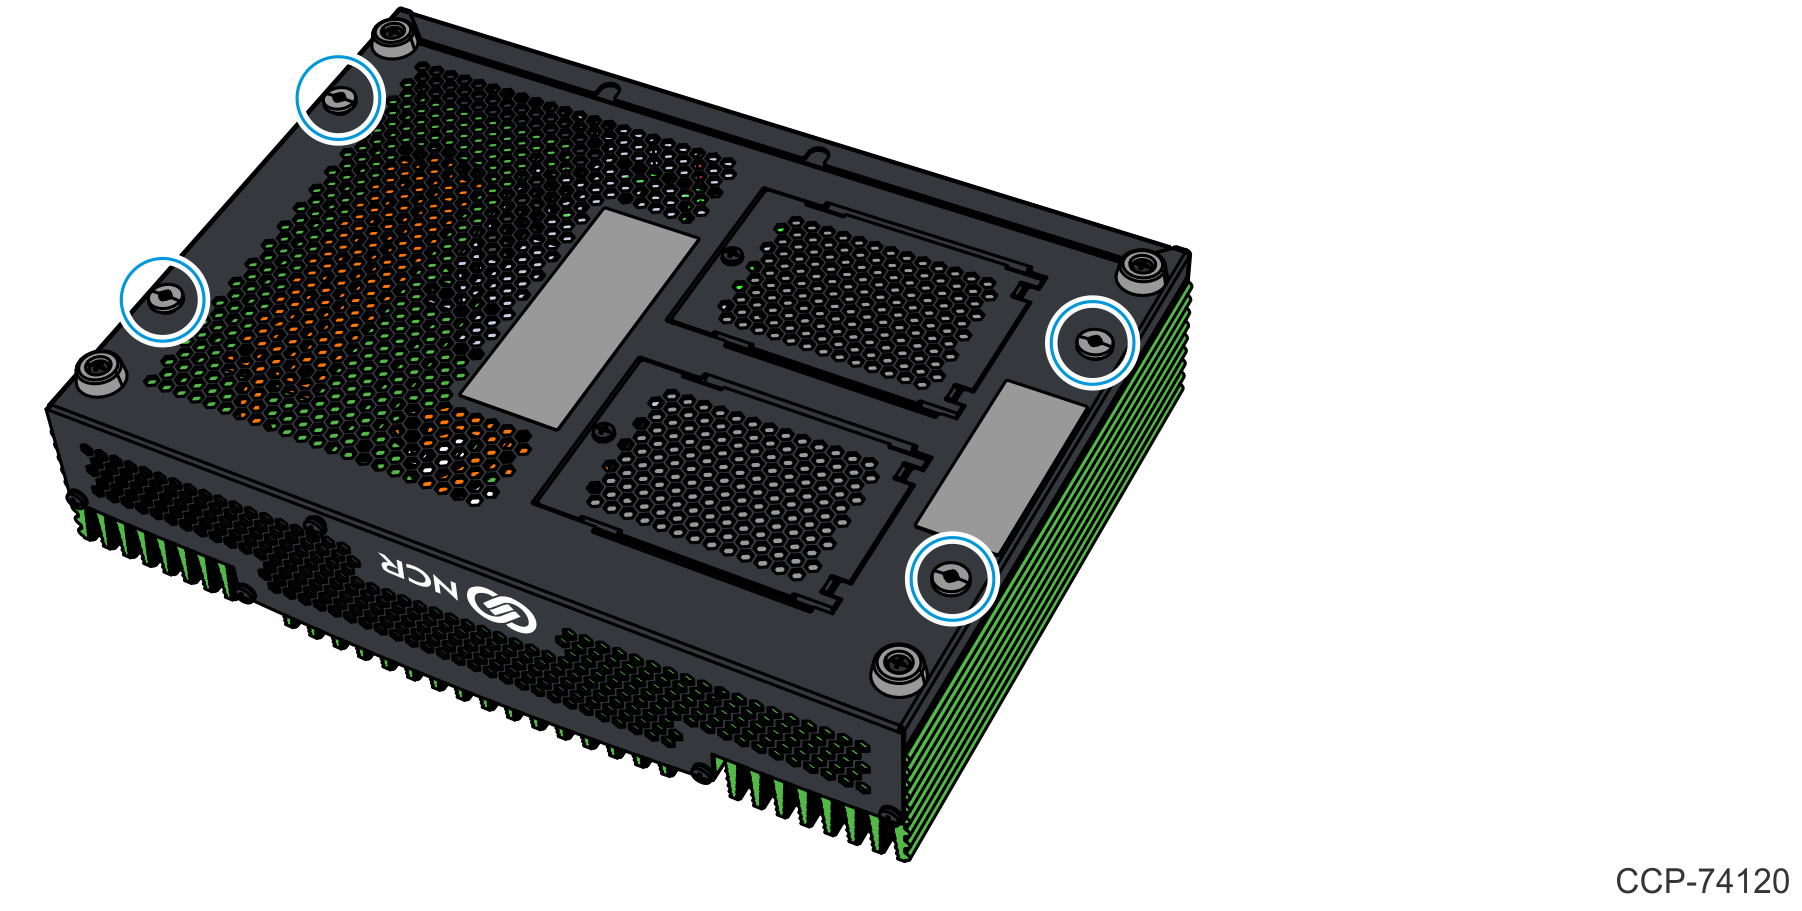
5.Lay the N3000 face down on a flat surface.
6.Insert the four Step Pan Head Flat Screws into the hole locations marked with a W.
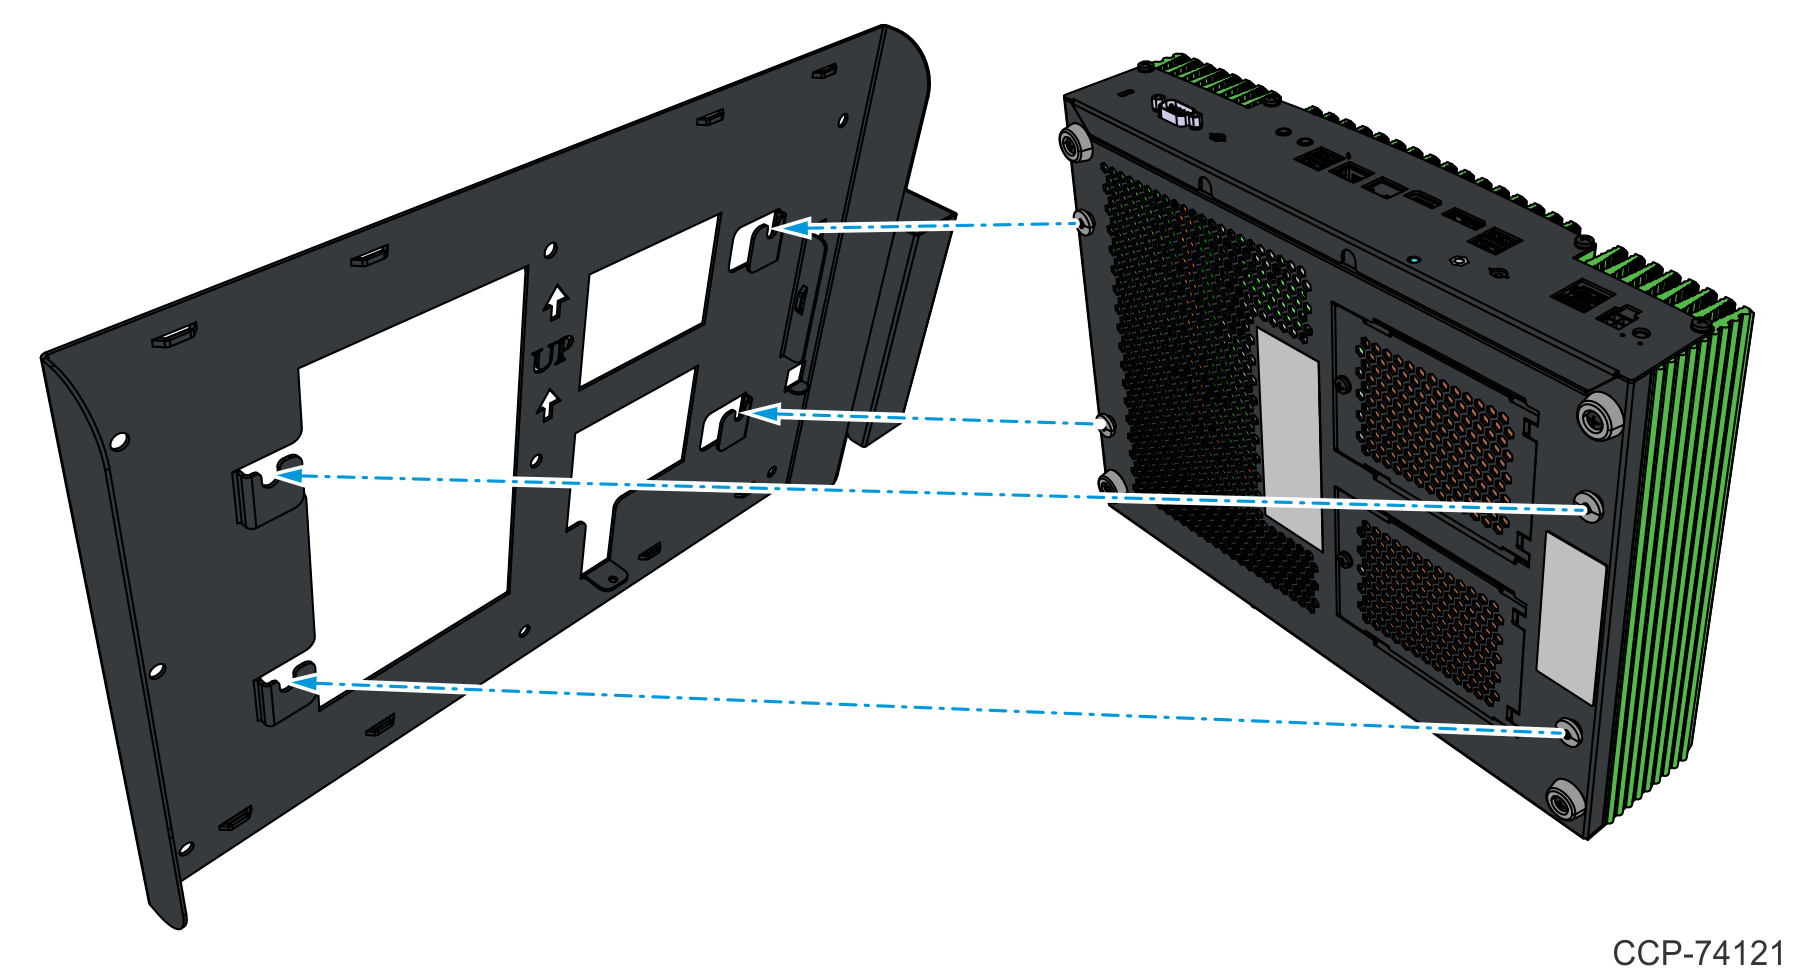
7.Position the N3000 so that its ports are on top, mount the four Step Pan Head Flat Screws onto their slots on the Wall Mount Bracket, and slide the N3000 downward to lock it in place.
Caution: Ensure that all four screws are fully inserted into the bracket.
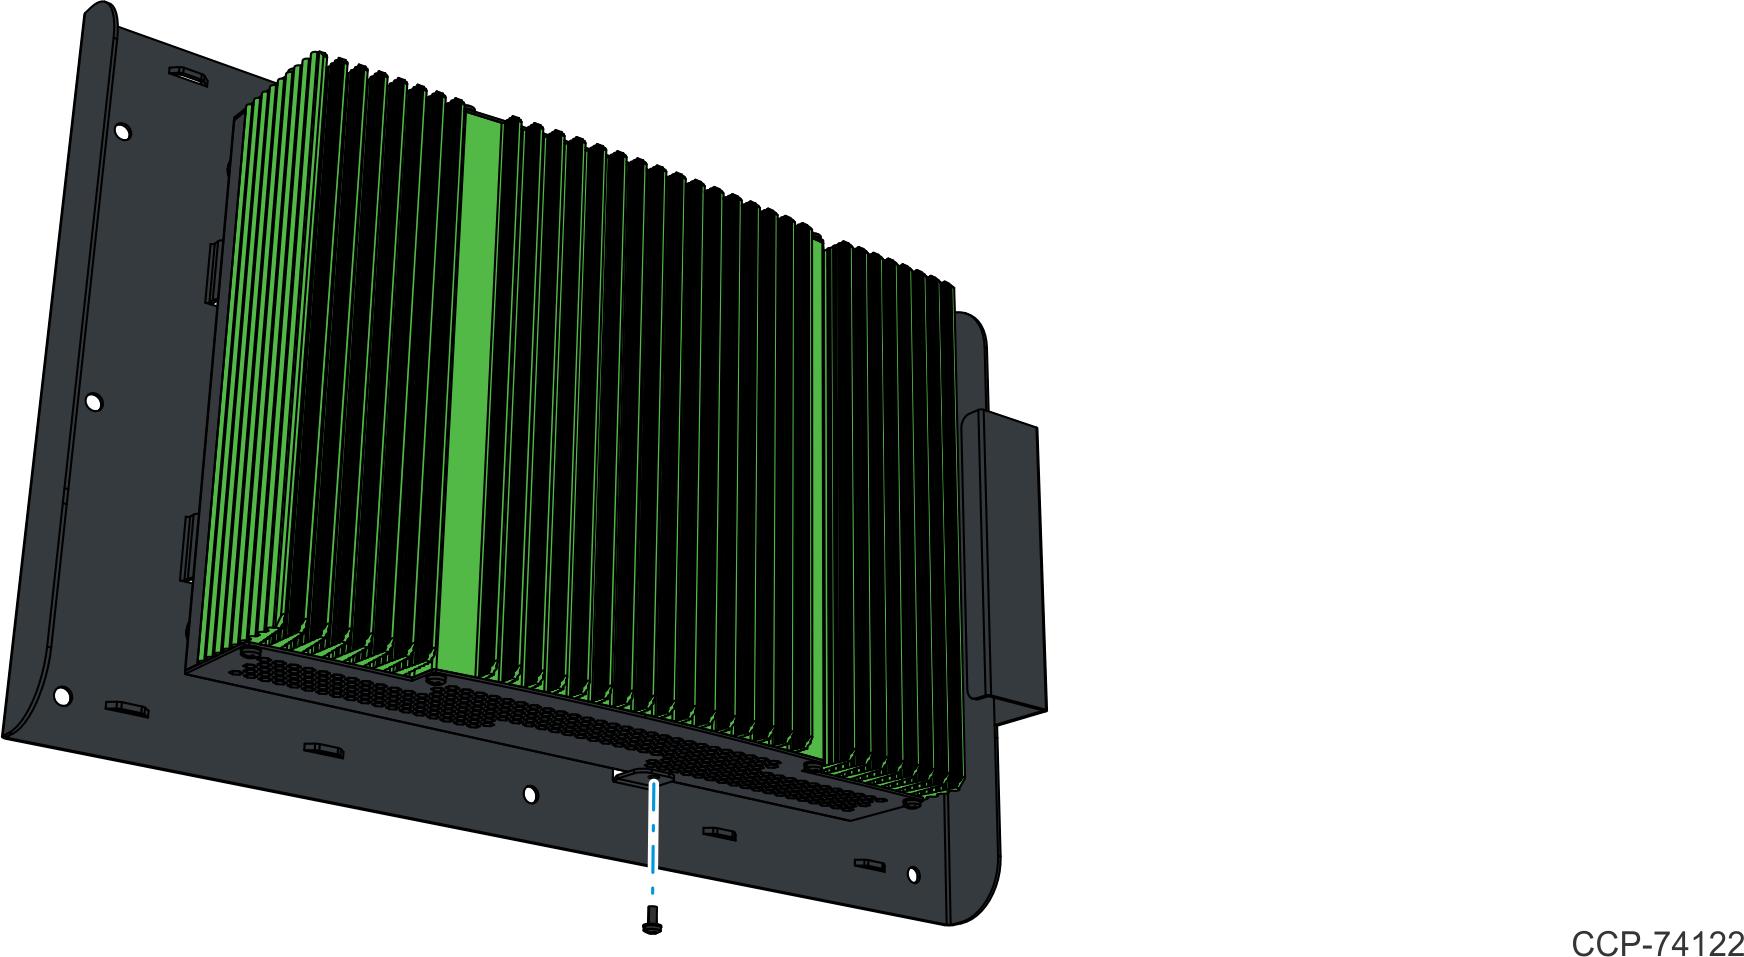
8.Secure the N3000 with the included security screw.
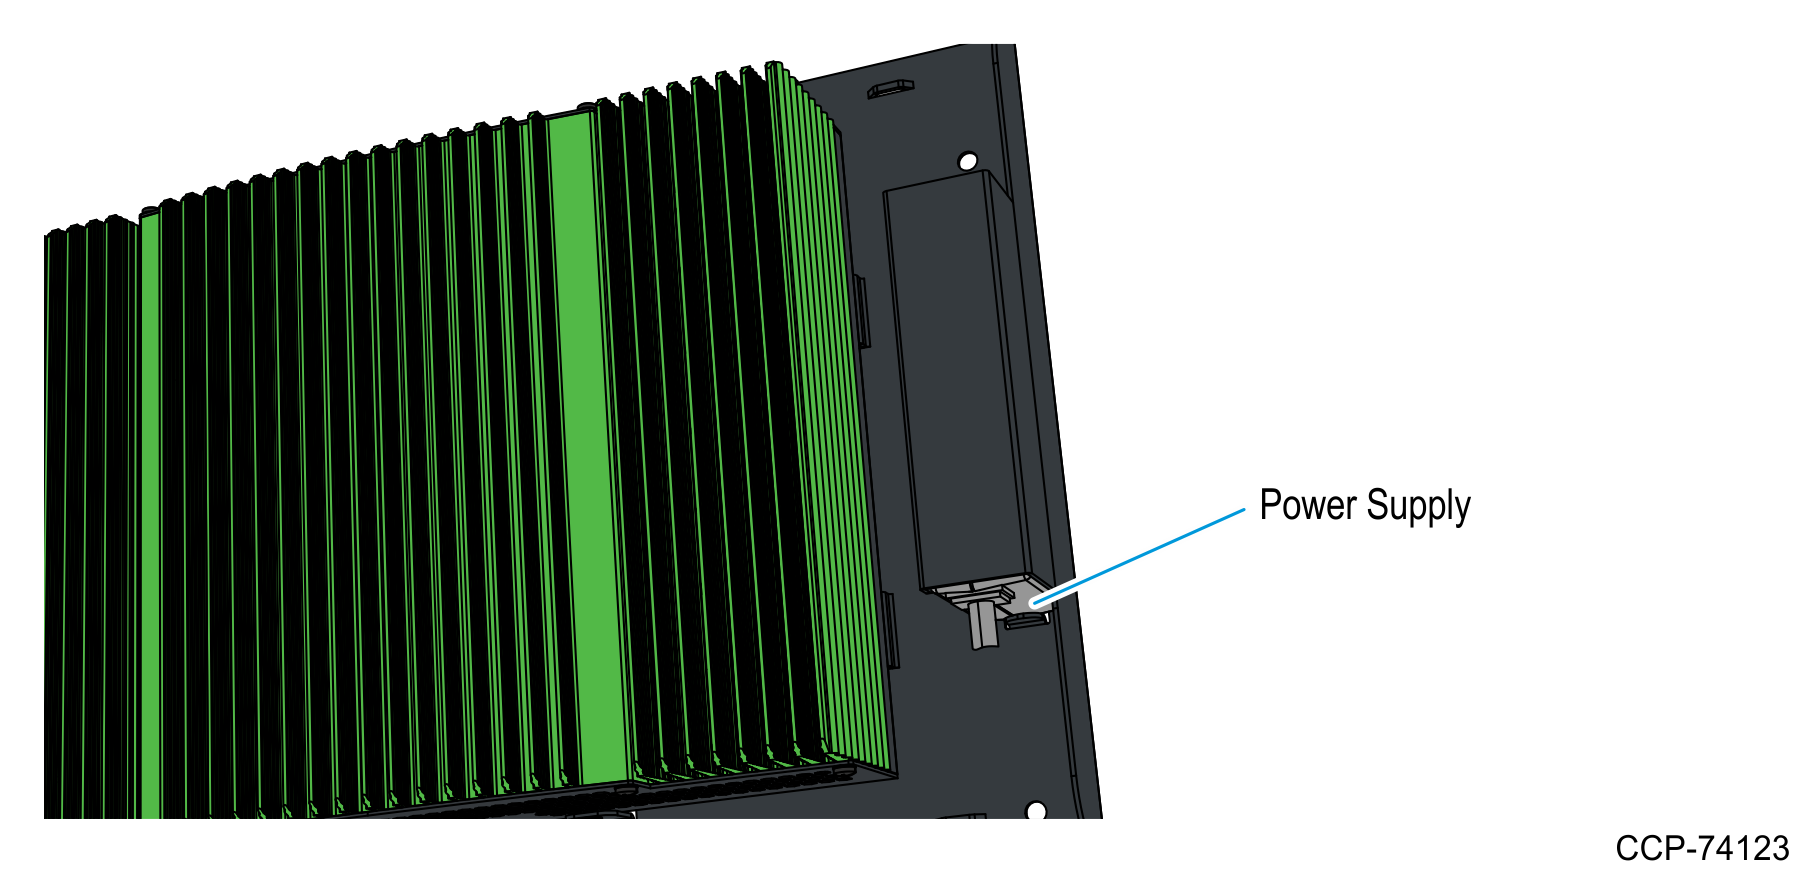
9.Insert the Power Supply into the power supply pocket on the bracket.
Note: Route and tie the power cord in place as needed.