Installing 1ST Self-Service Receipt Printer
To install the 1ST Self-Service Receipt Printer, follow these steps:
1.Access the printer latch plate screws by bending or removing the black plastic spill tray.
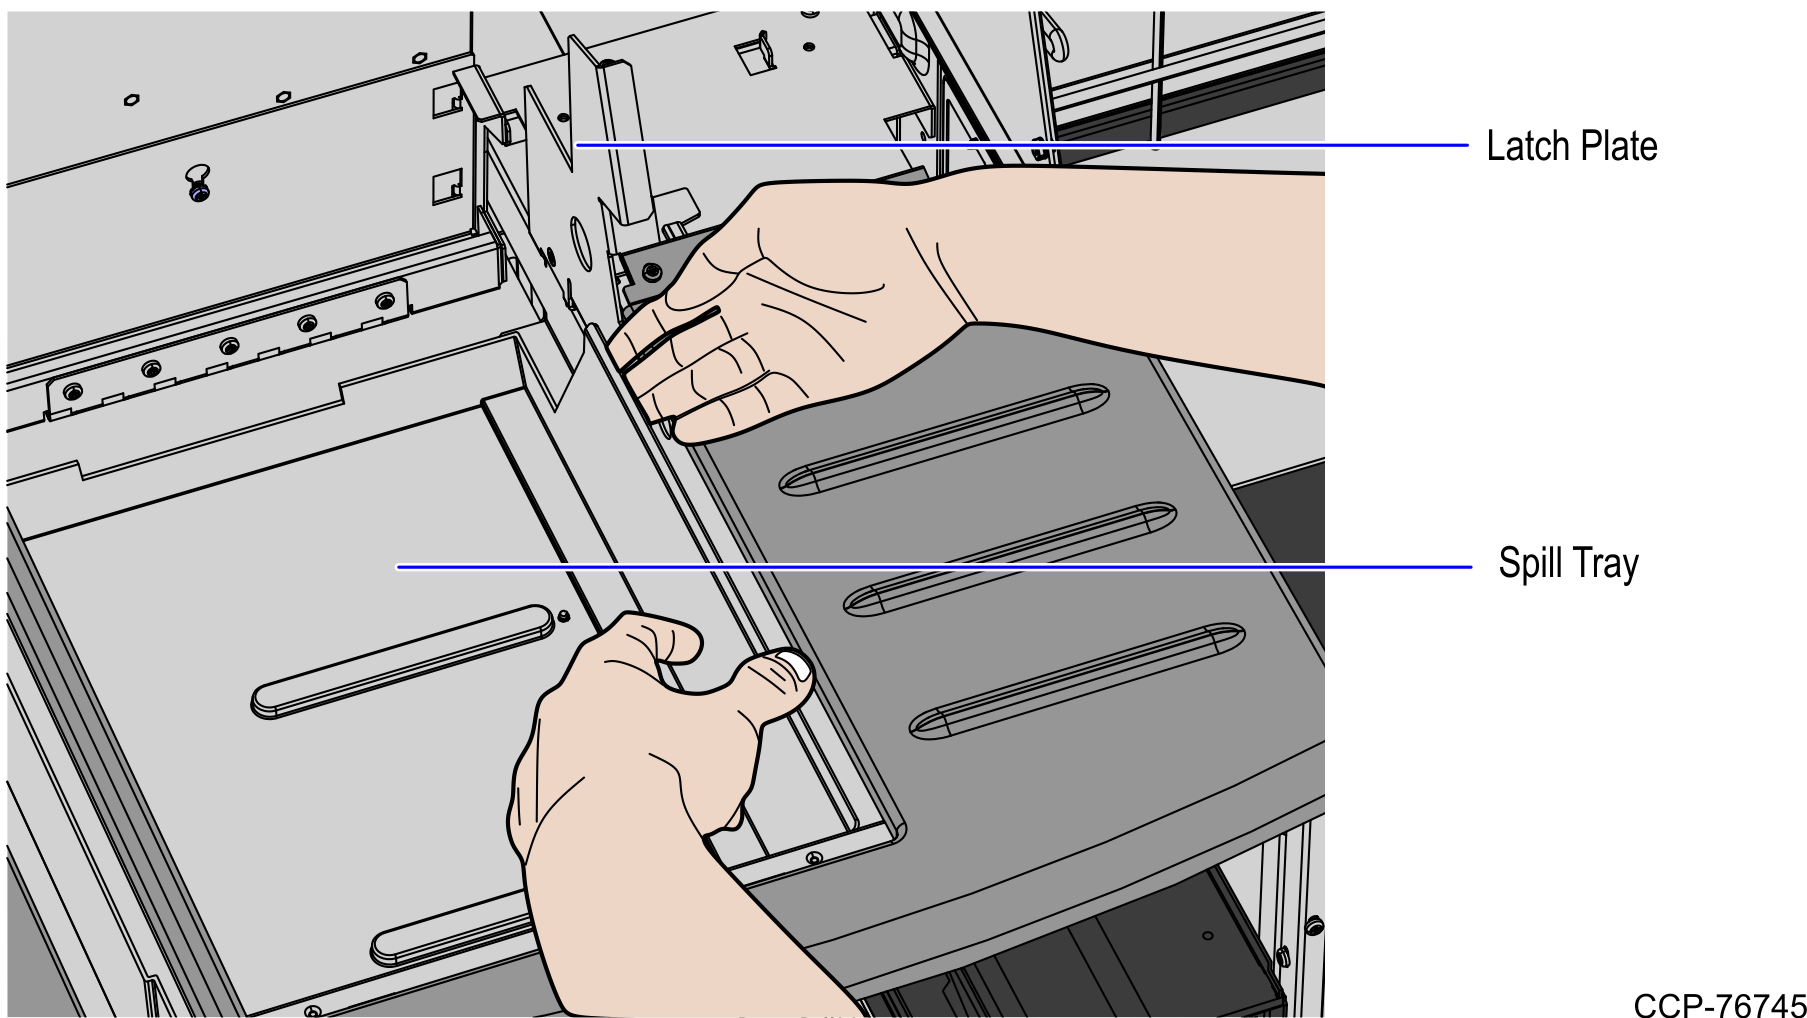
2.Remove the latch plate bracket by doing the following::
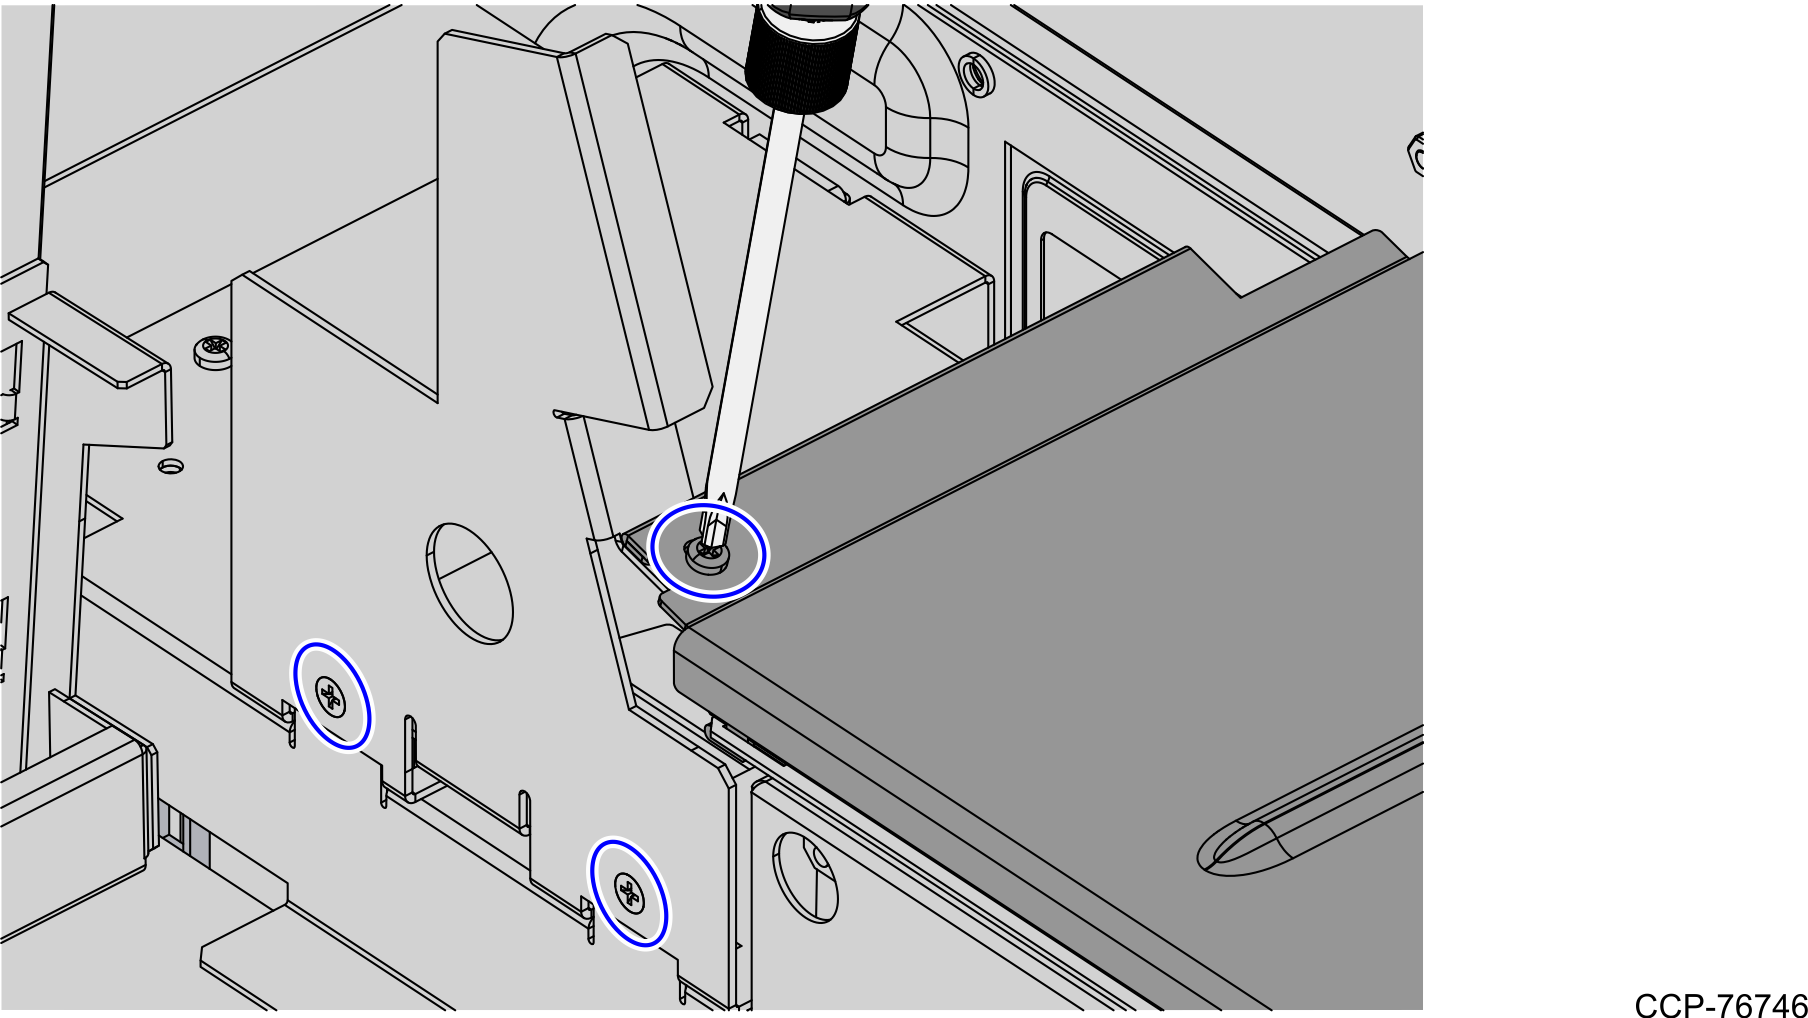
a.Remove and set aside three (3) screws, which secure the latch plate bracket on the printer bucket frame.
b.Slide the latch plate bracket to the left, as shown in the image below.

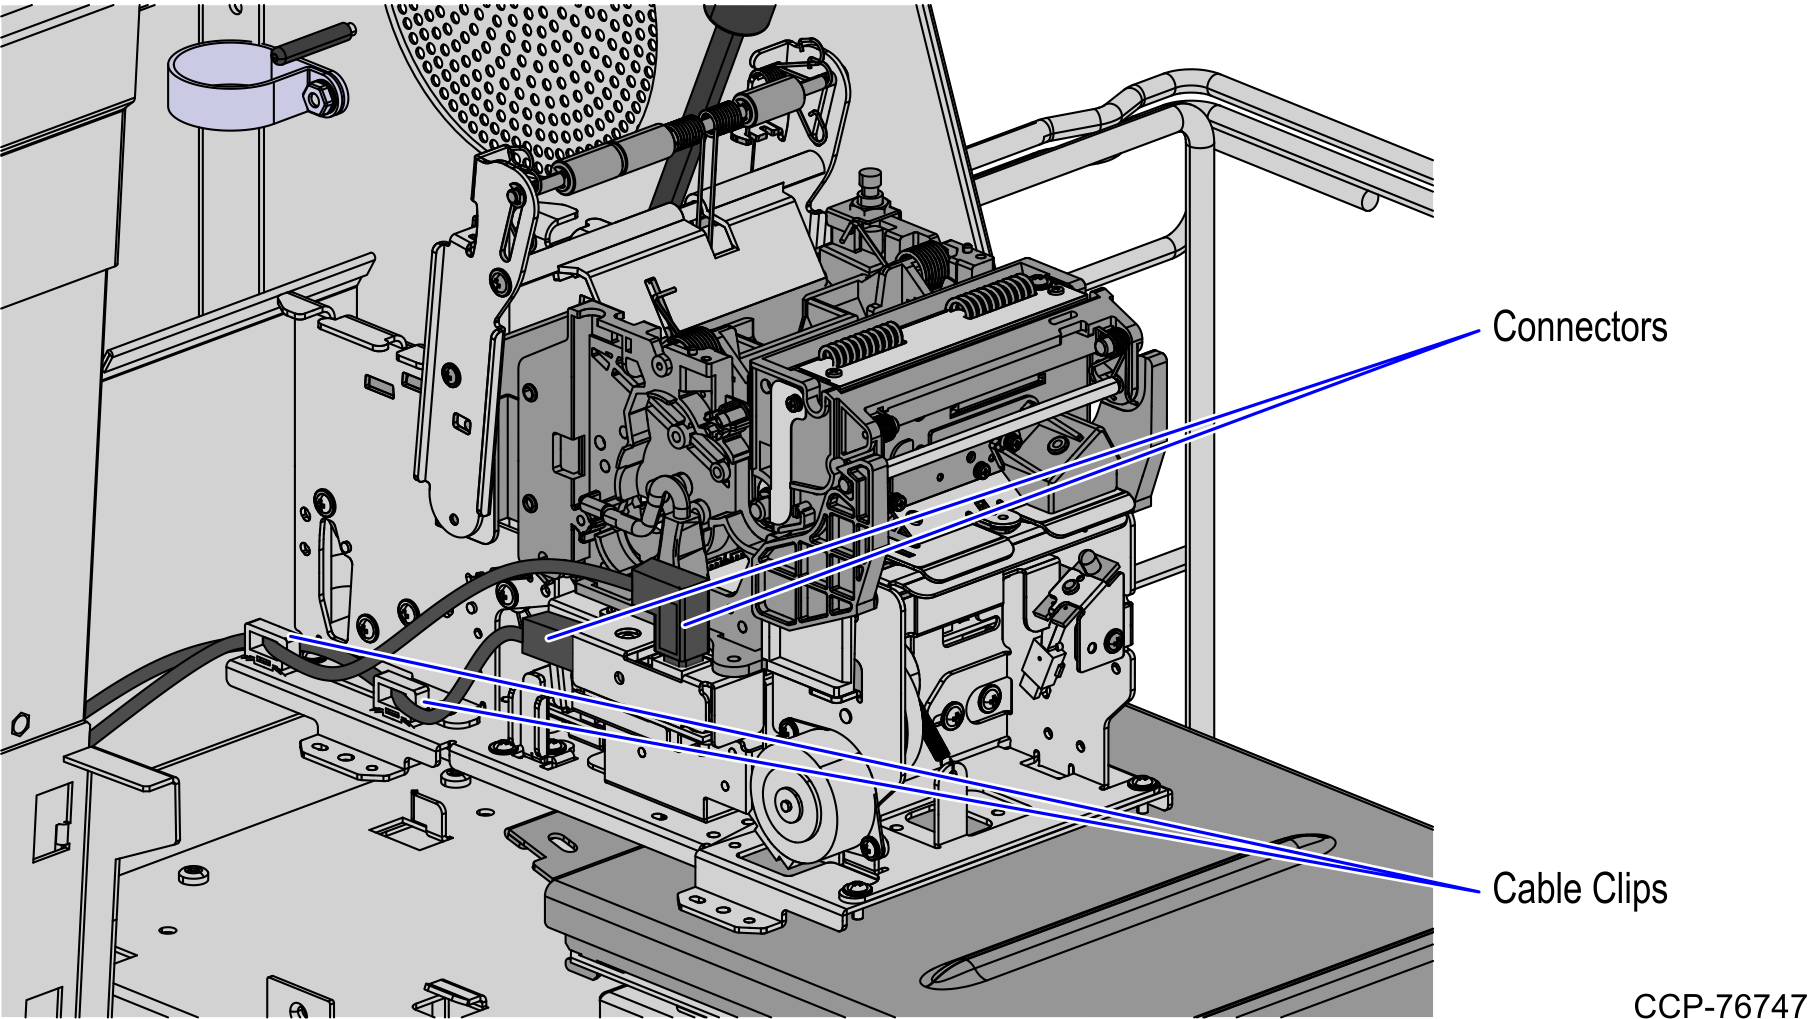
3.Route the power cables through the plastic cable clips and then connect to the 1ST Self-Service Receipt Printer, as shown in the image below.
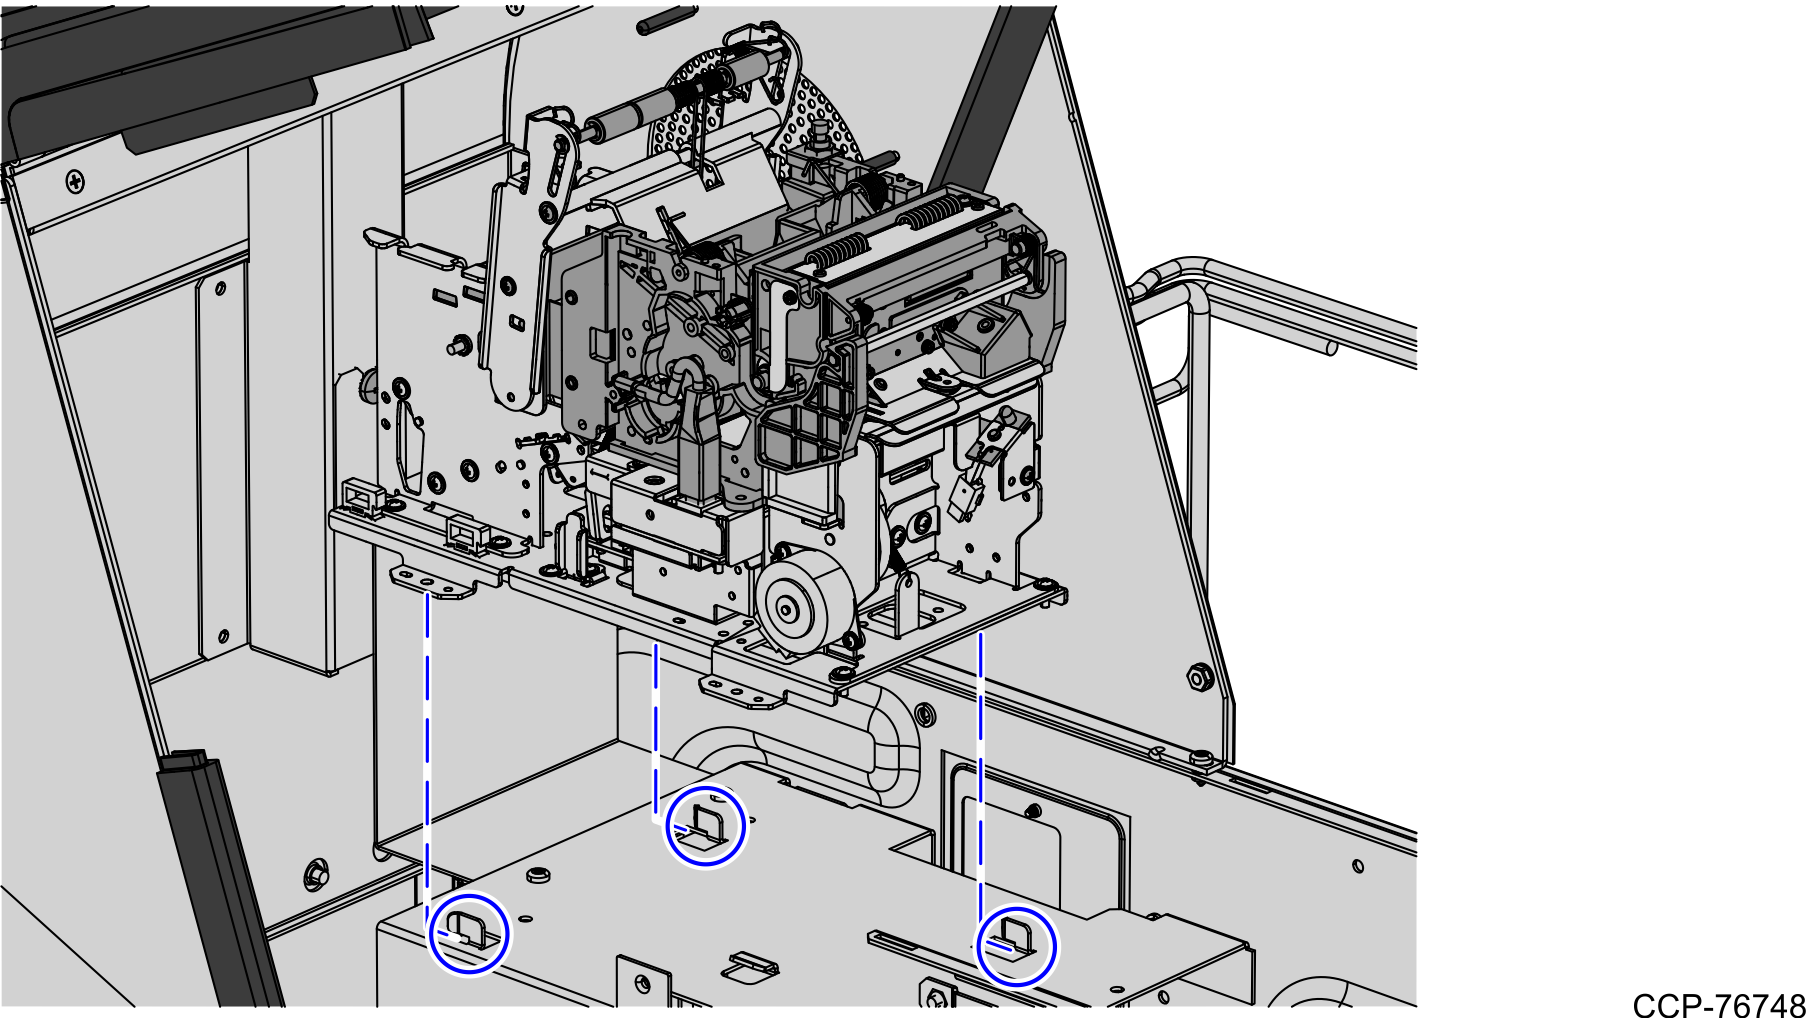
4.Align and slide the metal printer feet to hook tabs on the cabinet to lock the 1ST Self-Service Receipt Printer in place.
Note: Ensure that the three (3) printer feet (two rear and one front right) are fully captured by the hooks. The fourth printer foot (front left) is held down by the latch plate.
5.Using the three (3) screws that were set aside, secure the latch plate bracket on the printer bucket frame.
6.Place the black plastic spill tray back to the Scanner/Scale bucket, if necessary.