Installing Lower Bumpers on Bagwell
To install lower bumpers on the bagwell, follow these steps:
Note: This procedure provides instructions for installing the kit on a 3-Bag Bagwell configuration only as an example.
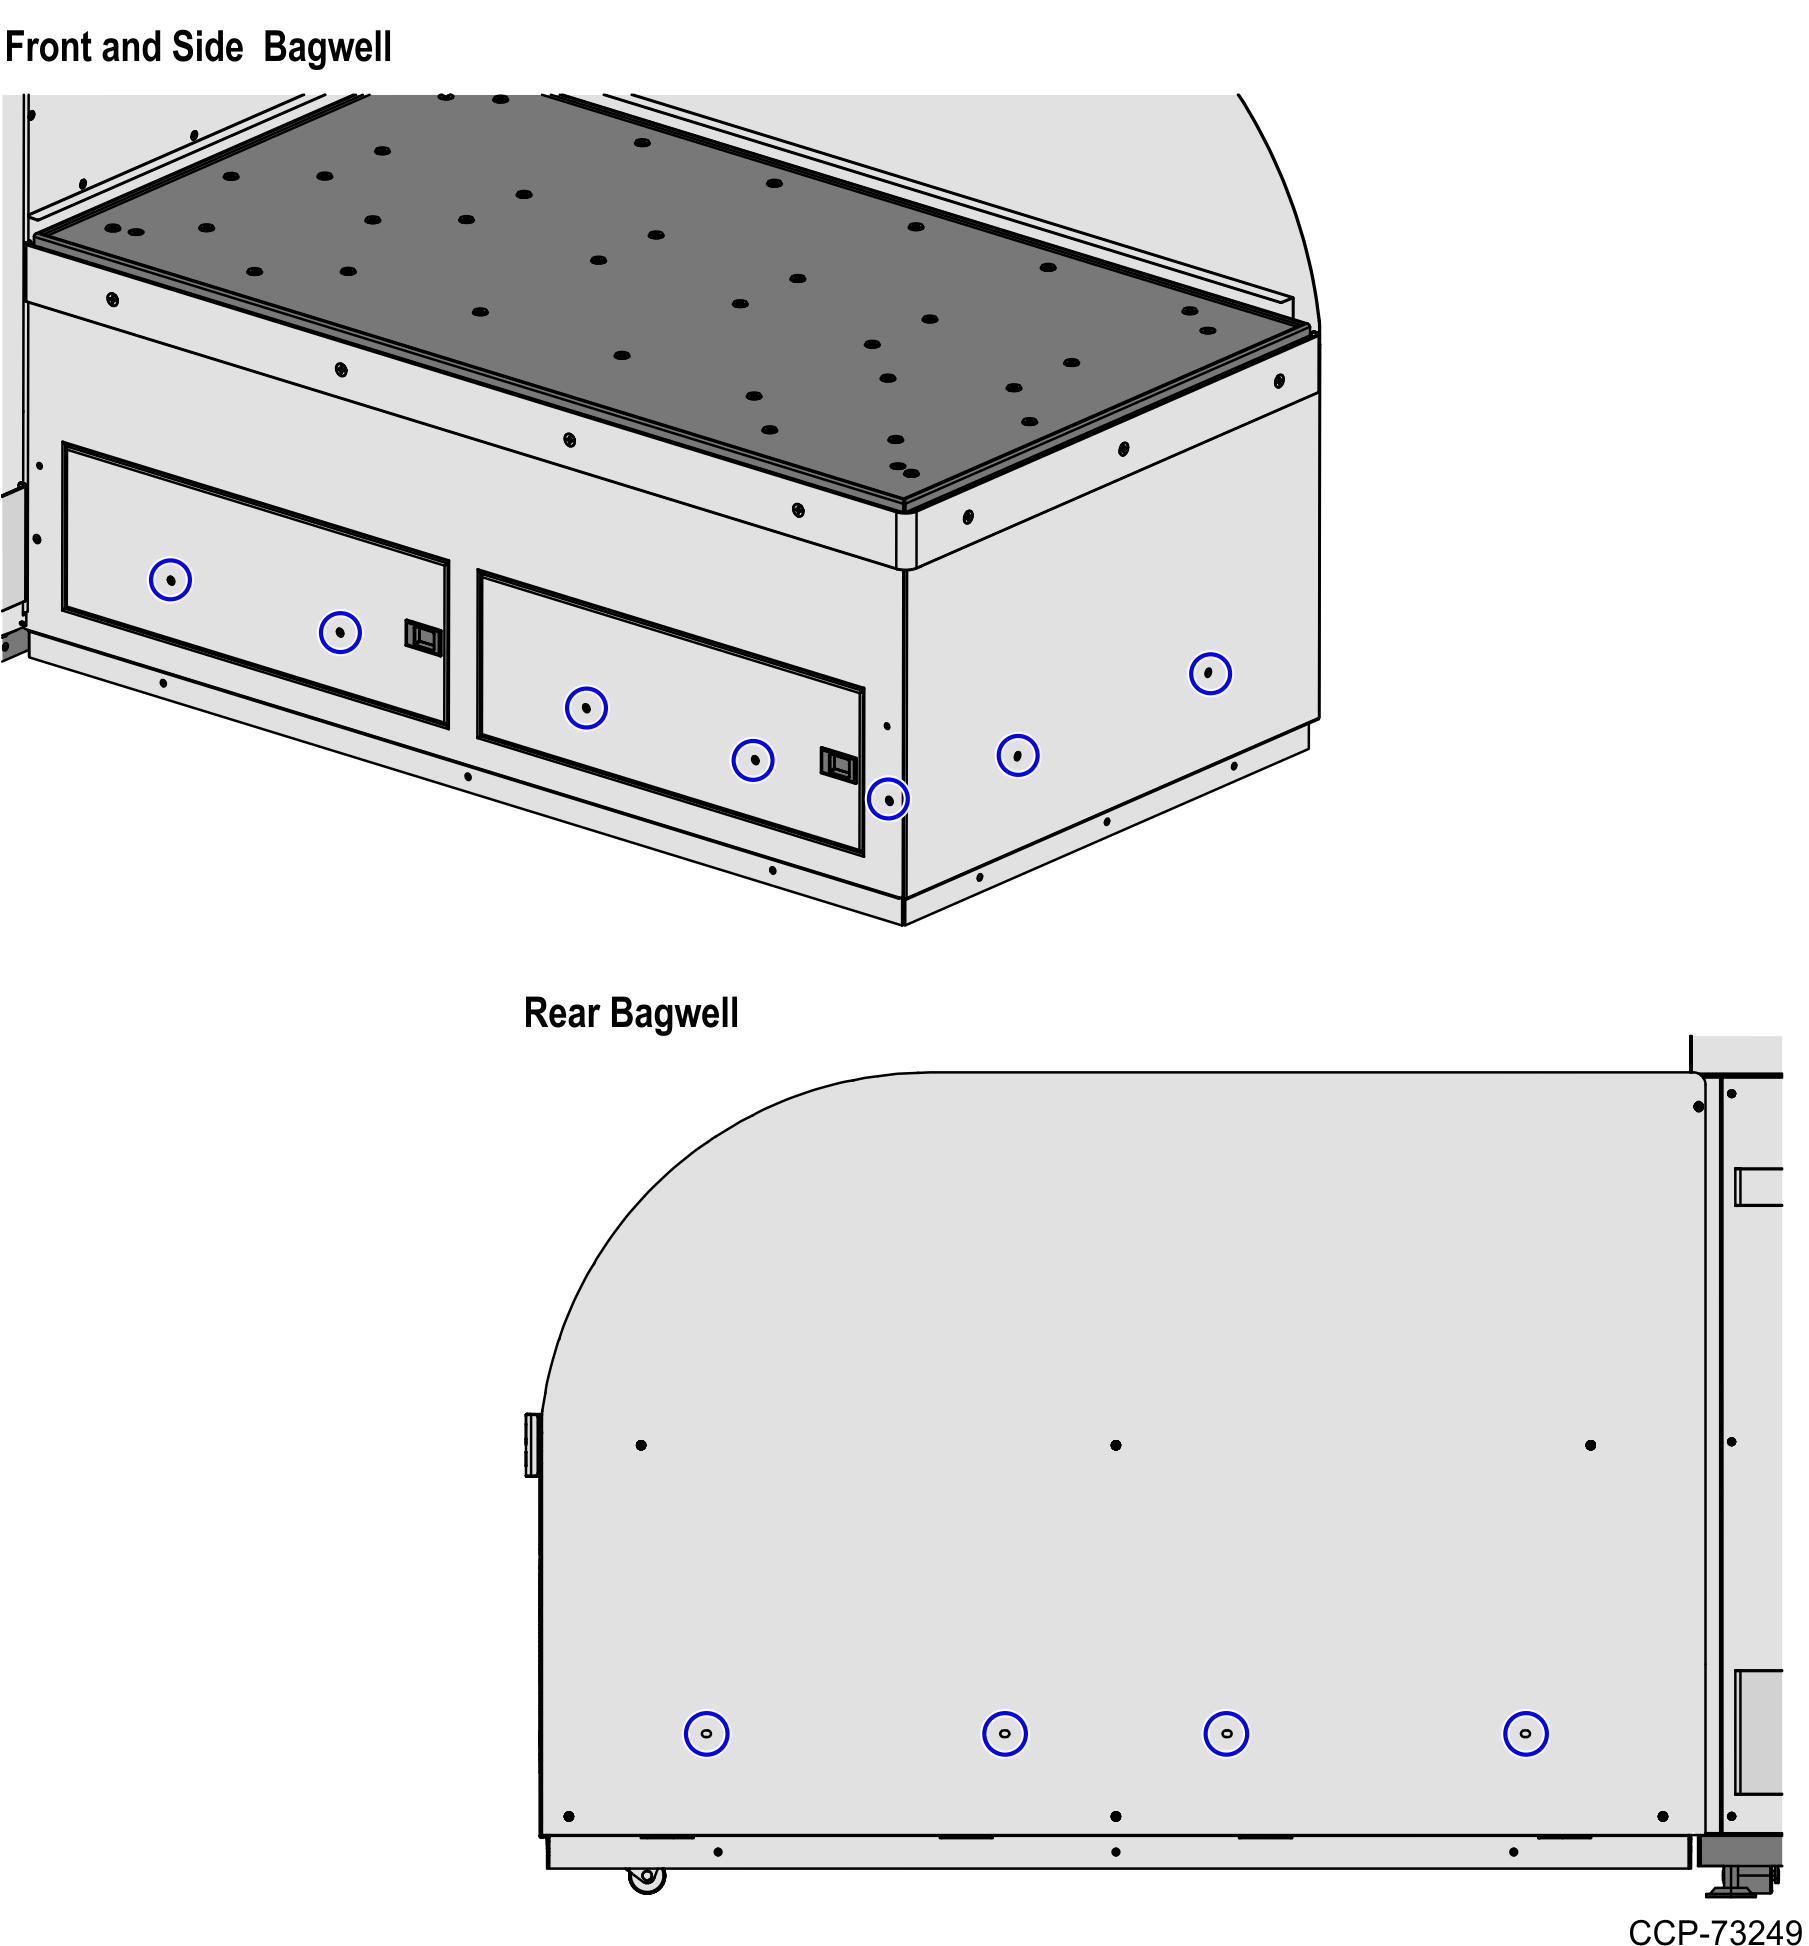
1.Remove hole cover labels from the lower area of the Bagwell as shown in the image below.
2.To install the Bagwell Door Bumpers, do the following:
a.Insert a bumper spacer into each hole on the bagwell doors.
b.Align the Bagwell Door Bumper holes with the corresponding bumper spacer and then secure each bumper using two 1/4-20 flat head screws as shown in the image below.
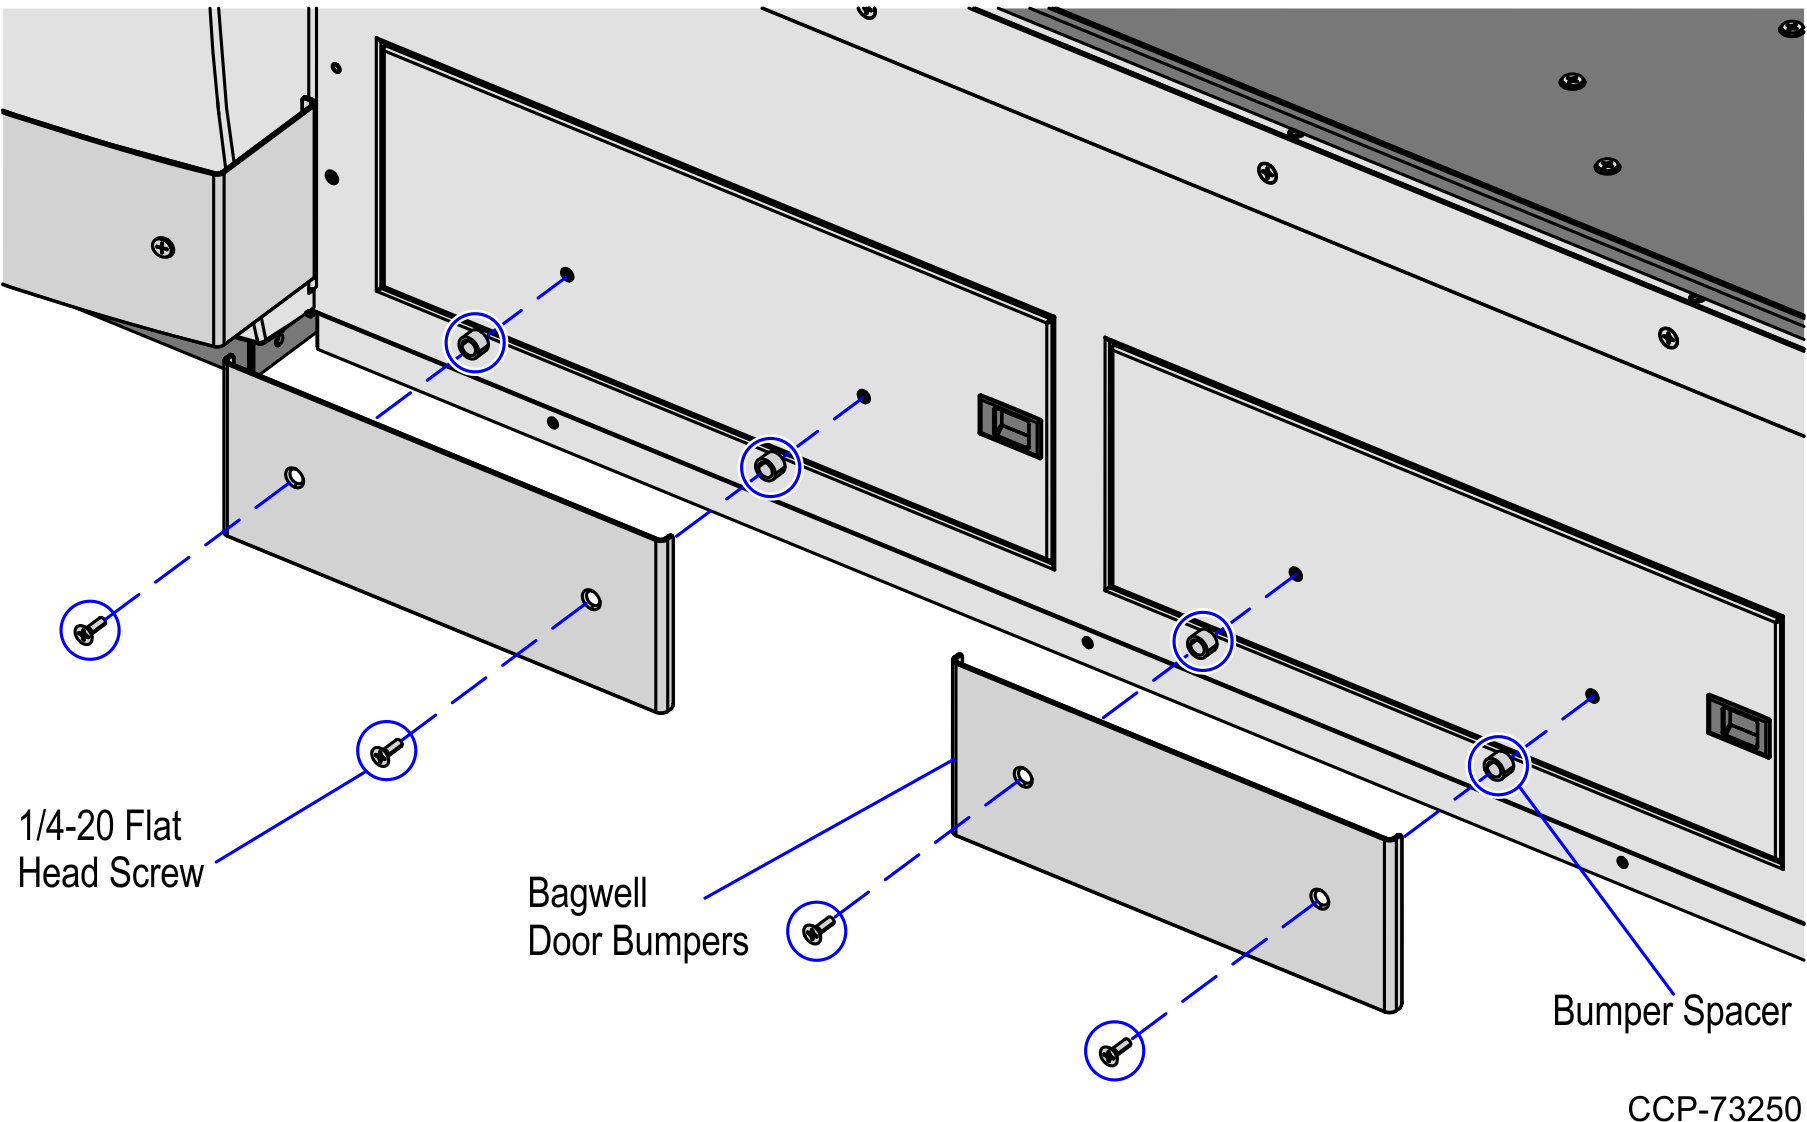
Note: There is only one Bagwell Door Bumper on a 2-Bag Bagwell unit. No Bagwell Door Bumper on a 1-Bag Bagwell unit.
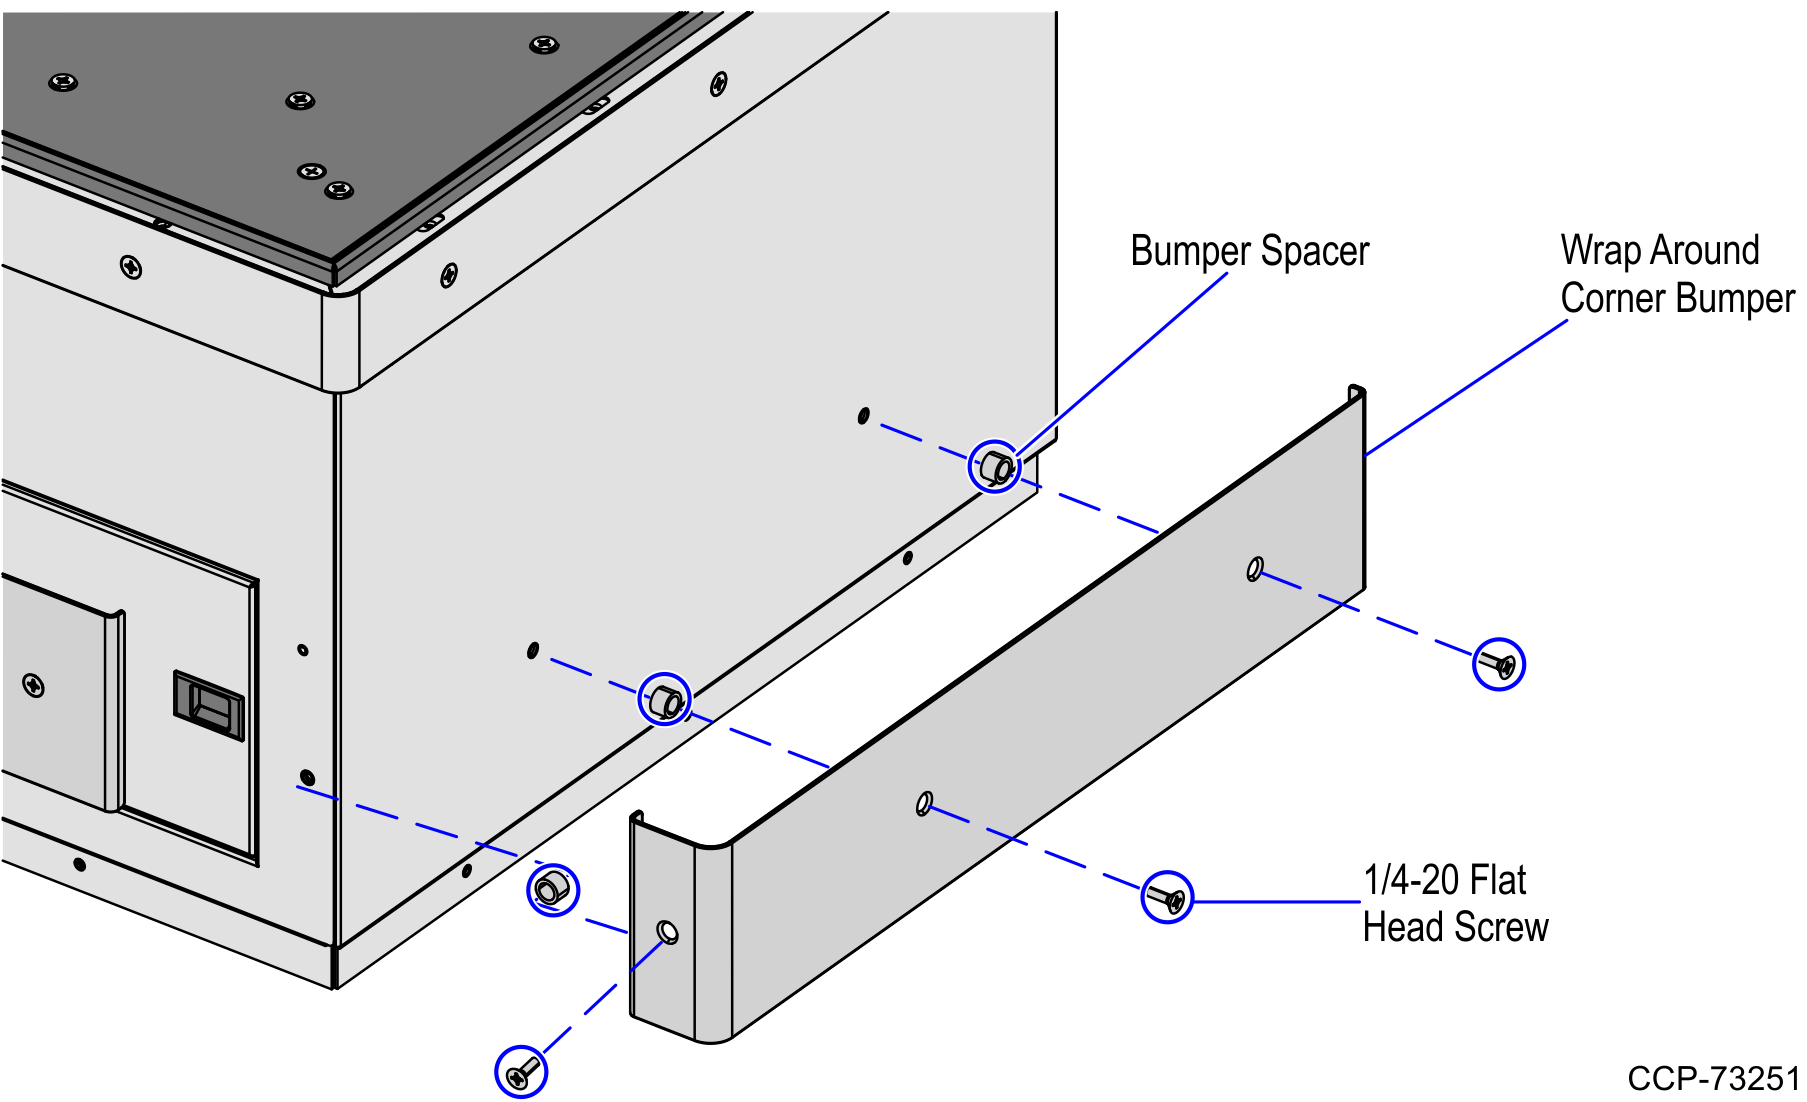
3.To install the Wrap Around Corner Bumper on the Bagwell side, do the following:
a.Insert a bumper spacer into each hole.
b.Align the Wrap Around Corner Bumper holes with the corresponding bumper spacer and then secure using three 1/4-20 flat head screws as shown in the image below.
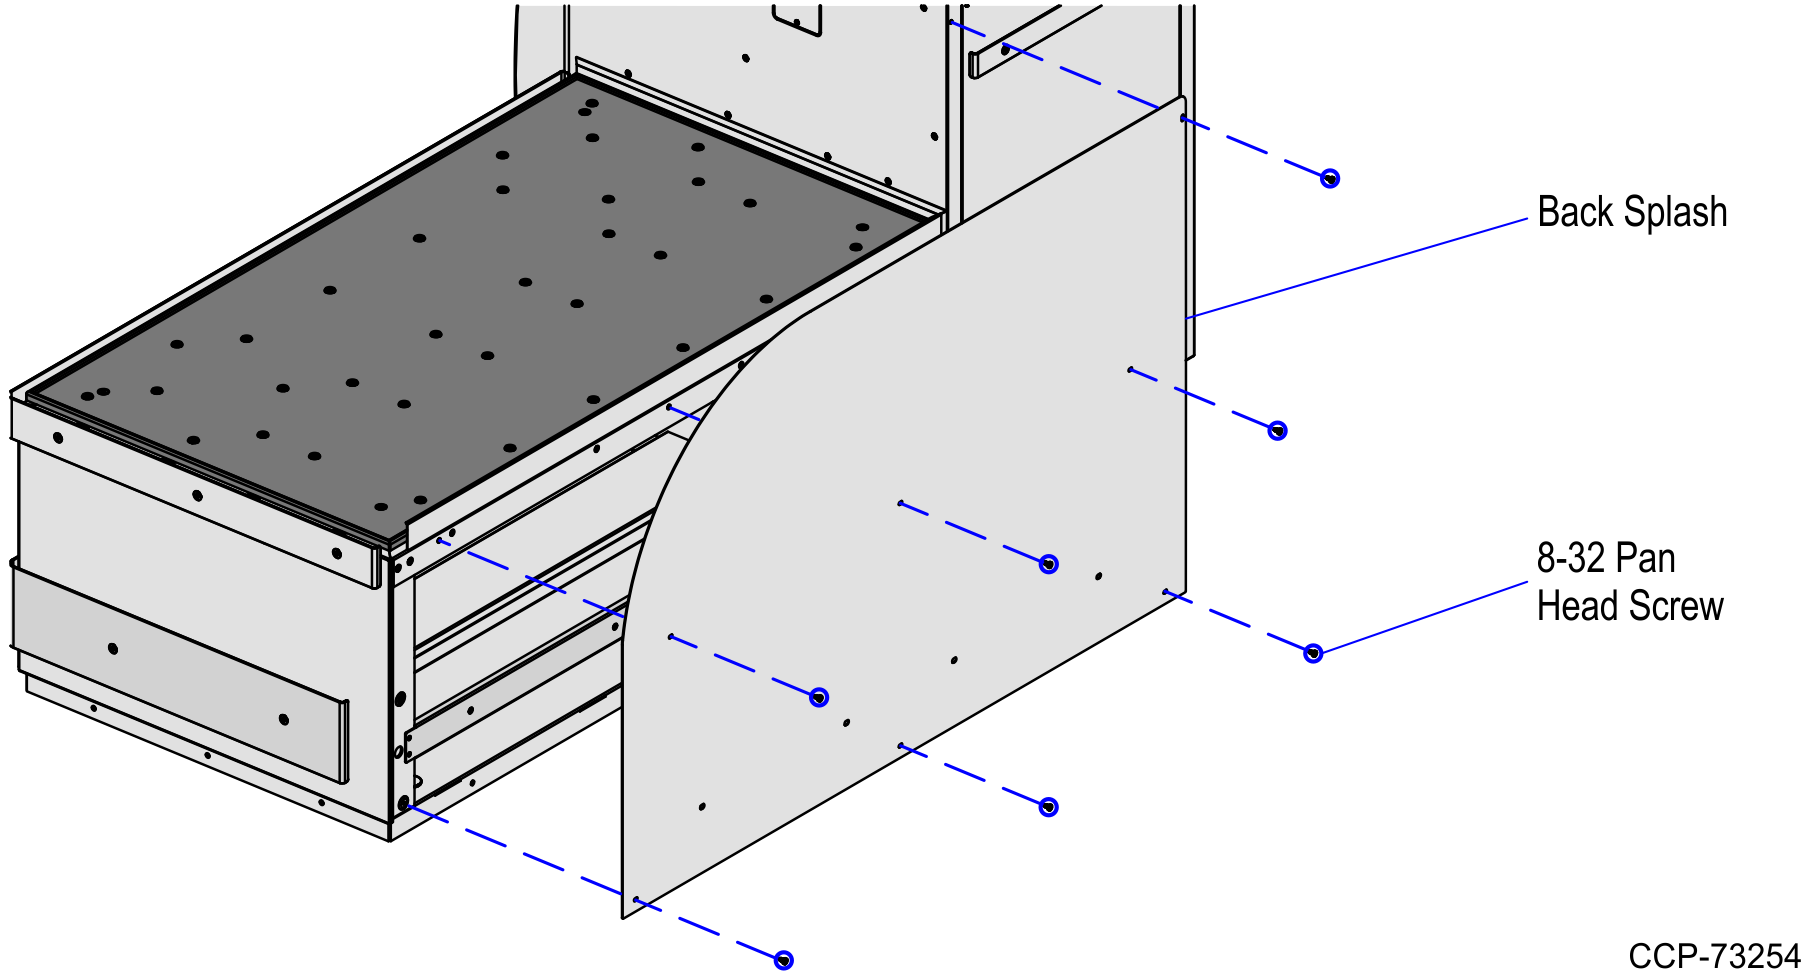
4.Detach the back splash from the bagwell frame by removing seven 8-32 pan head screws.

5.Attach the rear support bracket onto the bagwell frame using four 8-32 nut.
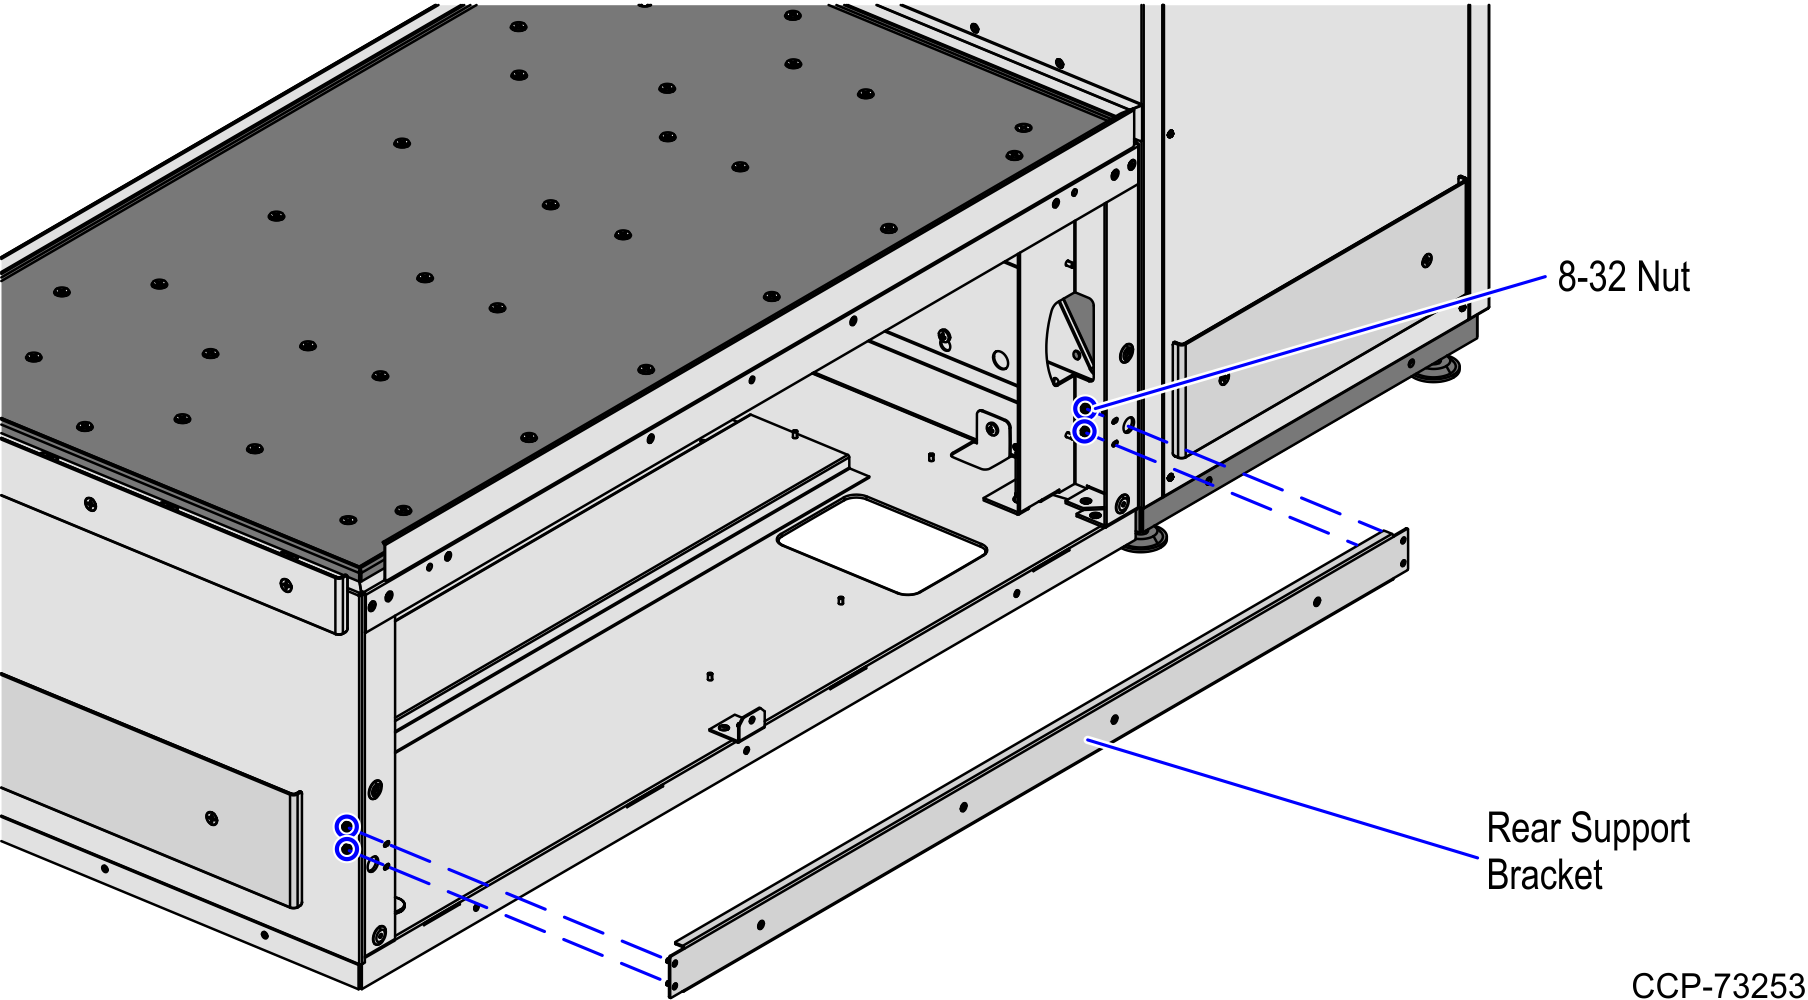
6.Attach the back splash onto the bagwell frame using seven 8-32 pan head screws.
7.To install a Rear Bagwell Bumper, do the following:
a.Insert a bumper spacer into each hole on the back splash.
b.Align the Rear Bagwell Bumper holes with the corresponding bumper spacer and then secure each bumper using two 1/4-20 flat head screws as shown in the image below.
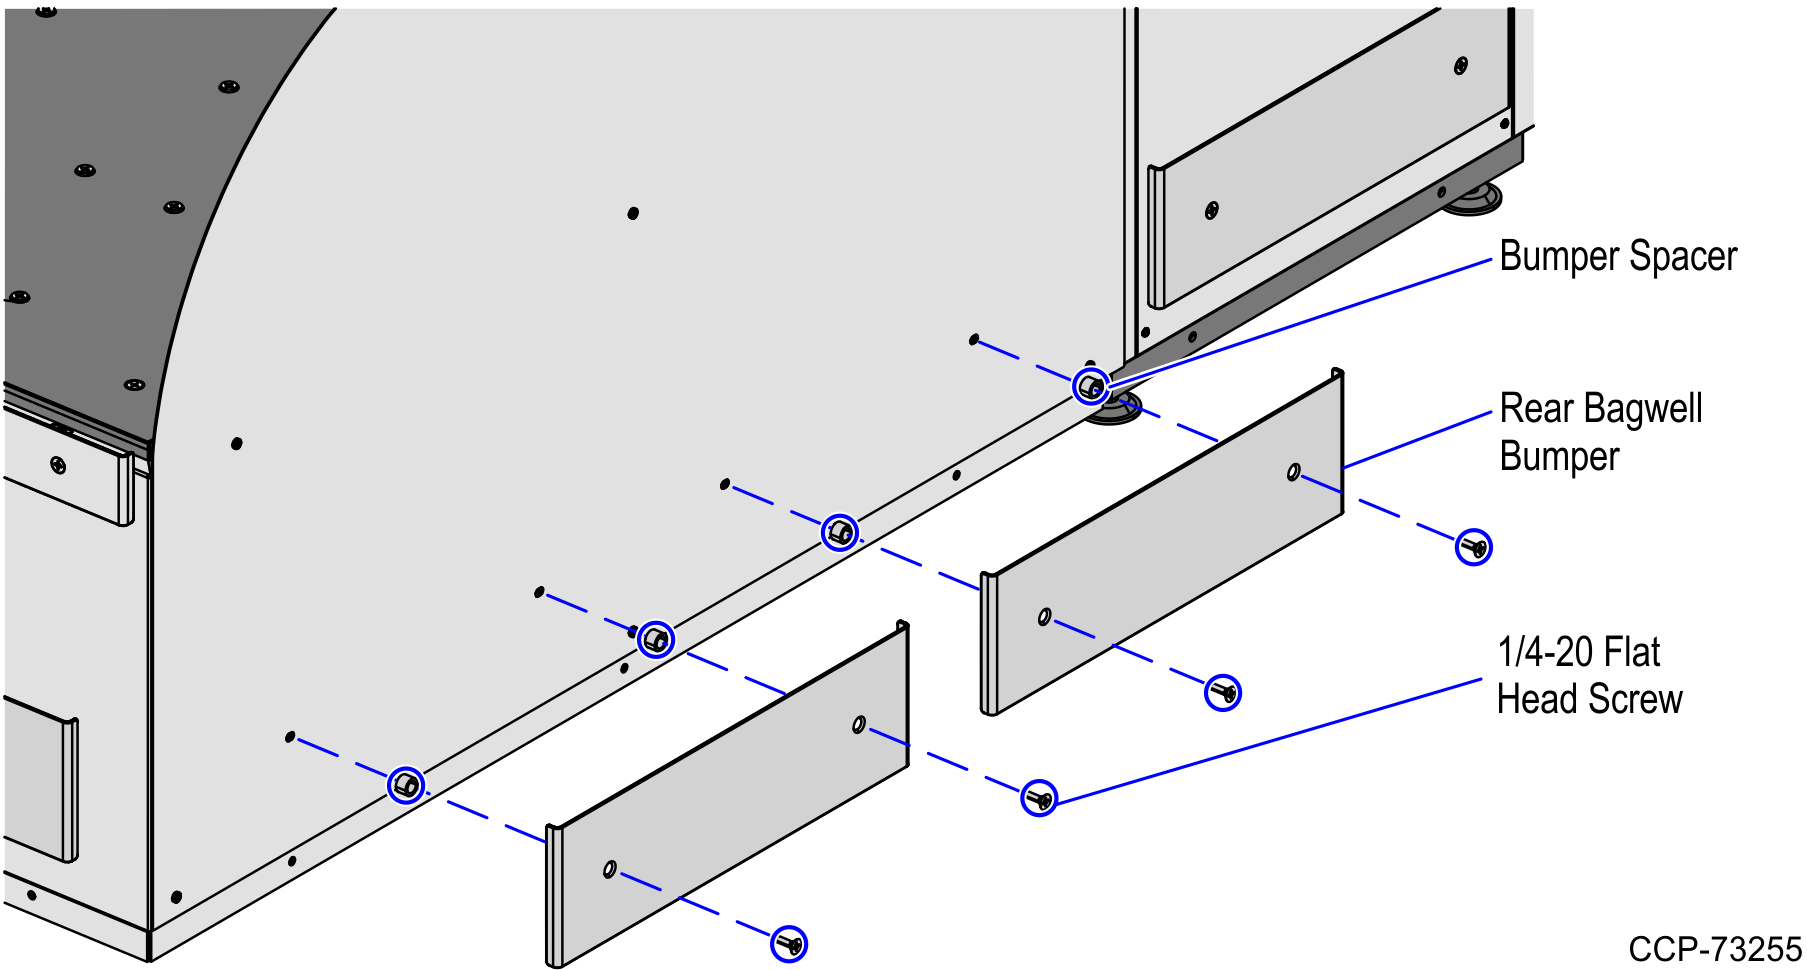
Note: There is only one Rear Bagwell Bumper for 2-Bag Bagwell and 1-Bag Bagwell units.