Installing Core Door Hinge
To install the Core Door Hinge, follow these steps:
1.Install the hinge to the Core Door inner frame using seven (7) screws, but do not fully tighten for adjustment purposes.
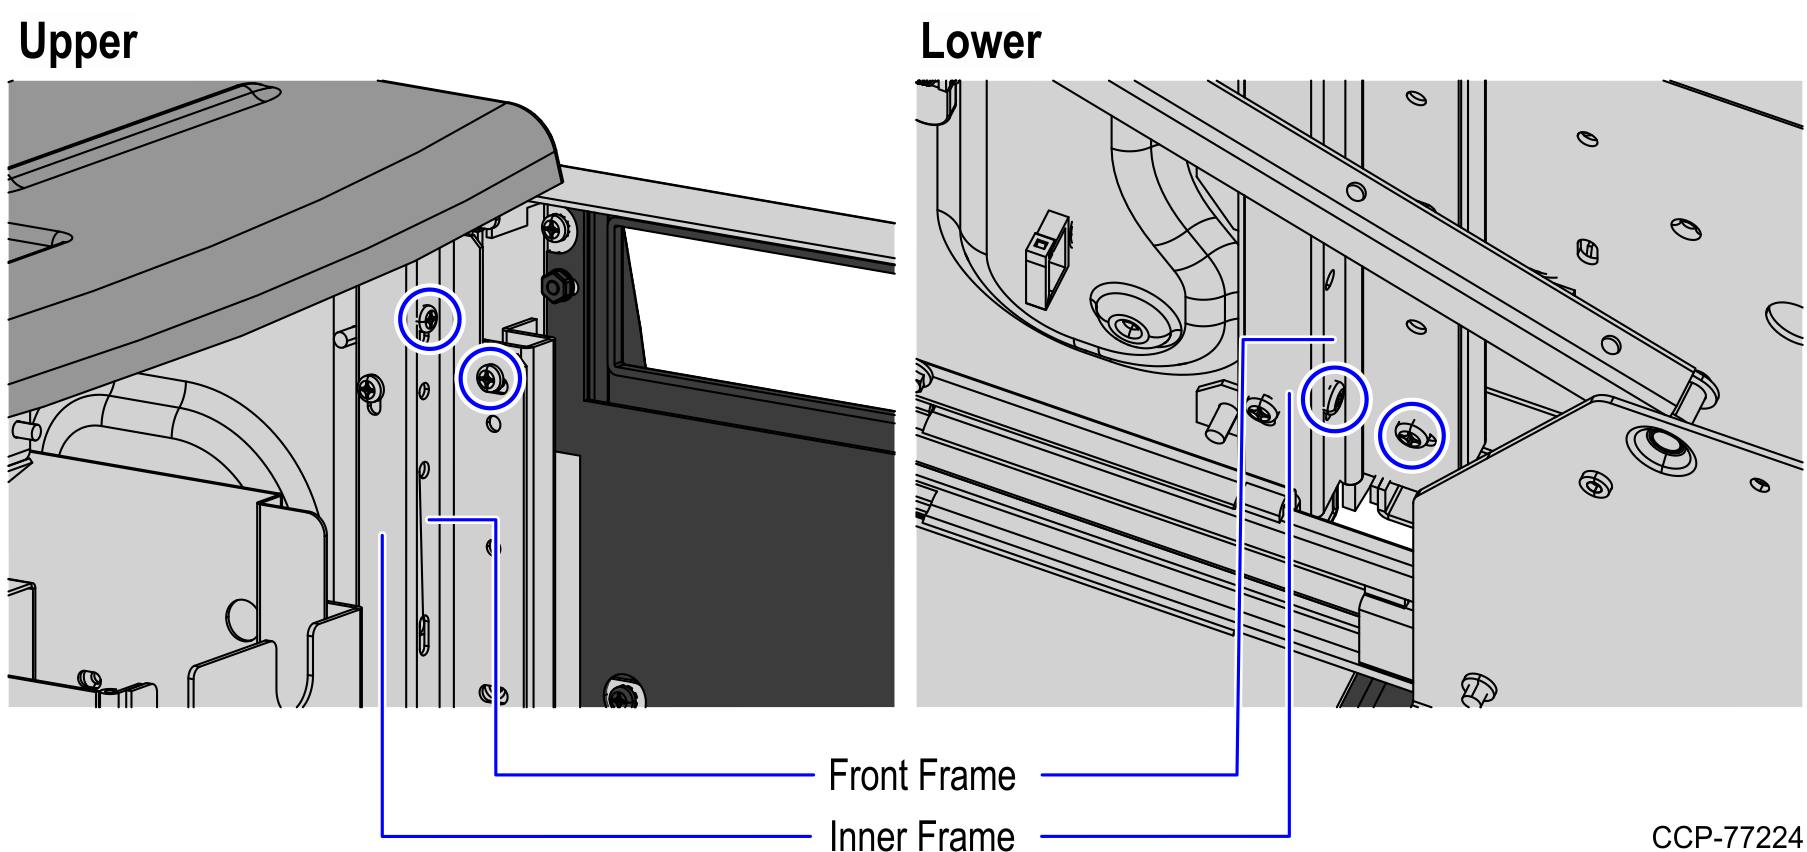
2.Secure the hinge and the Core Door by tightening the upper and lower two (2) screws on the front frame and the door. This allows easy adjustment of the Core Door before securing the remaining screws.
Caution: The Core Door is heavy. Handle the Core Door with caution.
3.Do the following:
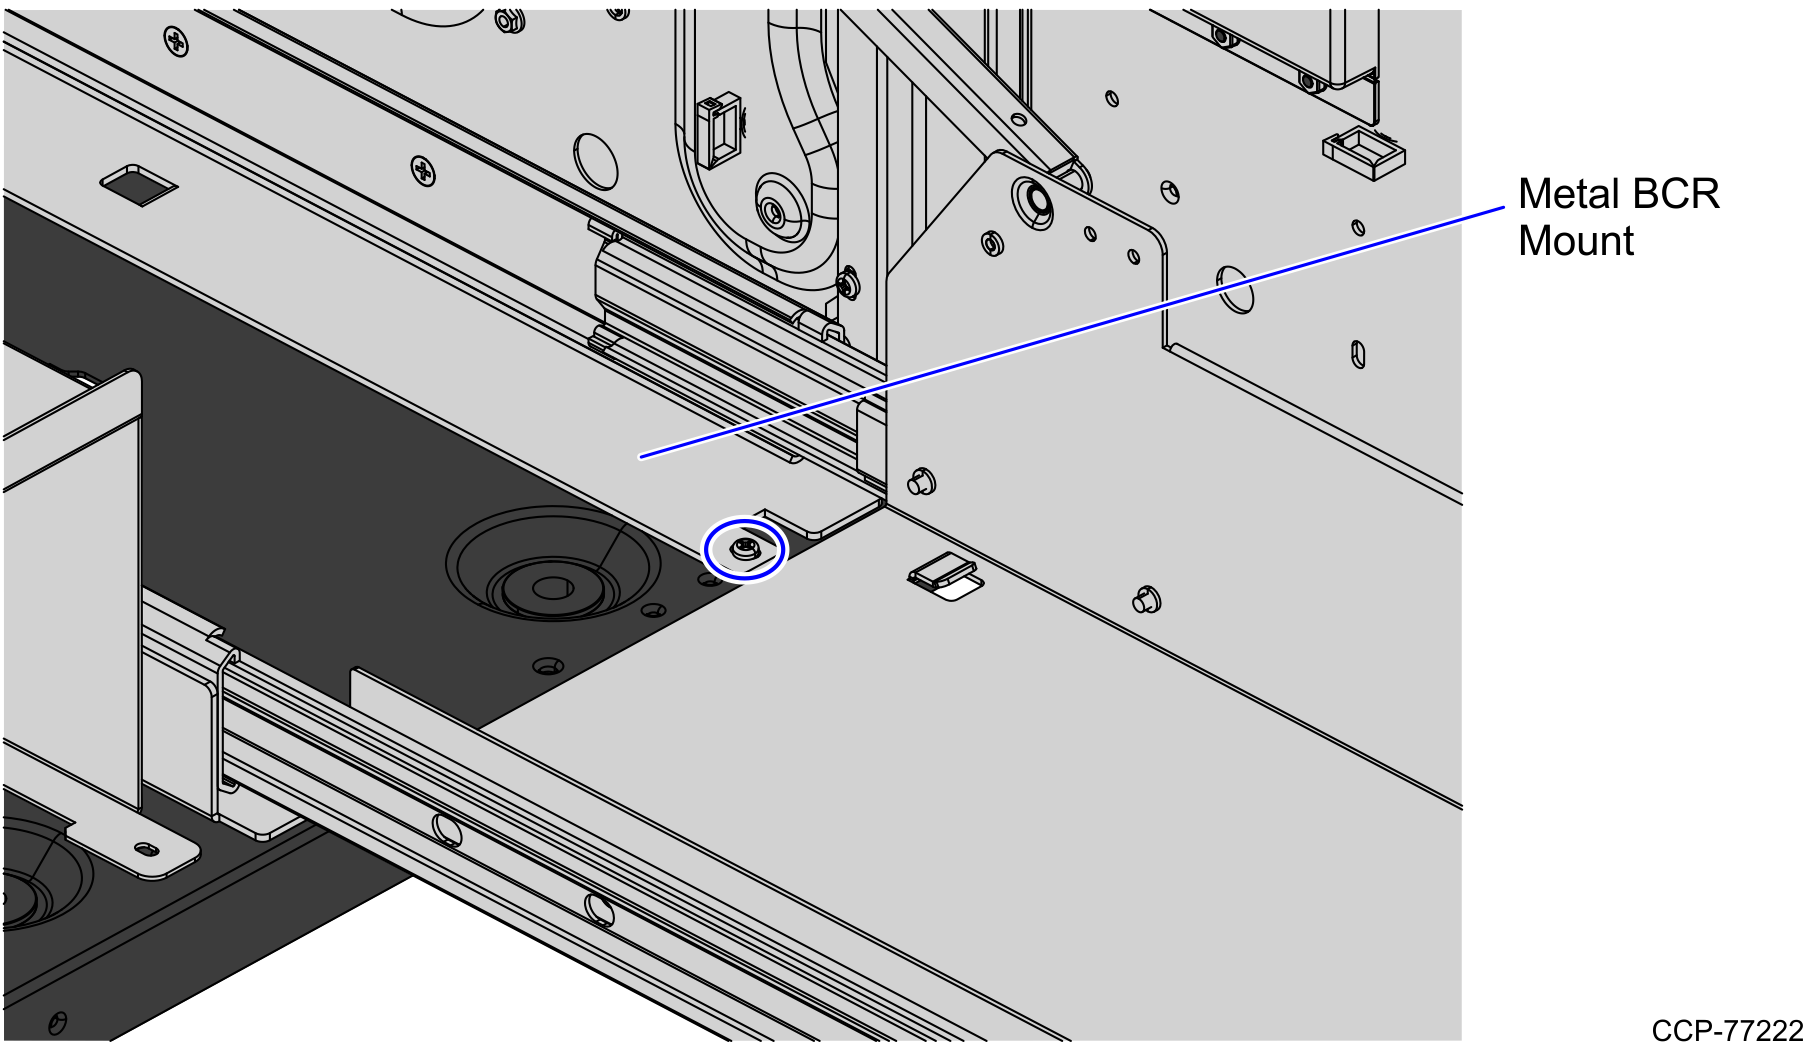
a.On the right side of the BCR shelf, hook and slide the bracket forward.
b.Secure metal BCR mount to the cabinet floor using a screw, as shown in the image below.
4. Install the Lower and Upper Fixed Brackets, if necessary. For more information, refer to Installing Upper and Lower Fixed Brackets.
5.Temporarily install the following components to check if the components fits well when closing the Core Door.
|
# |
Component |
Related Task/Information |
|---|---|---|
|
a. |
Bulk Coin Recycler |
For more information, refer to NCR SelfServ™ Checkout (7350) Hardware Service Guide (B005-0000-1827).
|
|
b. |
Note Dispenser |
|
|
c. |
Uninterruptible Power Supply (UPS) |
|
|
d. |
Note Acceptor Cashbox |
|
|
e. |
Note Acceptor Module |
6.Make necessary adjustments to the hinge alignment to ensure smooth closing of the Core Door.
Note: To streamline the installation procedure, make the same necessary adjustments to the Upper and Lower Fixed Brackets, if necessary.
7.Secure the hinge to the Core Cabinet frame using the remaining twenty-two (22) screws.