Installing Scanner/Scale
To install the Scanner/Scale, follow these steps:
Note: For the purpose of illustration only, this procedure uses illustrations showing a NCR RealScan 78 Scanner/Scale. The same procedure applies for units using NCR RealScan 79e Bi-Optic Imager Scanner/Scale (7879).
1.Unlock and open the Upper Cabinet door.
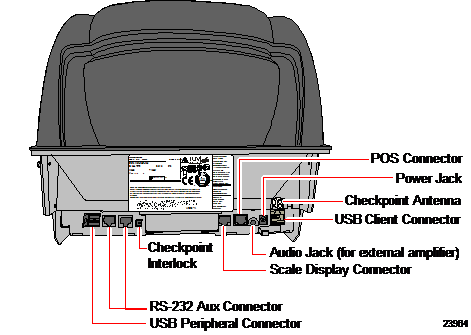
2.Connect the Interface/Power Cable to the USB connector of the Scanner/Scale.
Note: The NCR RealPOS High Performance Scanner/Scale (7878) uses only one cable for both Power and Interface connection.
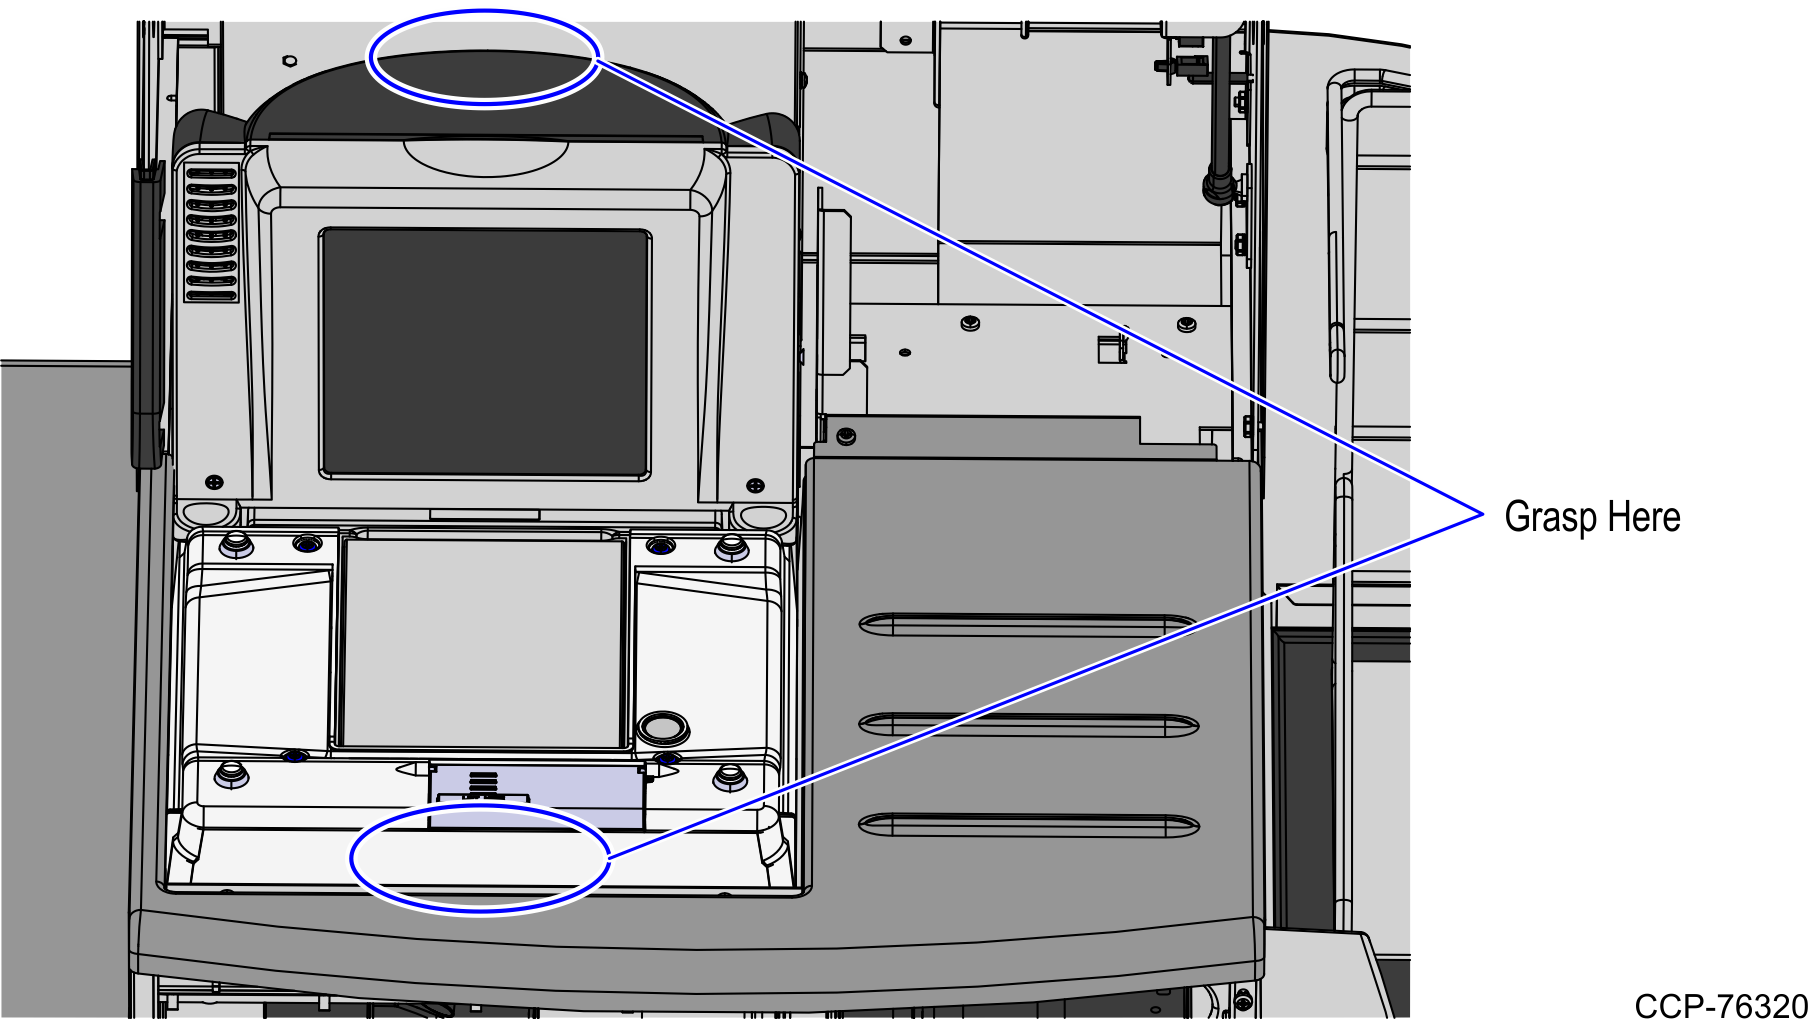
3.Grasp the Scanner/Scale by its handles and lower it into the checkstand cutout.
Caution: Be careful not to damage any of the cables.
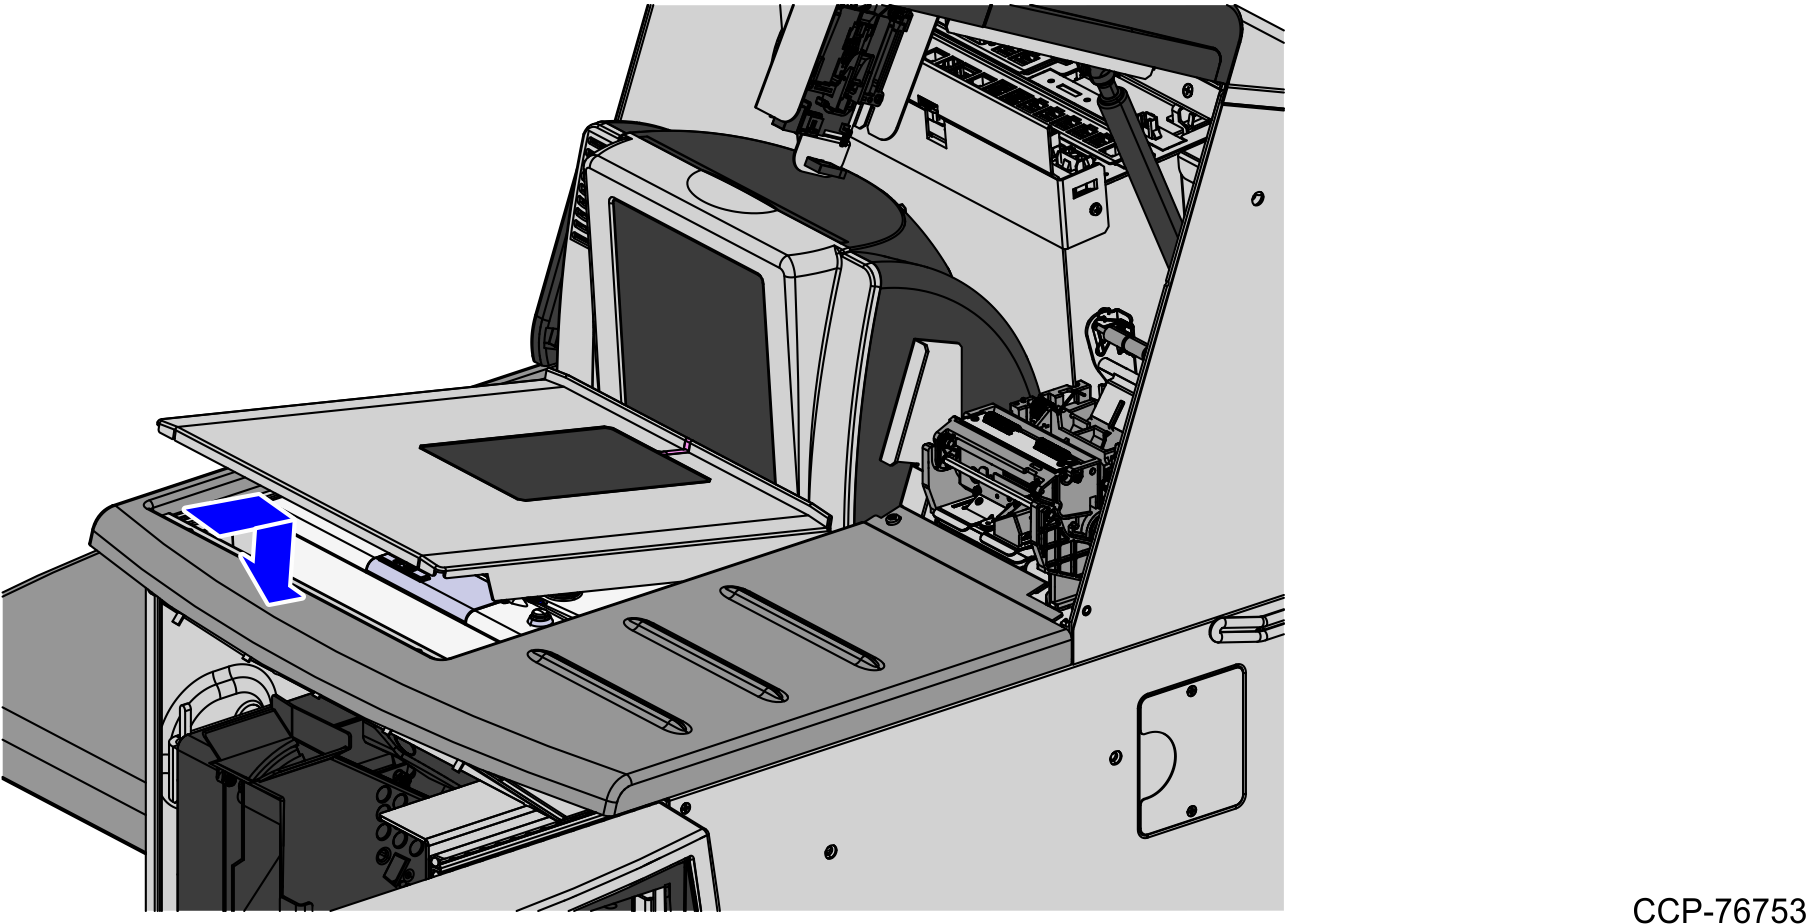
4.Place the back of Scanner/Scale on the two supports located on the E-Box mount.
5.Lower the Scanner/Scale unto the scanner bucket area.
6.Install the Scale Plate by placing it on top of the load cells.
Note: It is important that the Scanner does not rock on its supports. Ensure that the Scanner is sitting on all four supports.
Note: The Scanner/Scale must be calibrated before the system goes live. For more information, refer to Calibrating and Adjusting System Hardware.