Removing Scanner/Scale
To remove the Scanner/Scale, follow these steps:
Note: For the purpose of illustration only, this procedure uses illustrations showing a NCR RealScan 78 Scanner/Scale. The same procedure applies for units using NCR RealScan 79e Bi-Optic Imager Scanner/Scale (7879).
Note: Ensure to open the Upper Cabinet Door before proceeding. For more information, refer to Opening Upper Cabinet Door.
1.Open the Upper Cabinet Door is open. For more information, refer to Opening Upper Cabinet Door.
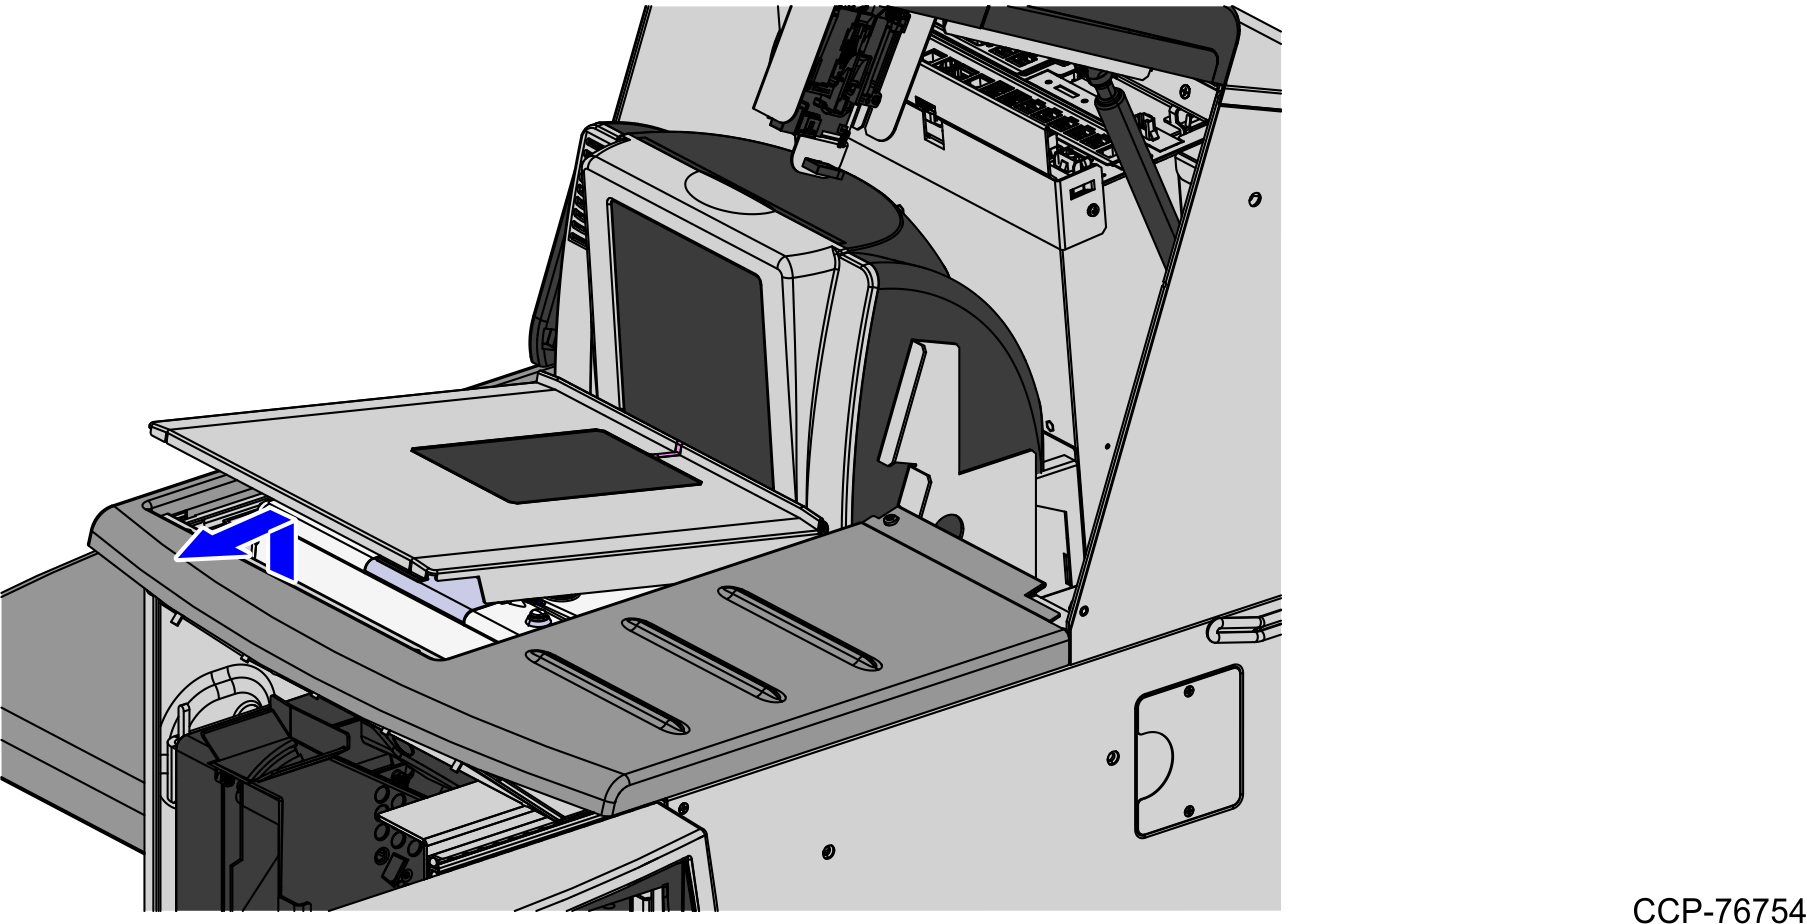
2.Lift and remove the Scale Plate from the Scanner.
3.Do the following to remove the Scanner/Scale from the scanner bucket area:
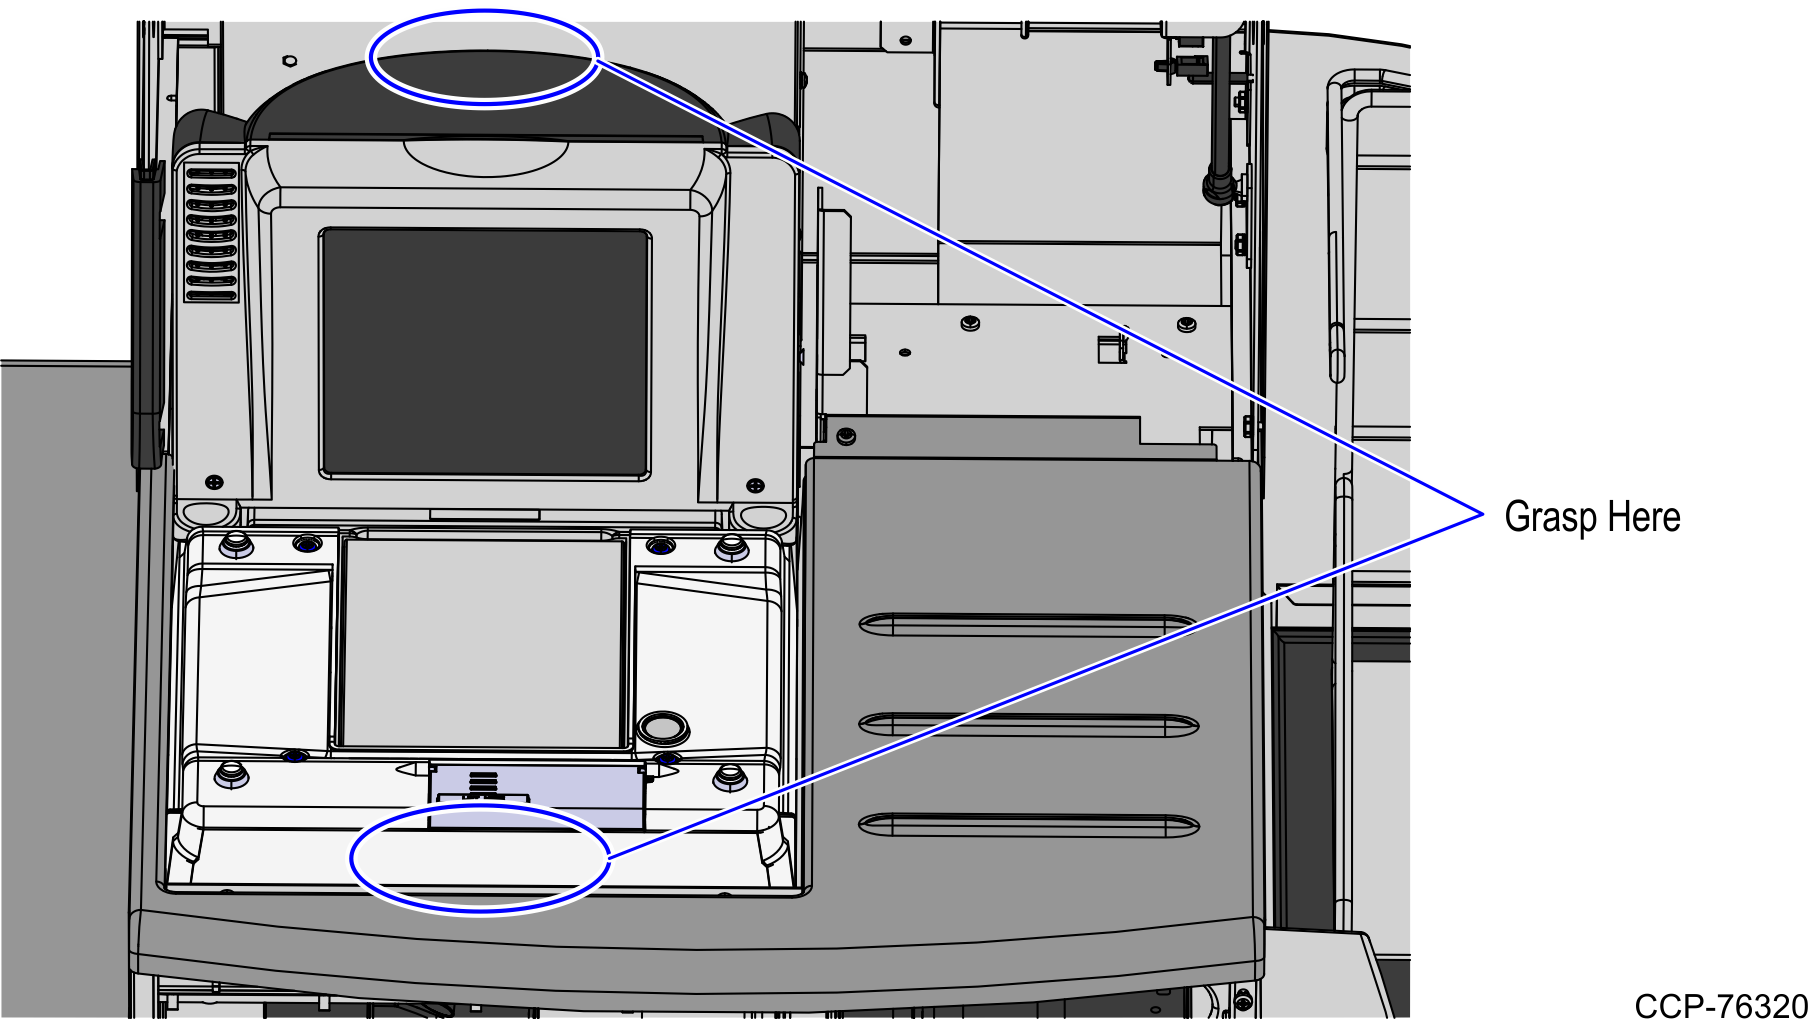
a.Grasp the front of the Scanner and lift up.
b.Grasp the back of the Scanner and slide scanner out of bucket area.
4.Disconnect the Interface/Power Cable from the USB connector on the Scanner. Verify all remaining cables are disconnected from the Scanner and remove the Scanner from the checkstand.
Note: If the Scanner/Scale comes with Sensormatic® features, remove power from the Sensormatic® Controller before removing the Sensormatic® Interface cable and then apply power to the Sensormatic® Controller after reconnecting all Sensormatic® cables.