Assembling Trackball
Assembling Trackball
To assemble the Trackball device, follow these steps:
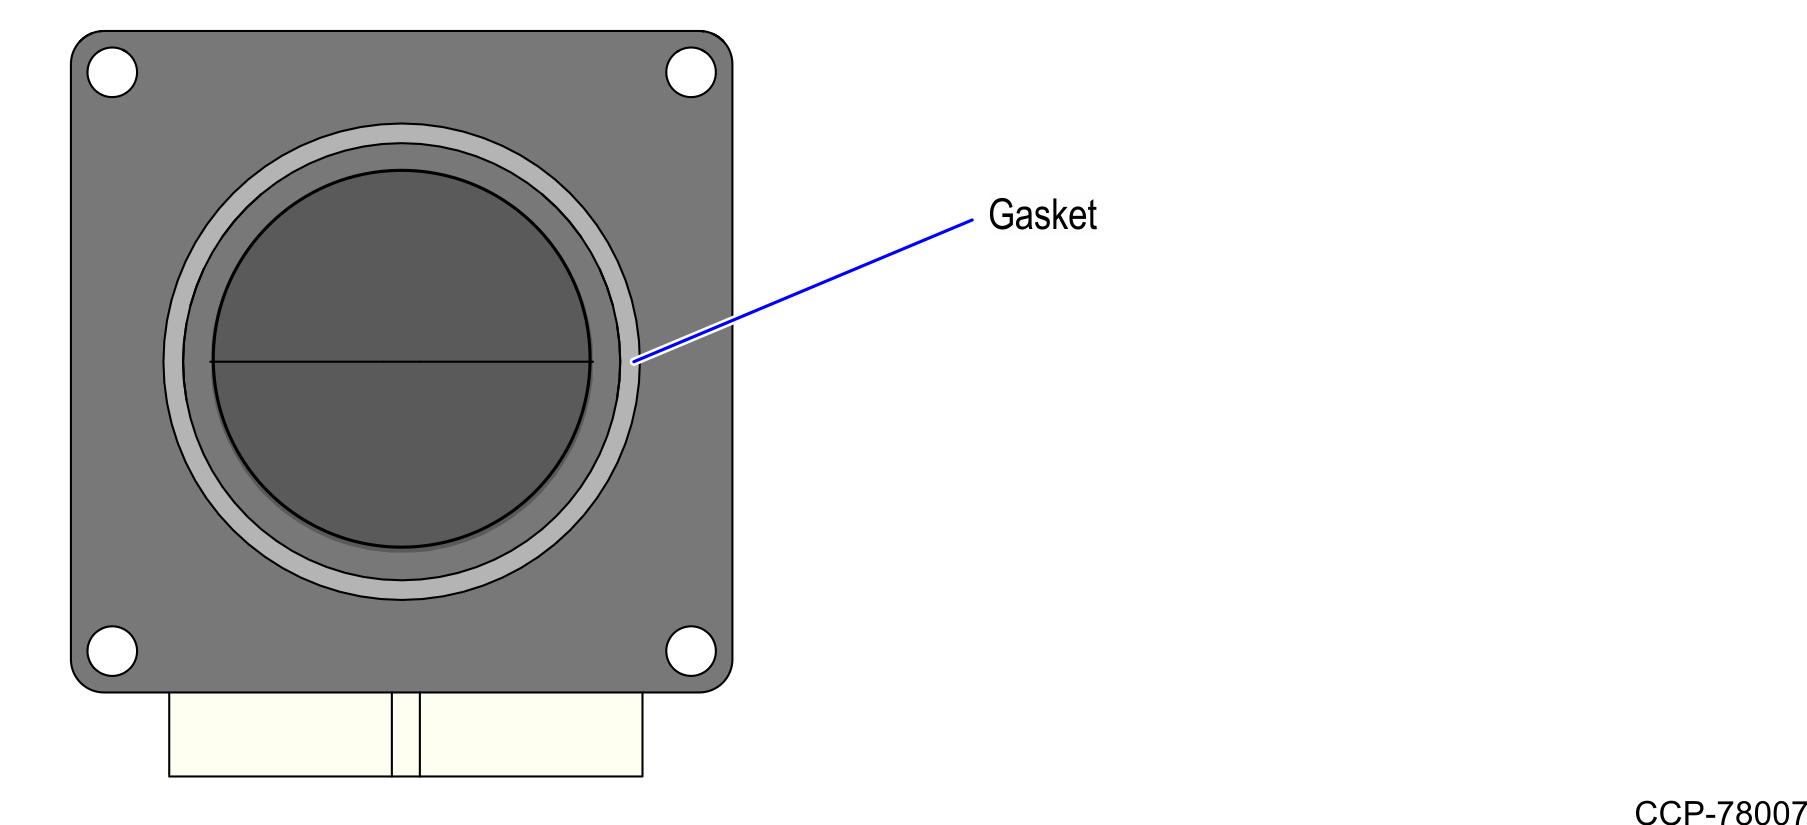
1.Place the Trackball gasket on top of the device, as shown in the image below.
Note: The Trackball gasket is located between the packing foam and top of the Trackball box.
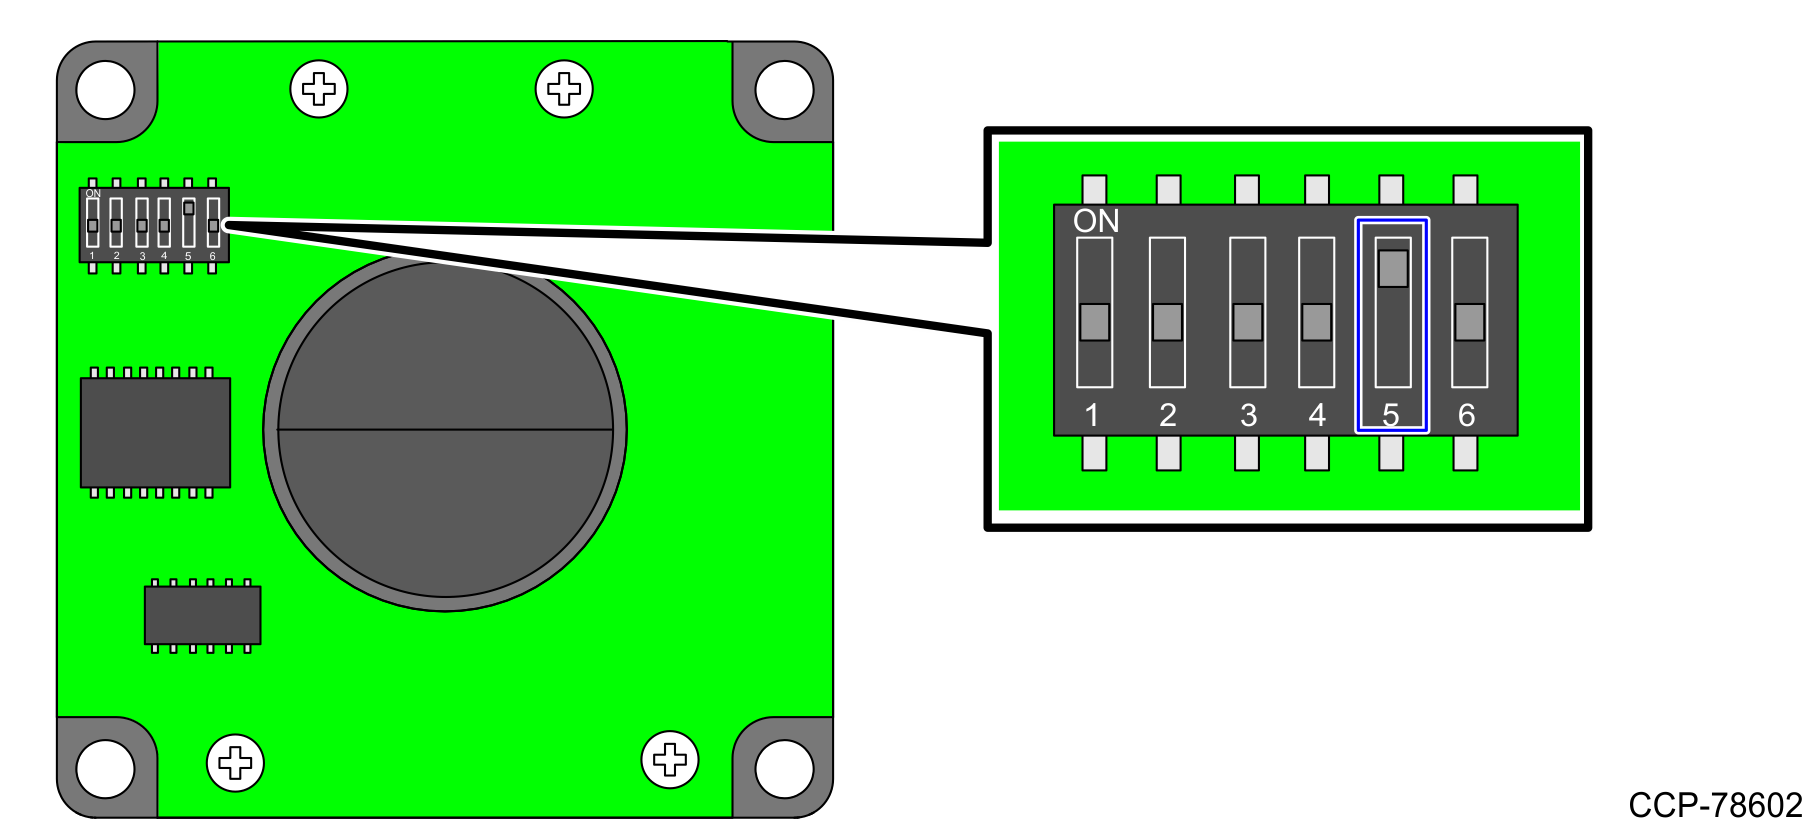
2.Verify if there is a Switch Position at the back of the Trackball device. If there is a Switch Position, change the setting orientation of the Trackball by switching Switch Position 5 from OFF to ON, as shown in the image below.
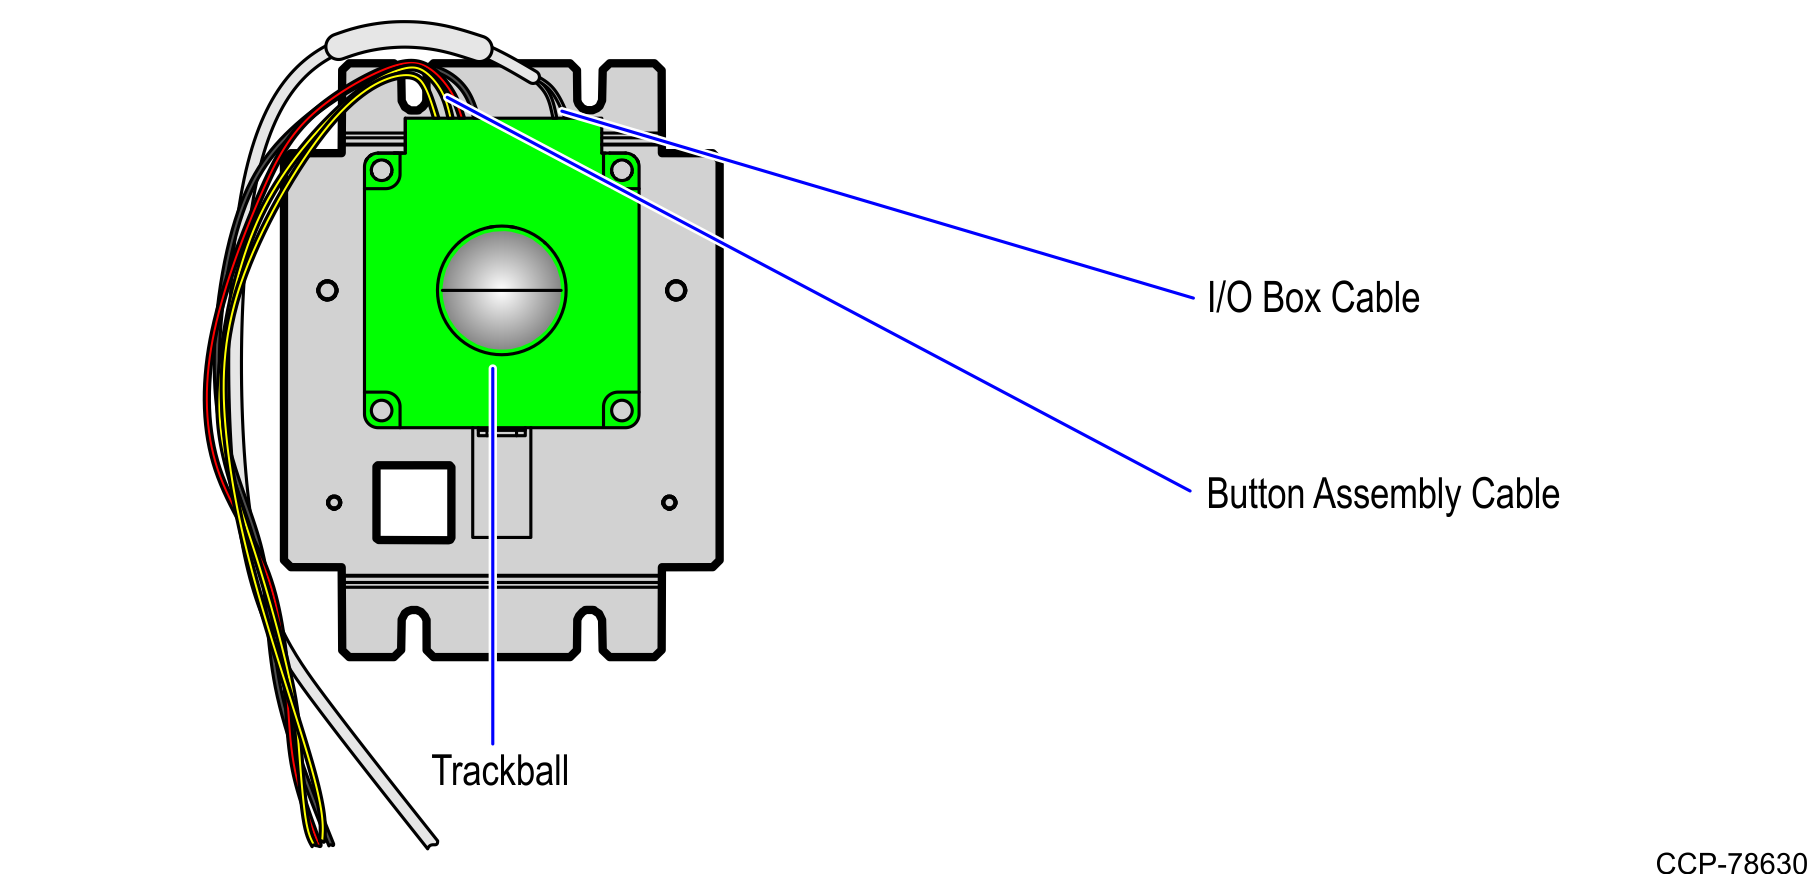
3.Connect the Button Assembly and I/O Box/E-Box cables to the Trackball, as shown in the image below.
4.Place the Trackball device over the Trackball mount and place the Hold Down Bracket over the Trackball, as shown in the image below.
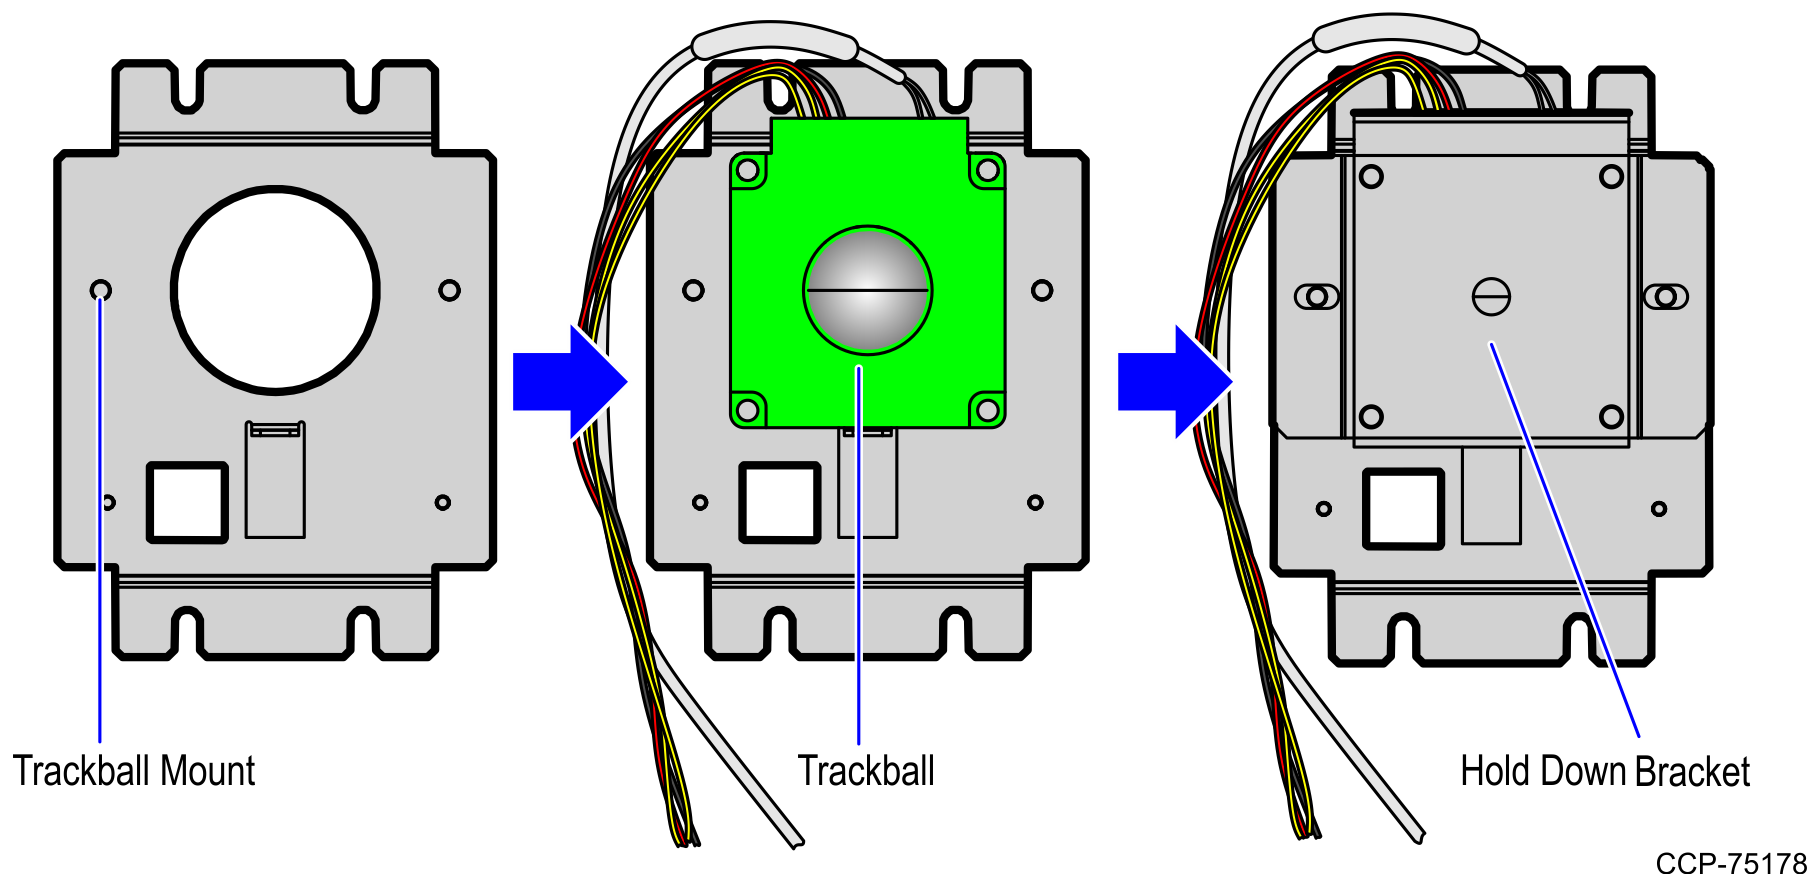
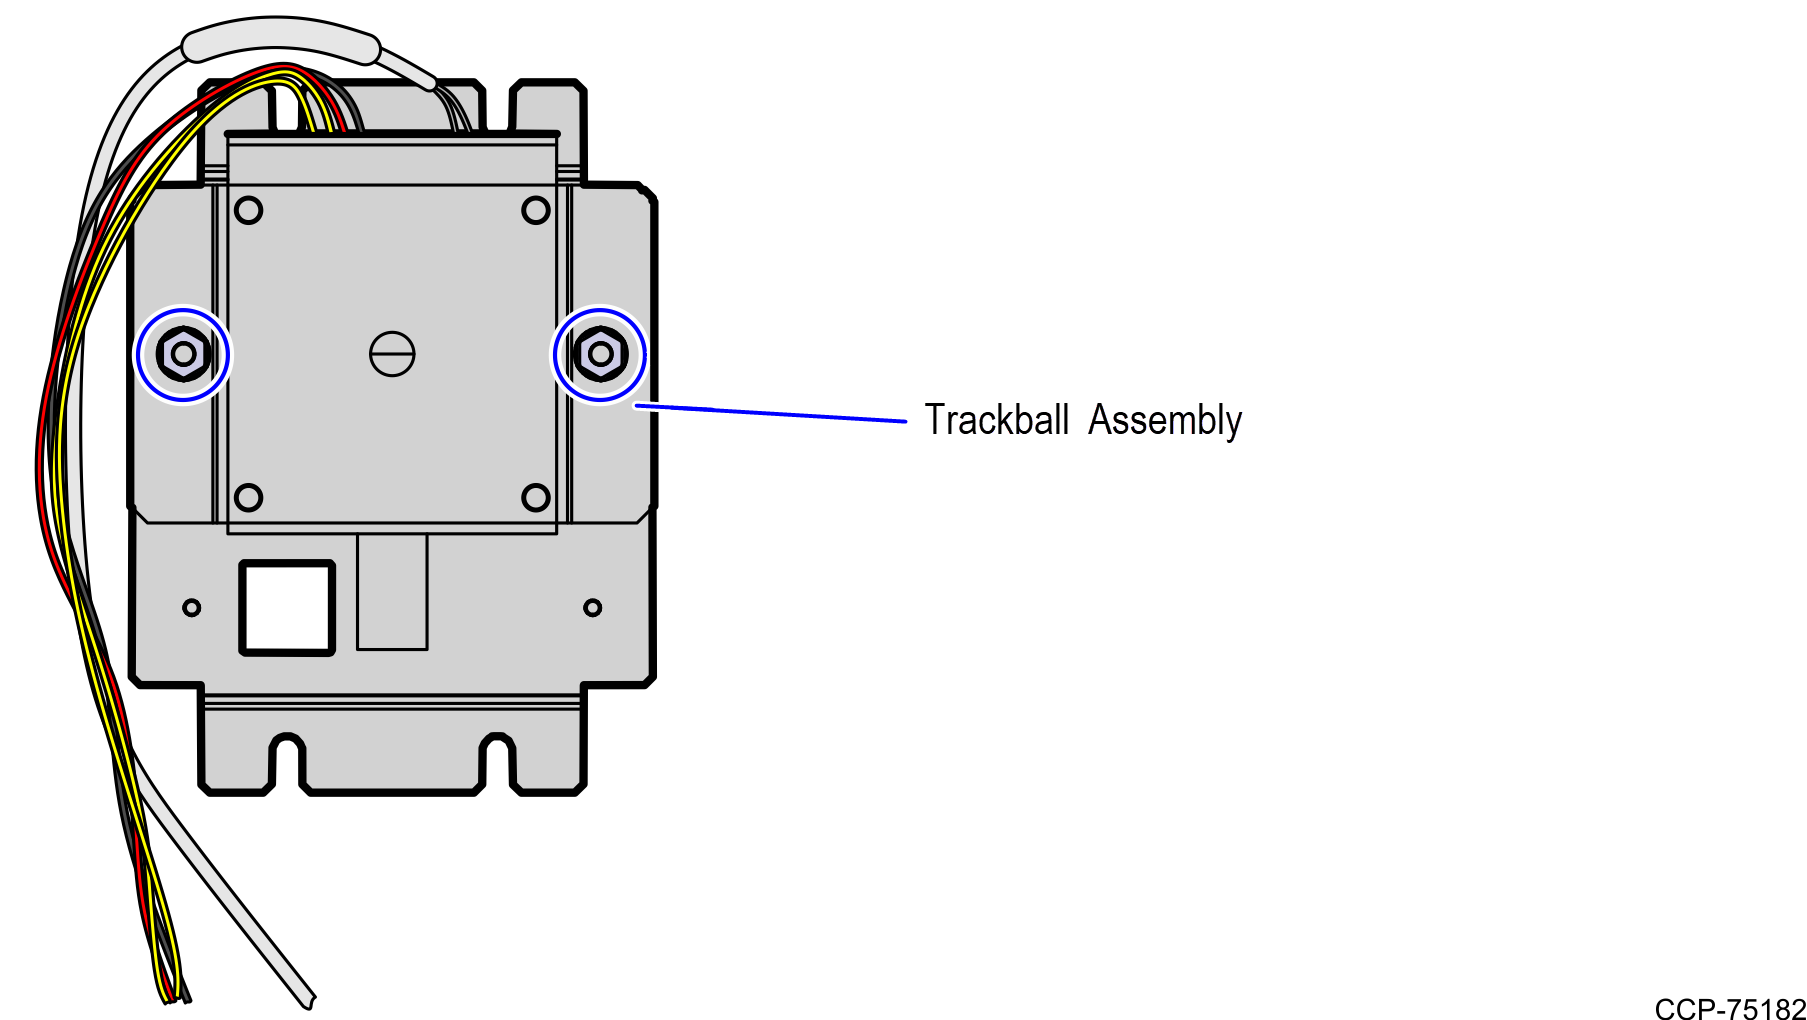
5.Secure the Hold Down Bracket over the Trackball using two (2) nuts.
6.Do the following:
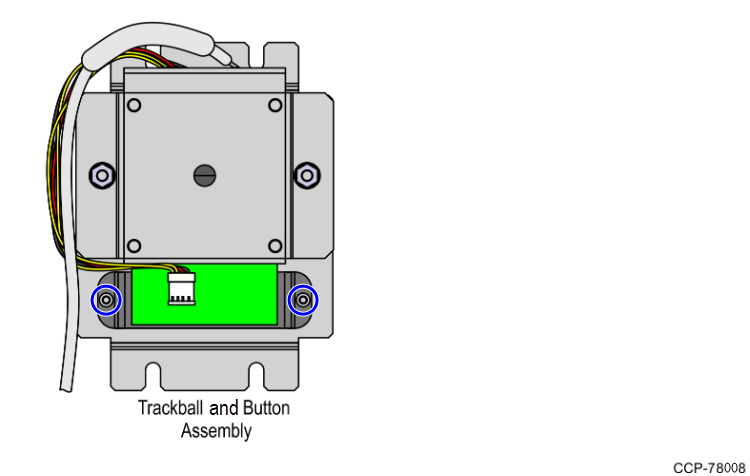
a.Place the Button assembly over two PEM studs on the Trackball Assembly.
Note: Ensure that the cable going to the I/O Box or E-Box is on the opposite side of the square button cutout as shown in the image below.
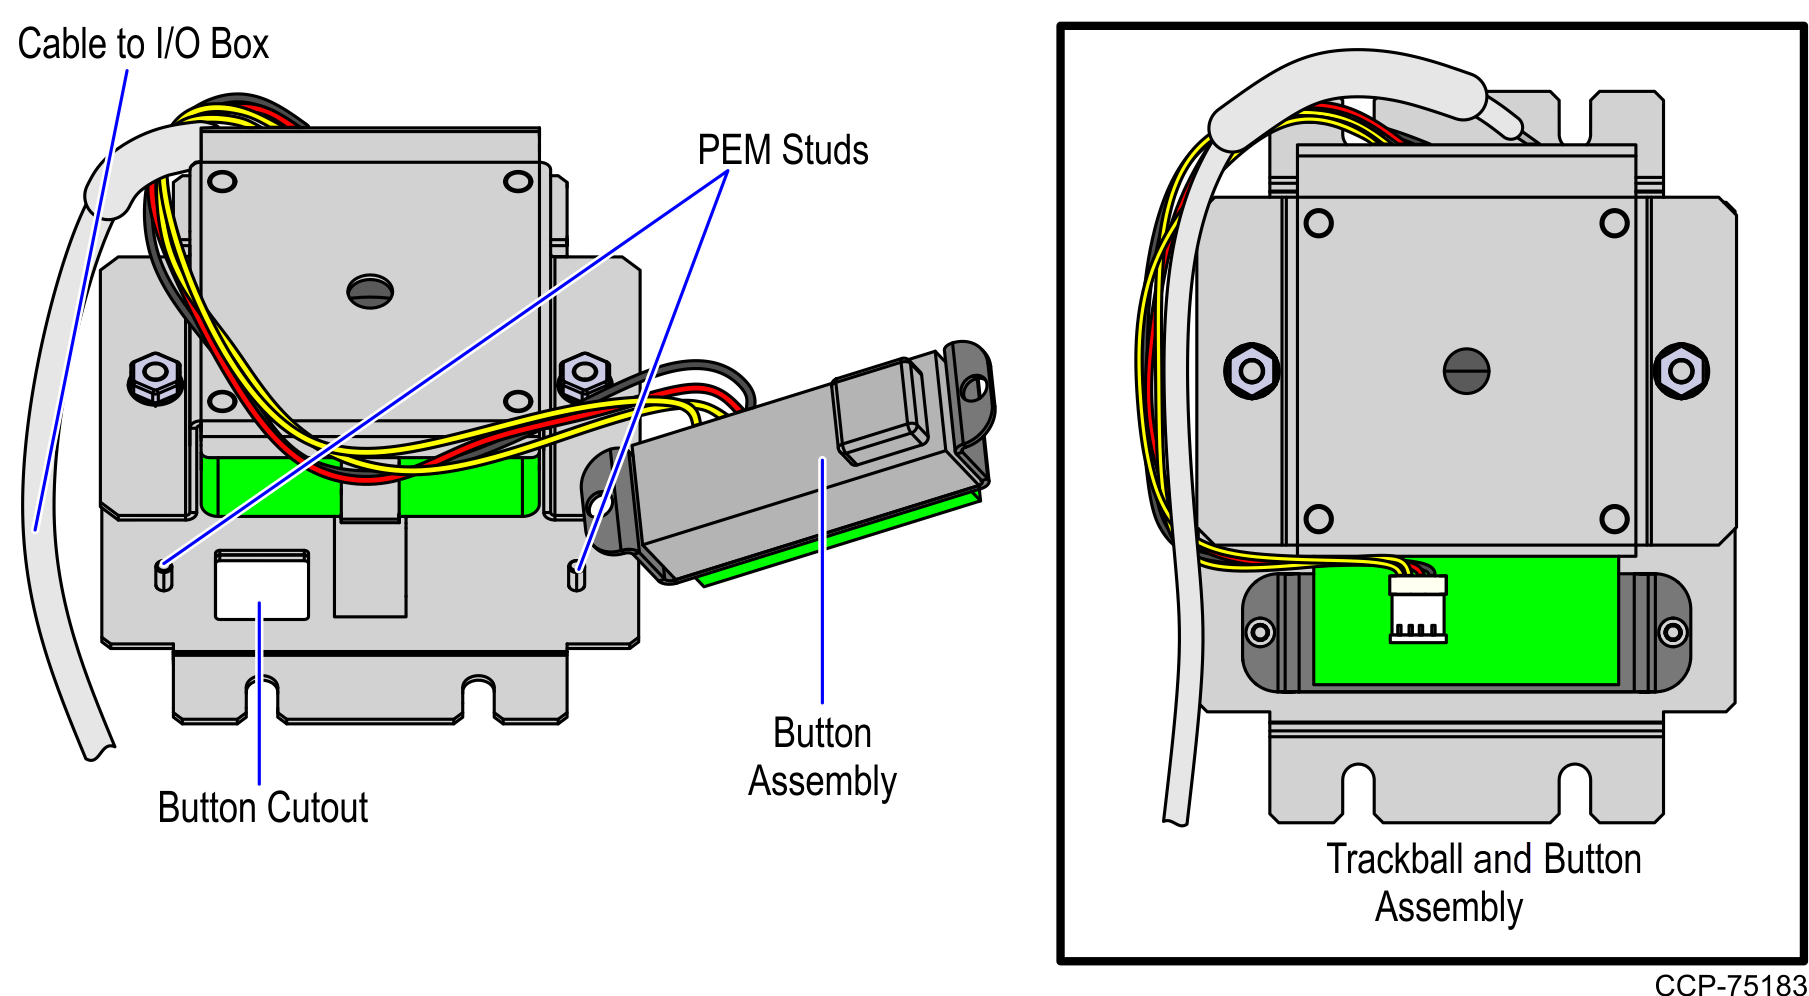
b.Secure the Button assembly to the Trackball Assembly using two (2) nuts.
Note: Ensure that the cable connection between the Trackball assembly to the Button assembly is secure.