Installing Scanner/Scale Demarcation Labels on 7350 Convertible Units
To attach the Scanner/Scale Demarcation Labels on a Convertible SelfServ Checkout unit, follow these steps:
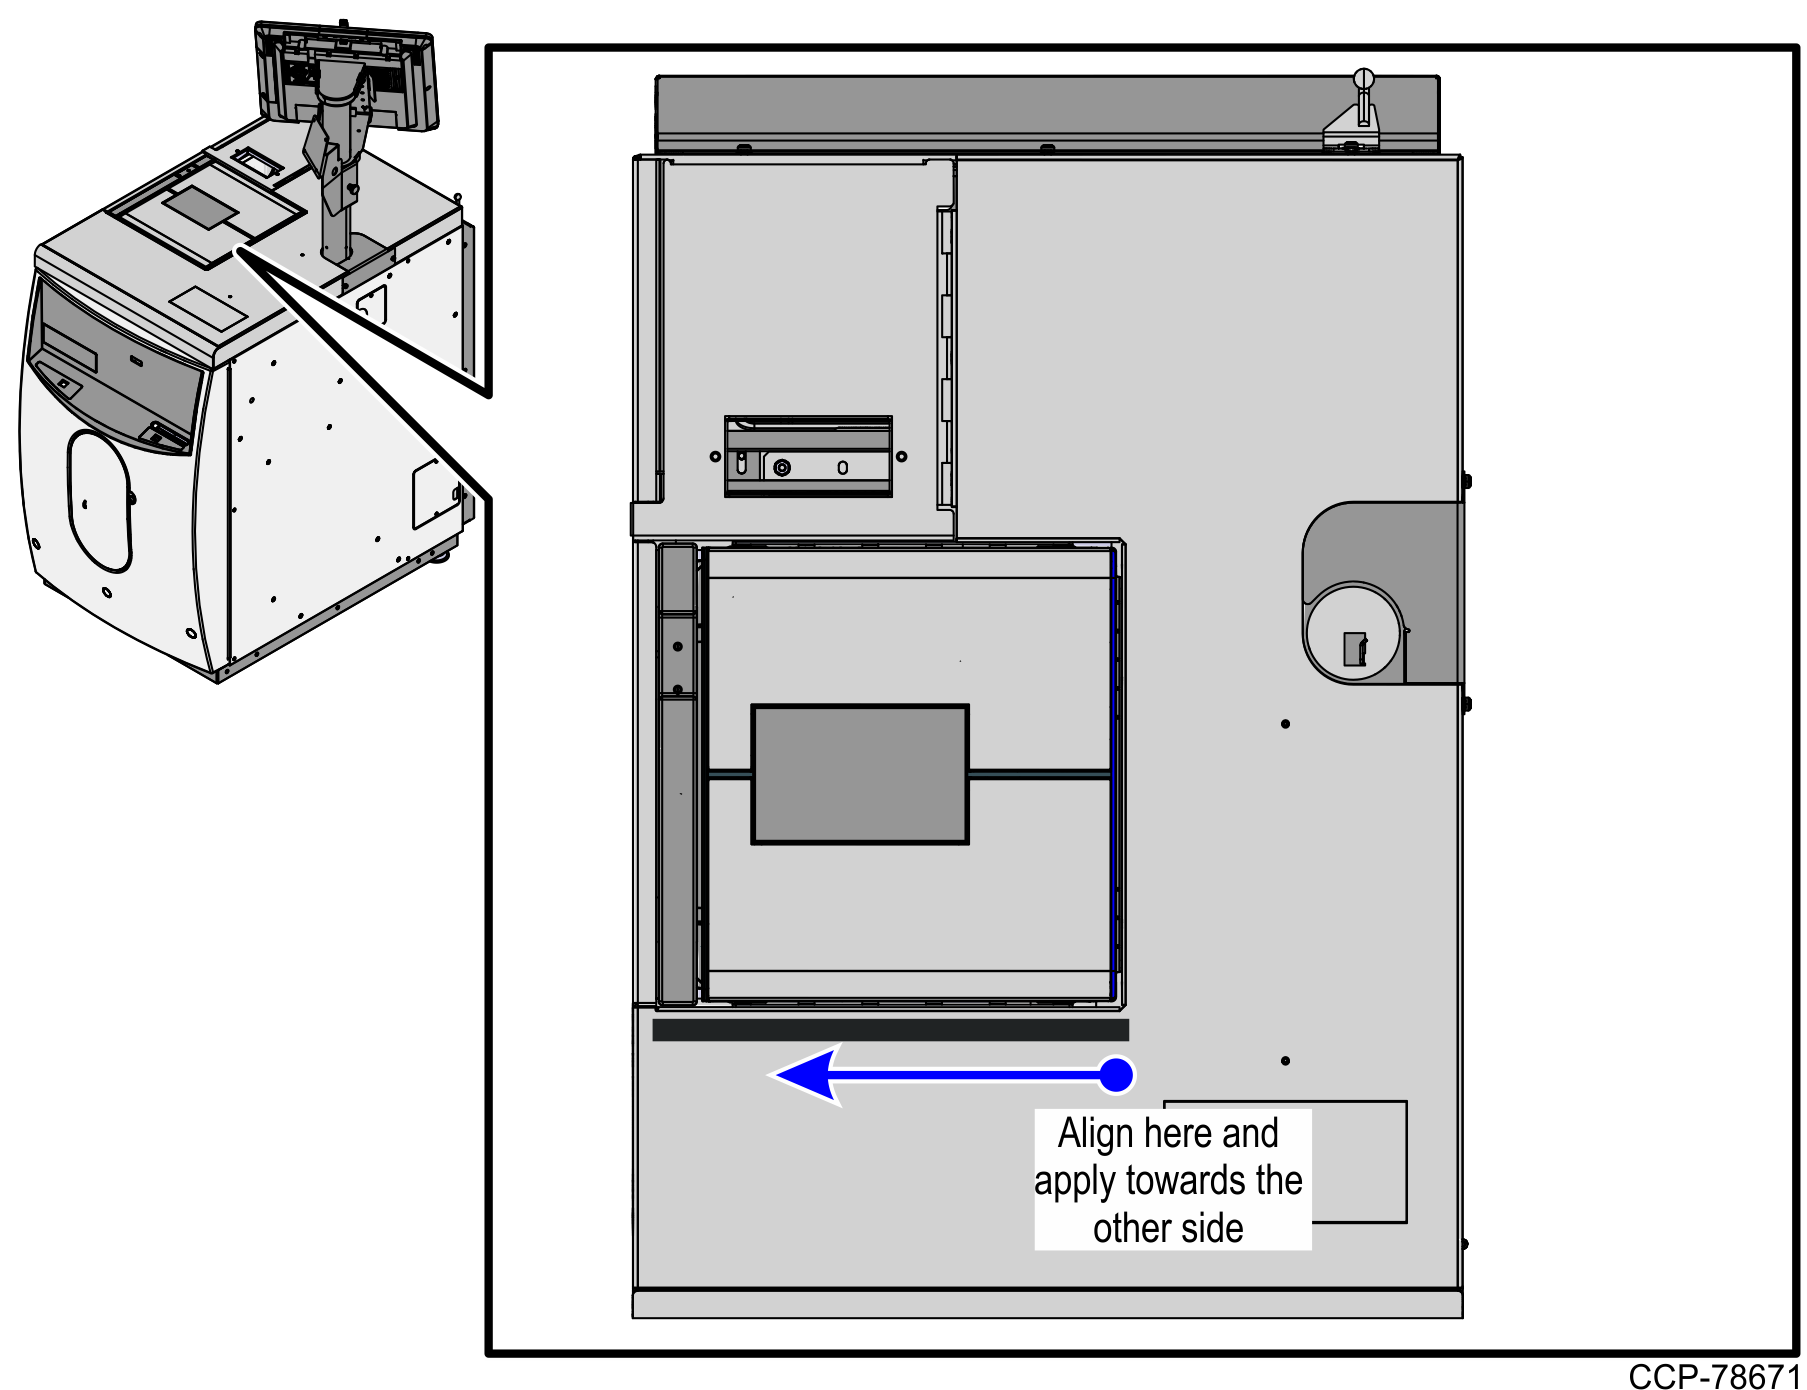
- Attach the "Scanner Front" label by doing the following:
- Remove the "Scanner Front" label from the label sheet.

- Position and attach the "Scanner Front" label starting from the right edge of the Scanner/Scale towards the other side of the Scanner/Scale, as shown in the image below.
- Remove the "Scanner Front" label from the label sheet.
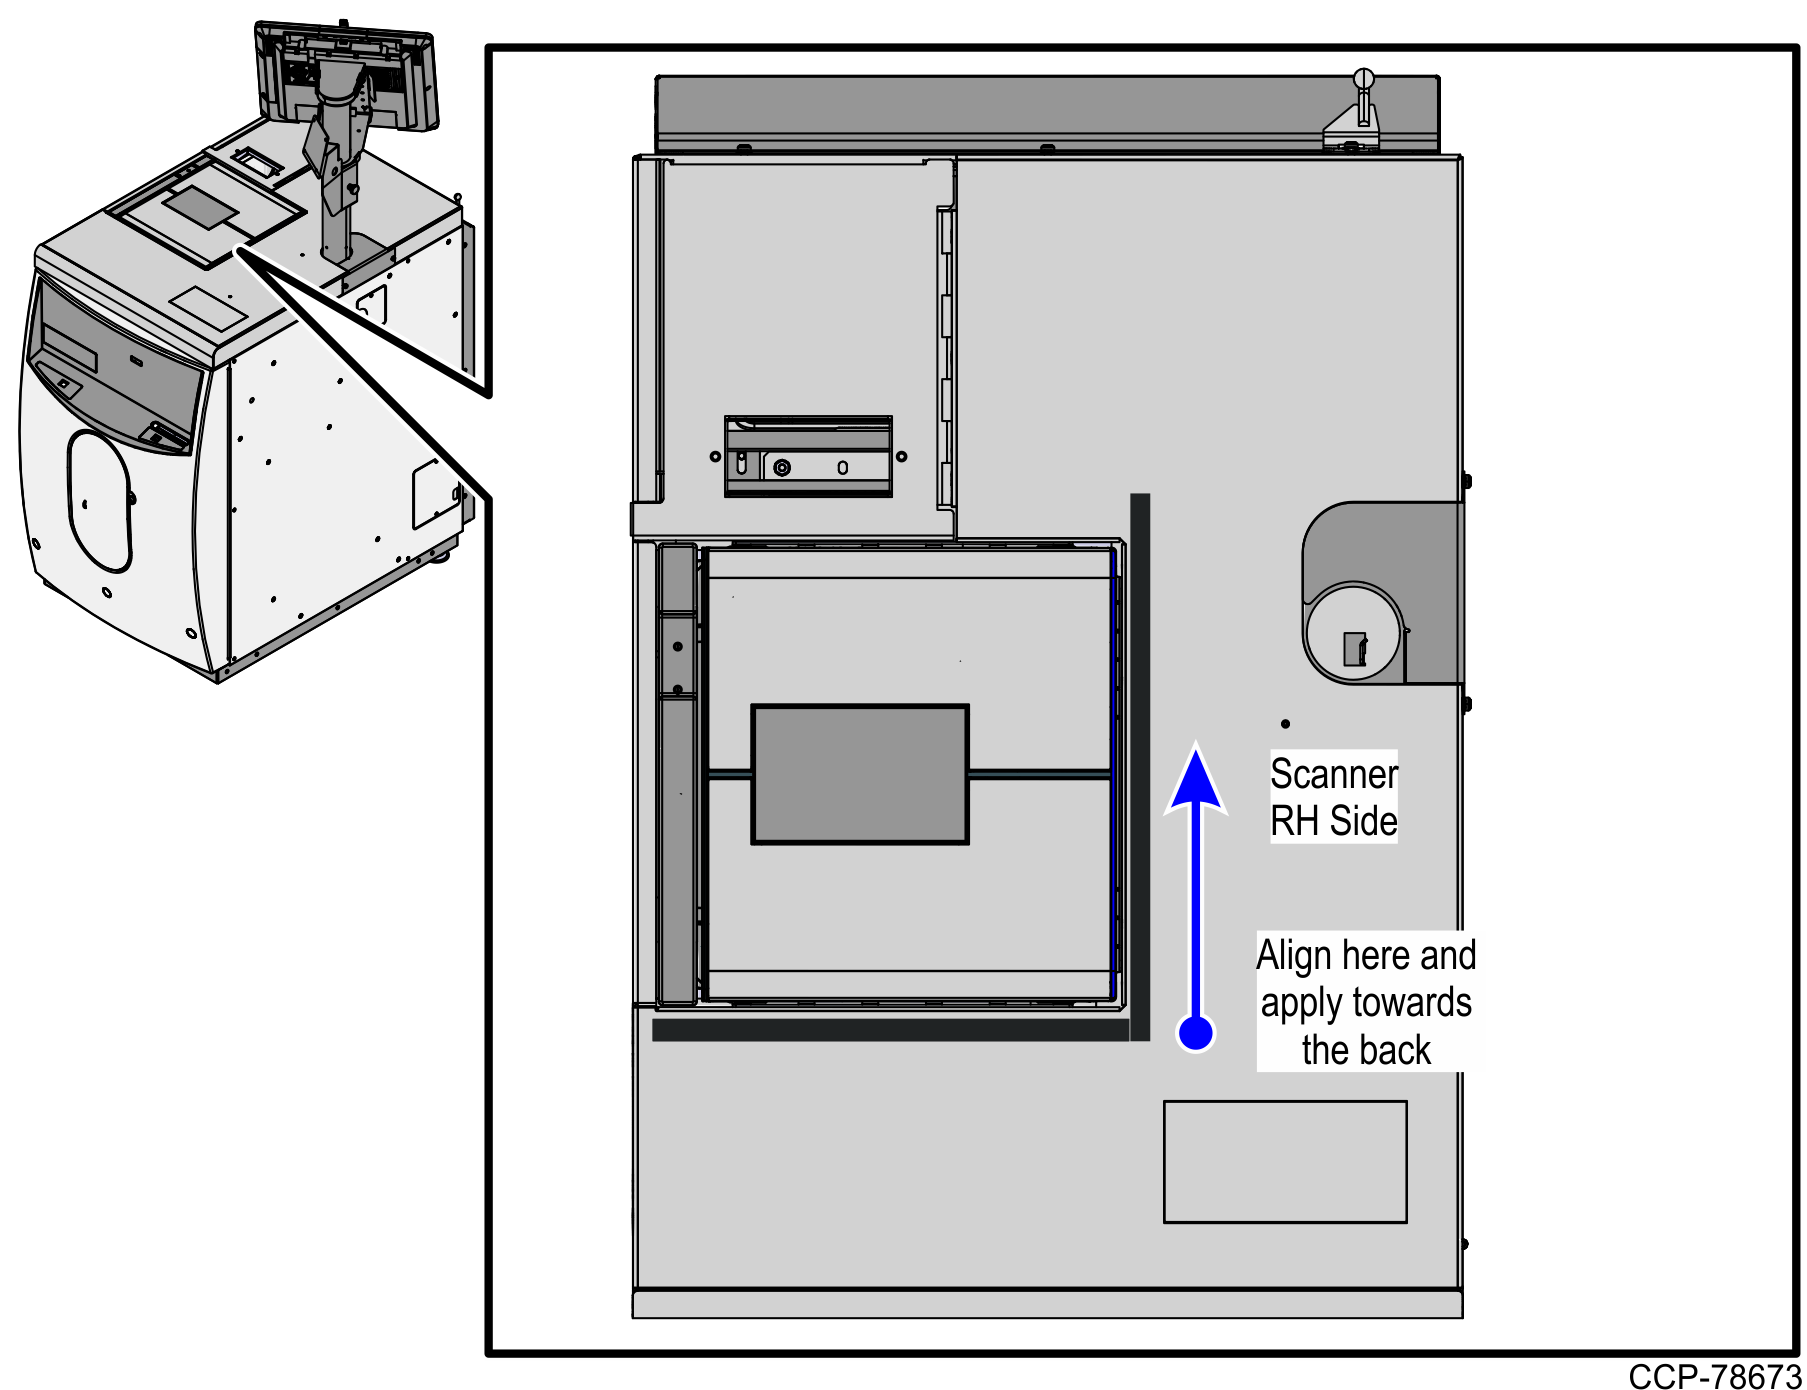
- Attach the "Scanner RH Side" label by doing the following:
- Remove the "Scanner RH Side" label from the label sheet.

- Position and attach the "Scanner RH Side" label starting from the right side of the outer edge of the "Scanner Front" label towards the back of the Scanner/Scale, as shown in the image below.
- Remove the "Scanner RH Side" label from the label sheet.
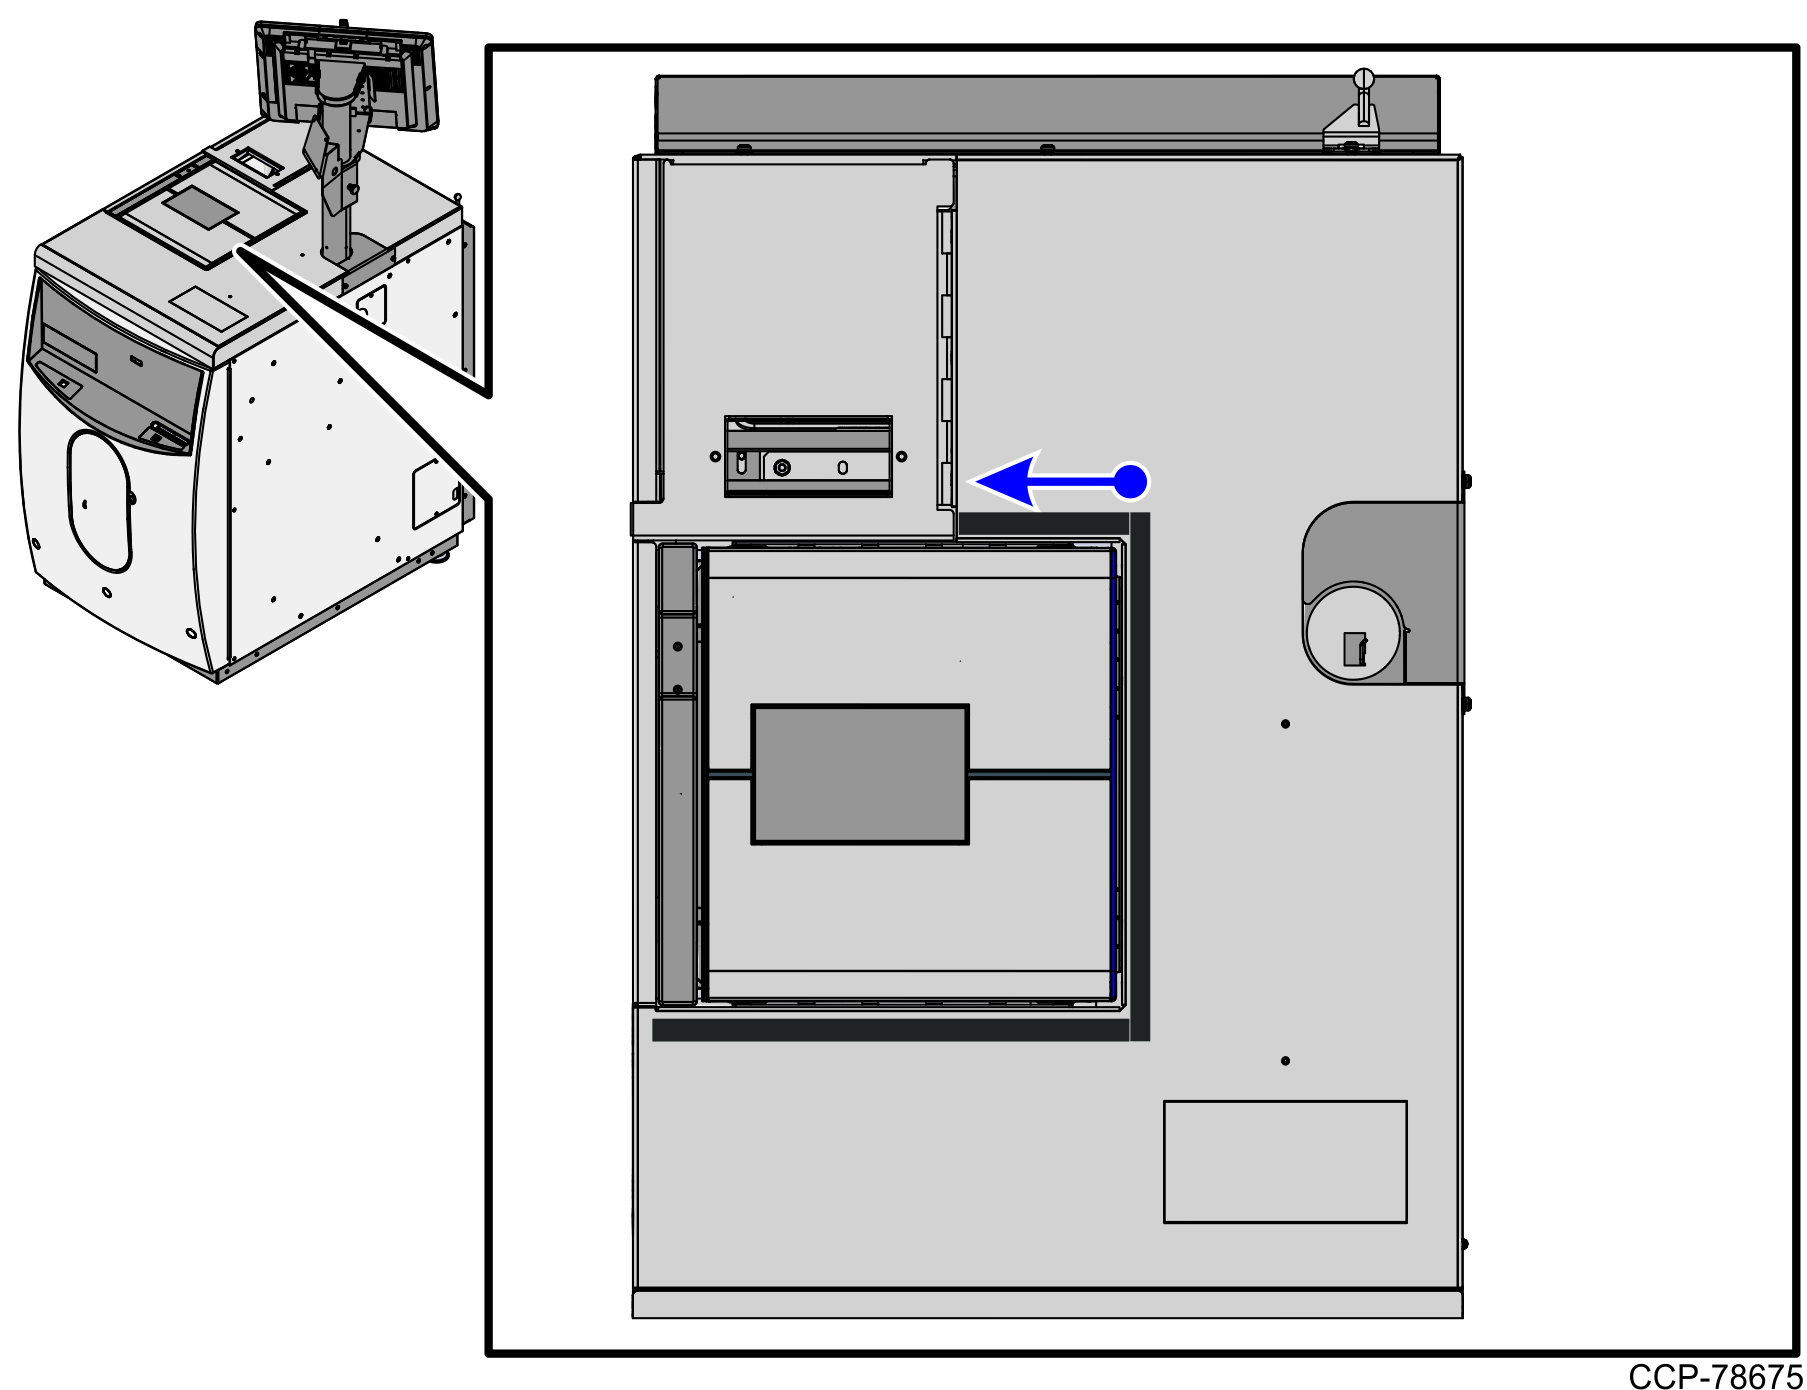
- Attach the "Scanner Back" label by doing the following:
- Remove the "Scanner Back" label from the label sheet.

- Position and attach the "Scanner Back" label starting from the left side of the outer edge of the "Scanner RH Side" label, as shown in the image below.
- Remove the "Scanner Back" label from the label sheet.
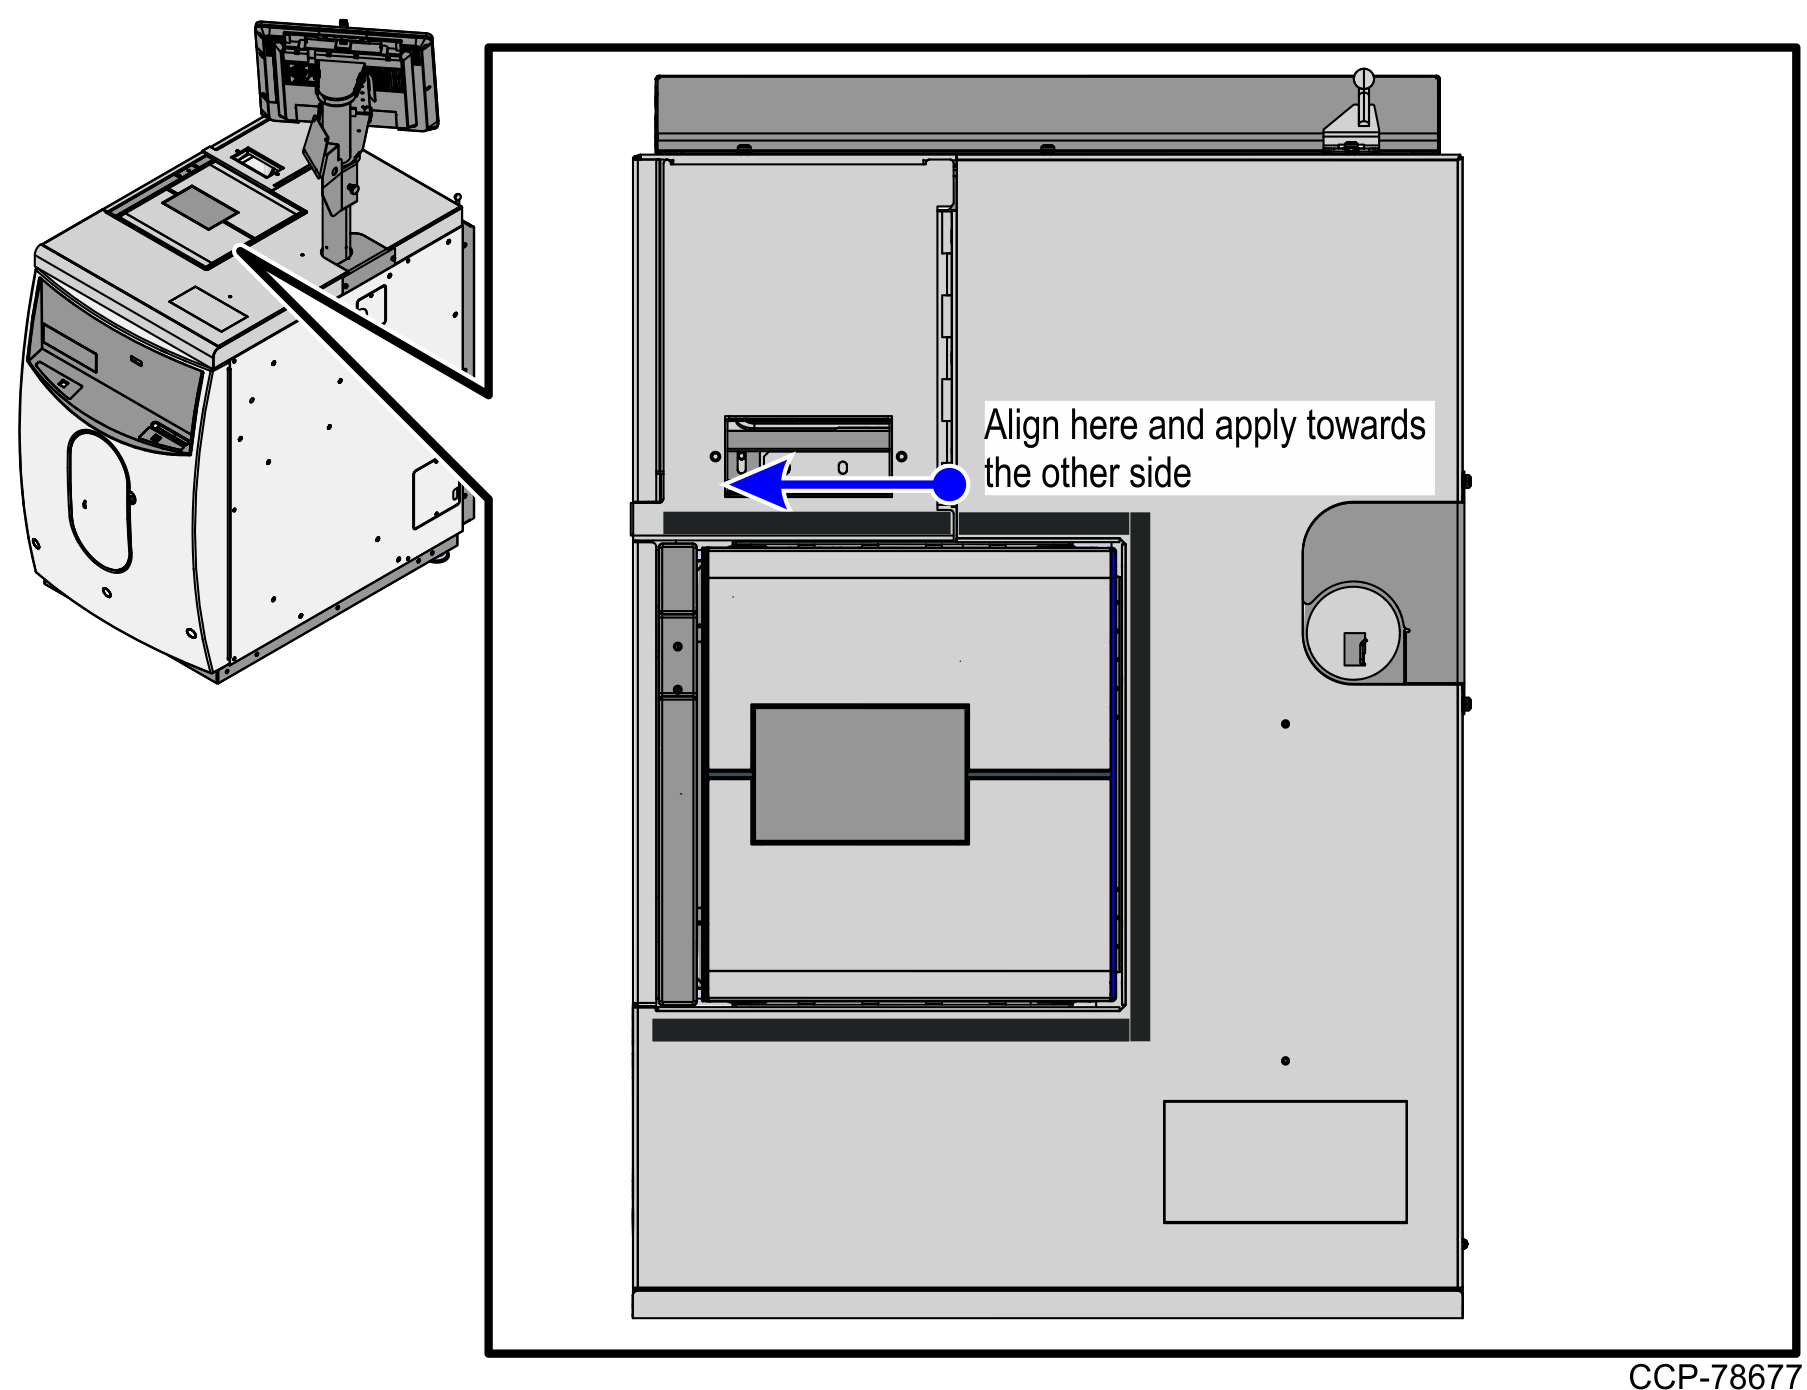
- Attach the "Printer Door" label by doing the following:
- Remove the "Printer Door" label from the label sheet.

- Position and attach the "Printer Door" label starting from the end of the "Scanner Back" label towards the other side of the Scanner/Scale, as shown in the image below.
- Remove the "Printer Door" label from the label sheet.