Installing Scanner/Scale Demarcation Labels on Standard Configuration
To attach the Scanner/Scale Demarcation Labels on a Standard SelfServ Checkout unit, follow these steps:
Note
This procedure is only applicable for NCR Voyix Self-Checkout (7350), NCR Voyix Self-Checkout (7358) and NCR Voyix Self-Checkout (7360) units.
- Attach the "Scanner Front" label by doing the following:
- Remove the "Scanner Front" label from the label sheet.

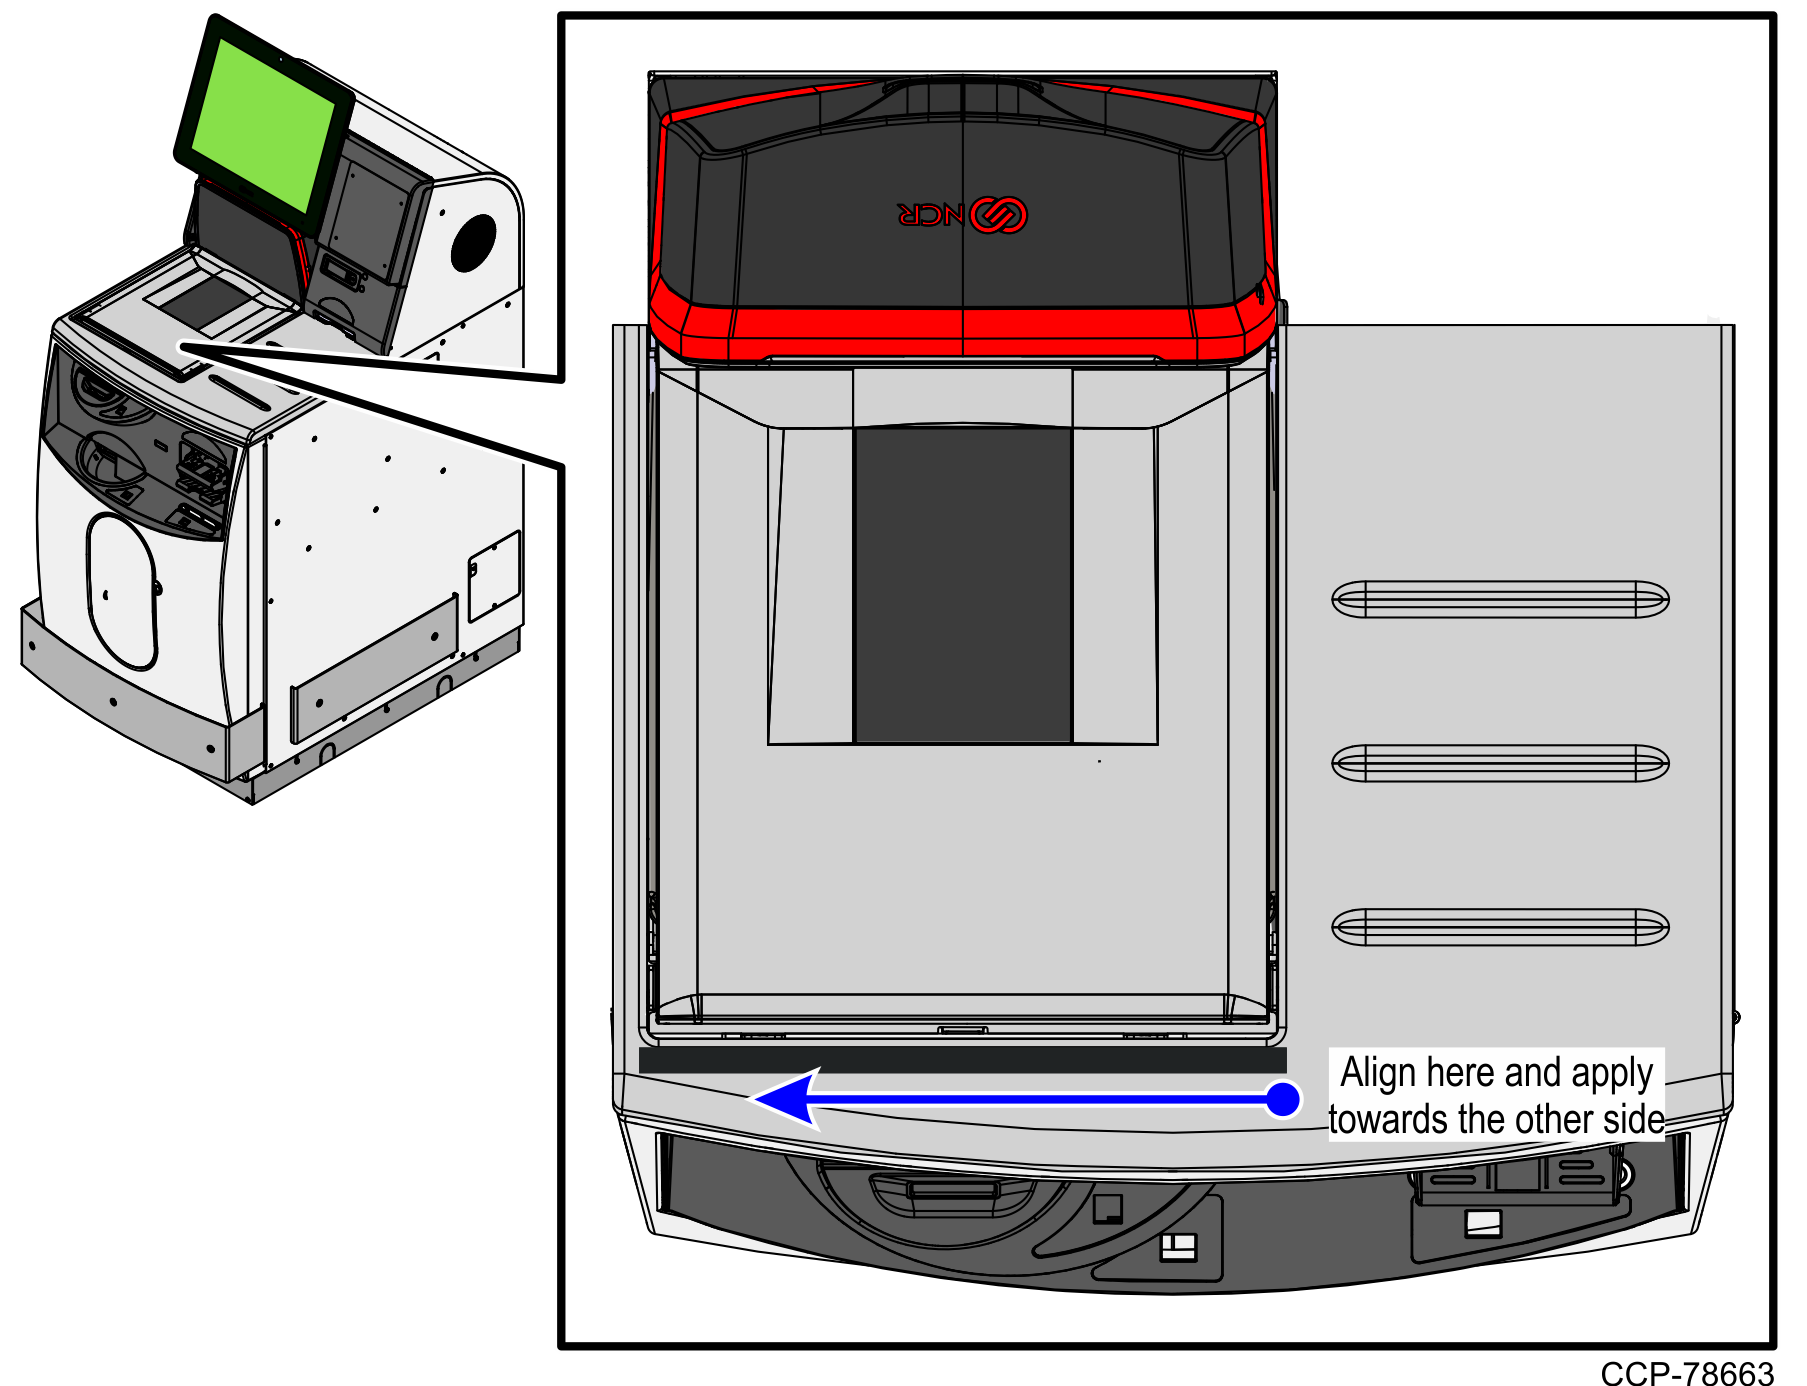
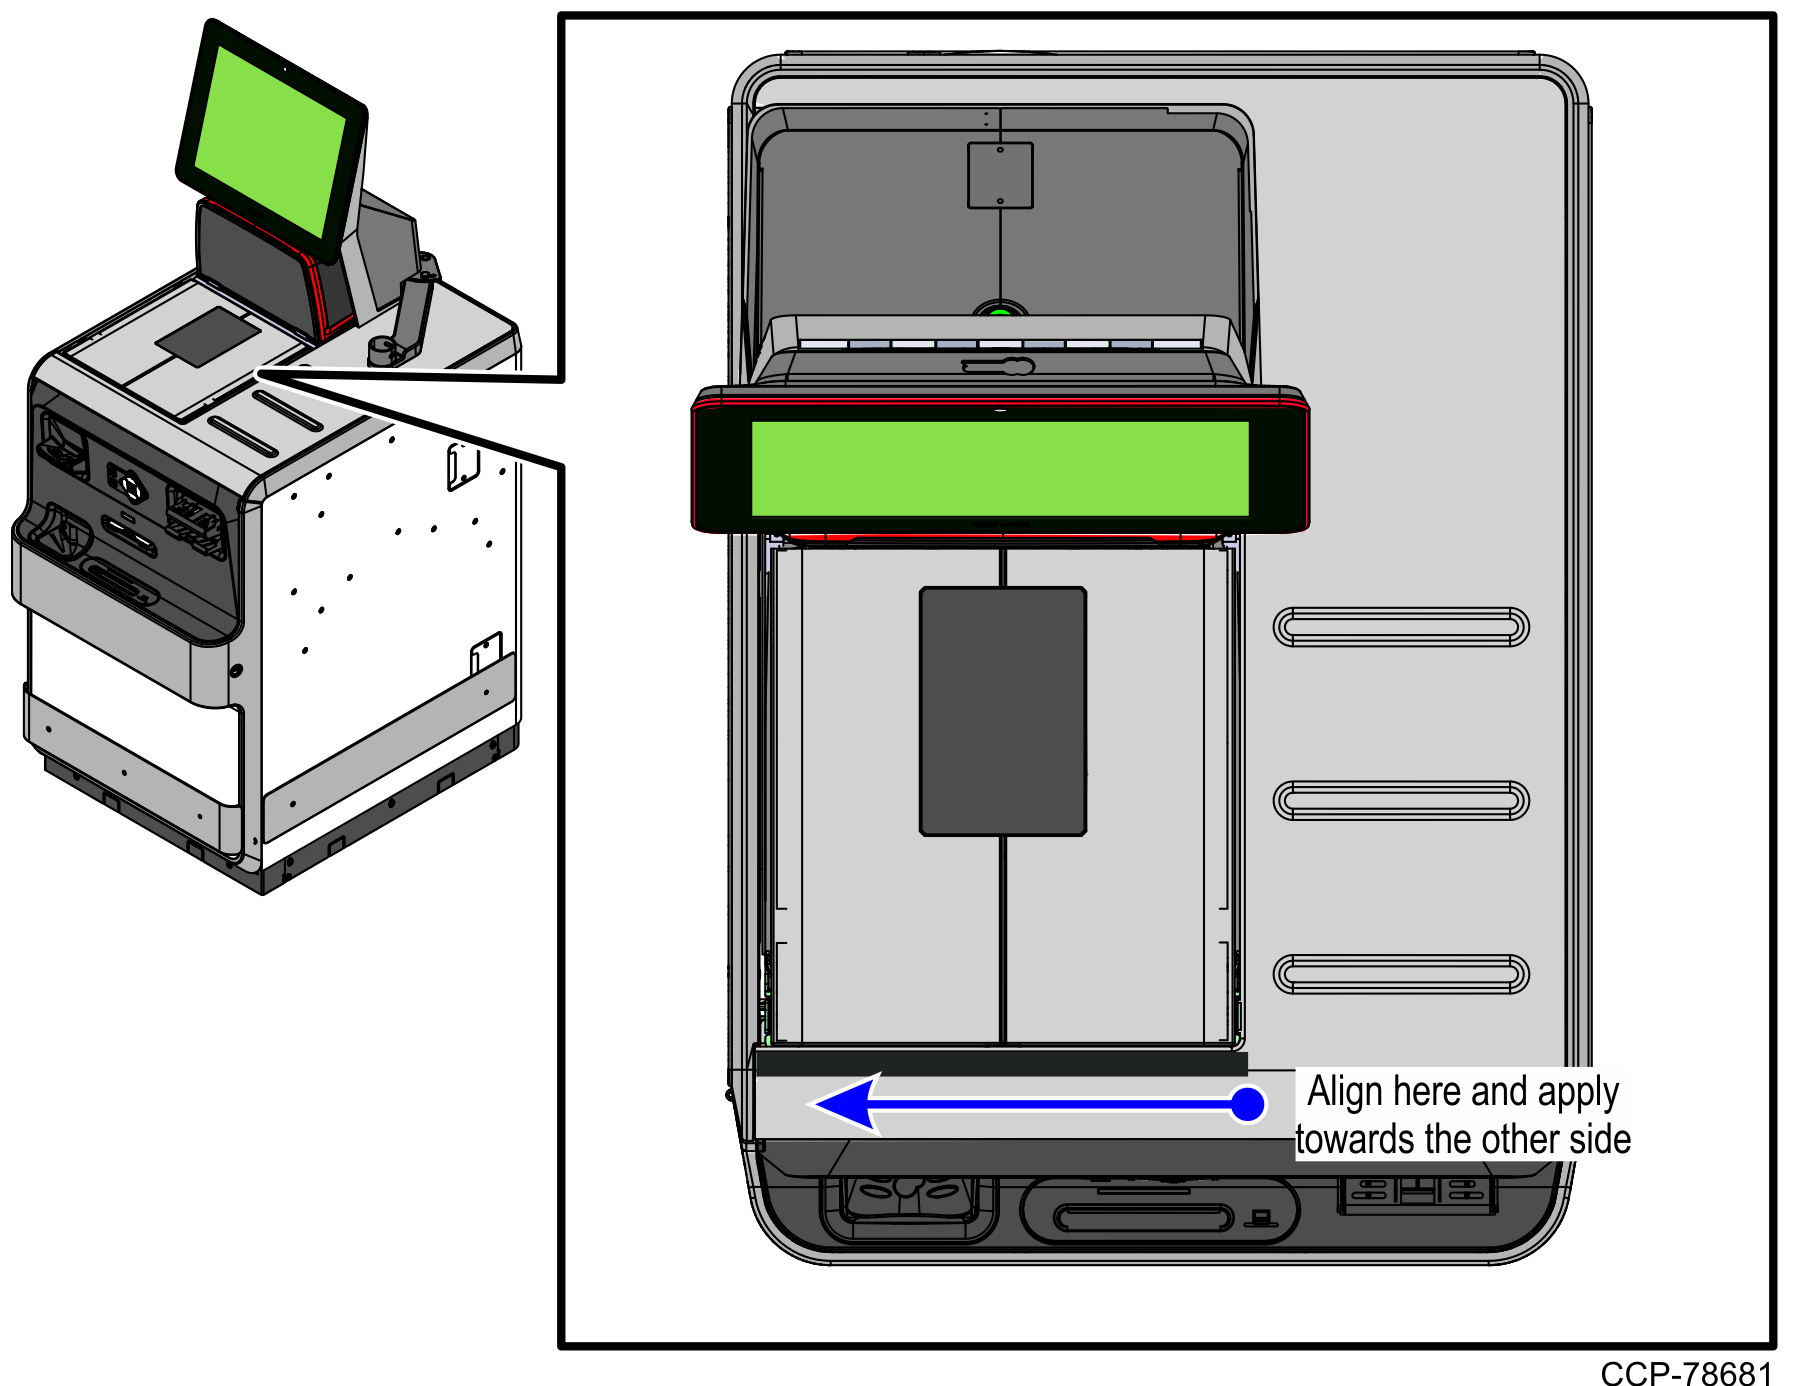
- Position and attach the "Scanner Front" label starting from the right edge of the Scanner/Scale towards the other side of the Scanner/Scale, as shown in the image below.
7350 and R6L Plus (7358) SelfServ Checkout Units
7360 SelfServ Checkout Unit
- Remove the "Scanner Front" label from the label sheet.
- Attach the side labels by doing the following:
- Remove the labels from the label sheet.

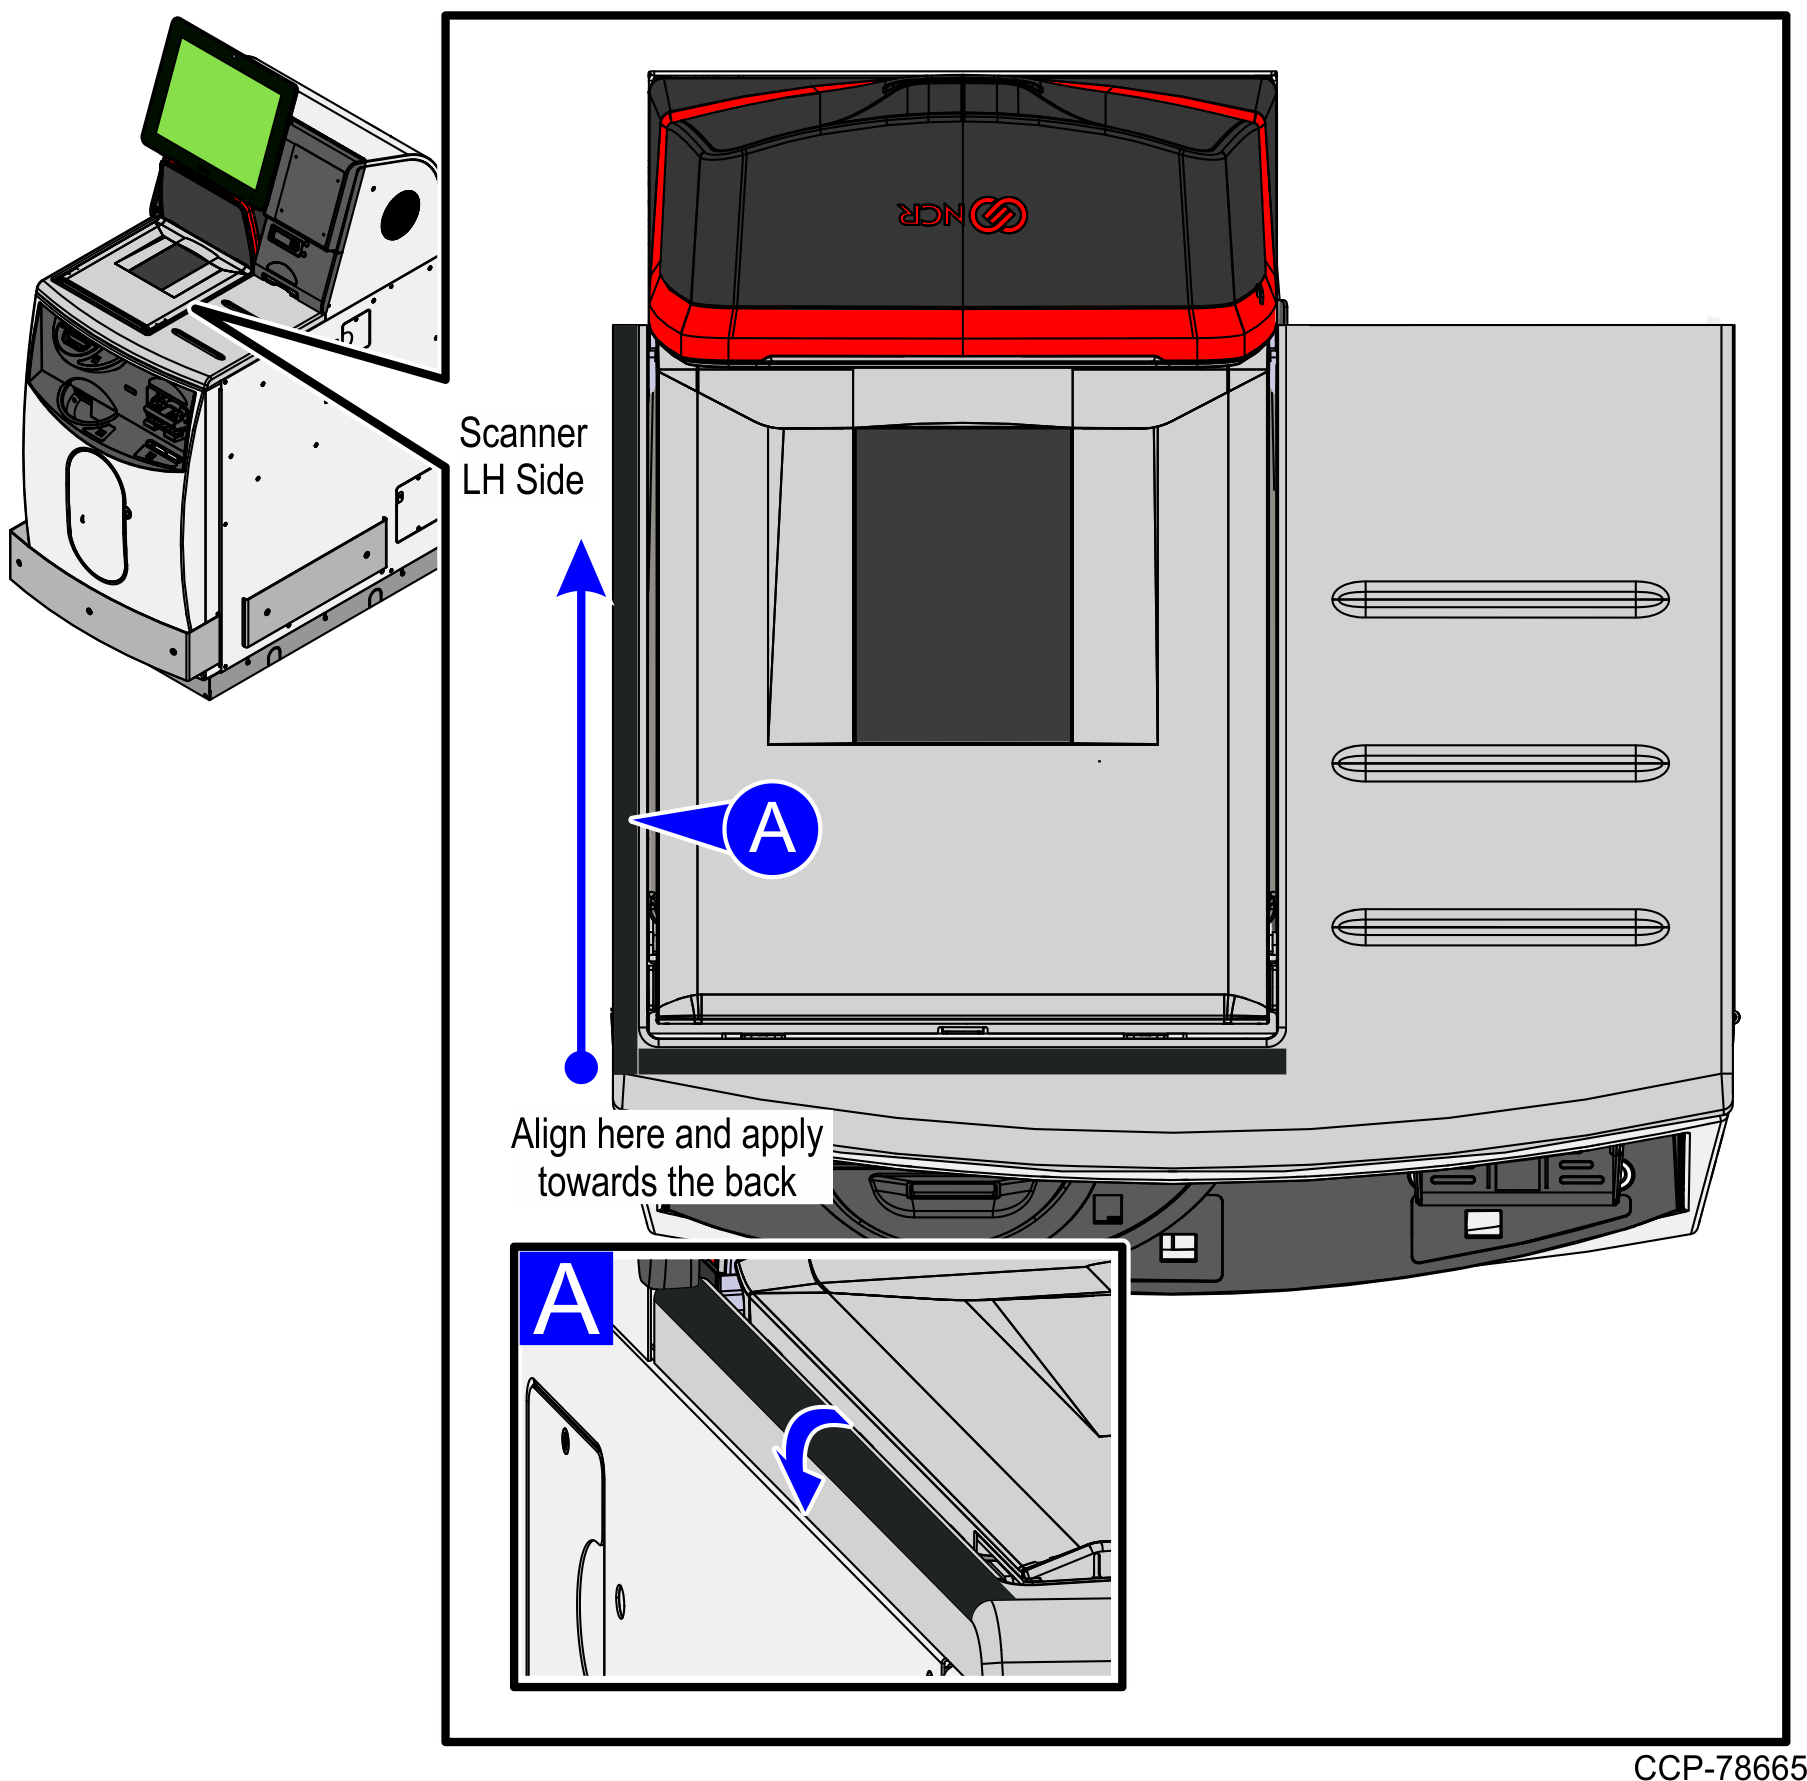
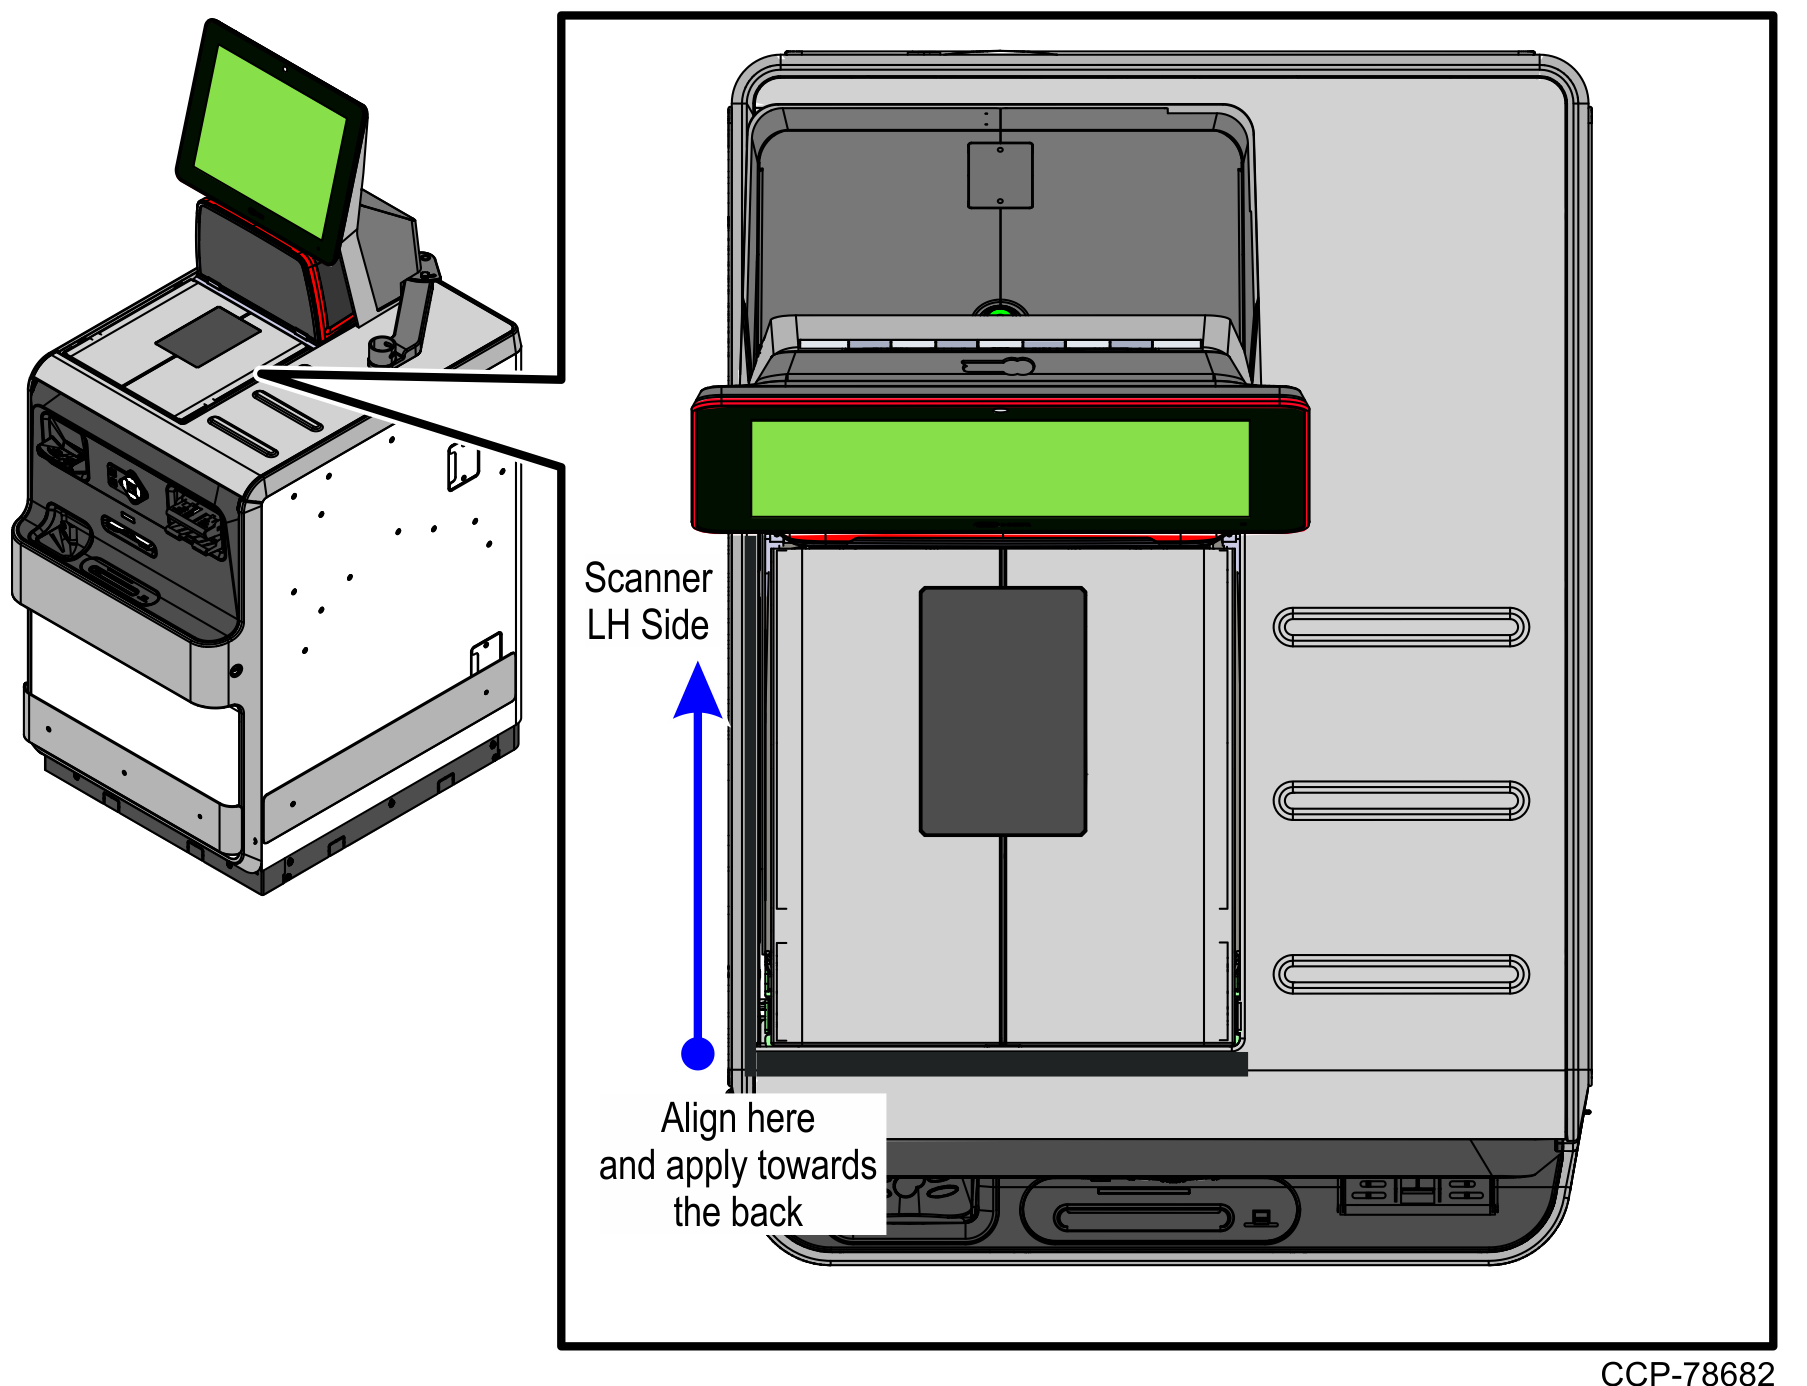
- Position and attach the "Scanner LH Side" label starting from the outer left side of the "Scanner Front" label towards the back of the Scanner/Scales, as shown in the image below.
7350 and R6L Plus (7358) SelfServ Checkout Units
NoteFor 7350 and R6L Plus SelfServ Checkout units, the "Scanner LH Side" label also covers the curved edge of the Top Plate.
7360 SelfServ Checkout Unit
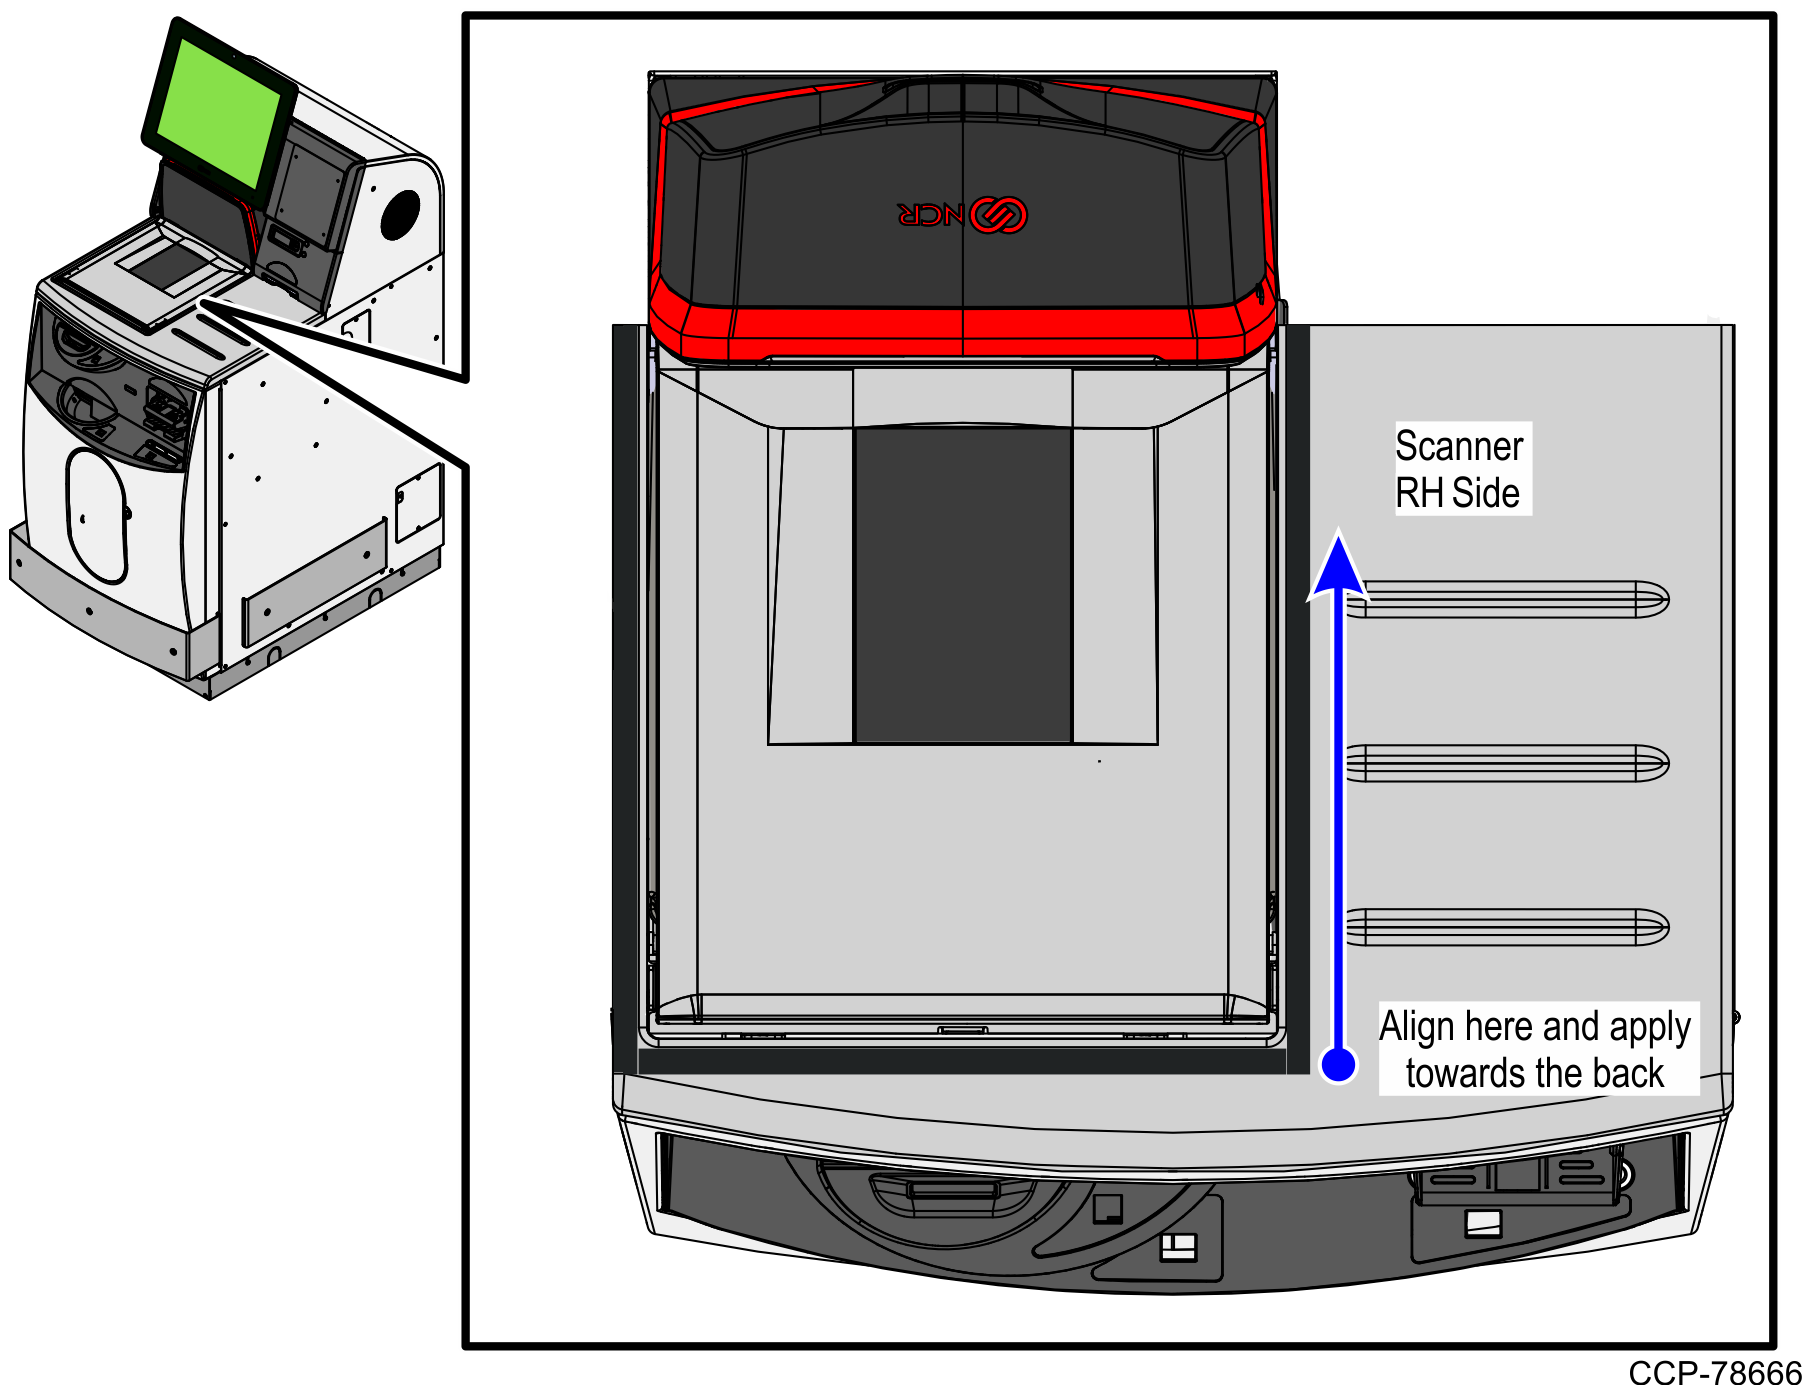
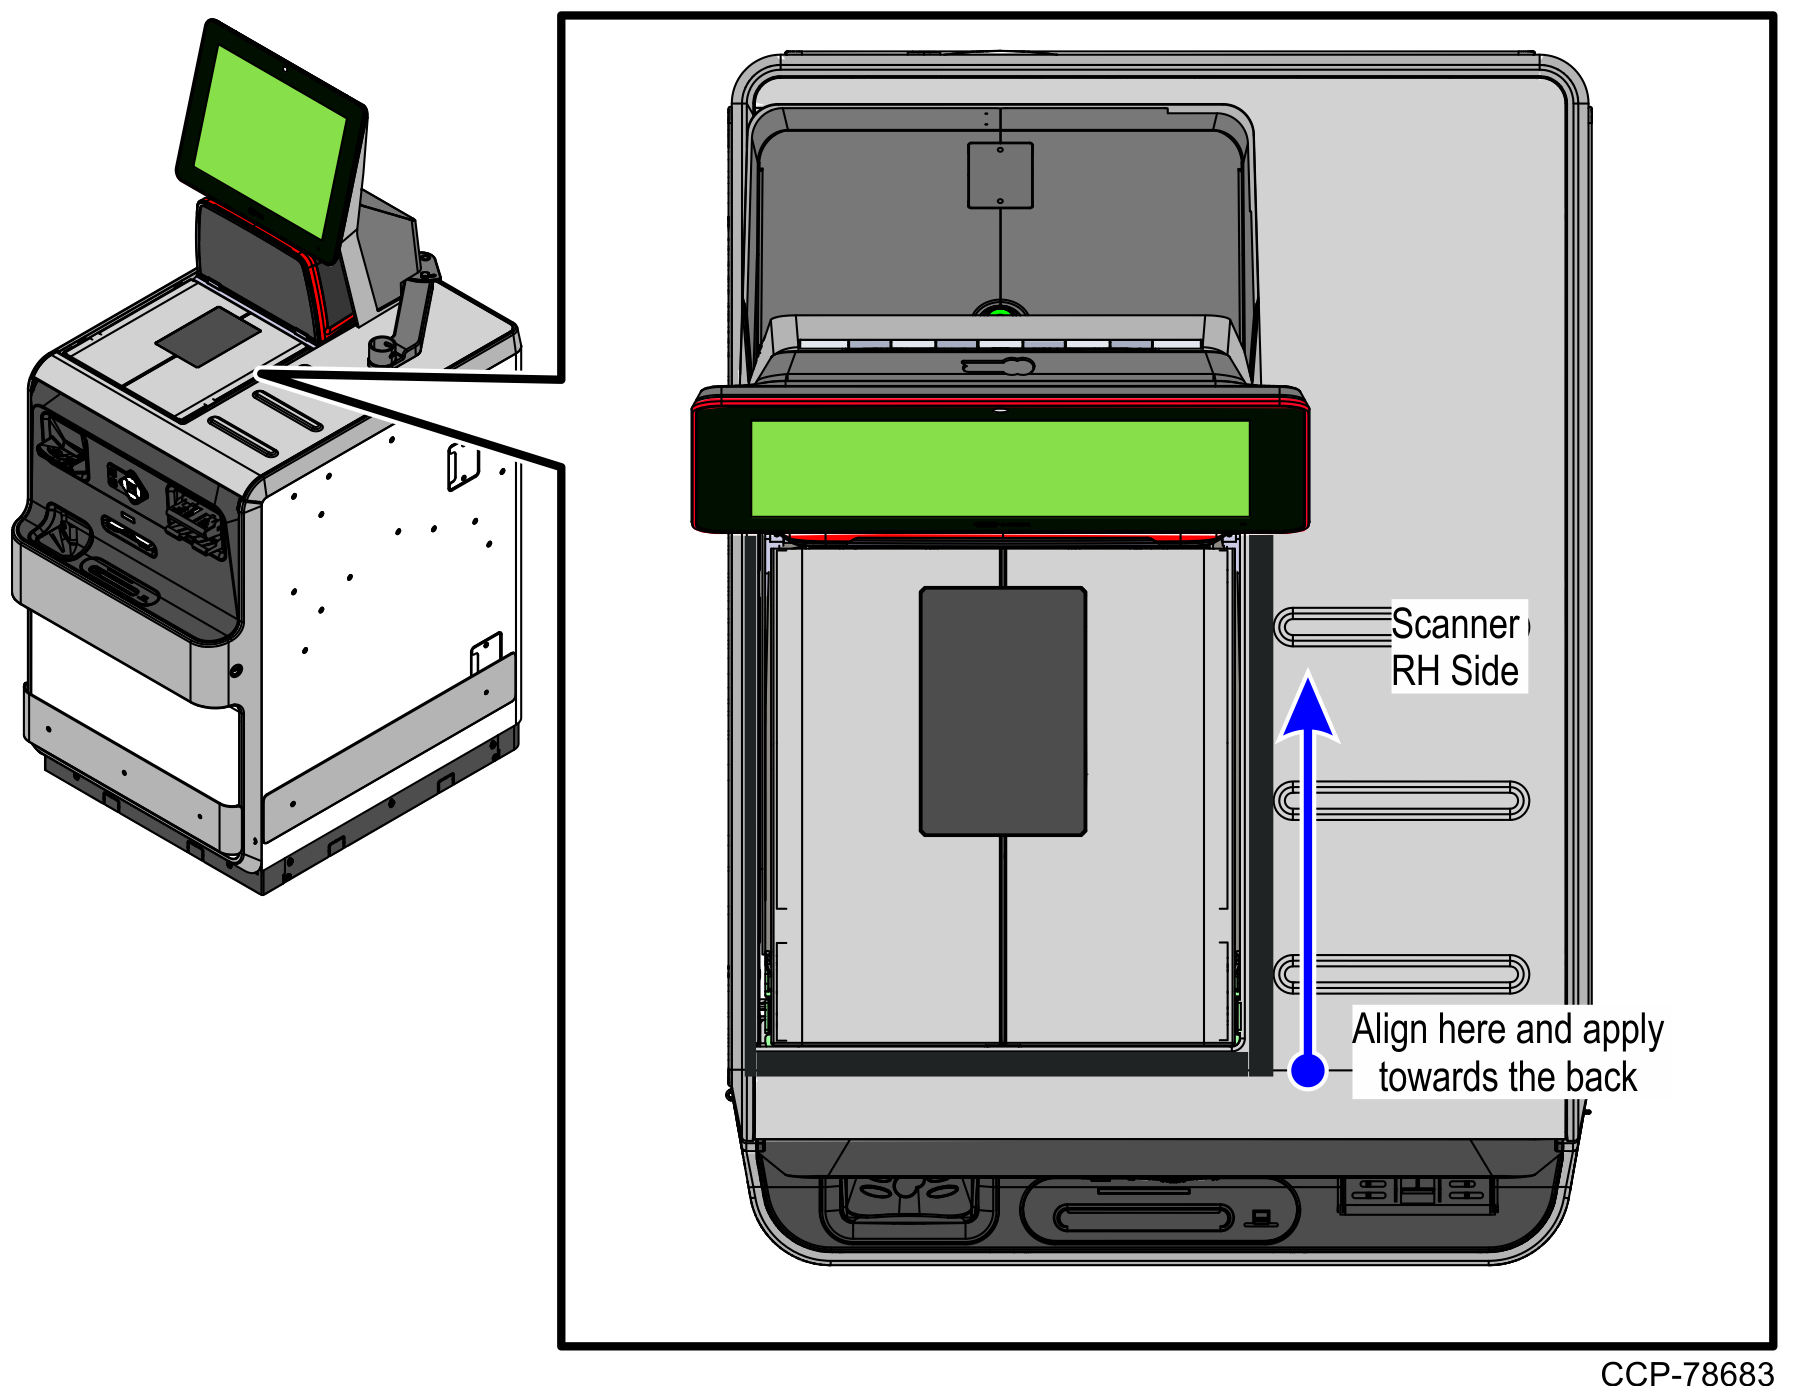
- Position and attach the "Scanner RH Side" label starting from the outer right side of the "Scanner Front" label towards the back of the Scanner/Scale, as shown in the image below.
7350 and R6L Plus (7358) SelfServ Checkout Units
7360 SelfServ Checkout Unit
- Remove the labels from the label sheet.