Routing cables of Core Door Components
When servicing R6L Plus Core Door components, NCR recommends routing their cables together for proper bundling and cable dressing. To route the cables of Core Door components, follow these steps:
Note: Ensure that all cables of the Core Door components are installed before applying zip ties.
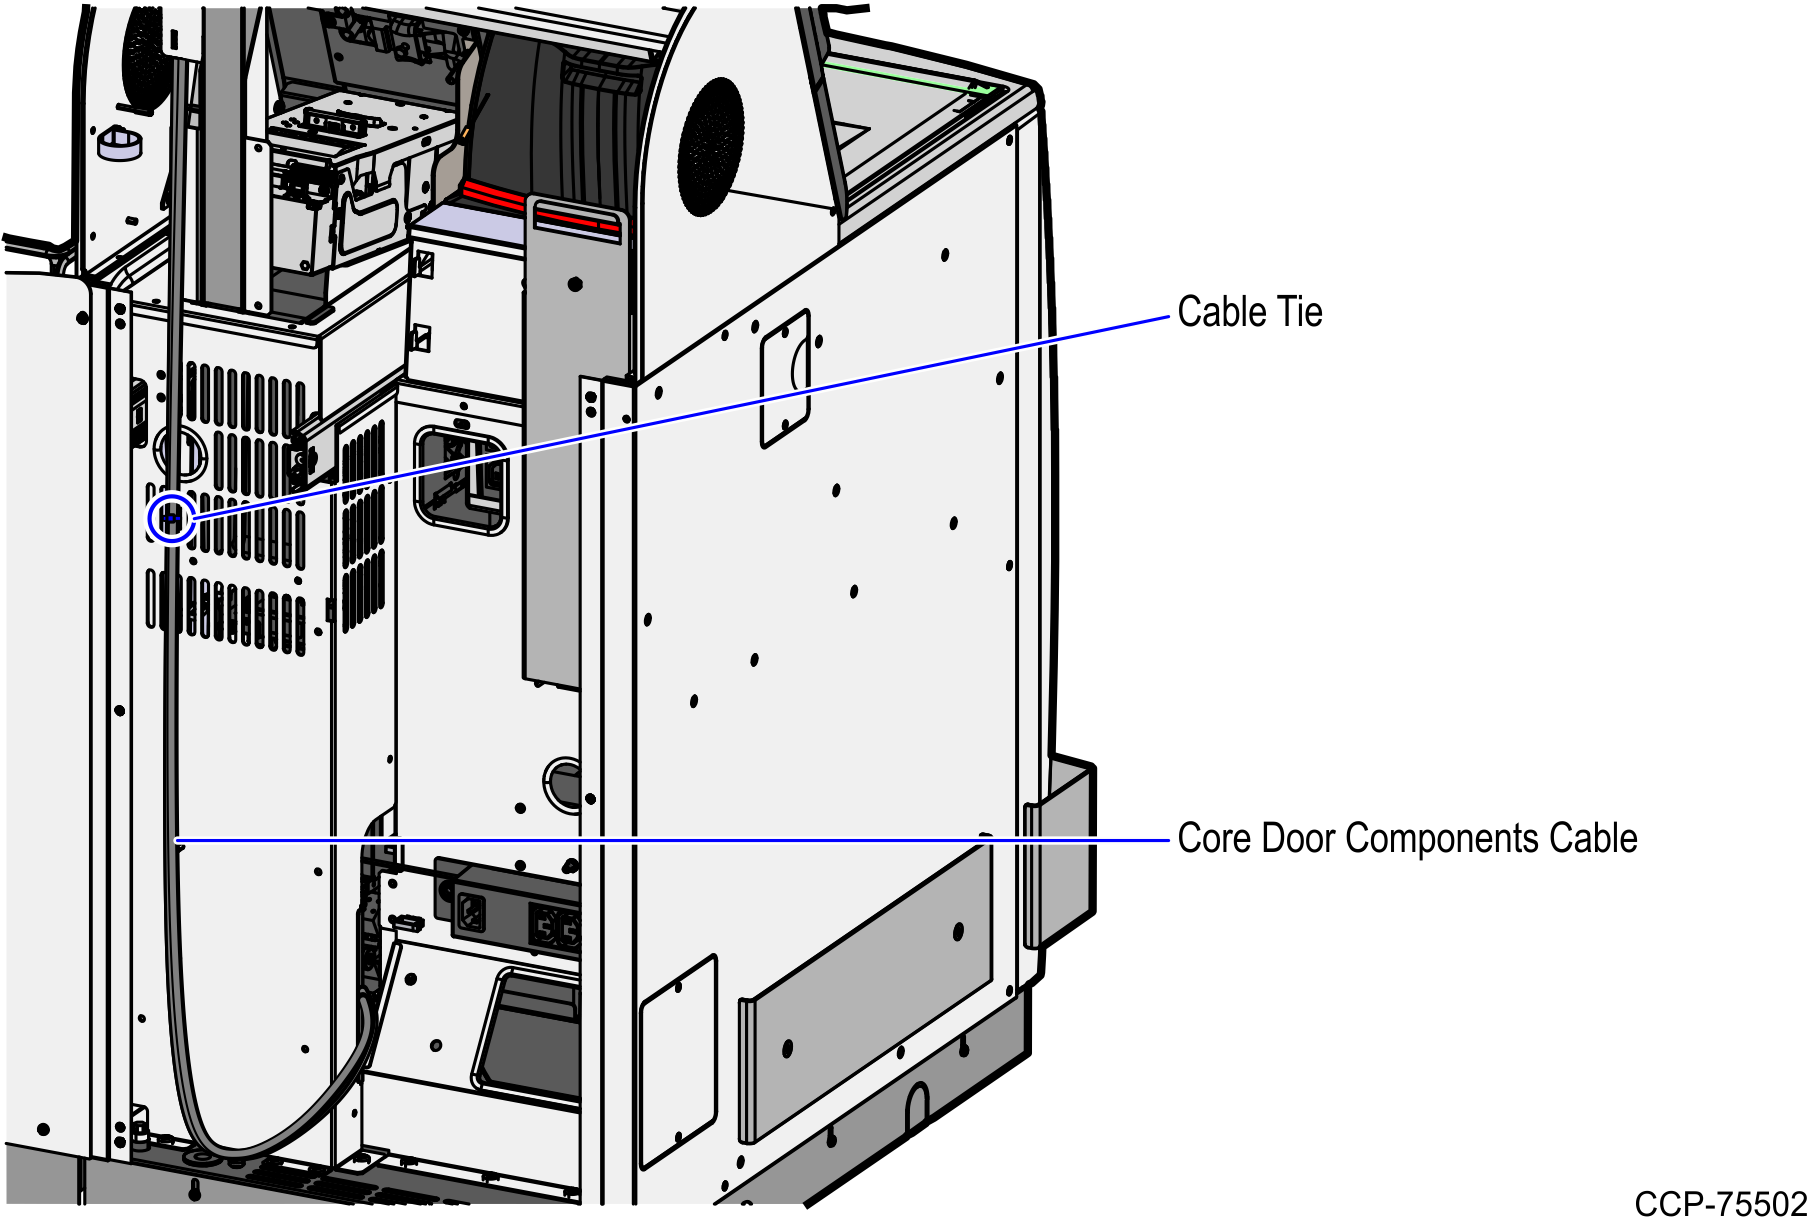
1.Route the cables along the Core wall, secure with wire saddles, and pass through the cable hole as shown below.
Note: Bundle cable with other cables using a cable wrap.

2.Through the Cable Access Hole, continue routing the cables up the rear of the Core Cabinet wall and into the Receipt Printer side of the unit as shown below.
3.From the Upper Cabinet frame, use cable ties to do the following:
a.Wrap the cables and then tie them on corresponding lance bridges to fix the cables on the Upper Cabinet frame as shown in the image below.
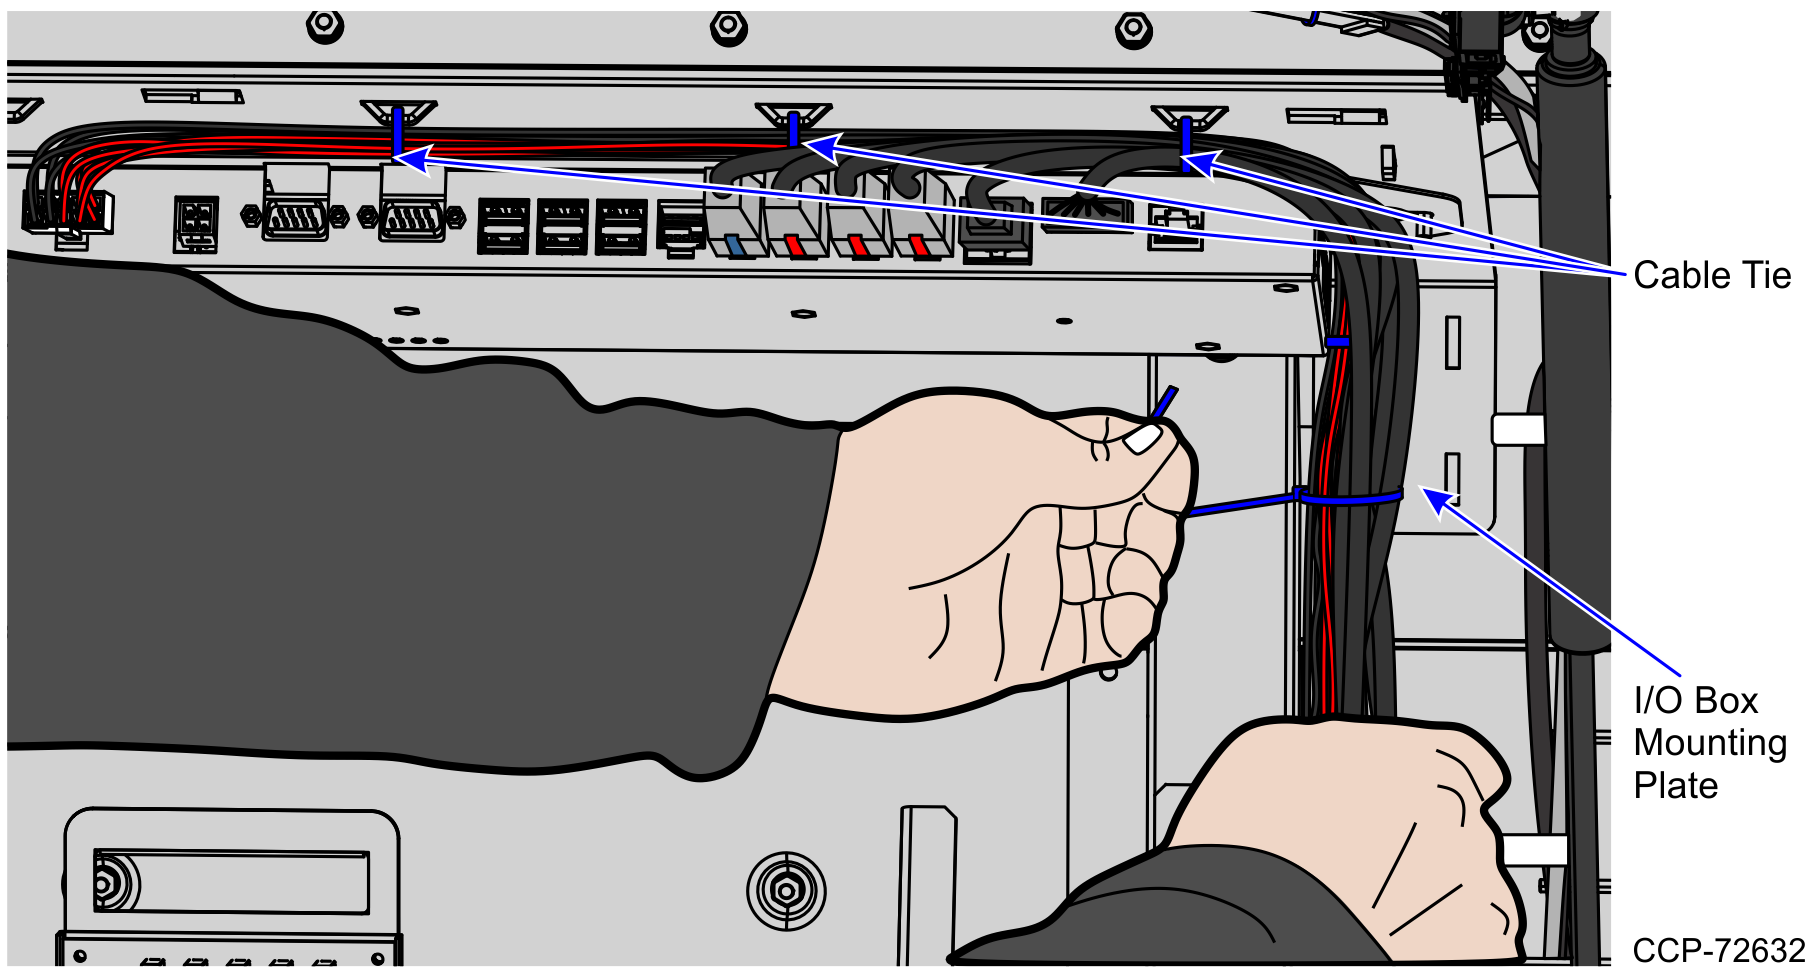
b.Group the cables of the Core Door components and then tie them on the I/O Box mounting plate as shown in the image above.