Removing the Conveyor Belt assembly
To remove the Conveyor Belt assembly from a NCR SelfServ™ Checkout (7350) or NCR FastLane SelfServ™ Checkout (7358) R6L Plus unit, follow these steps:
Note
This procedure shows theNCR FastLane SelfServ™ Checkout (7358) R6L Plus for illustration purpose only.
- Turn off the Input Belt. For more information, refer to Turning Off the Input Belt.
- Disconnect the Input Belt power cable from the power source.
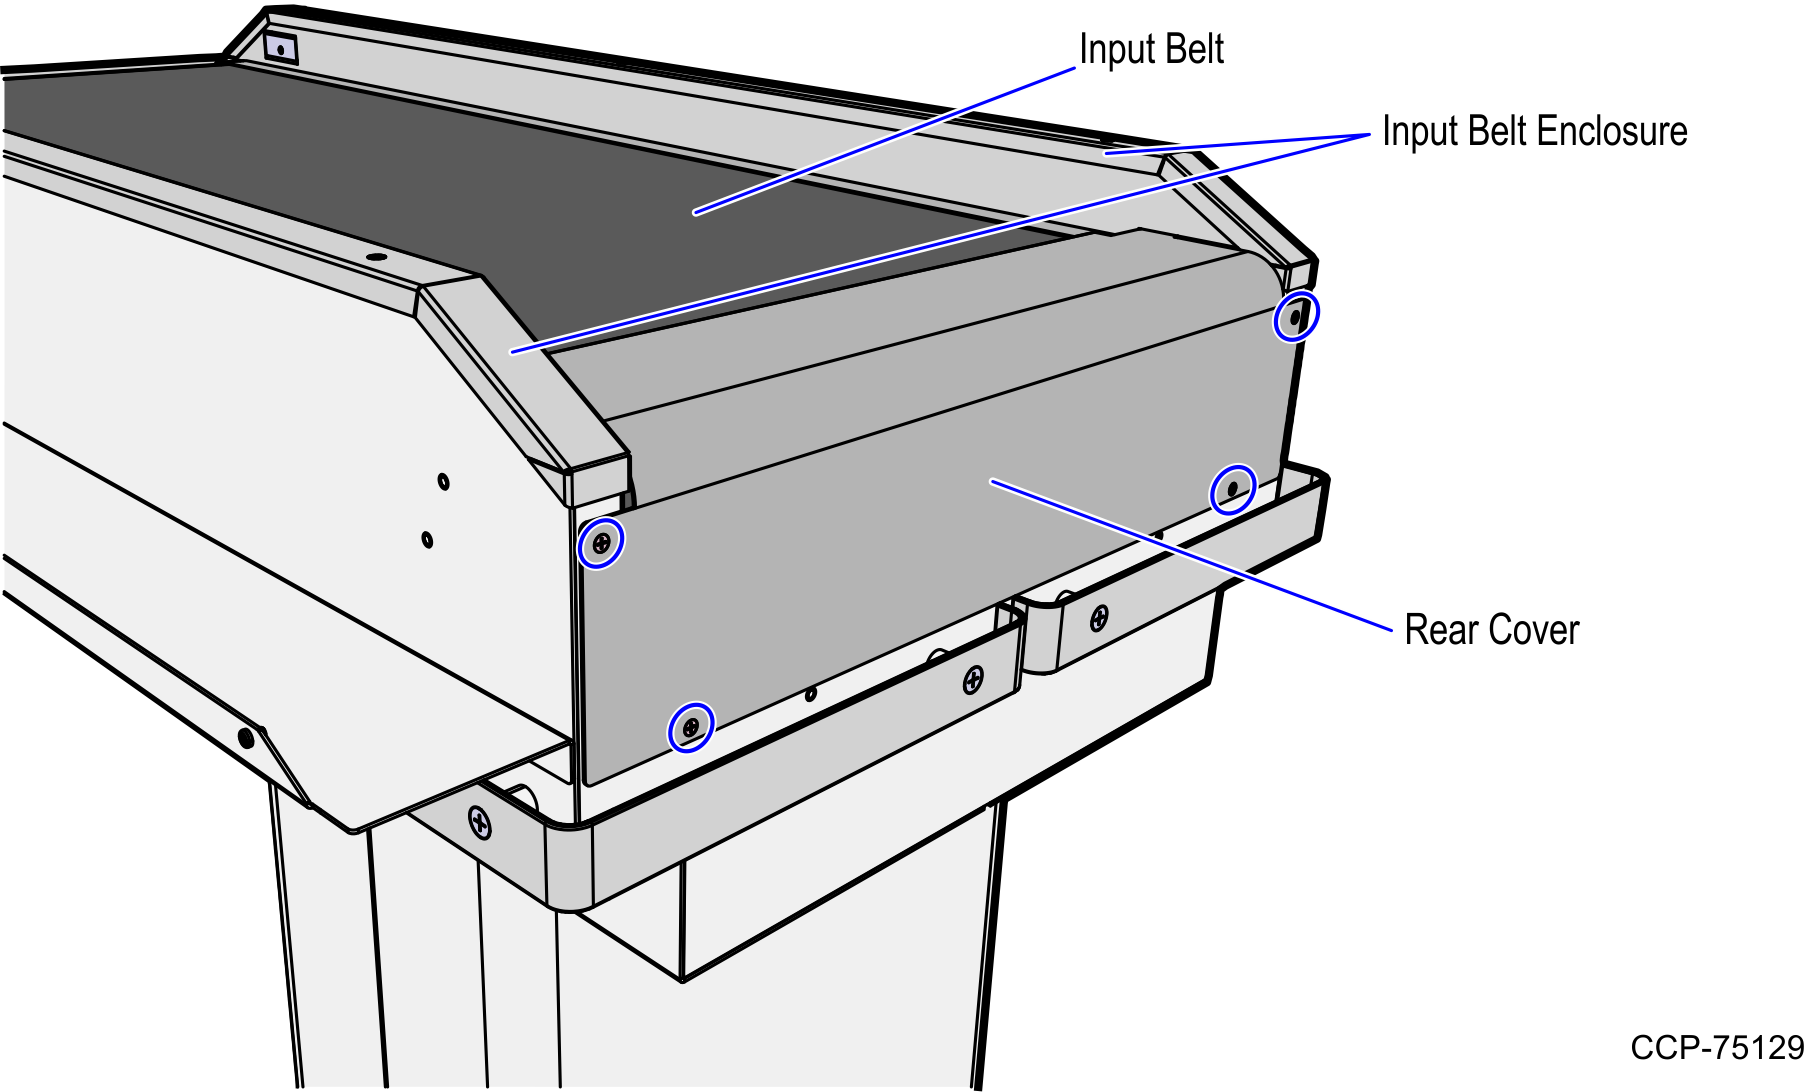
- Remove four (4) screws to detach the Rear Cover from the Input Belt frame.
- Do the following:
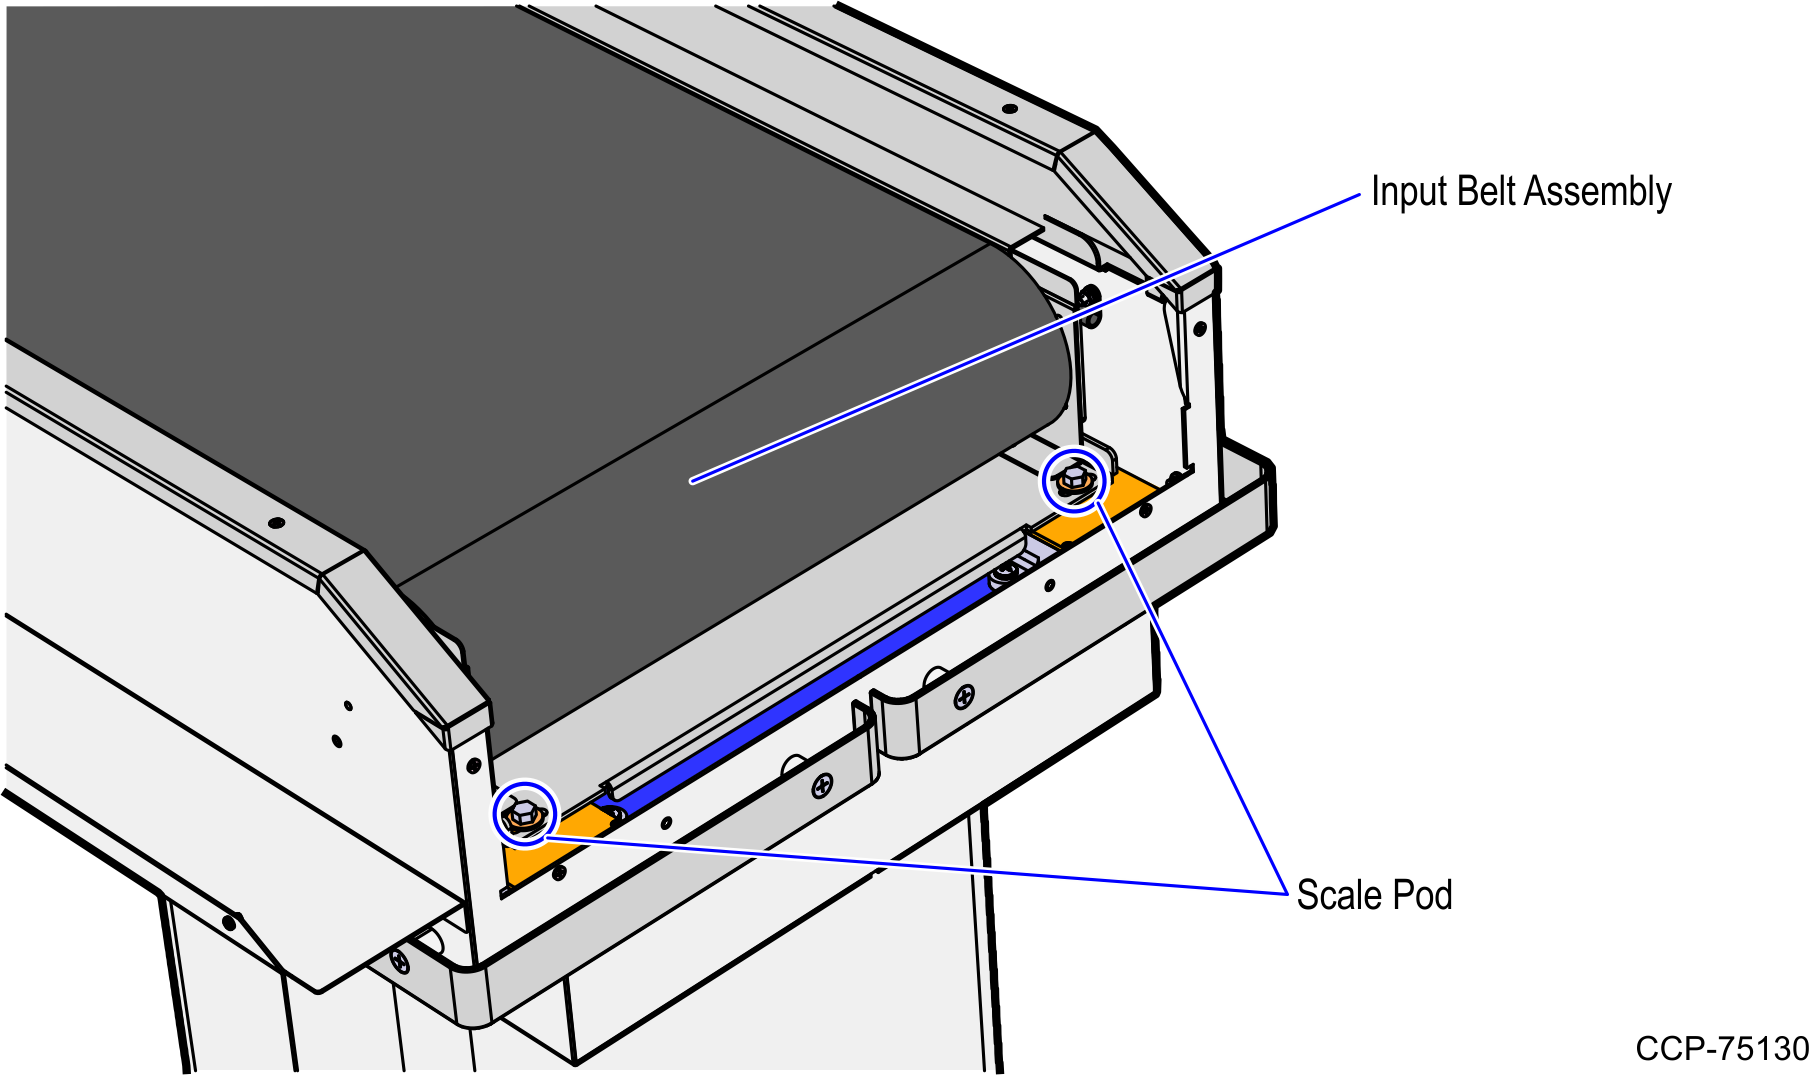
- Remove two (2) hex bolts securing the Input Belt Conveyor assembly to the Scale Pods.
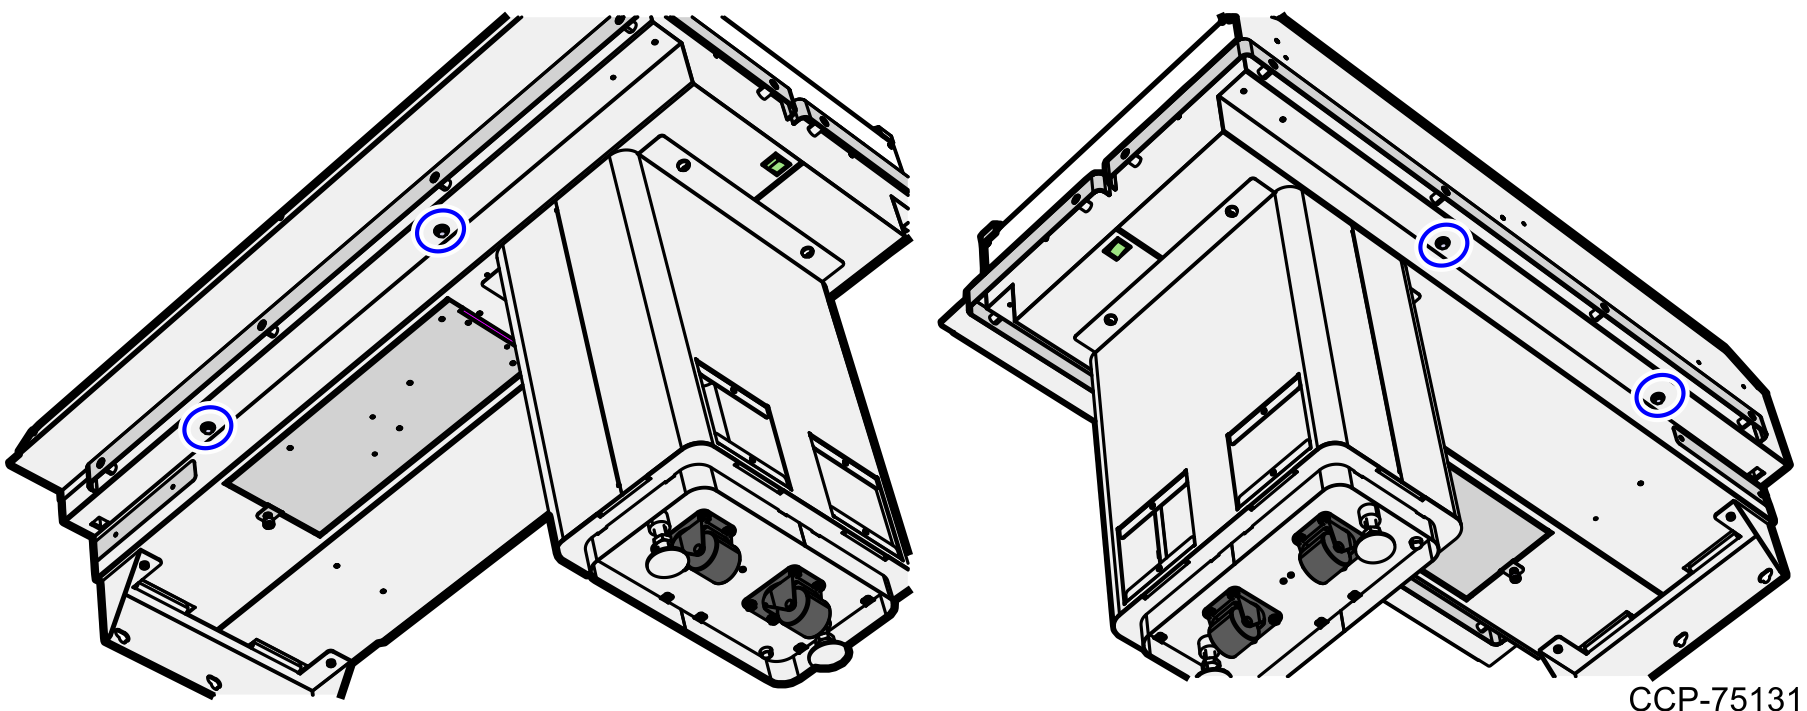
- Remove the four (4) hex bolts (two on each side) securing the Conveyor Belt assembly to the Input Belt frame. These bolts are located underneath the Input Belt frame, as shown in the image below.
- Remove two (2) hex bolts securing the Input Belt Conveyor assembly to the Scale Pods.
- Do the following:
- Stand at the end of the Input Belt.
- Grasp the Input Belt assembly, lift and then slide it forward to disengage the assembly from the PEM studs.Note
Hold the motor power cable so that it does not pinch.
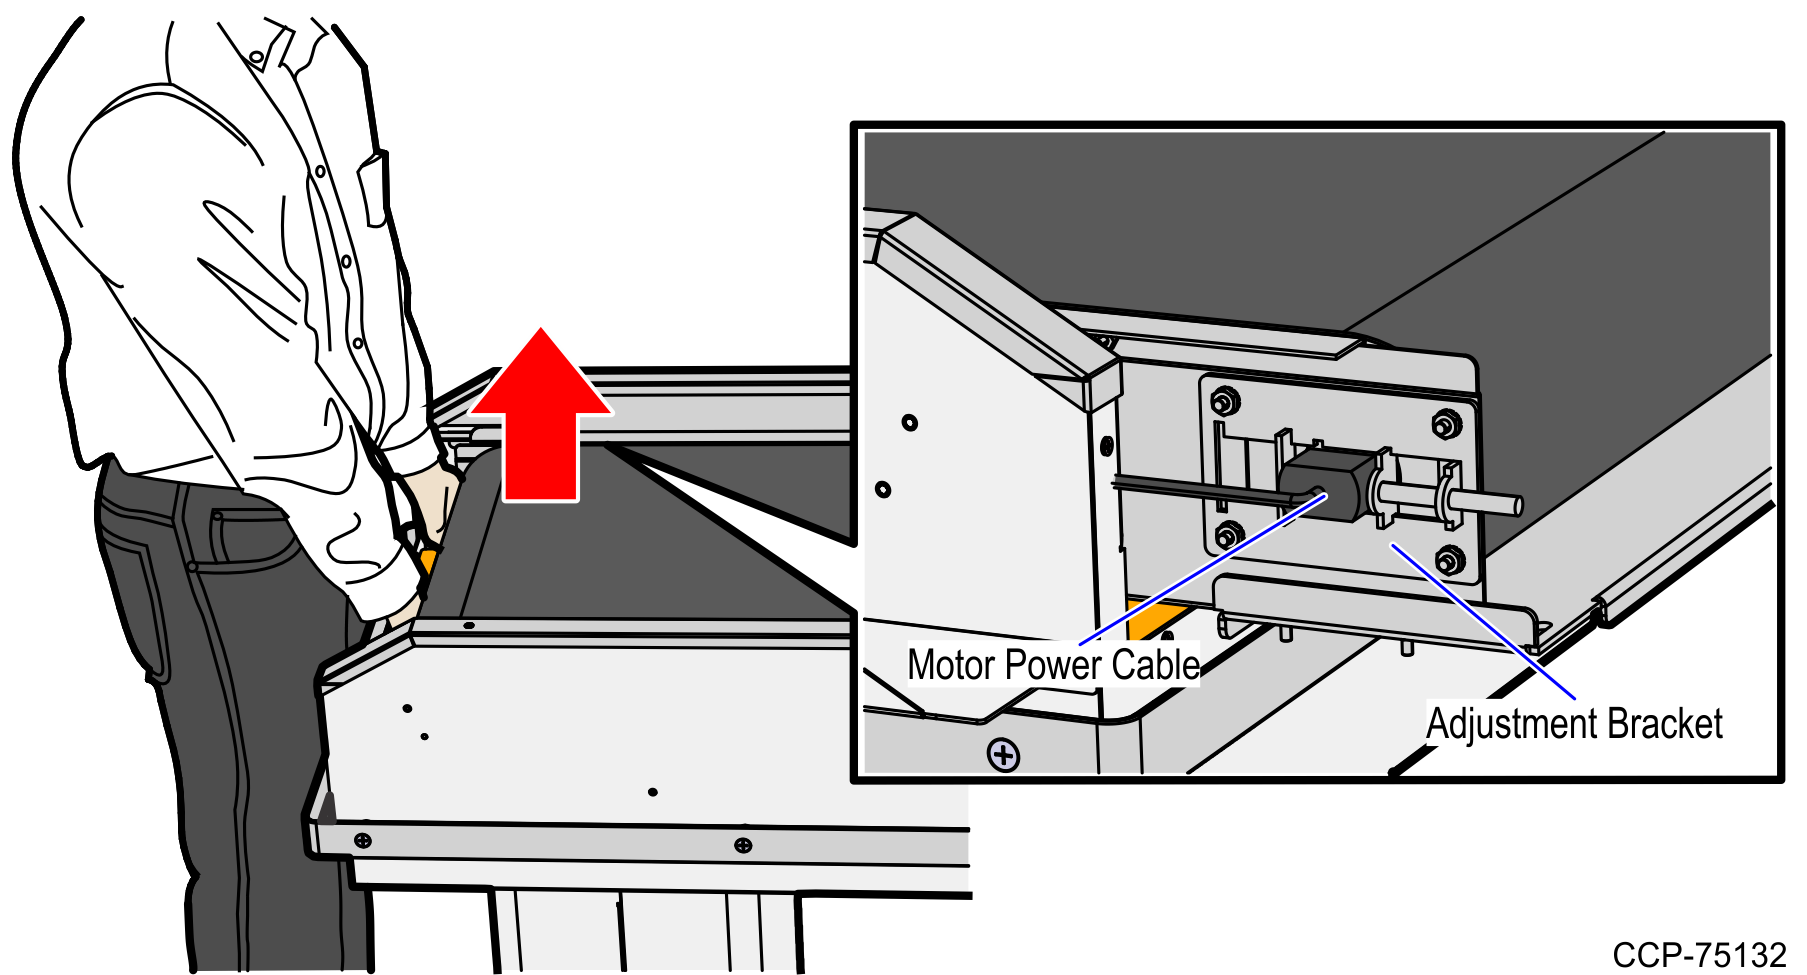
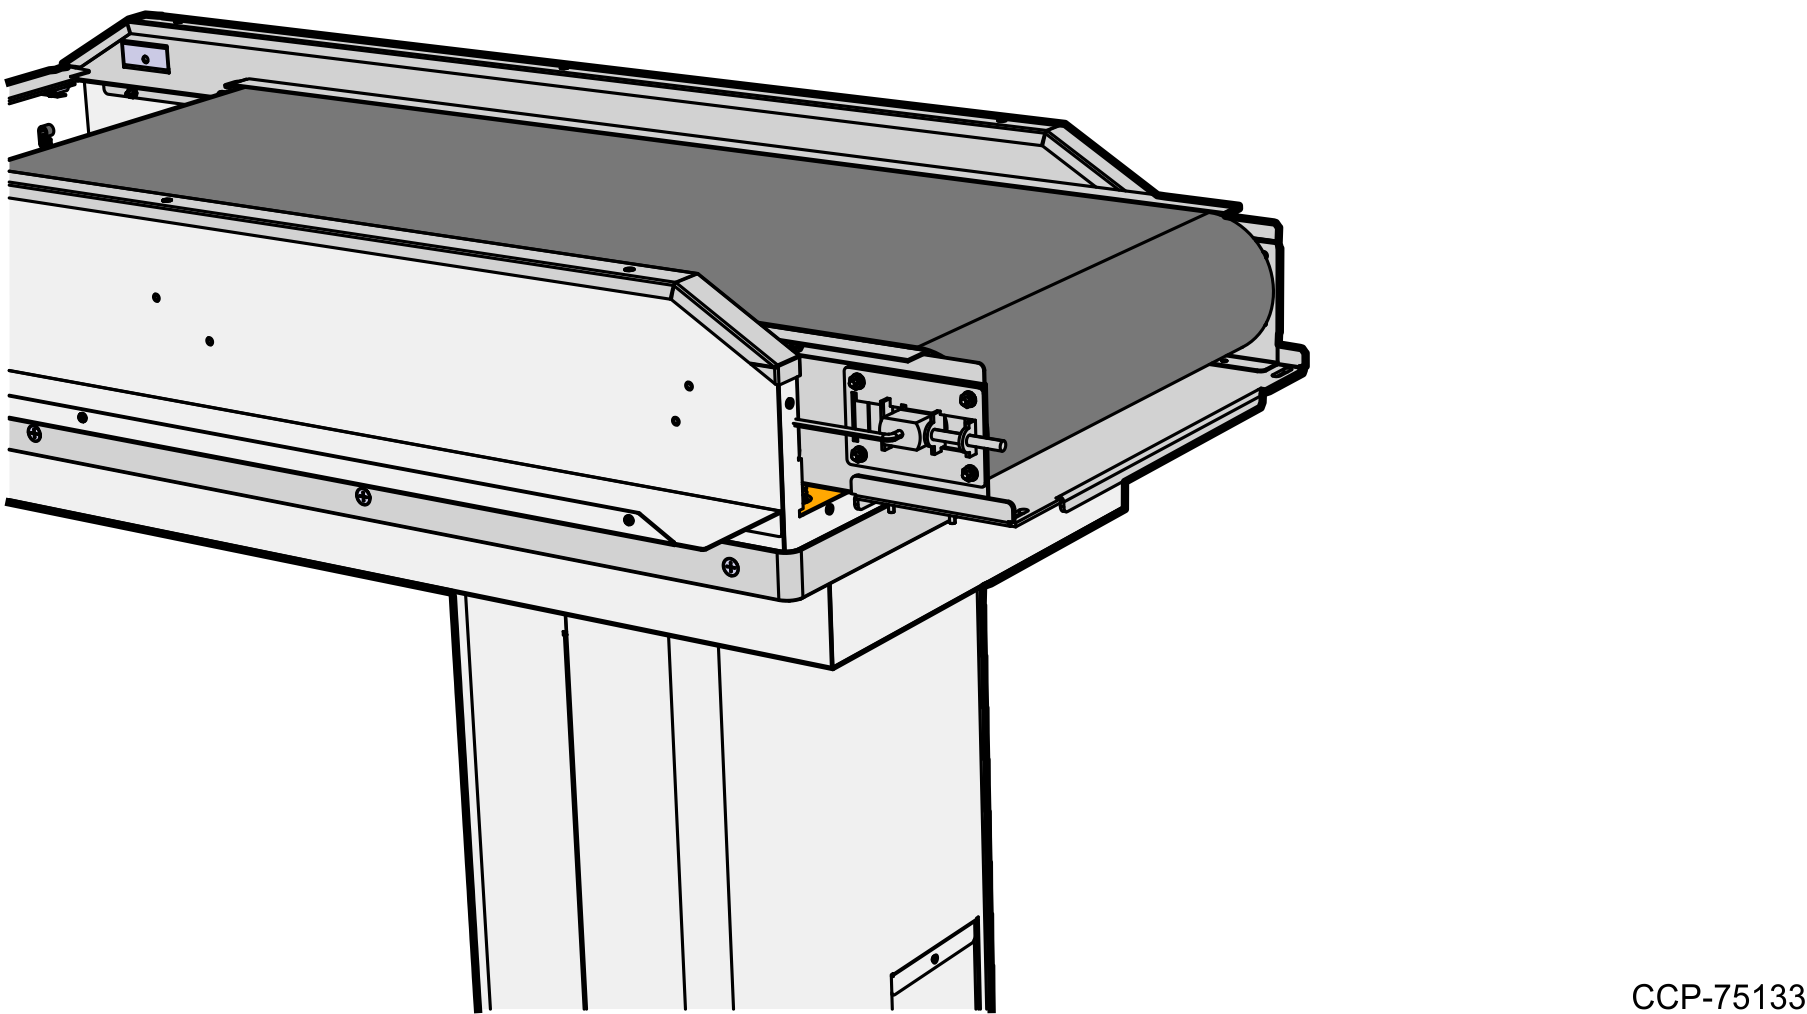
- Rest the rear of the Input Belt Conveyor assembly on the edge of the Input Belt frame as shown in the image below.
 Note
NoteEnsure not to pinch the motor cable.
NoteIt is recommended that you rest the belt assembly on a couple of supports on top of the cabinet to make it easier to service.
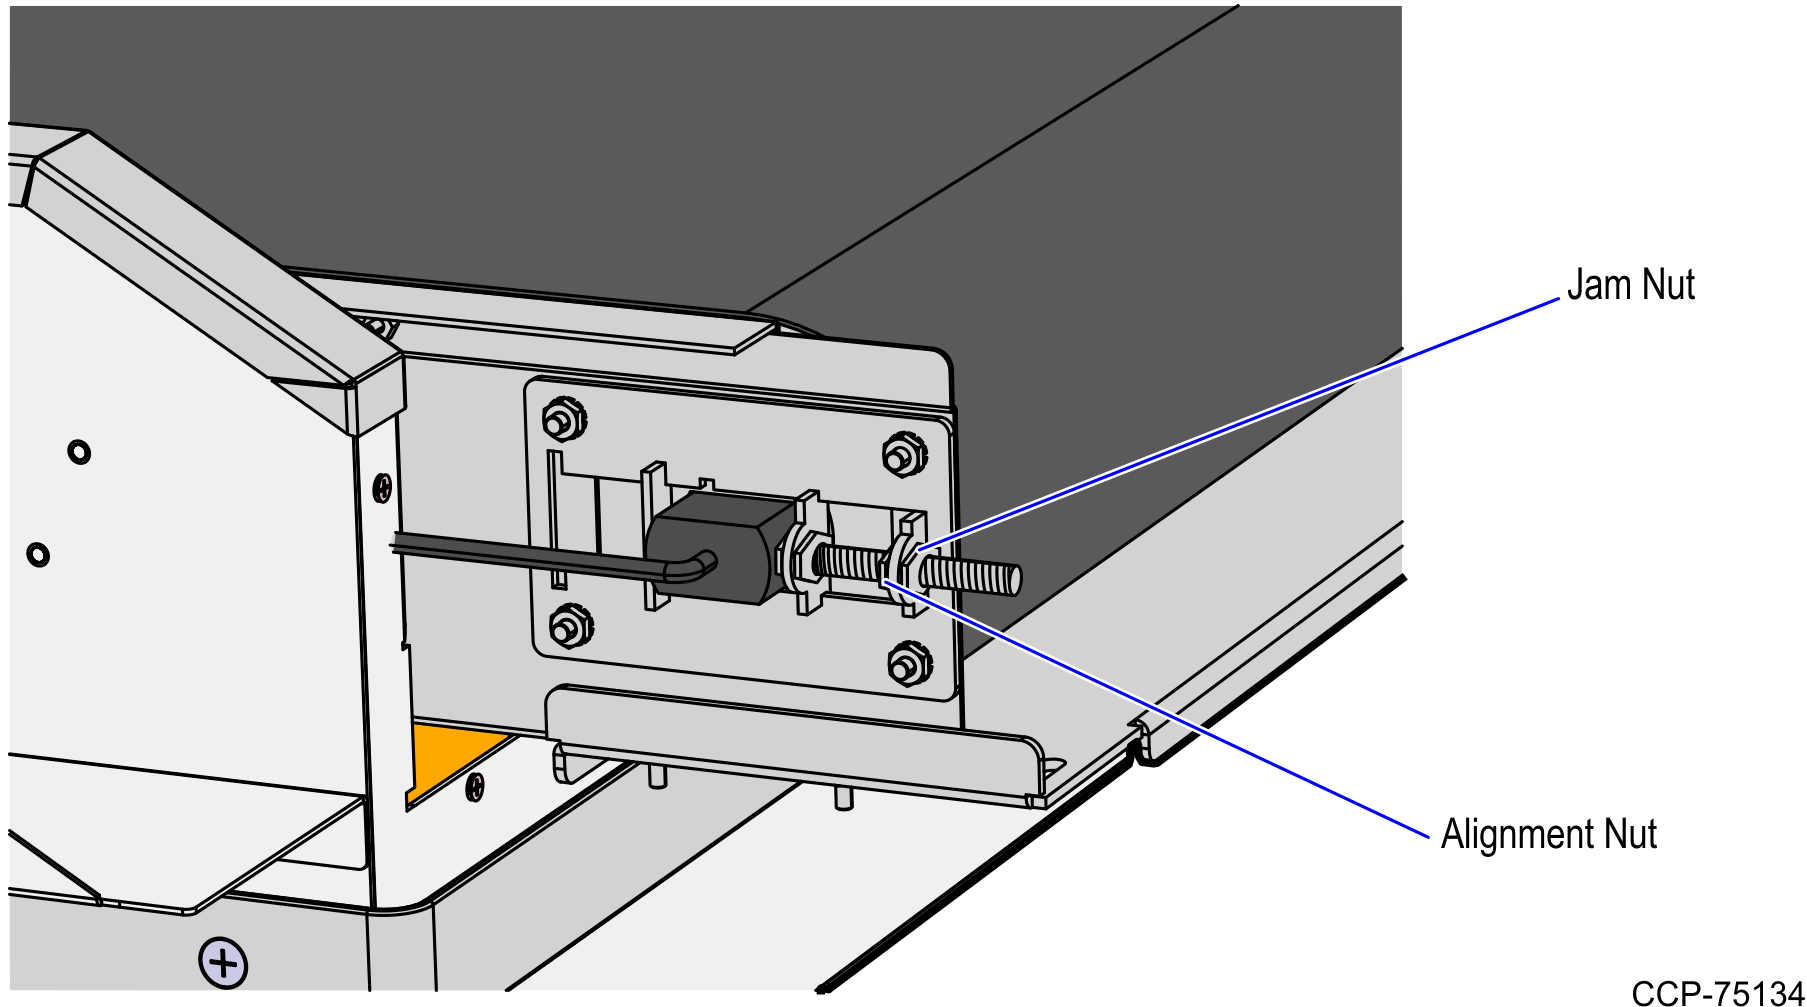
TipUse a marker and mark the position of the Alignment Nut and Jam Nut before loosening the belt tension. This will help the re-assembly procedure.