Installing the Scanner/Scale (7879e)
To install the NCR RealScan™ 79 Bi–Optic Imager Scanner/Scale (7879) in an NCR FastLane SelfServ Checkout(Fixed) unit, follow these steps:
Note
The Scanner cable is pre–routed along the floor of the Scanner bucket and up to the Terminal Display during the manufacturing process.
- If replacing an existing Scanner/Scale, remove the Scanner/Scale. For more information, refer to Removing the 7879e Scanner/Scale from Full Function (Fixed) units.
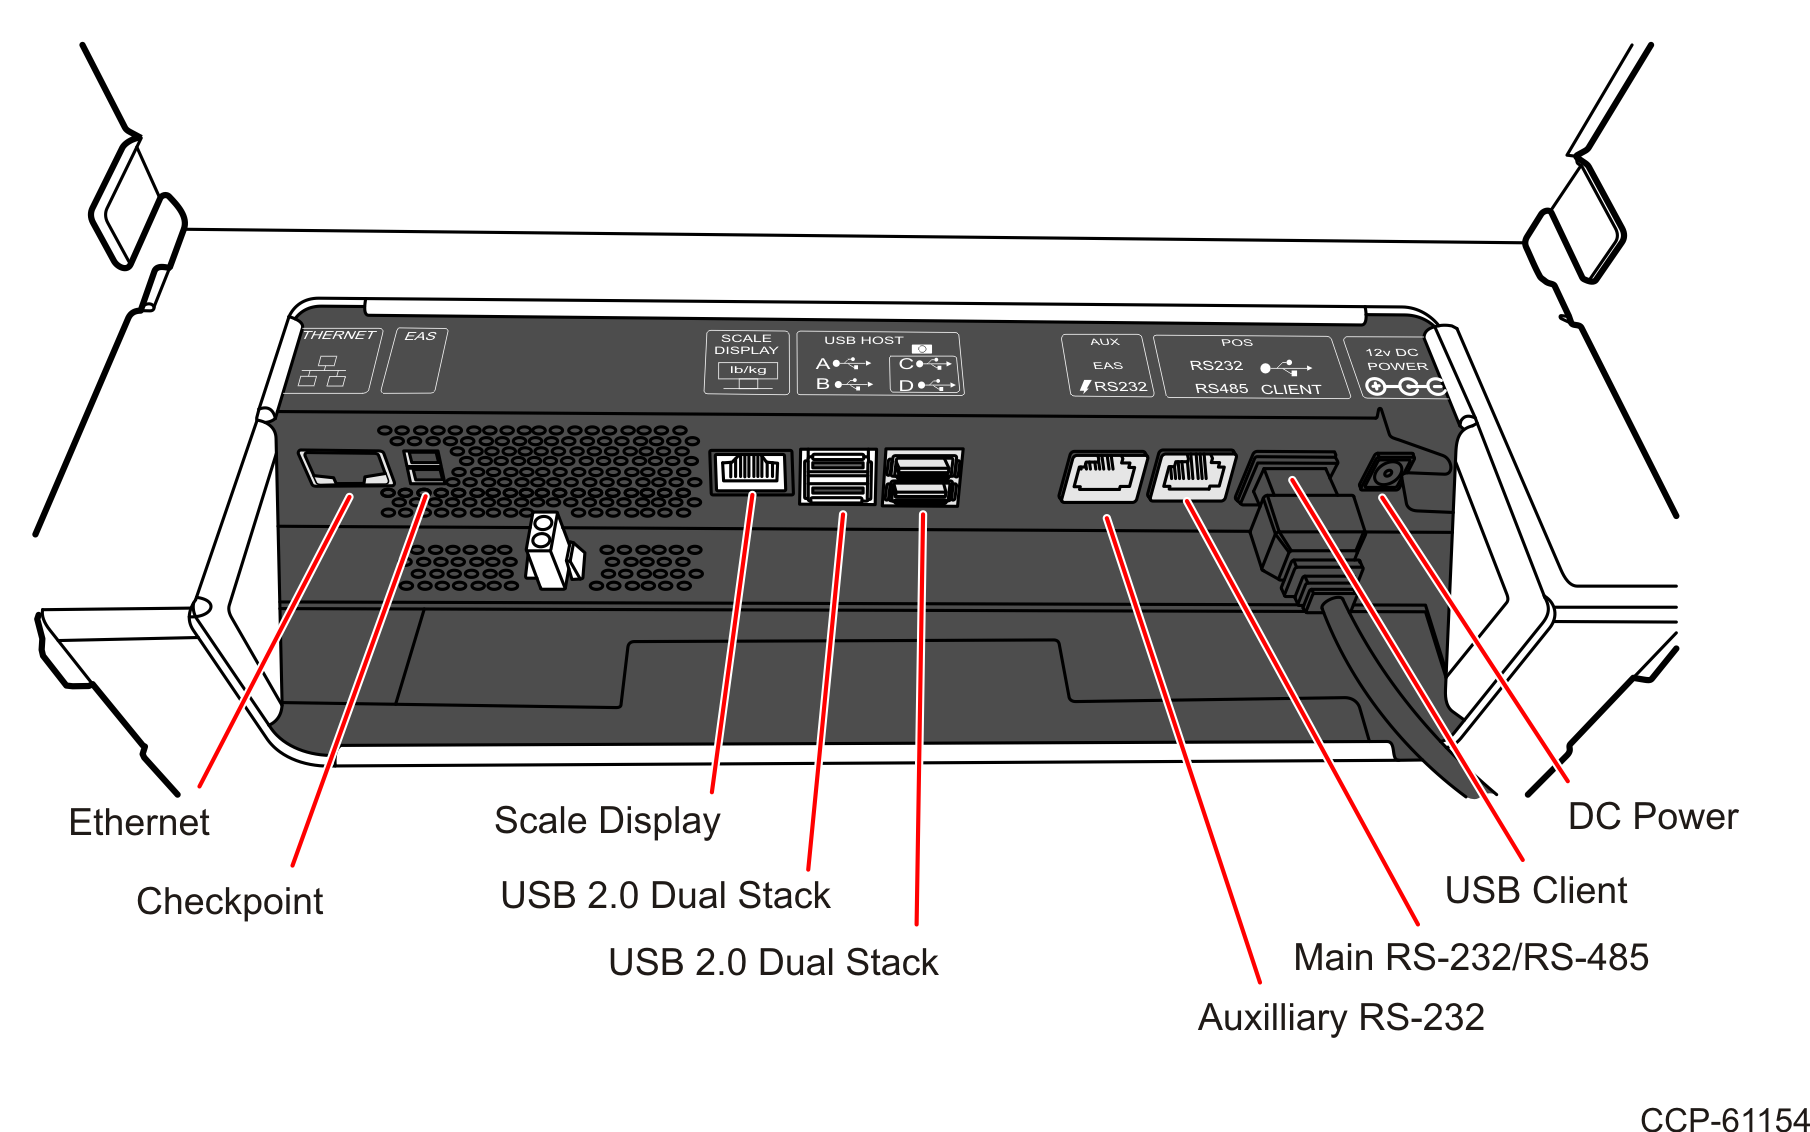
- Connect the scanner cable to the USB Client port on the RealScan 79 (7879).Note
Ensure that the SelfServ Checkout unit is turned off before connecting the USB cable.
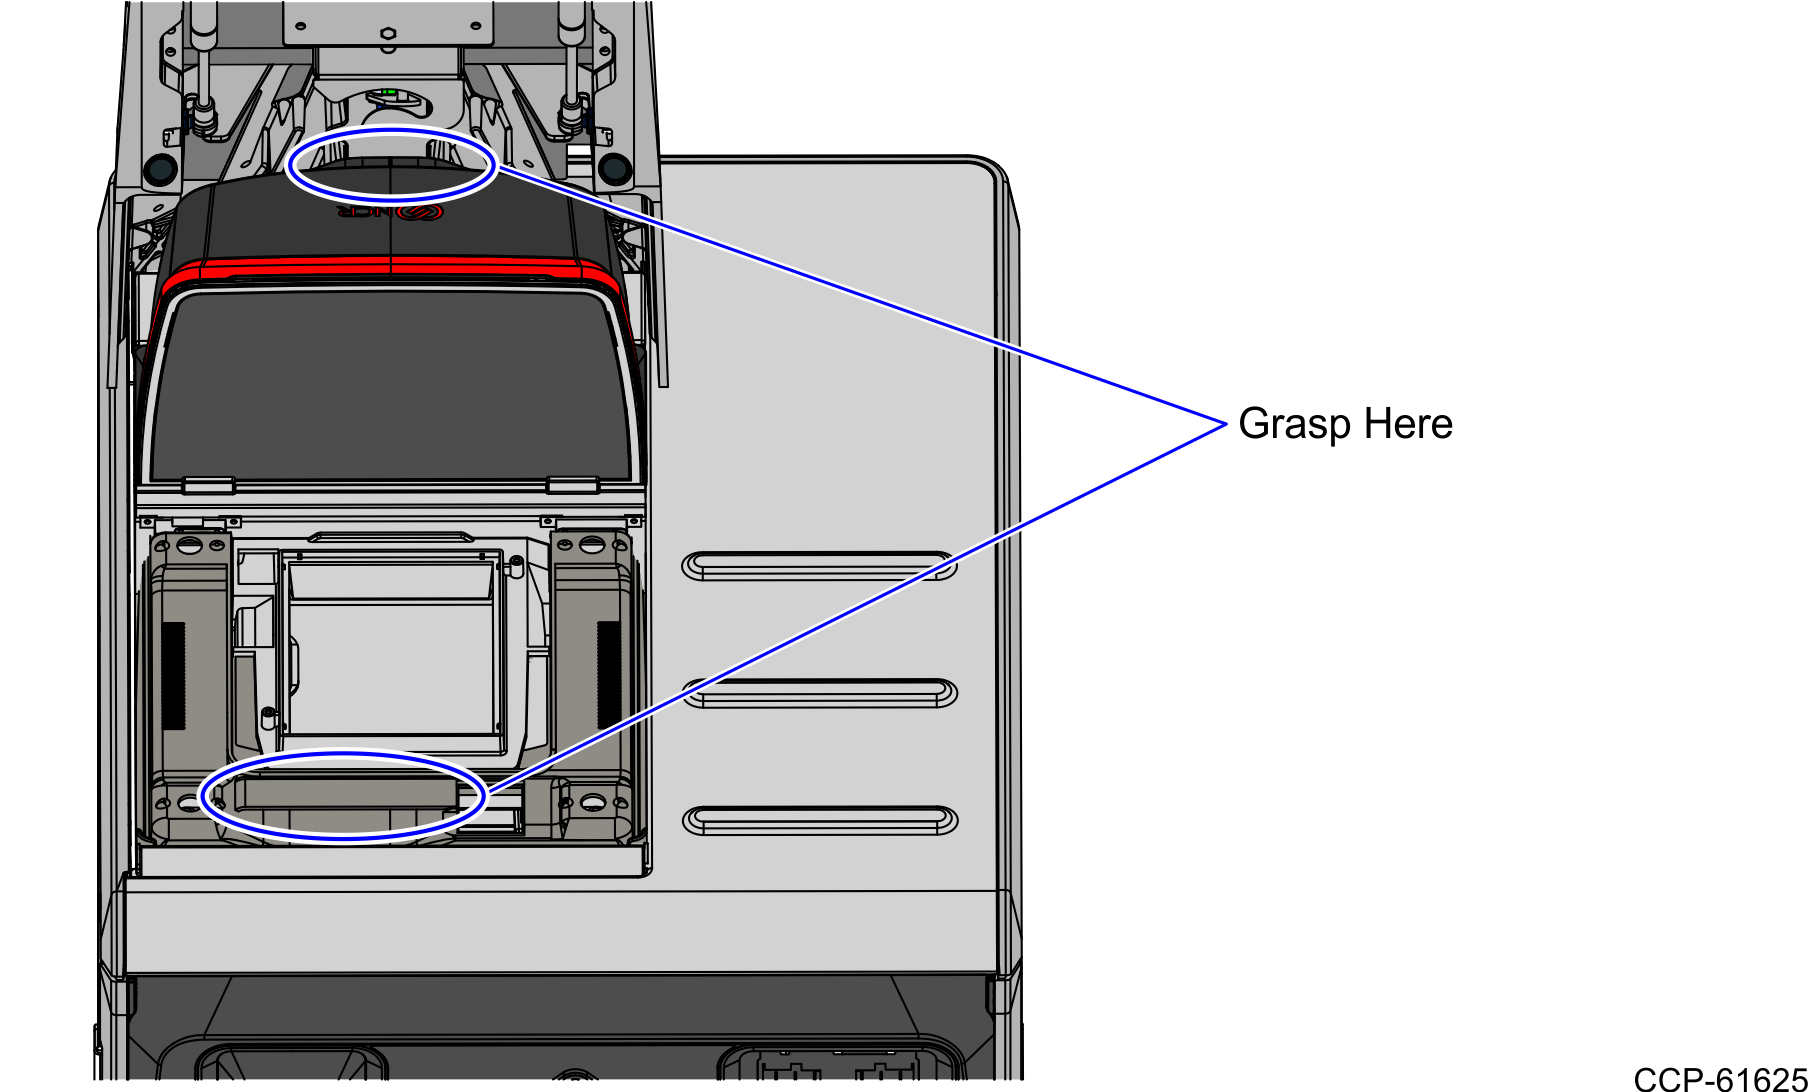
- Place the Scanner/Scale in the Scanner bucket.
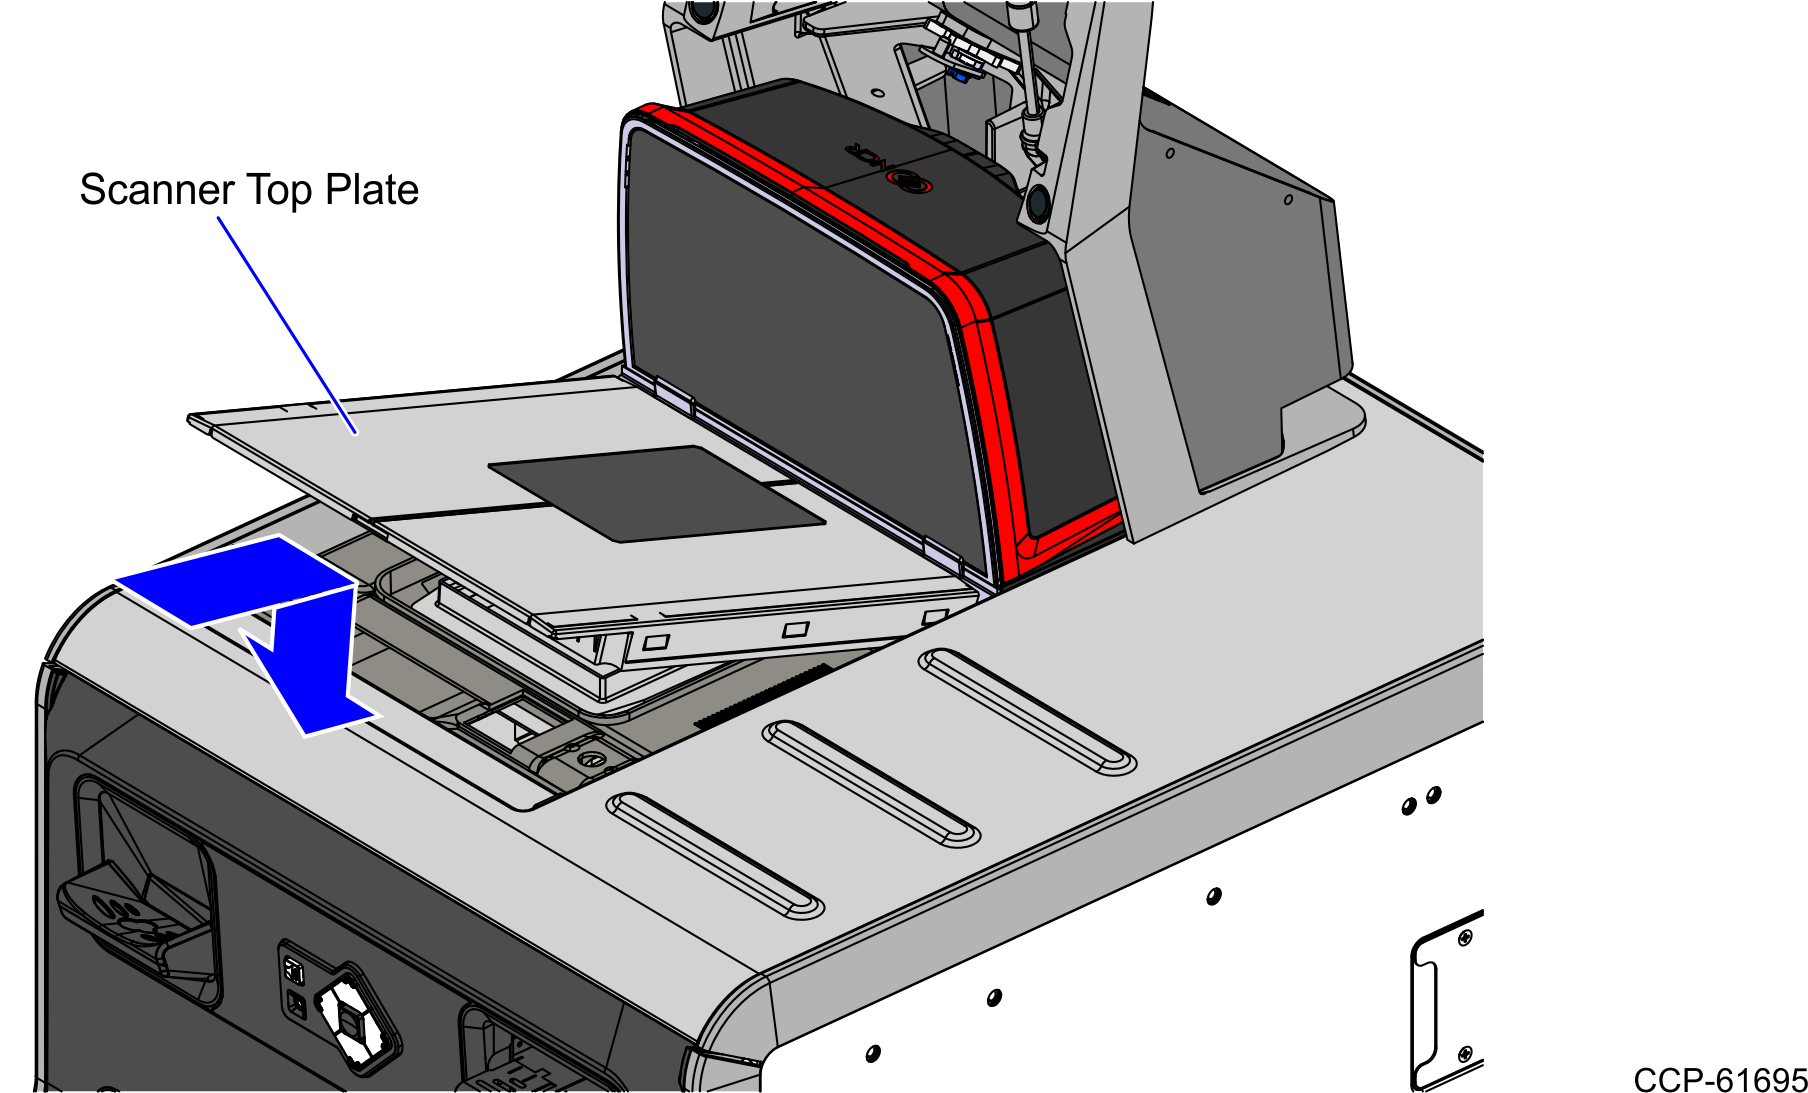
- Lower the Scale Plate as shown below:
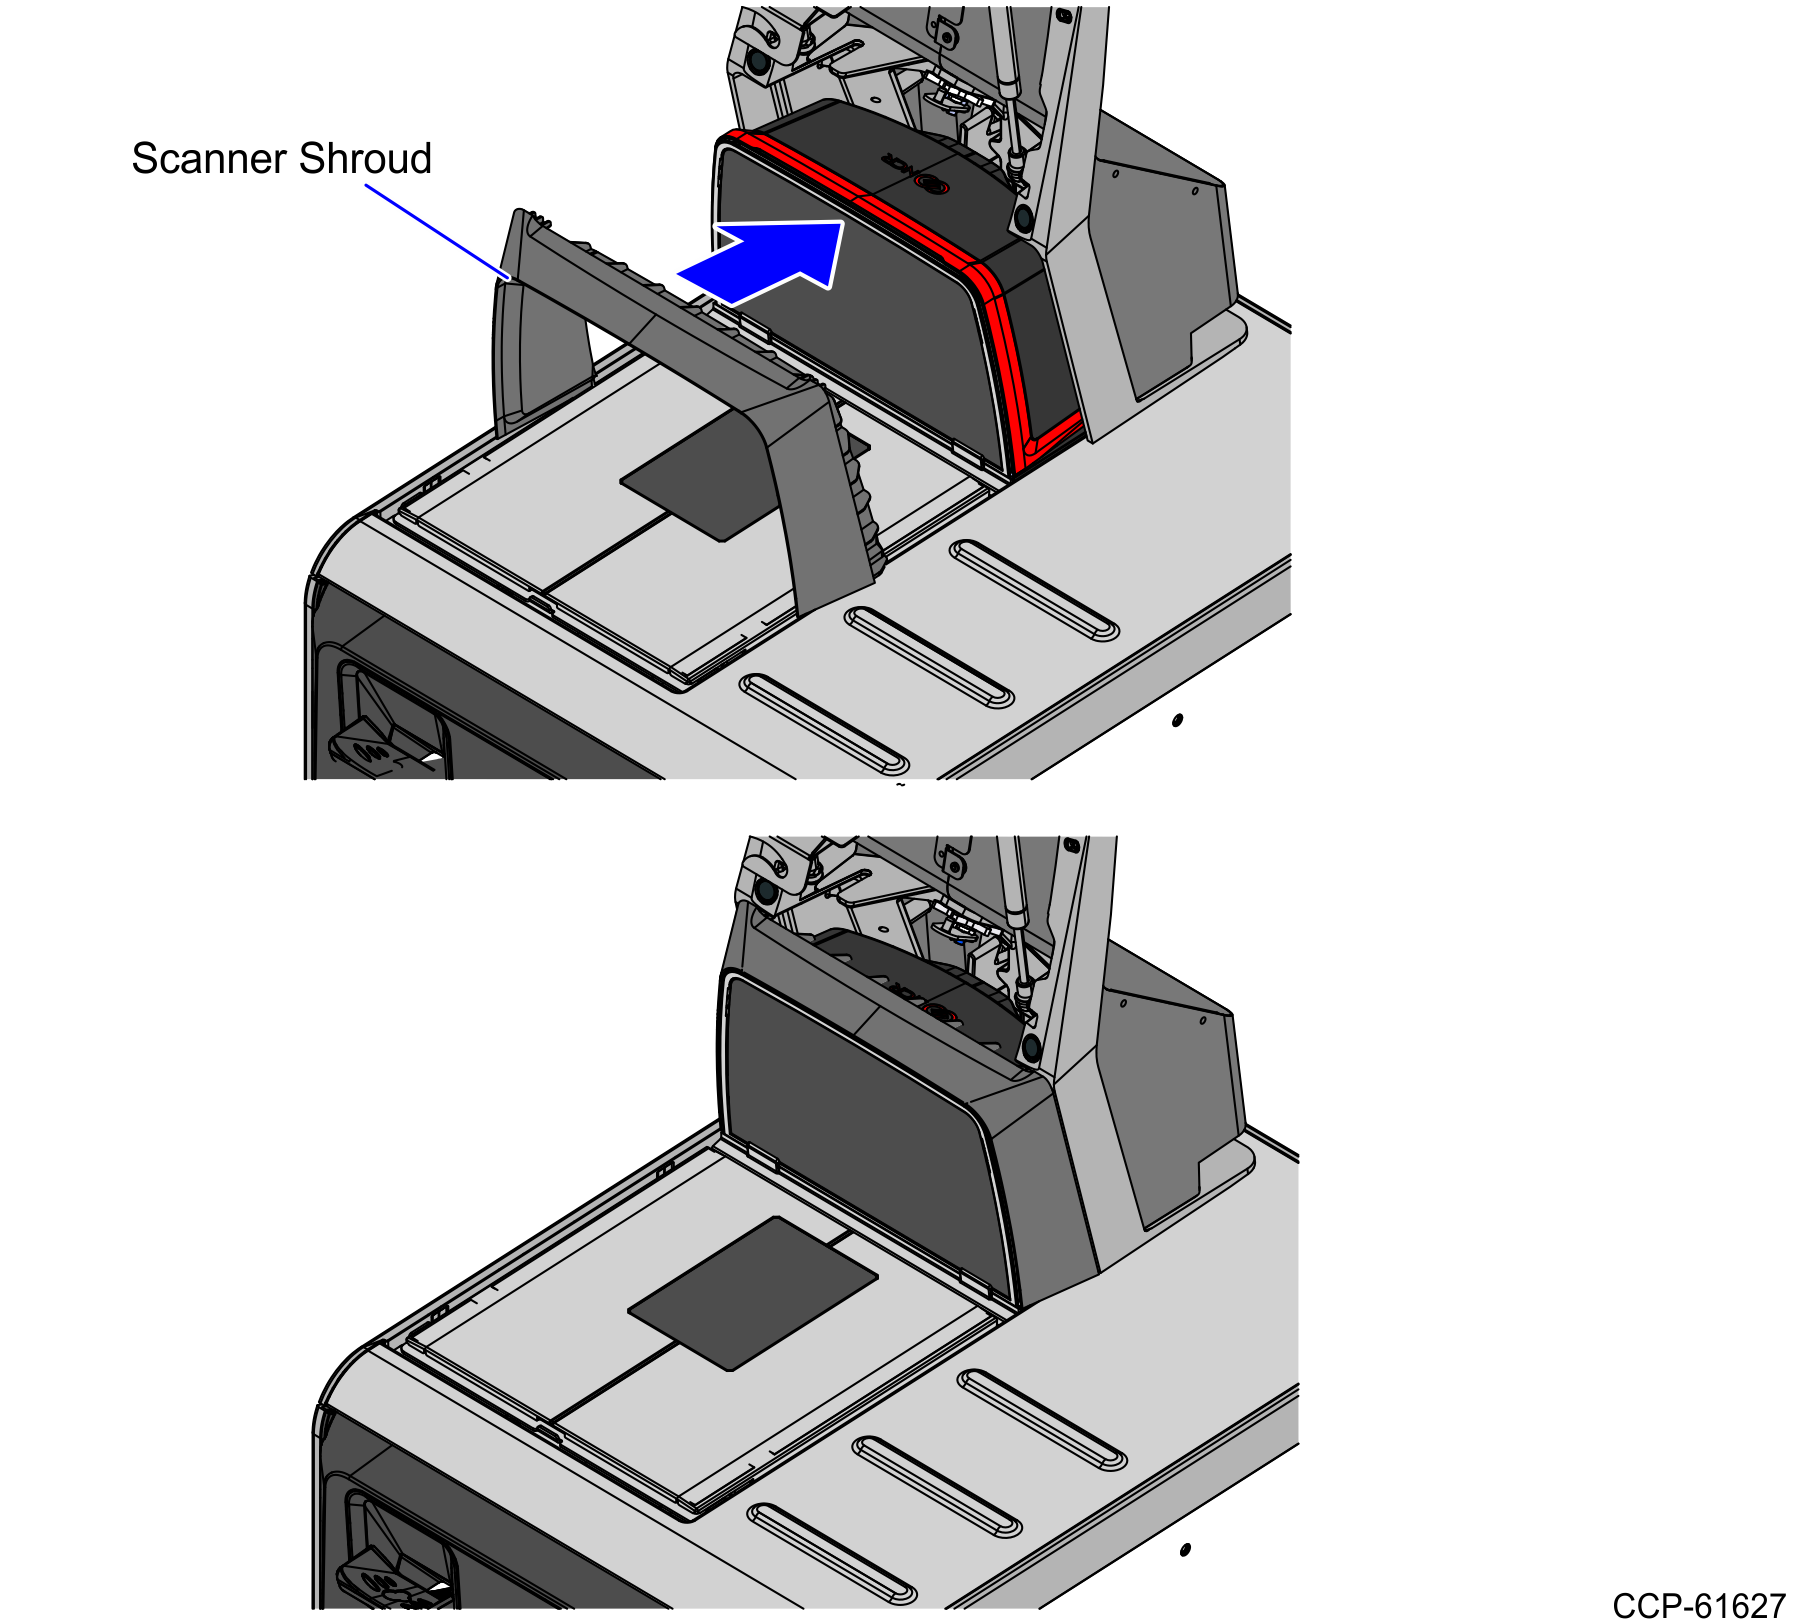
- Insert the Scanner Shroud over the top of the vertical scanner window.
 Note
NoteThe Scanner/Scale must be calibrated before the system goes live.
