Installing the Color Camera USB Cable
The Color Camera USB Cable is not shipped with the 7895 Scanner/Scale unit. It is purchased separately and needs to be installed during the initial setup of the unit. To install the Color Camera USB Cable, follow these steps:
When routing cables, ensure that the 7895 Color Camera cable is as far as possible from the Sensormatic® cables to avoid signal interference between the Sensormatic® EAS system and the Color Camera.
- Remove the Scanner Top Plate.
-
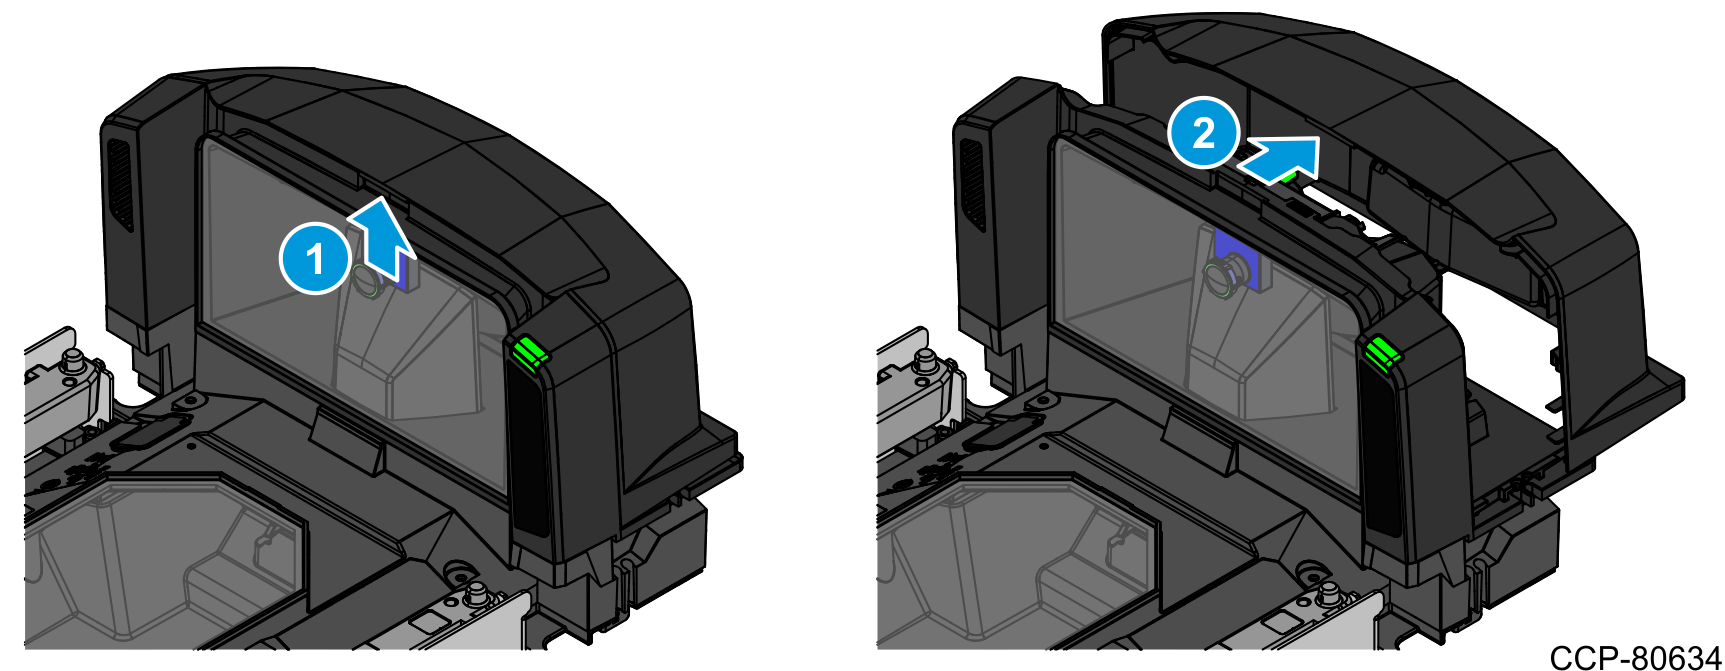
Using your thumb, lift the center of the Tower Cover to disengage and remove it from the tower housing.
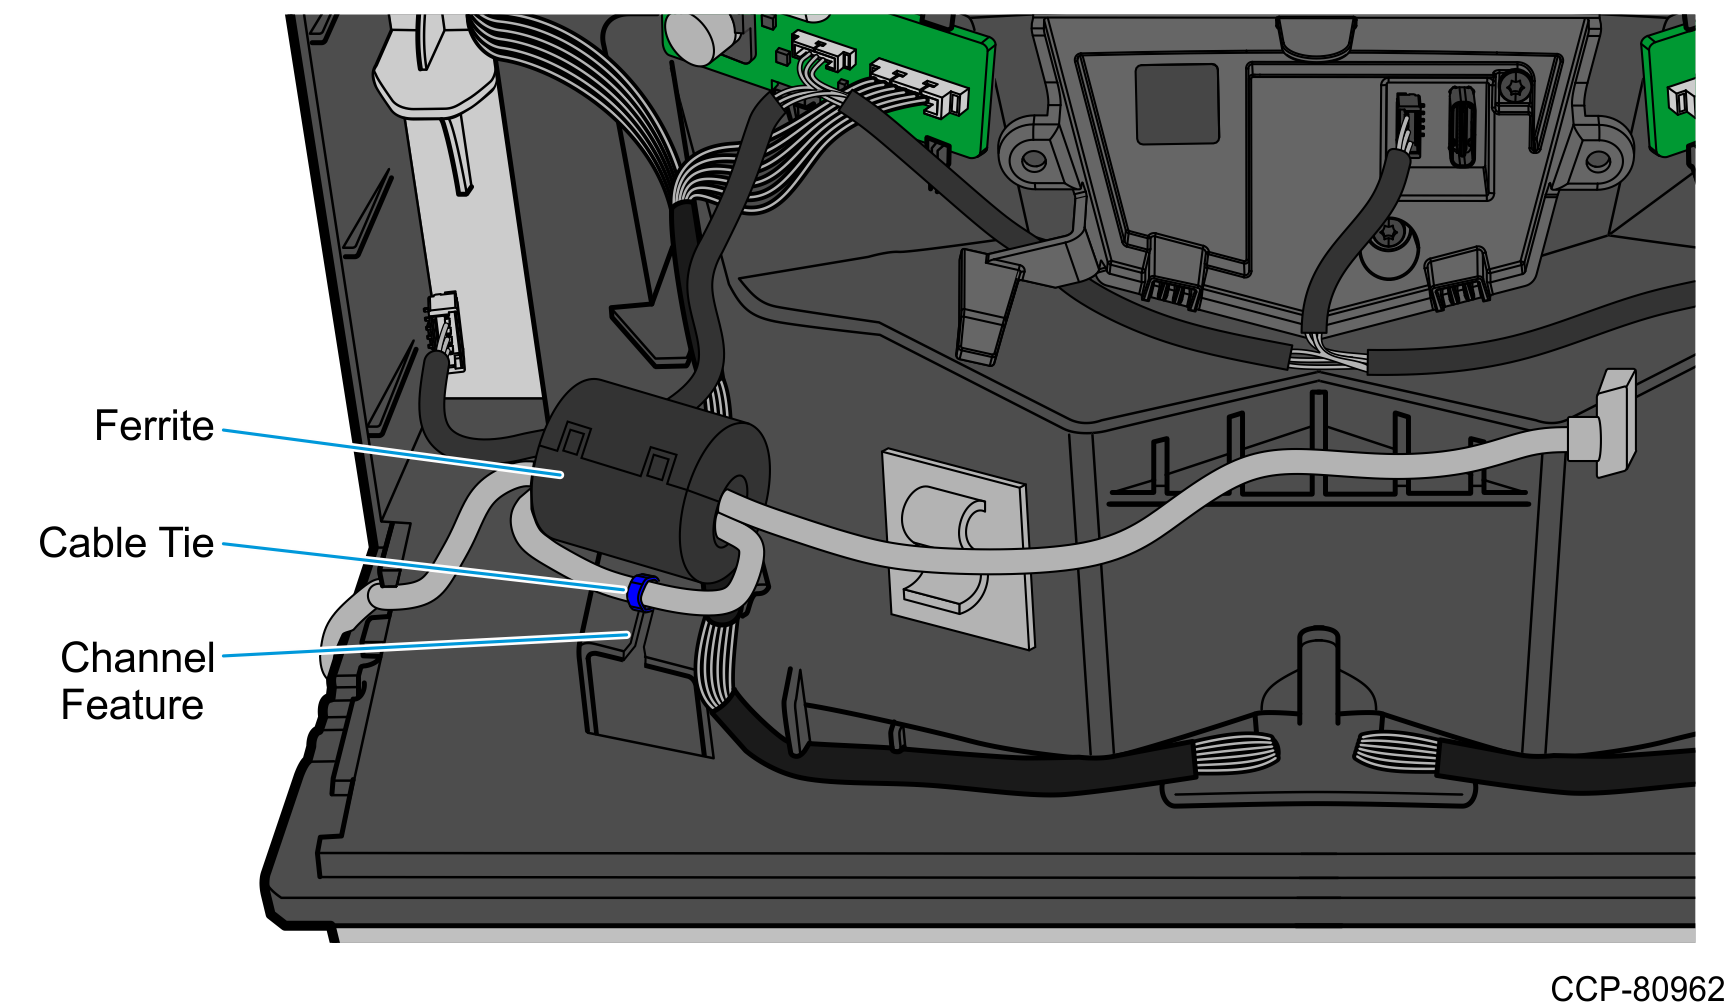
- Secure the ferrite of the Color Camera USB Cable to the tower housing.
- Insert the locking head of the cable tie into the slot of the channel feature in the scanner tower.
-
Push the ferrite all the way in by sliding the head of the cable tie through the slot.
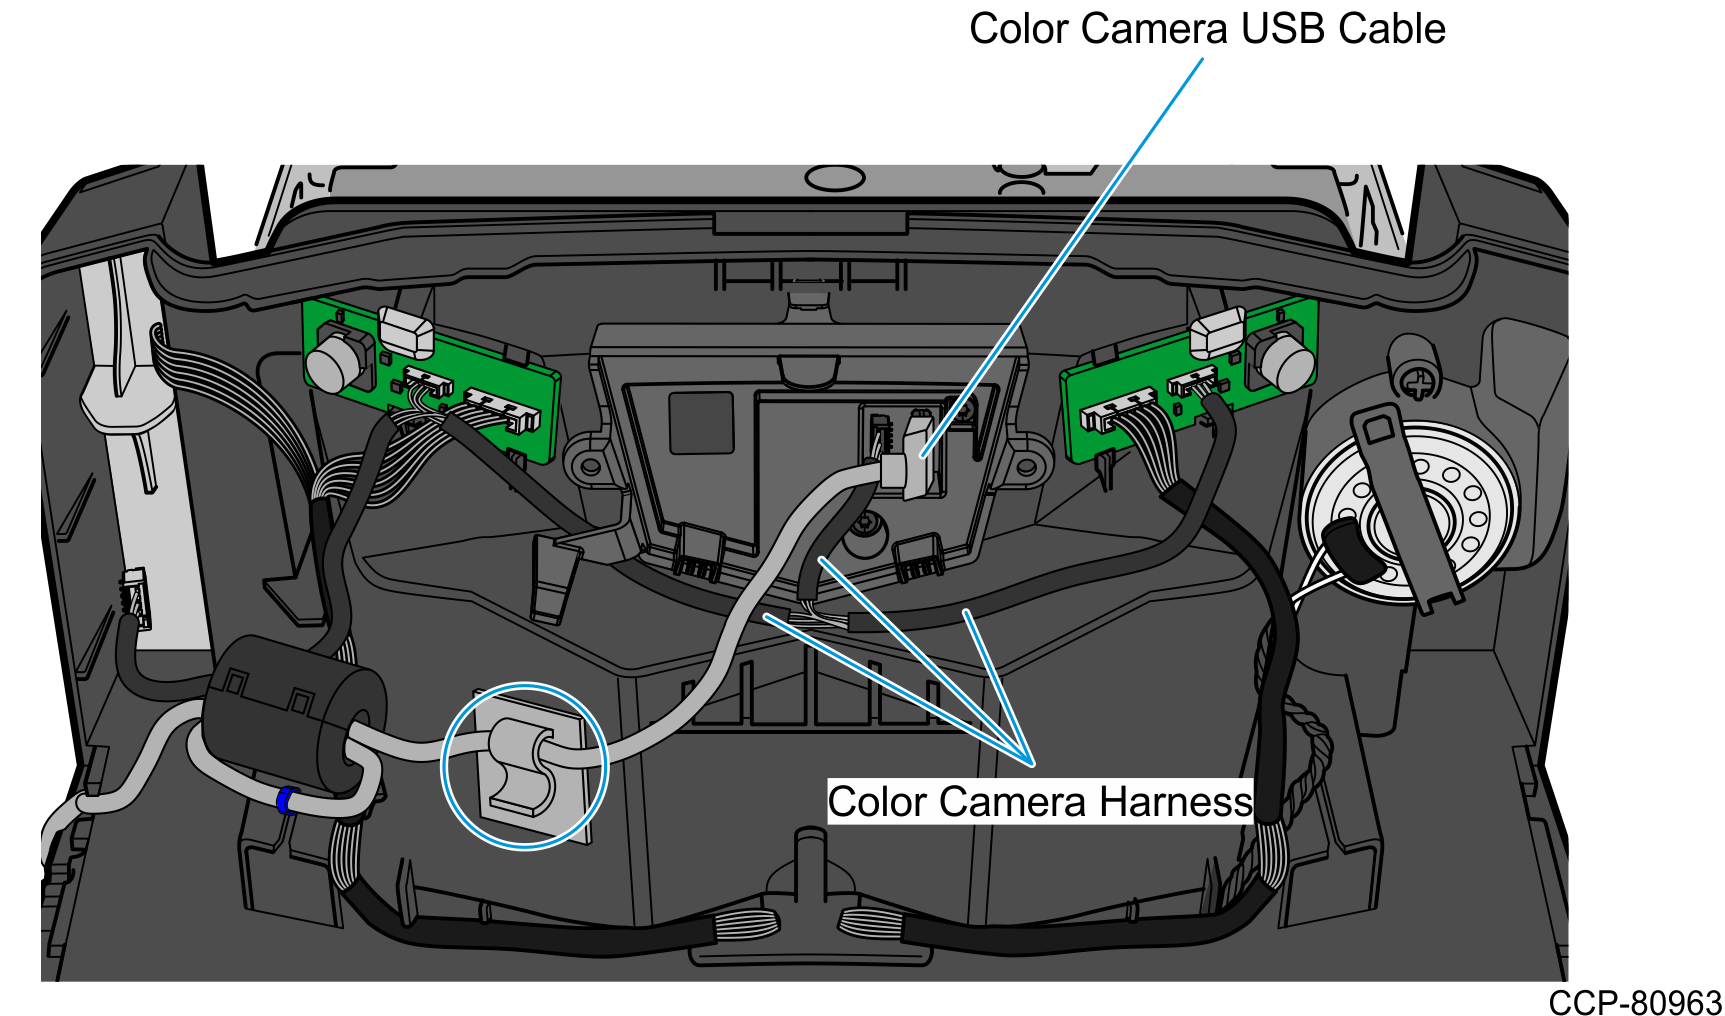
- Connect the USB Cable to the Color Camera Assembly and route it under its retainer tab.Caution
Ensure that the USB Cable is not touching the Color Camera Harness.
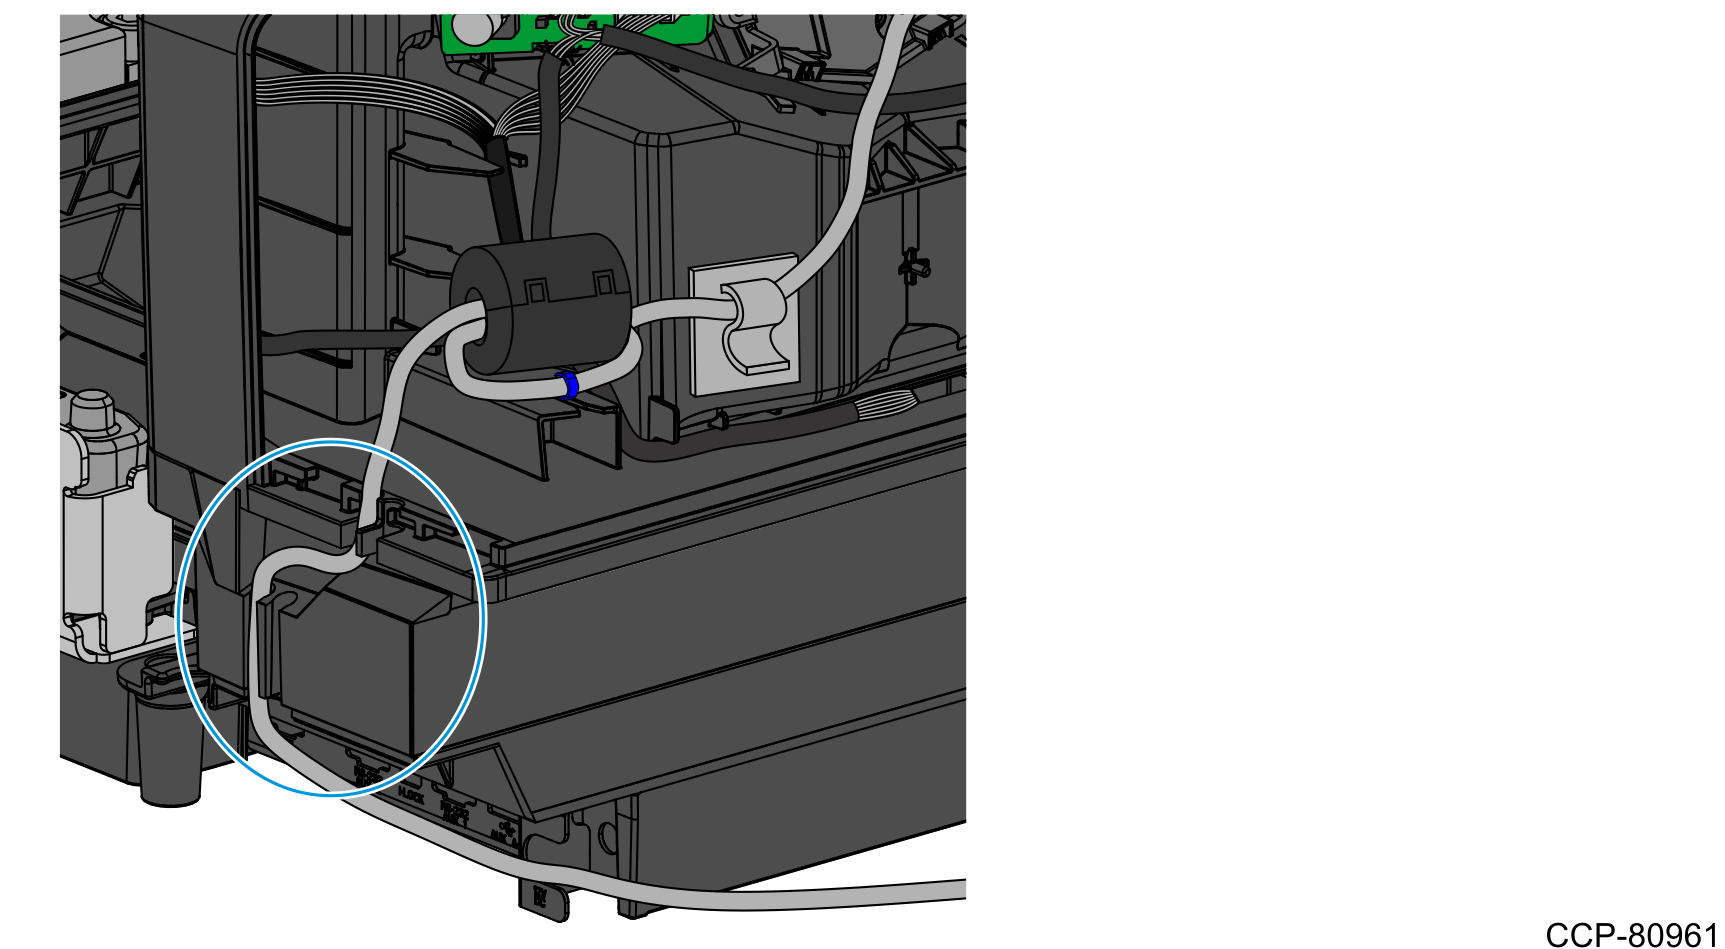
- Route the USB Cable through the cable exit slot on the side of the tower.
- Do the following:
- Route the cable through the side of the Display Hinged Bracket and secure using a cable tie, as shown in the image below.Note Apply enough slack to the cables so that they can move with the Terminal Display.
- Connect the USB Camera cable into the Terminal Display (USB Type A 3.0 Port B).
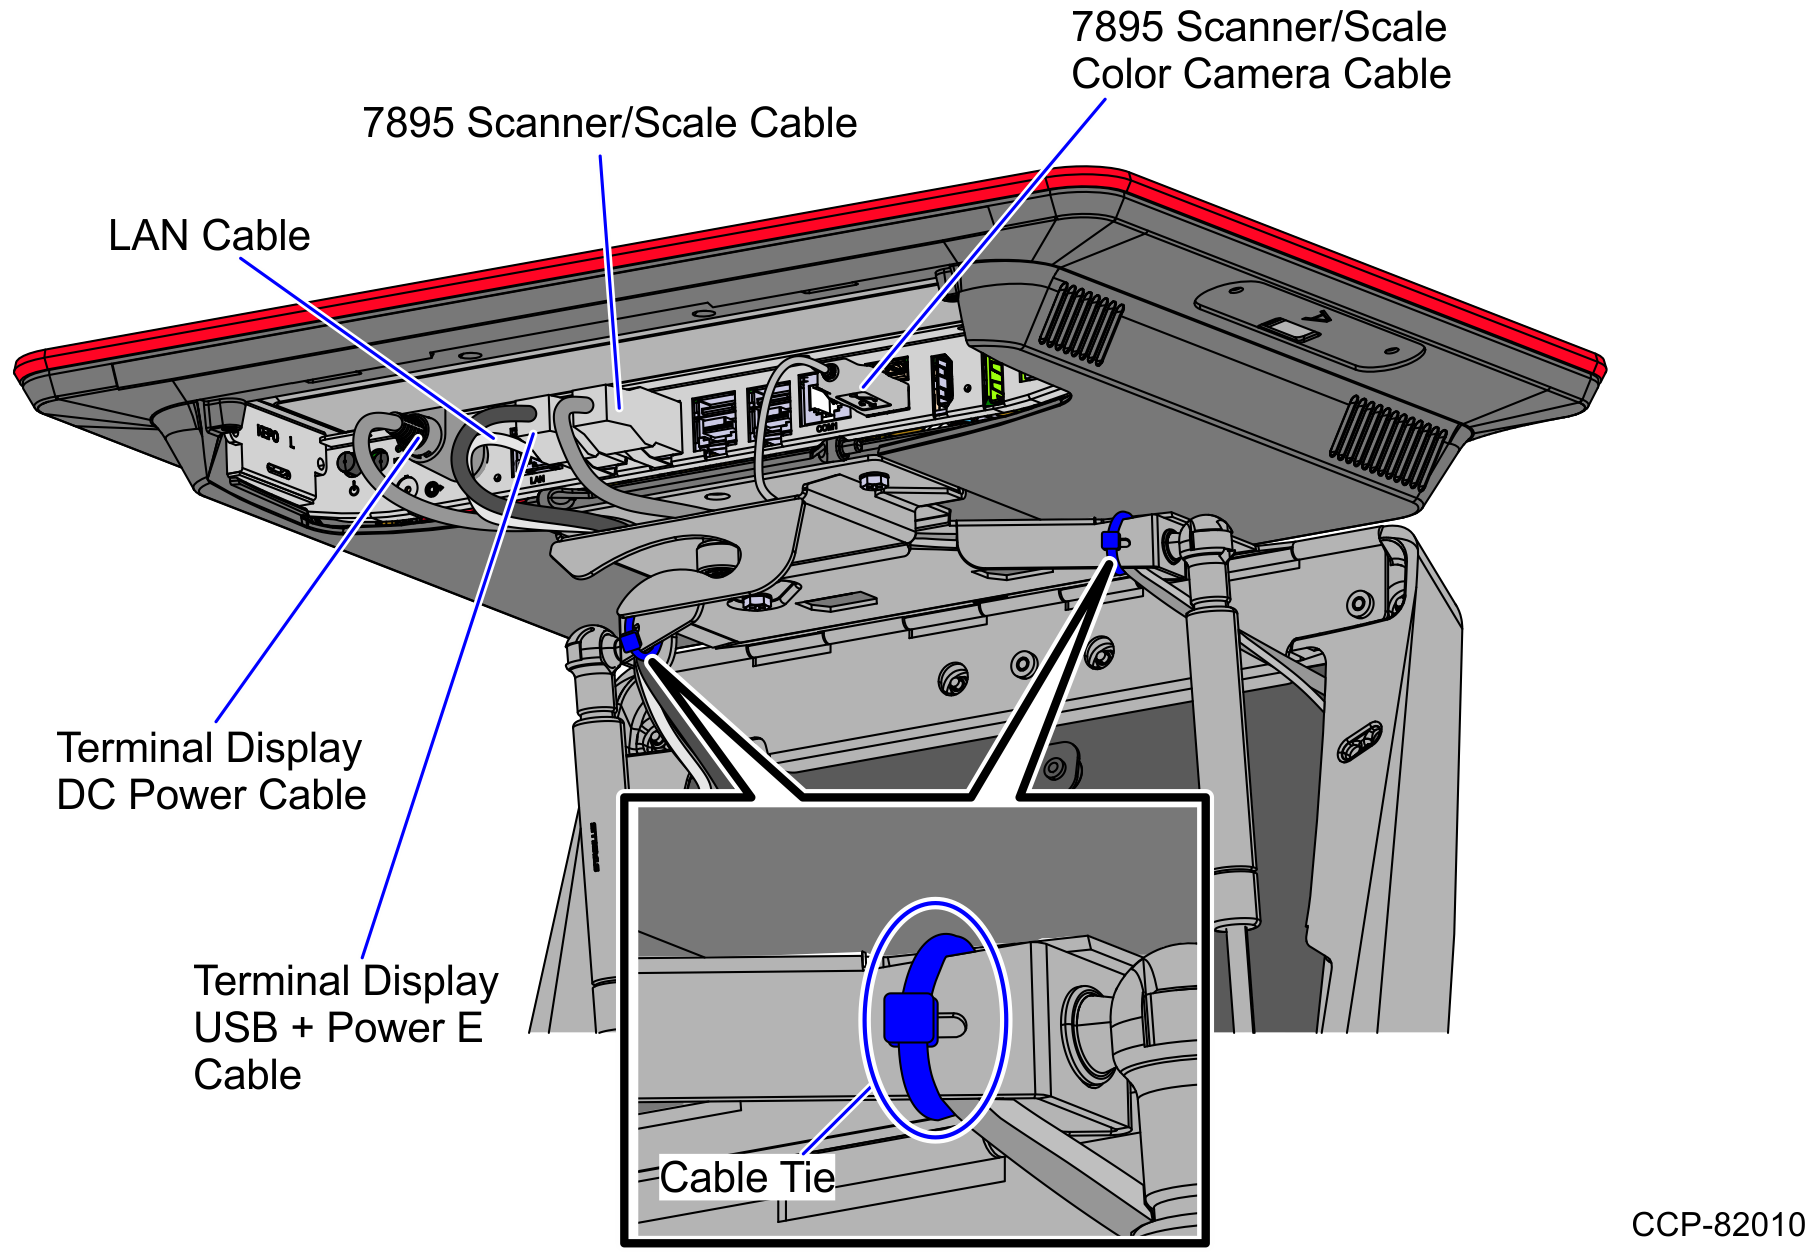
- Route the cable through the side of the Display Hinged Bracket and secure using a cable tie, as shown in the image below.