Removing Existing Bagwell
To remove an existing Bagwell, follow these steps:
- Remove the back panel of the Core.
- Remove the two screws that secure the Backsplash to the back of the Core.
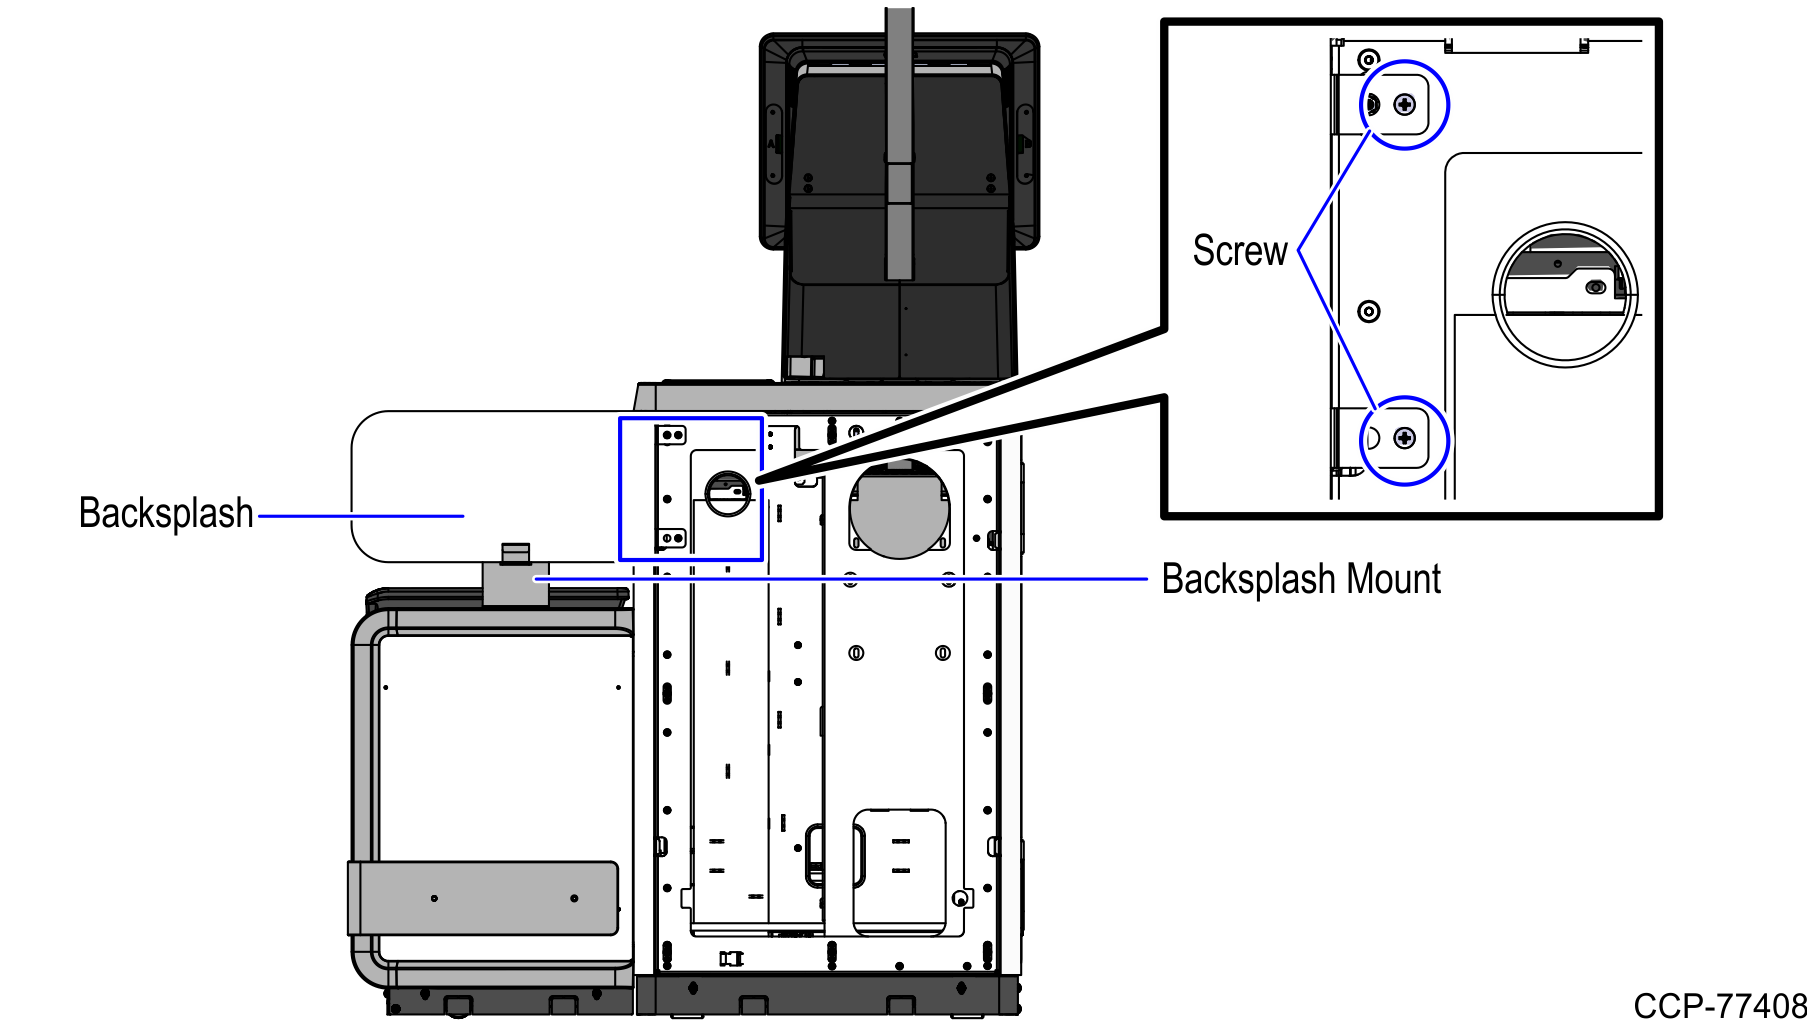
- Remove the Backsplash.
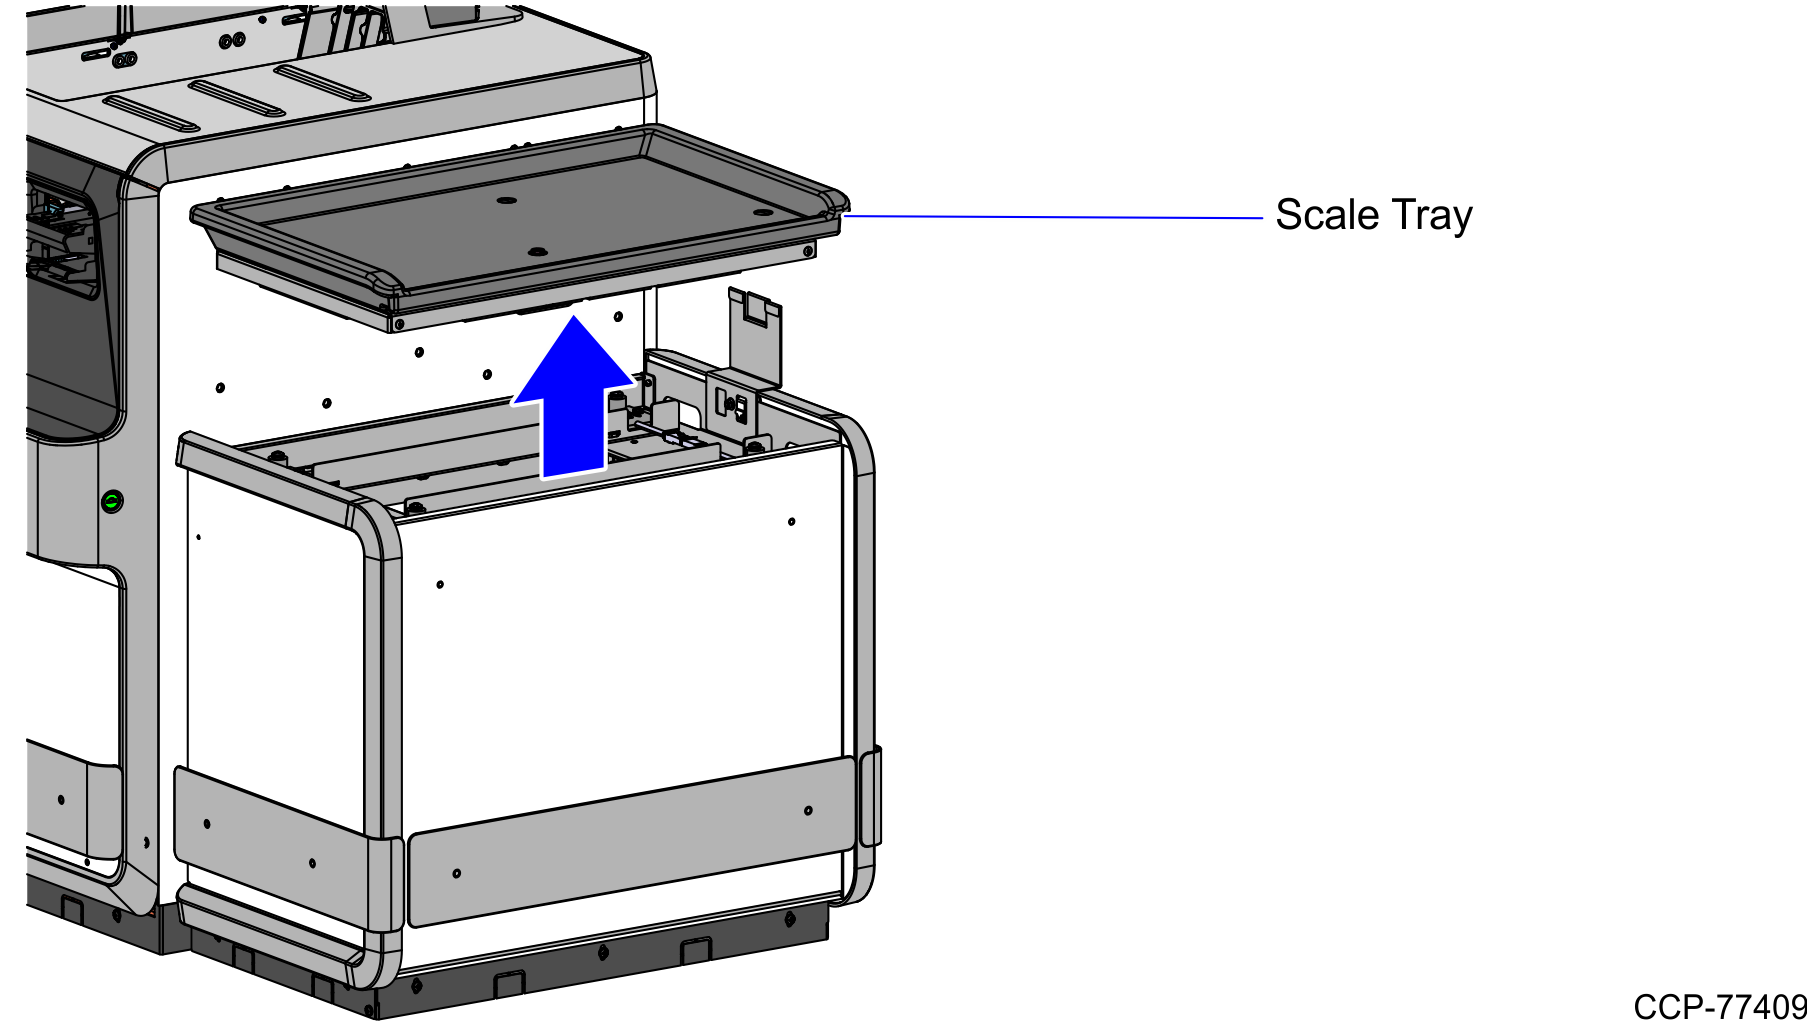
- Lift and remove the Scale Tray from the Bagwell.
- Remove two (2) nuts that secure the front and back color panels to the Bagwell Frame.
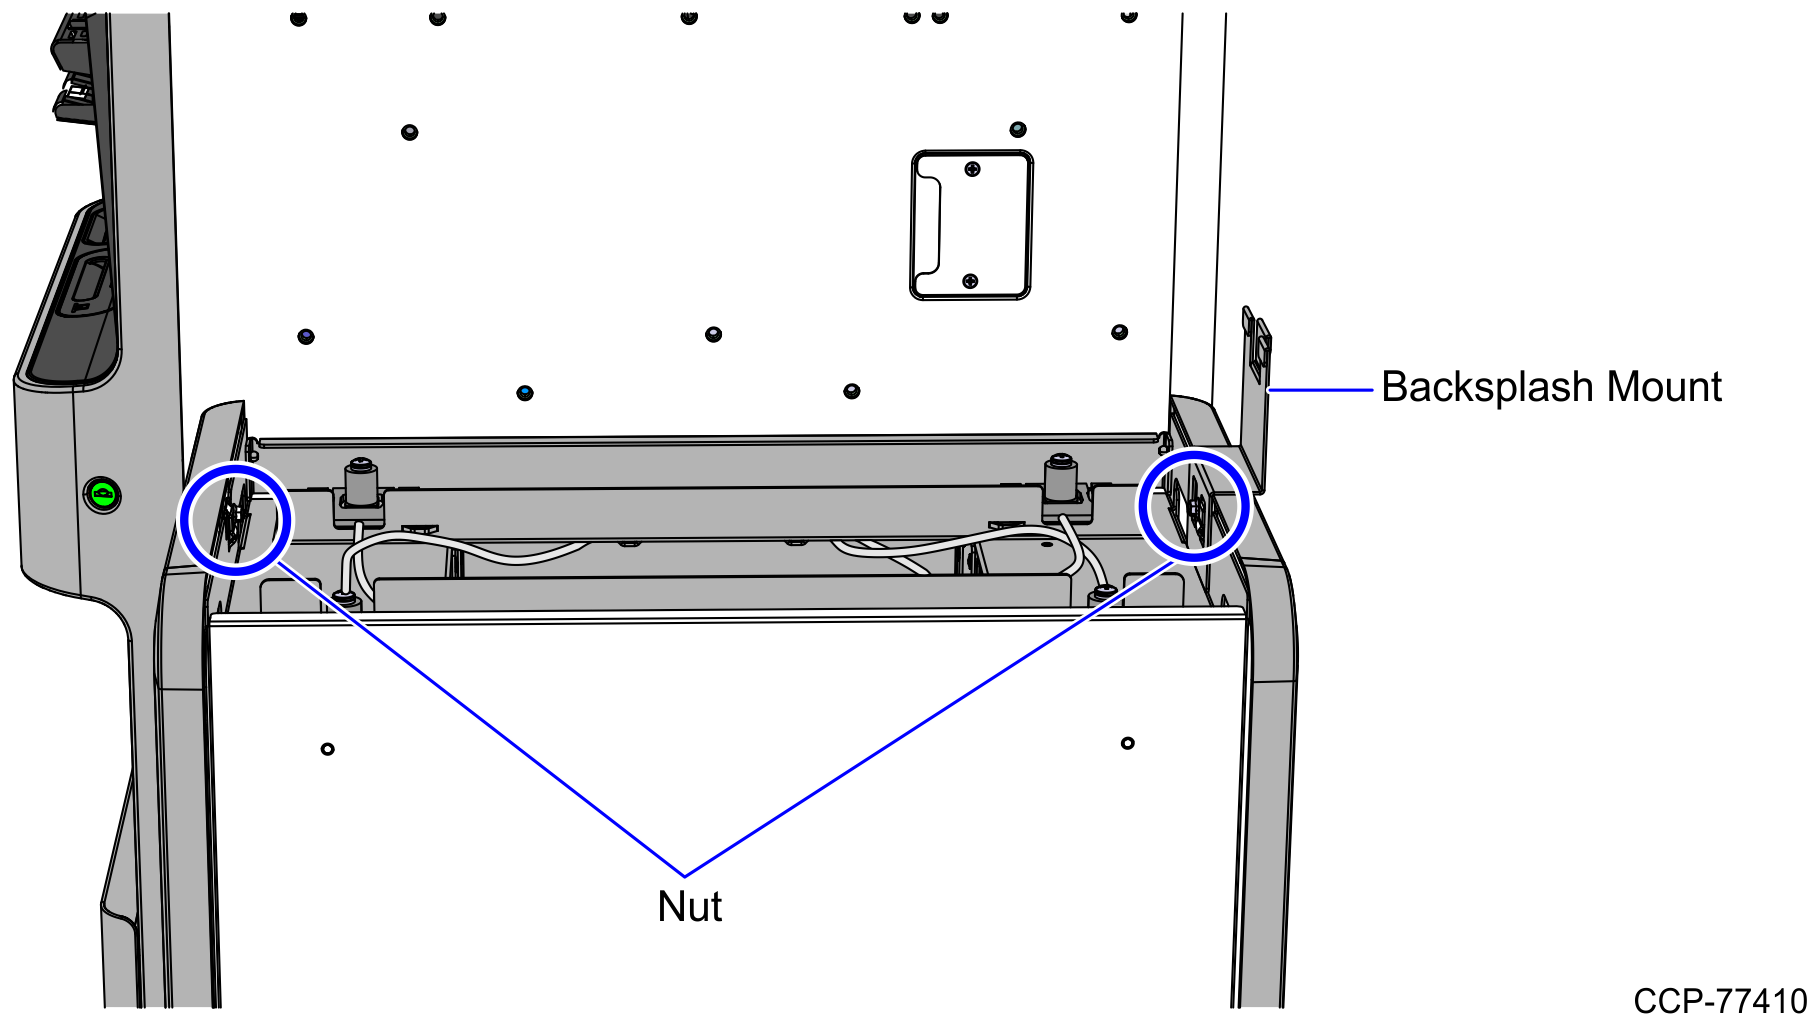
- Remove the Backsplash Mount.
- Remove the front and back color panels by pulling it up until it unclips from the Bagwell Frame.

- Disconnect the following cables:
- USB Power Cable from the Scale Controller
- Local Area Network (LAN) Cable from the Customer Interface
- AC Power Out Cables from the Power Strip
- AC Power In Cable from the Power StripNote
Remove cable ties, if necessary.
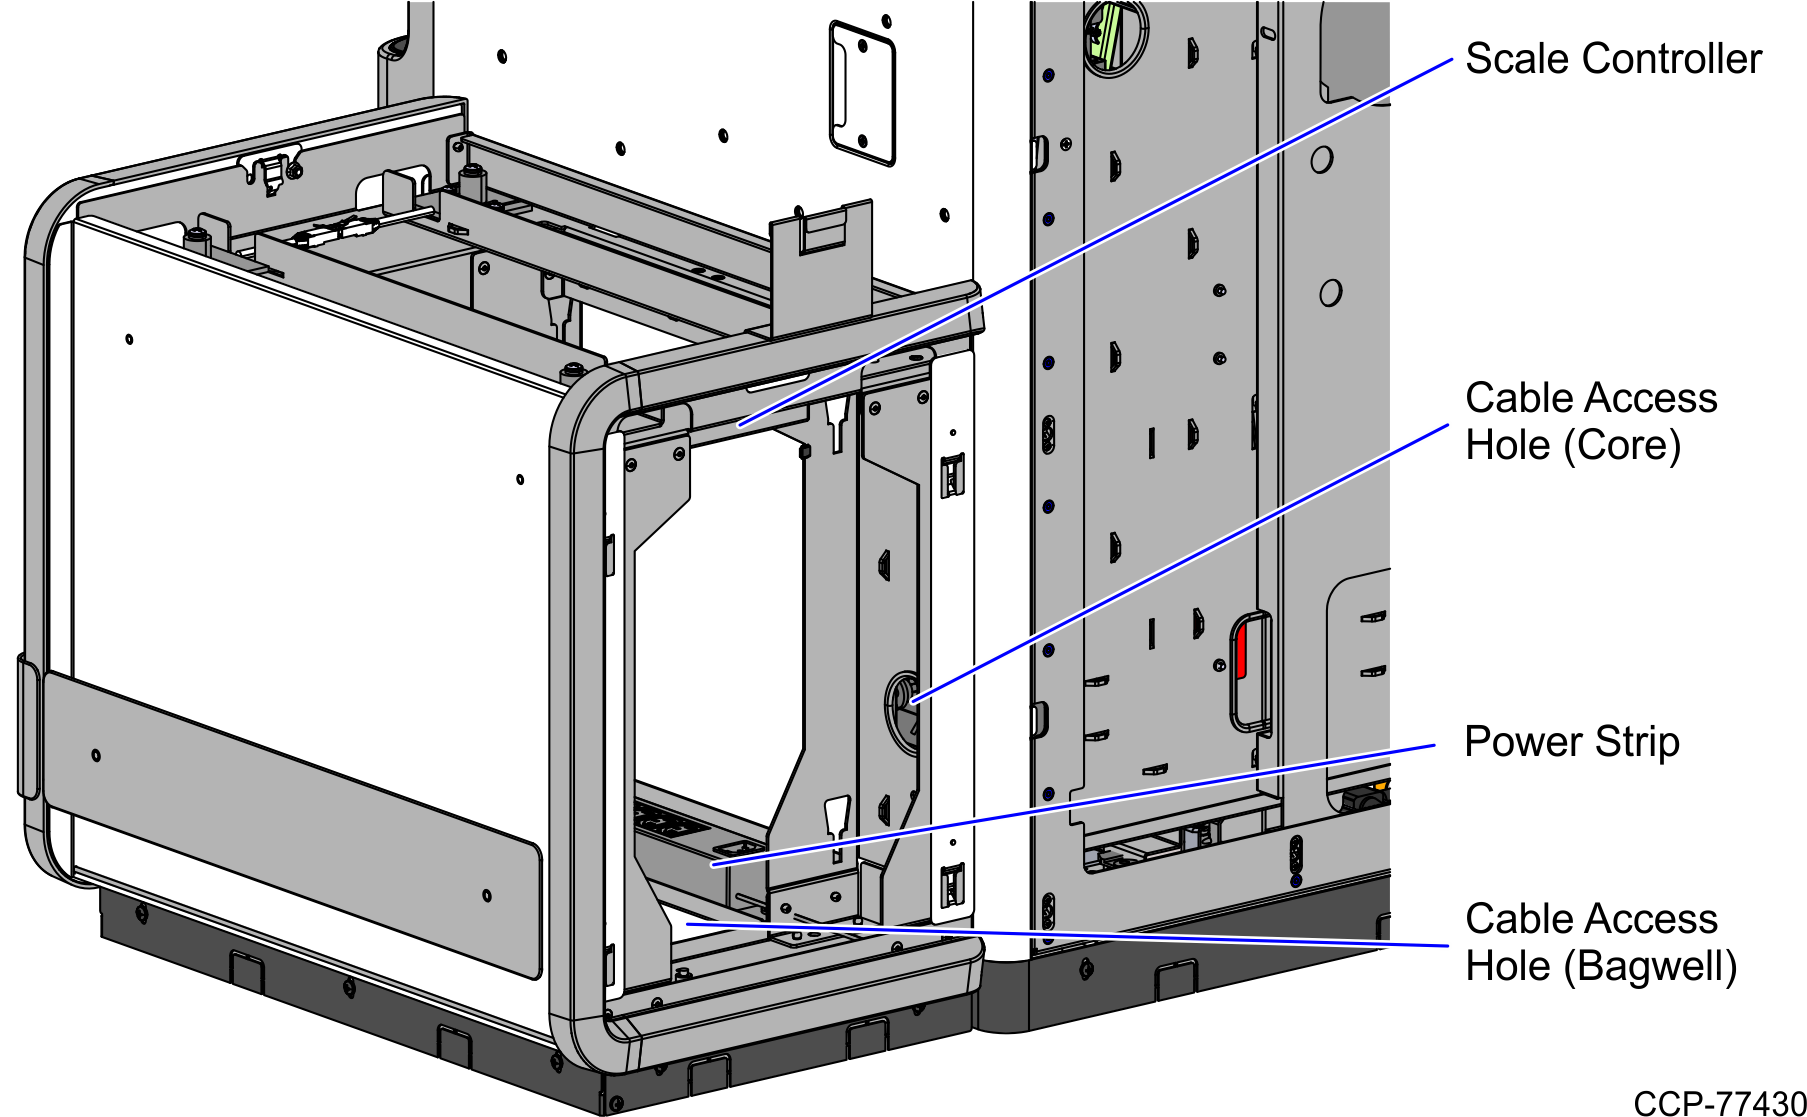
- Route the following cables through the cable access hole of the Core:
- USB Power Cable
- Local Area Network (LAN) Cable
- AC Power Out Cables
- Route the AC Power In Cable through the cable access hole on the base of the Bagwell.
- Remove the Bagwell by doing the following:
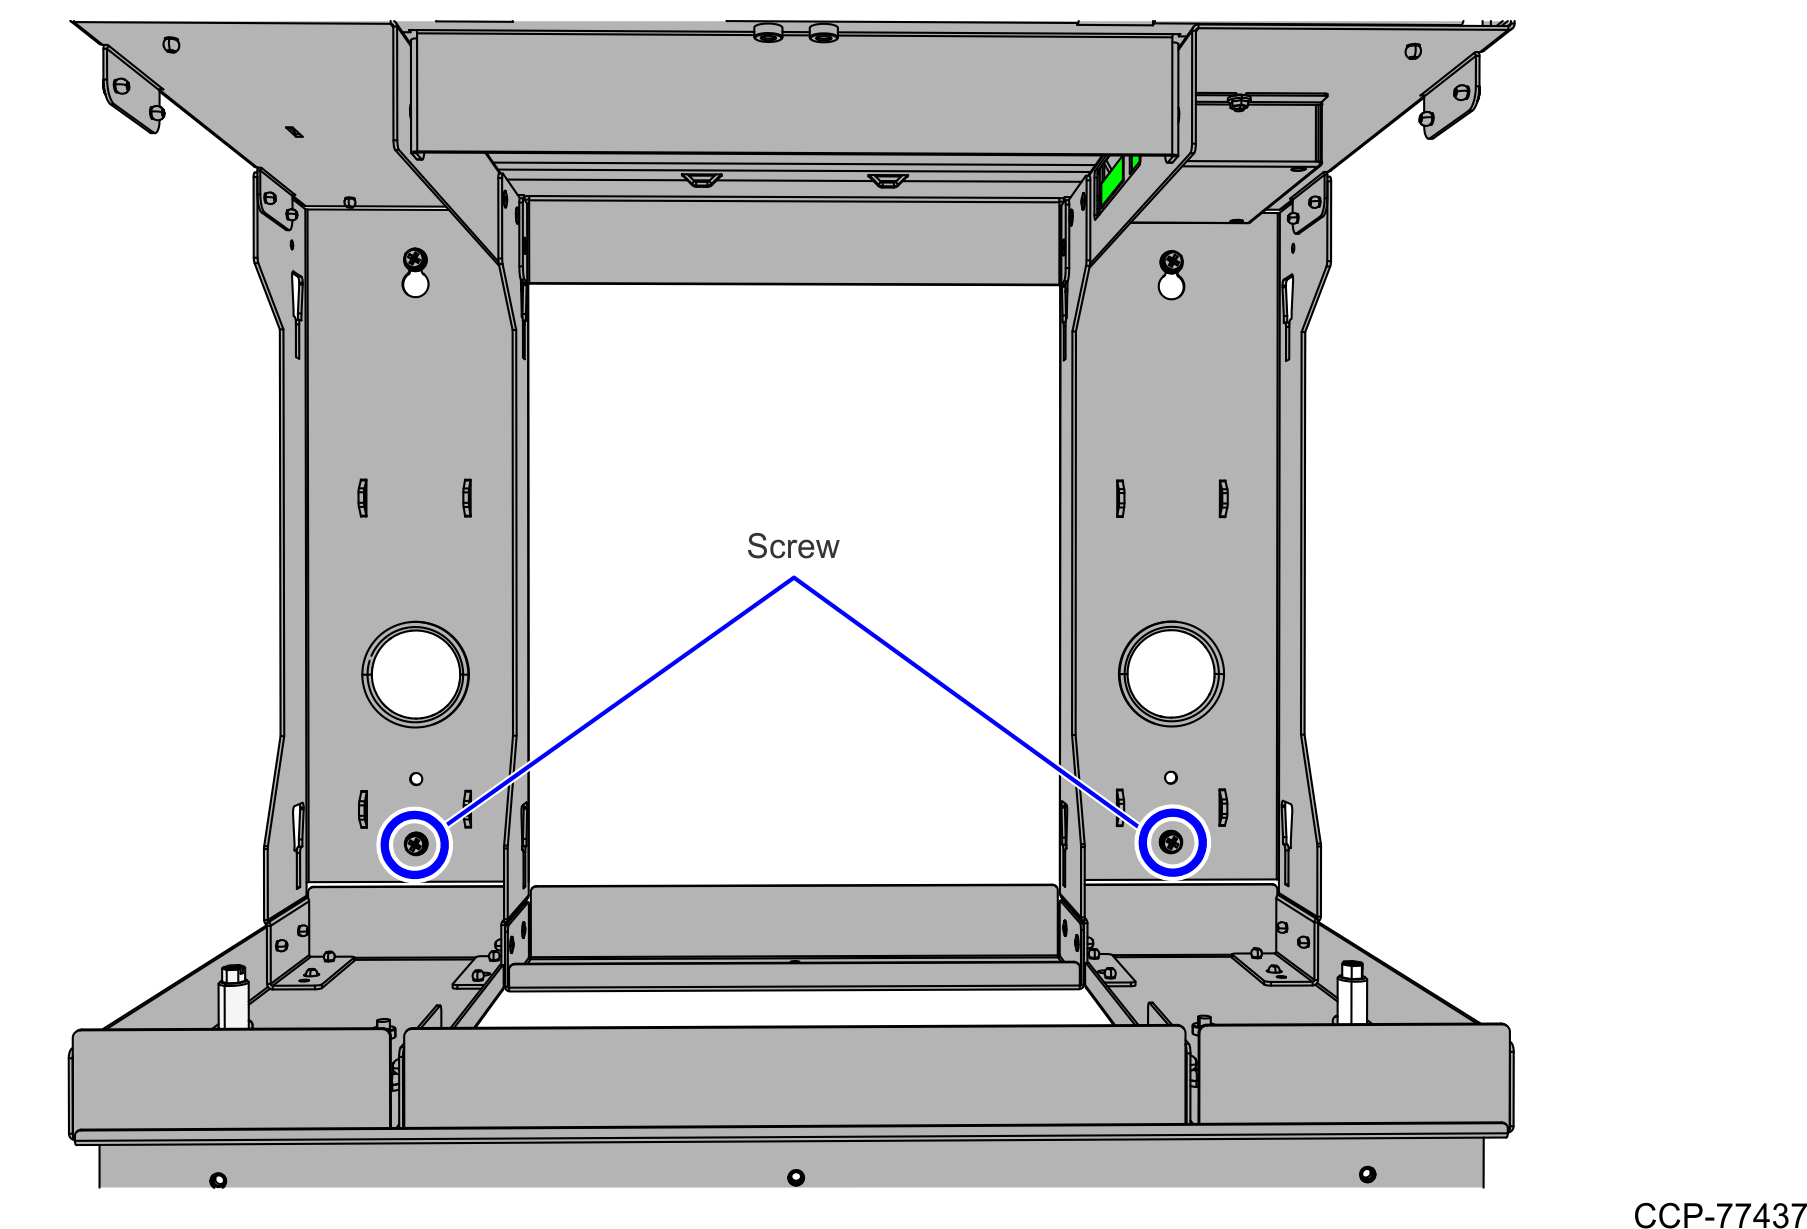
- Remove the two bottom screws that secure the Bagwell to the Core.
- Loosen the two upper screws that secure the Bagwell to the Core.
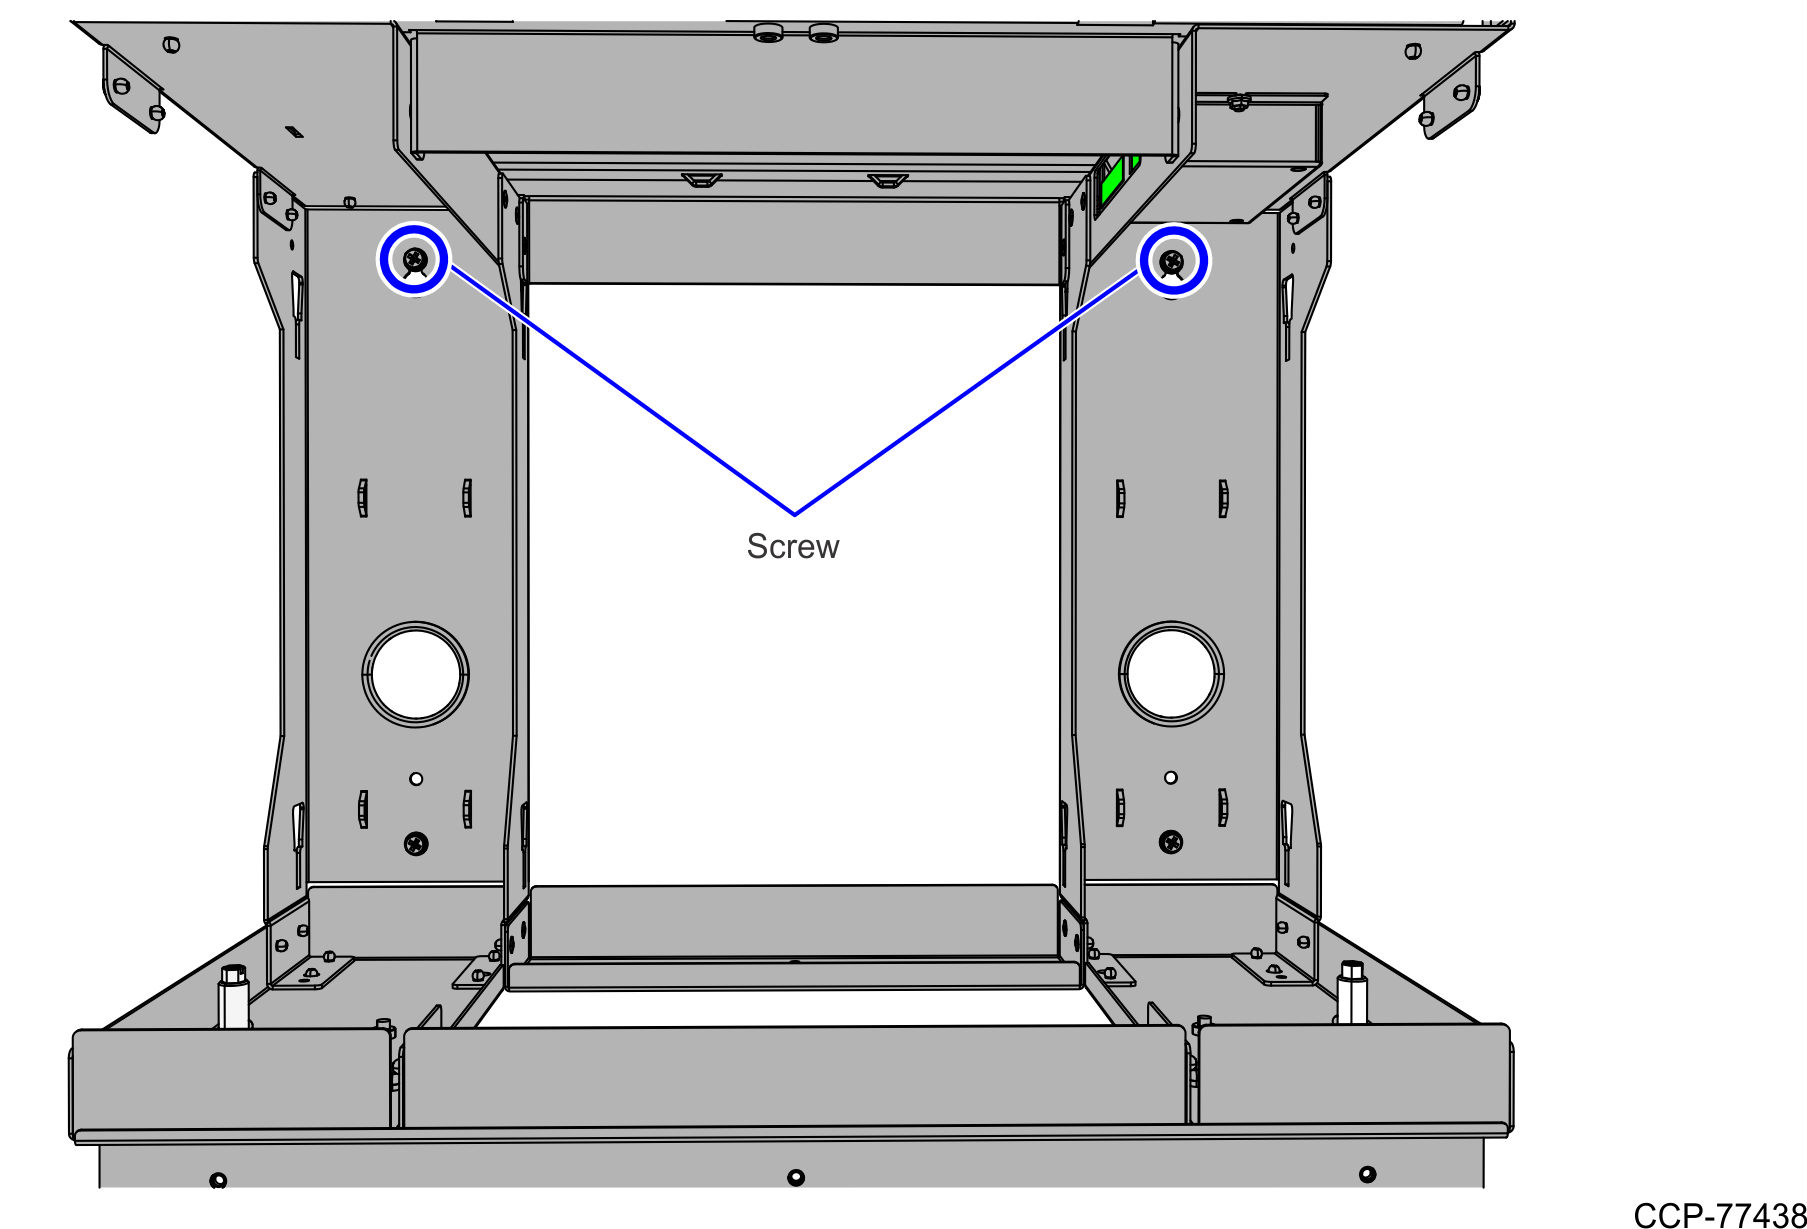
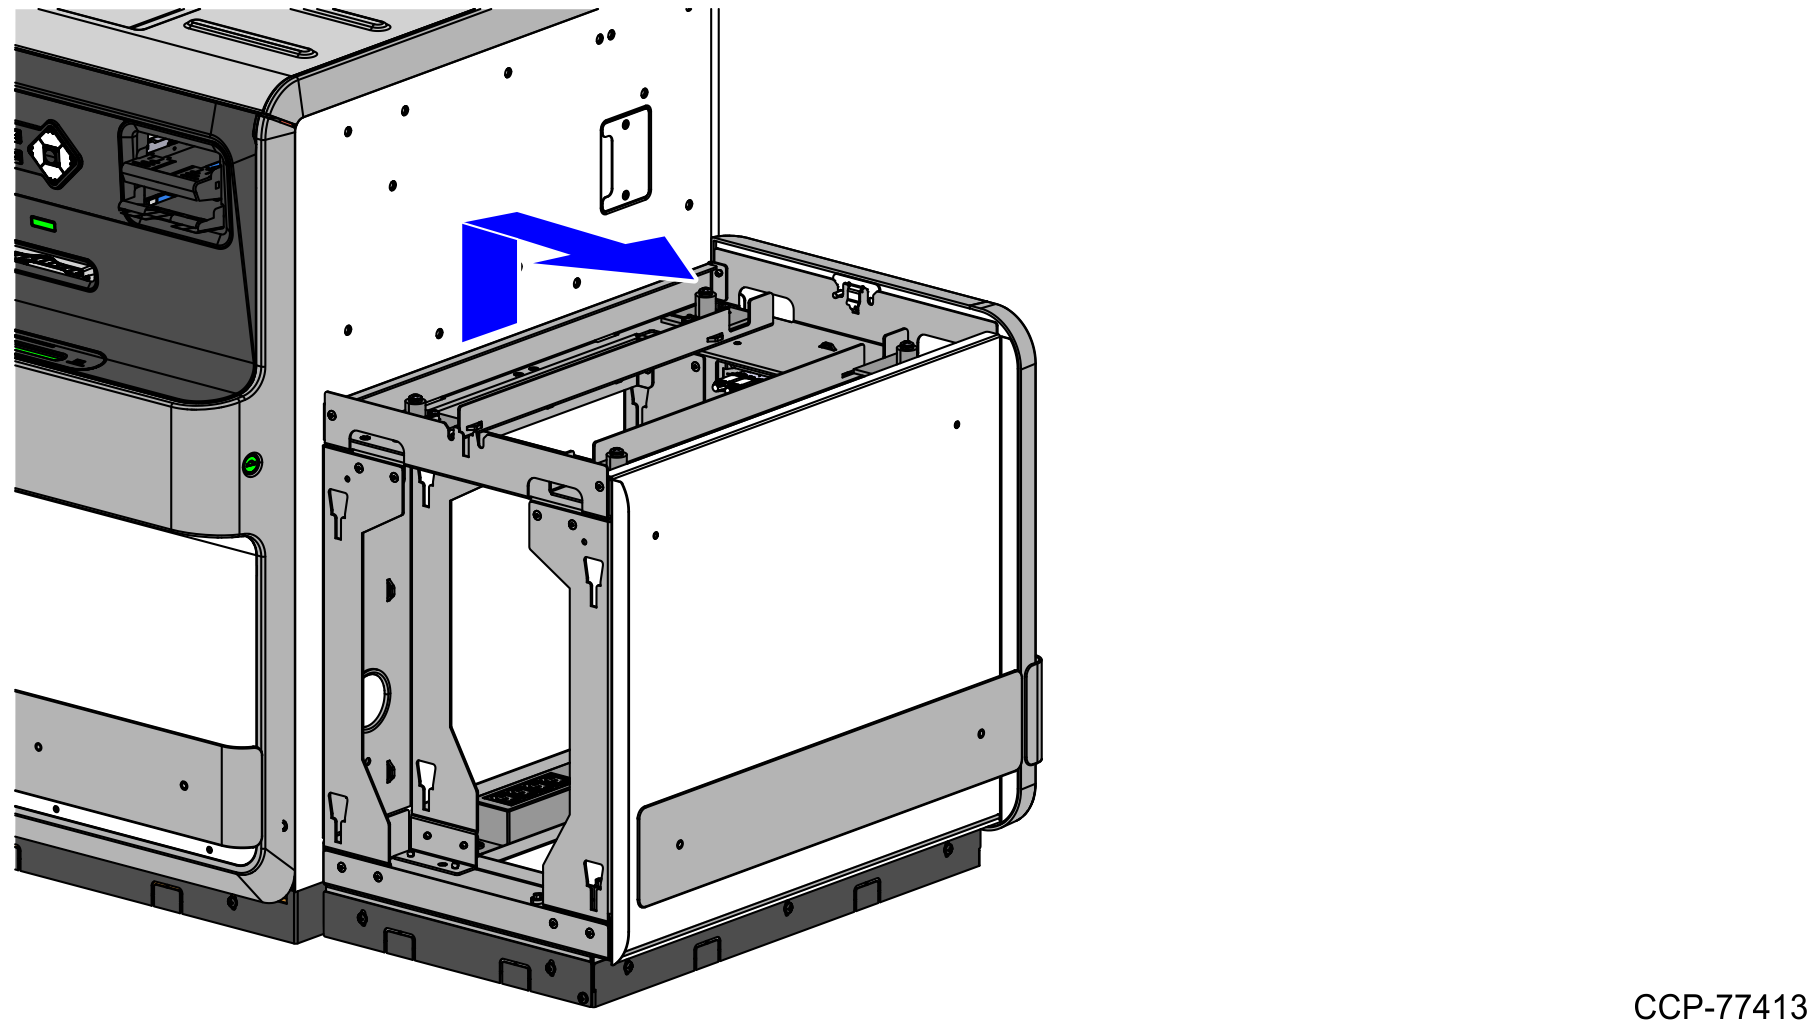
Lift the Bagwell up and away from the Core. The screw heads will pass through the key holes of the Bagwell Side Support.
NoteIf no new Bagwell will be installed in the same orientation, simply remove all four screws that secure the Bagwell to the Core.
- Remove the two bottom screws that secure the Bagwell to the Core.