Setting up the Scale Tray Expansion
To set up the Scale Tray Expansion, follow these steps:
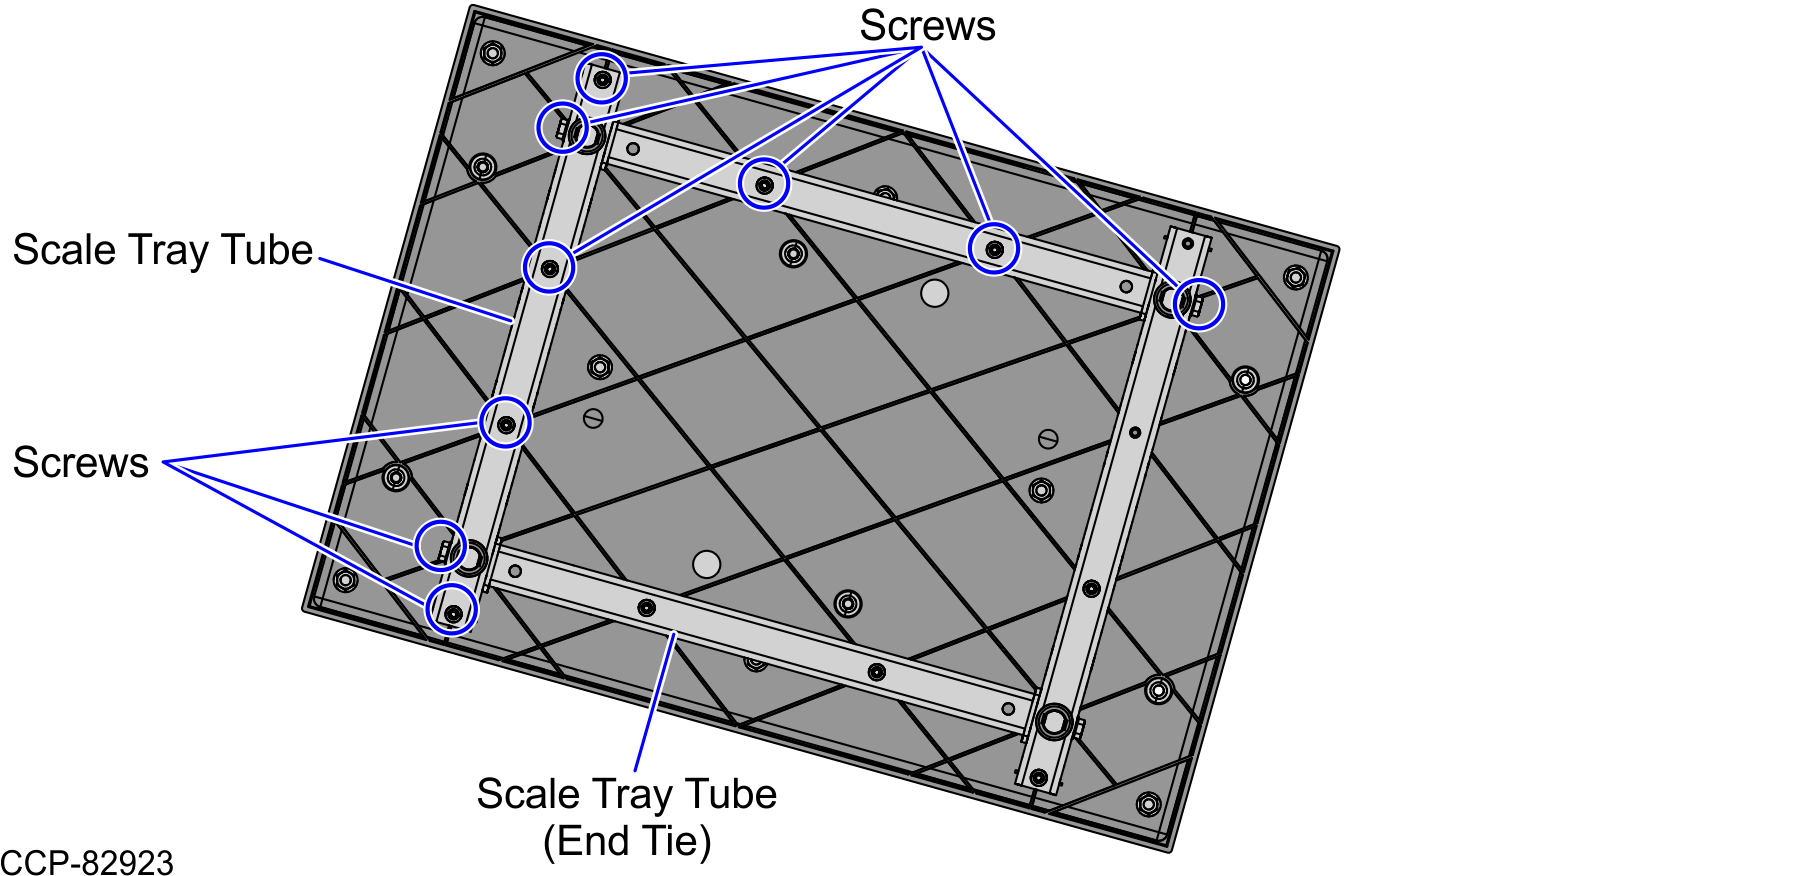
- Under the existing Scale Tray, detach one of the Scale Tray Tube (End Tie) by doing the following:
Remove nine (9) screws from the Scale Tray Tubes, as shown in the image below.
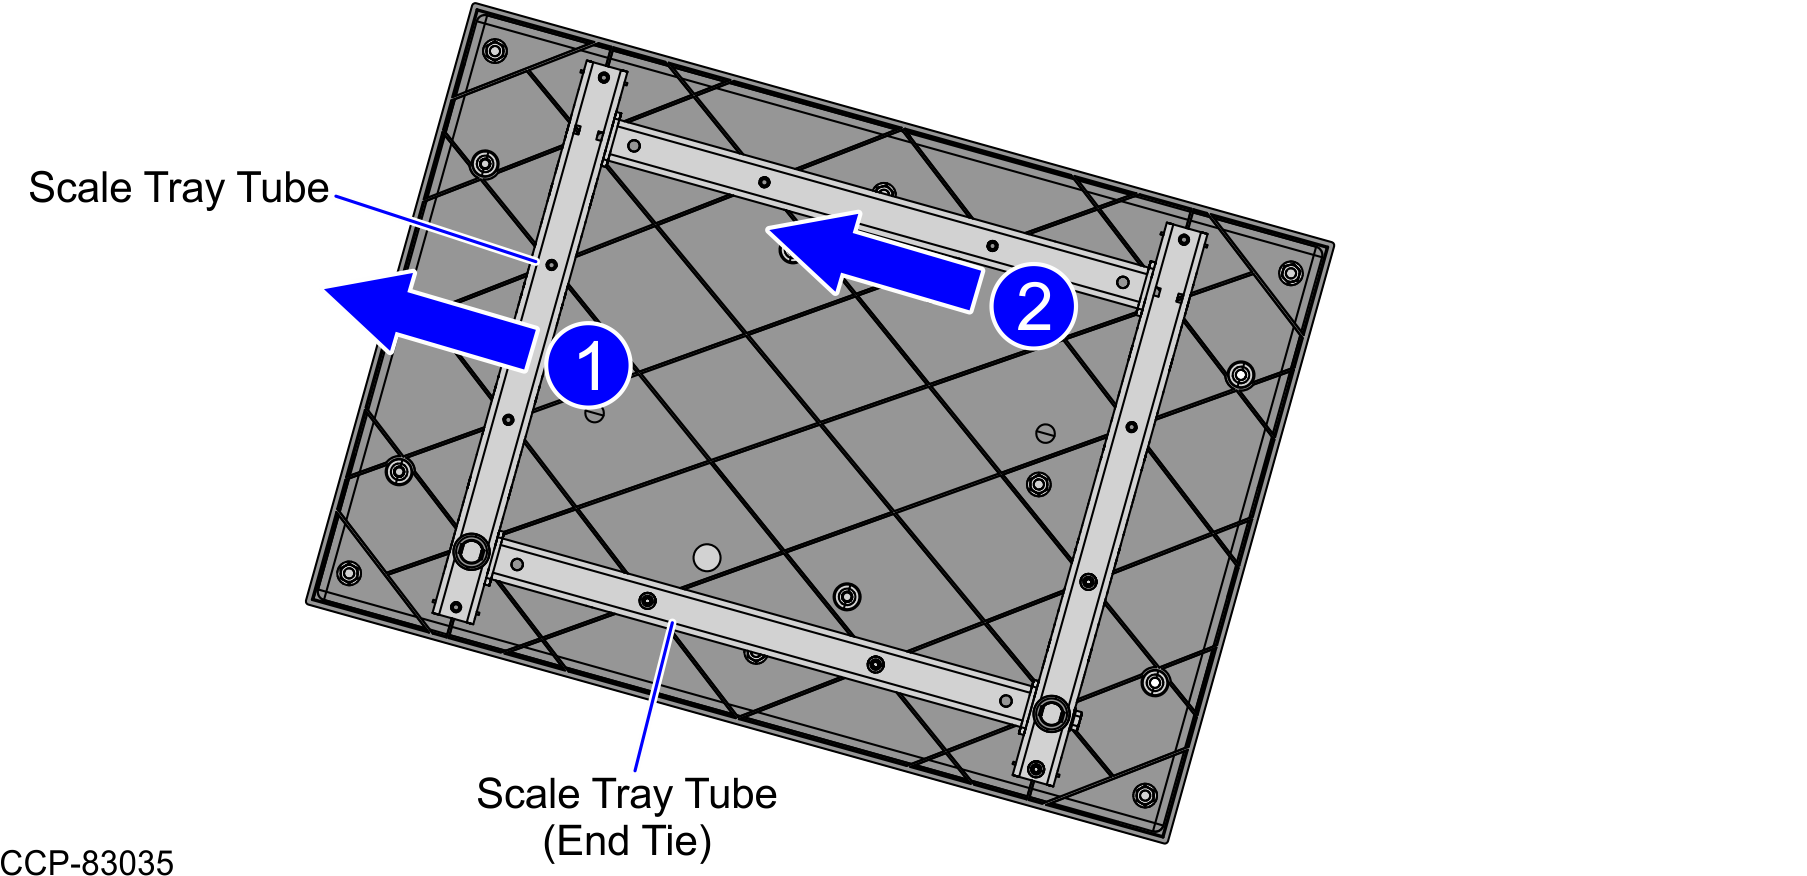
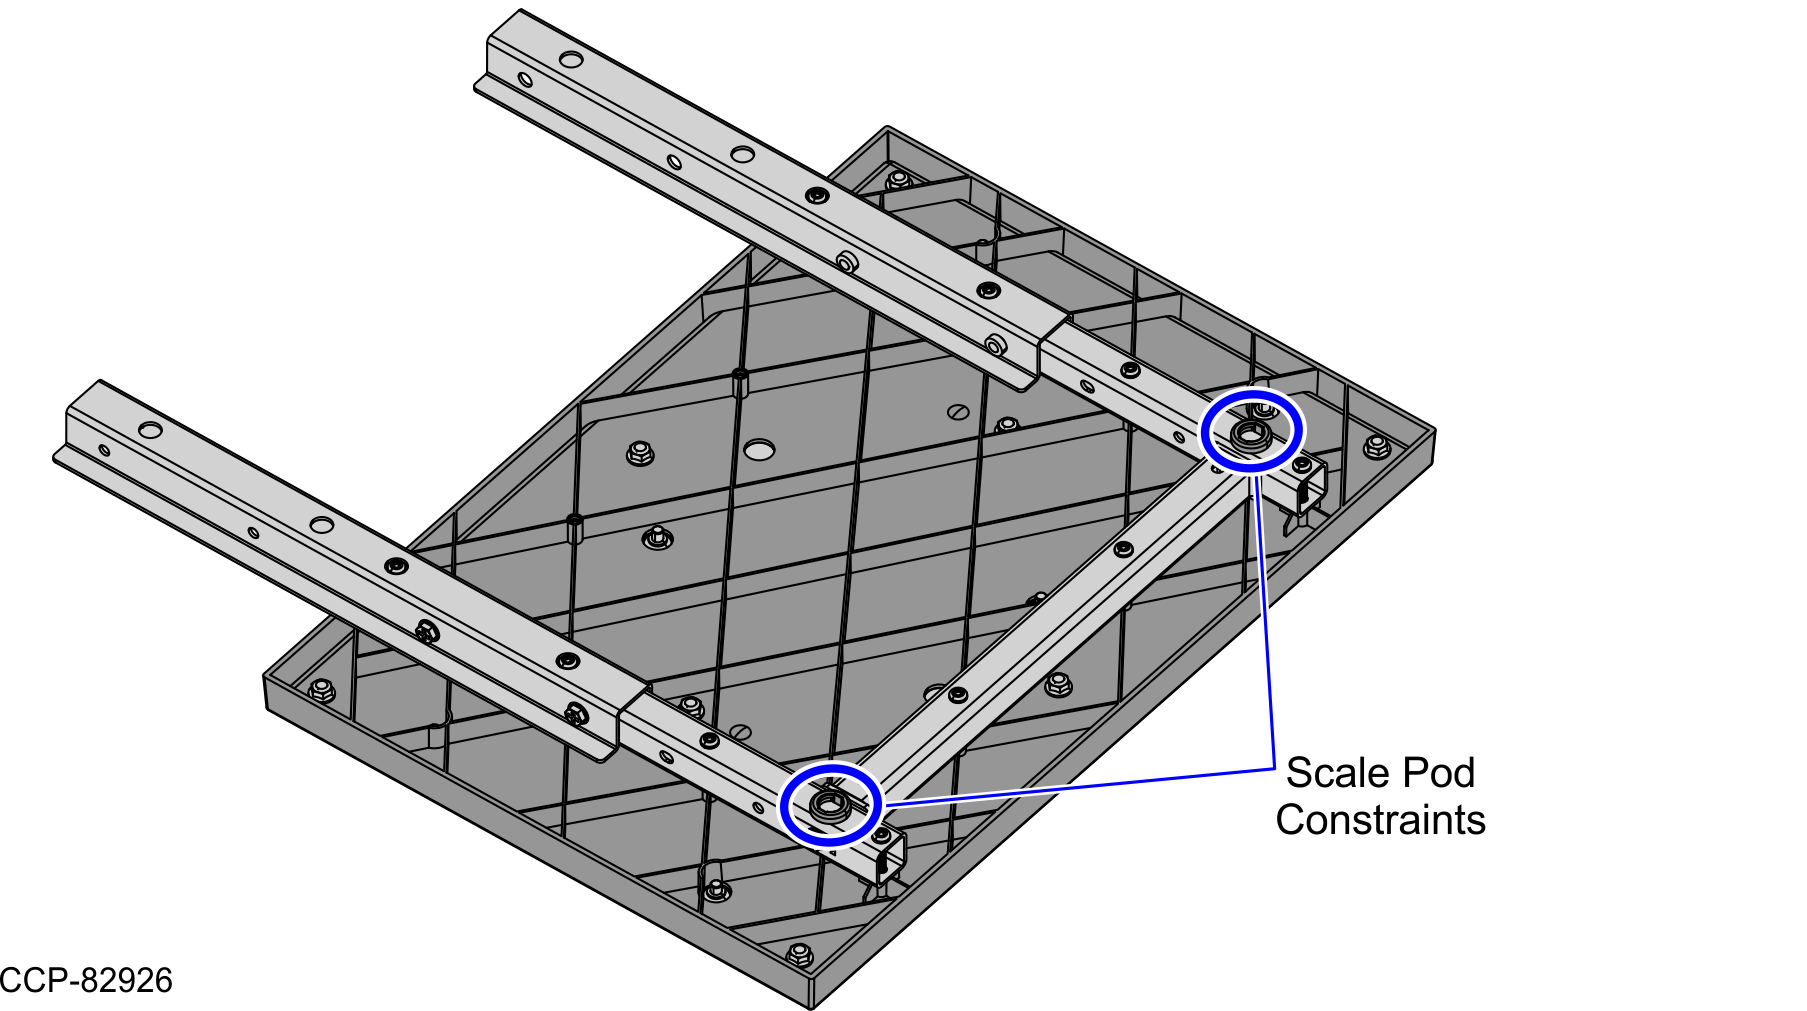
- Remove two (2) Scale Pod Constraints by using your fingers to pull and detach each Constraint from the corresponding cutouts on the Scale Tray Tubes, as shown in the image below.
- Remove the Scale Tray Tubes.
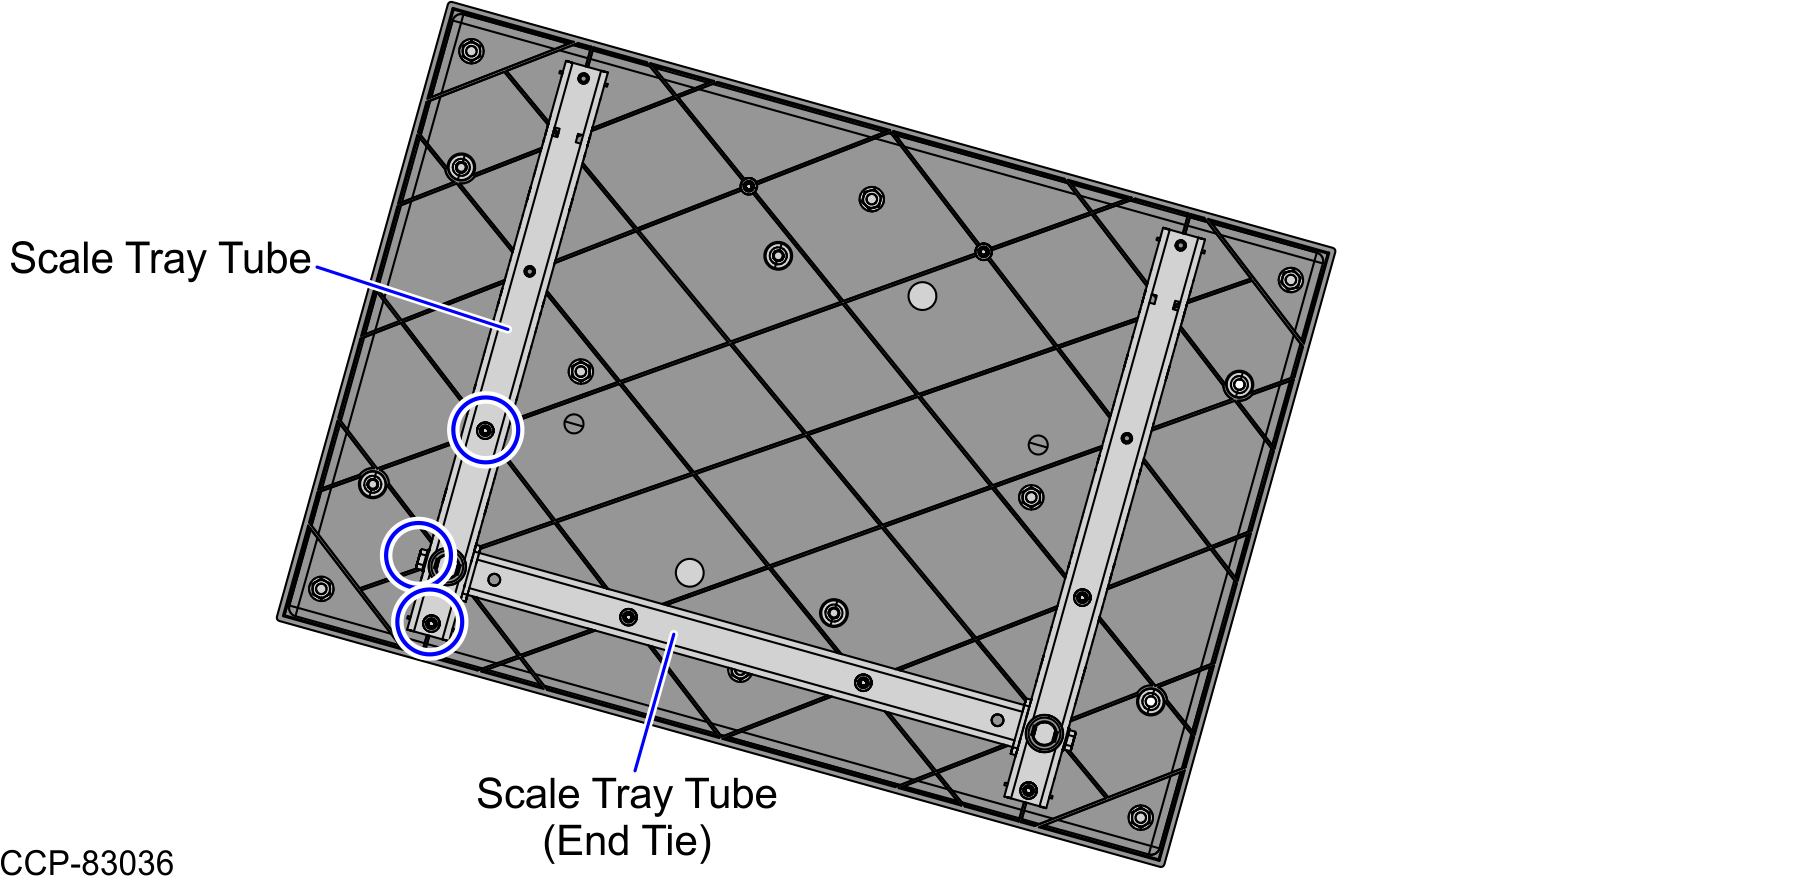
Re-attach the Scale Tray Tube using three (3) screws, as shown in the image below.
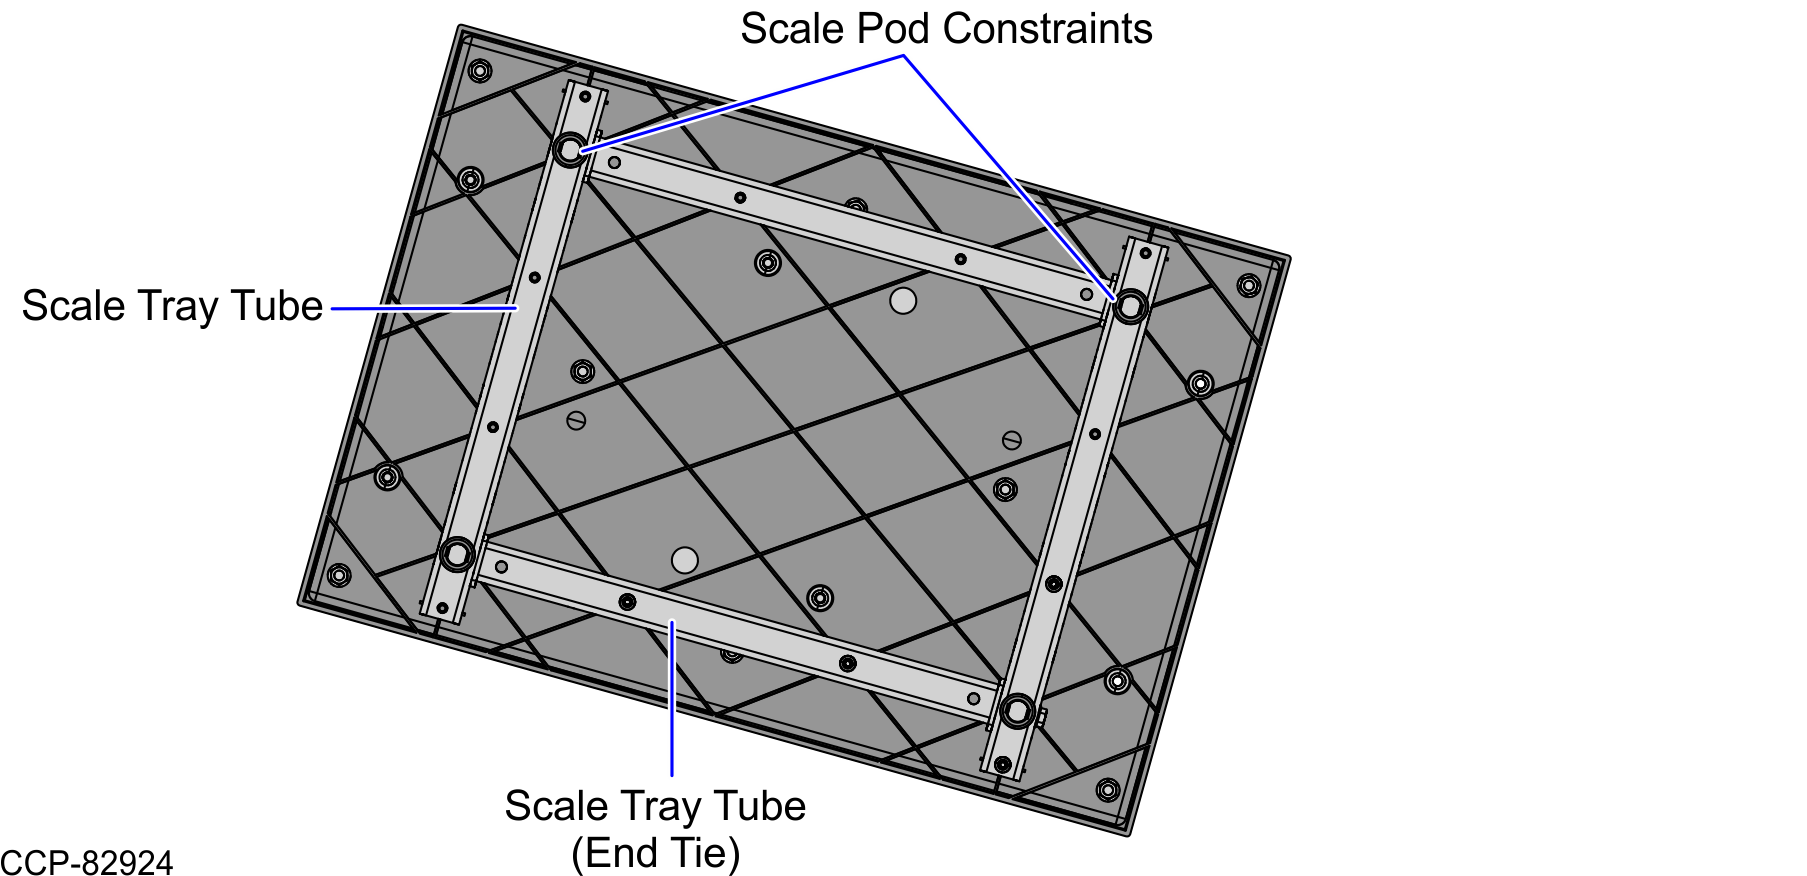
- Under the Scale Tray Expansion, attach the tubes by doing the following:
- Attach one (1) Scale Tray Tube (End Tie) using two (2) screws.
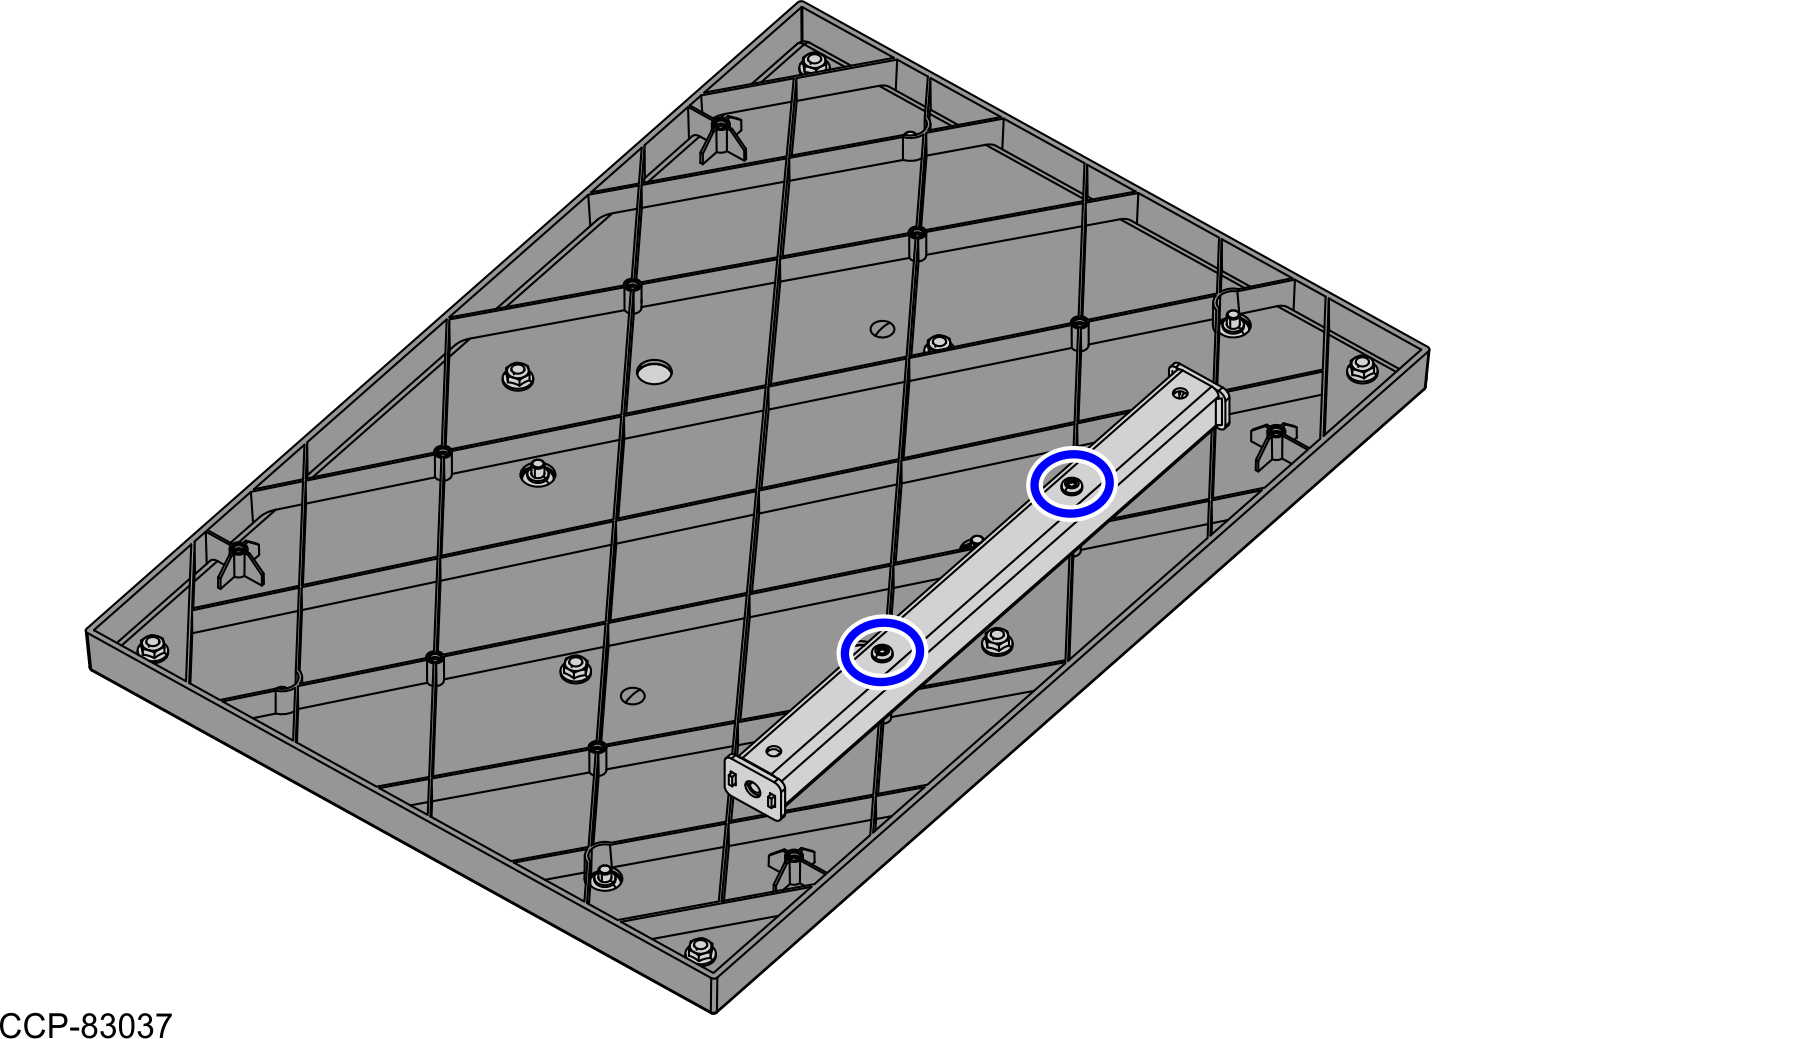
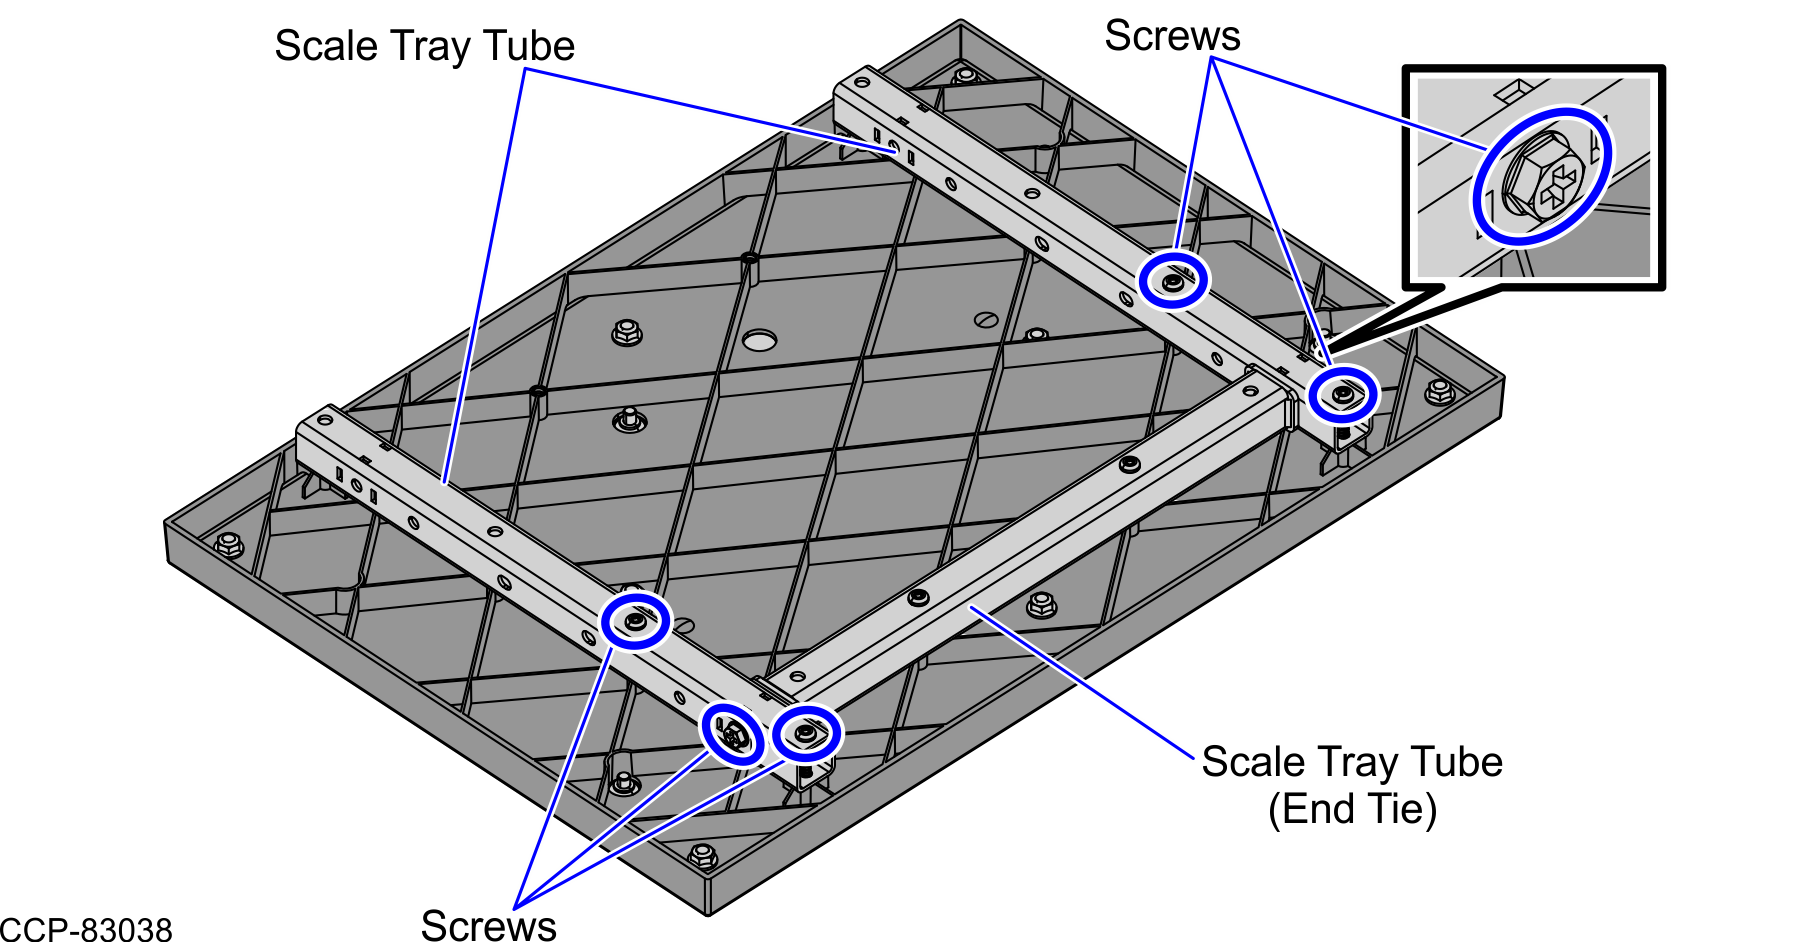
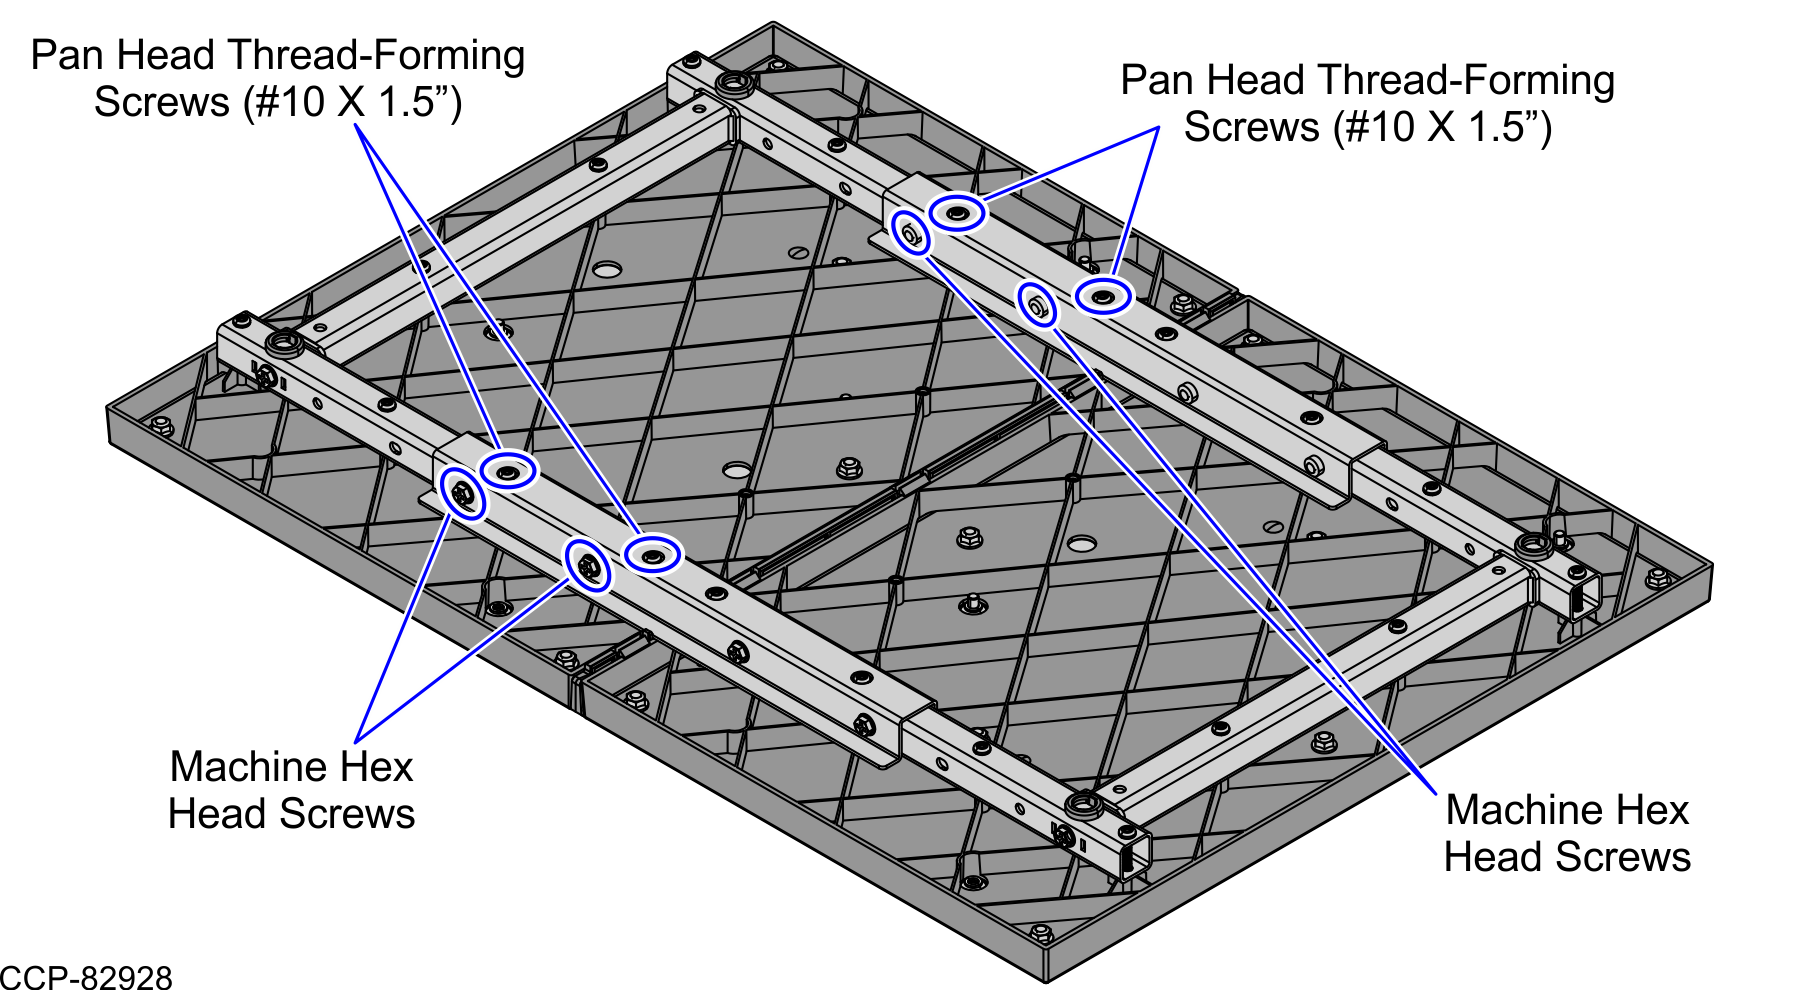
- Attach a Scale Tray Tube at each end of the Scale Tray Tube (End Tie) and secure each tube using three (3) screws, as shown in the image below.
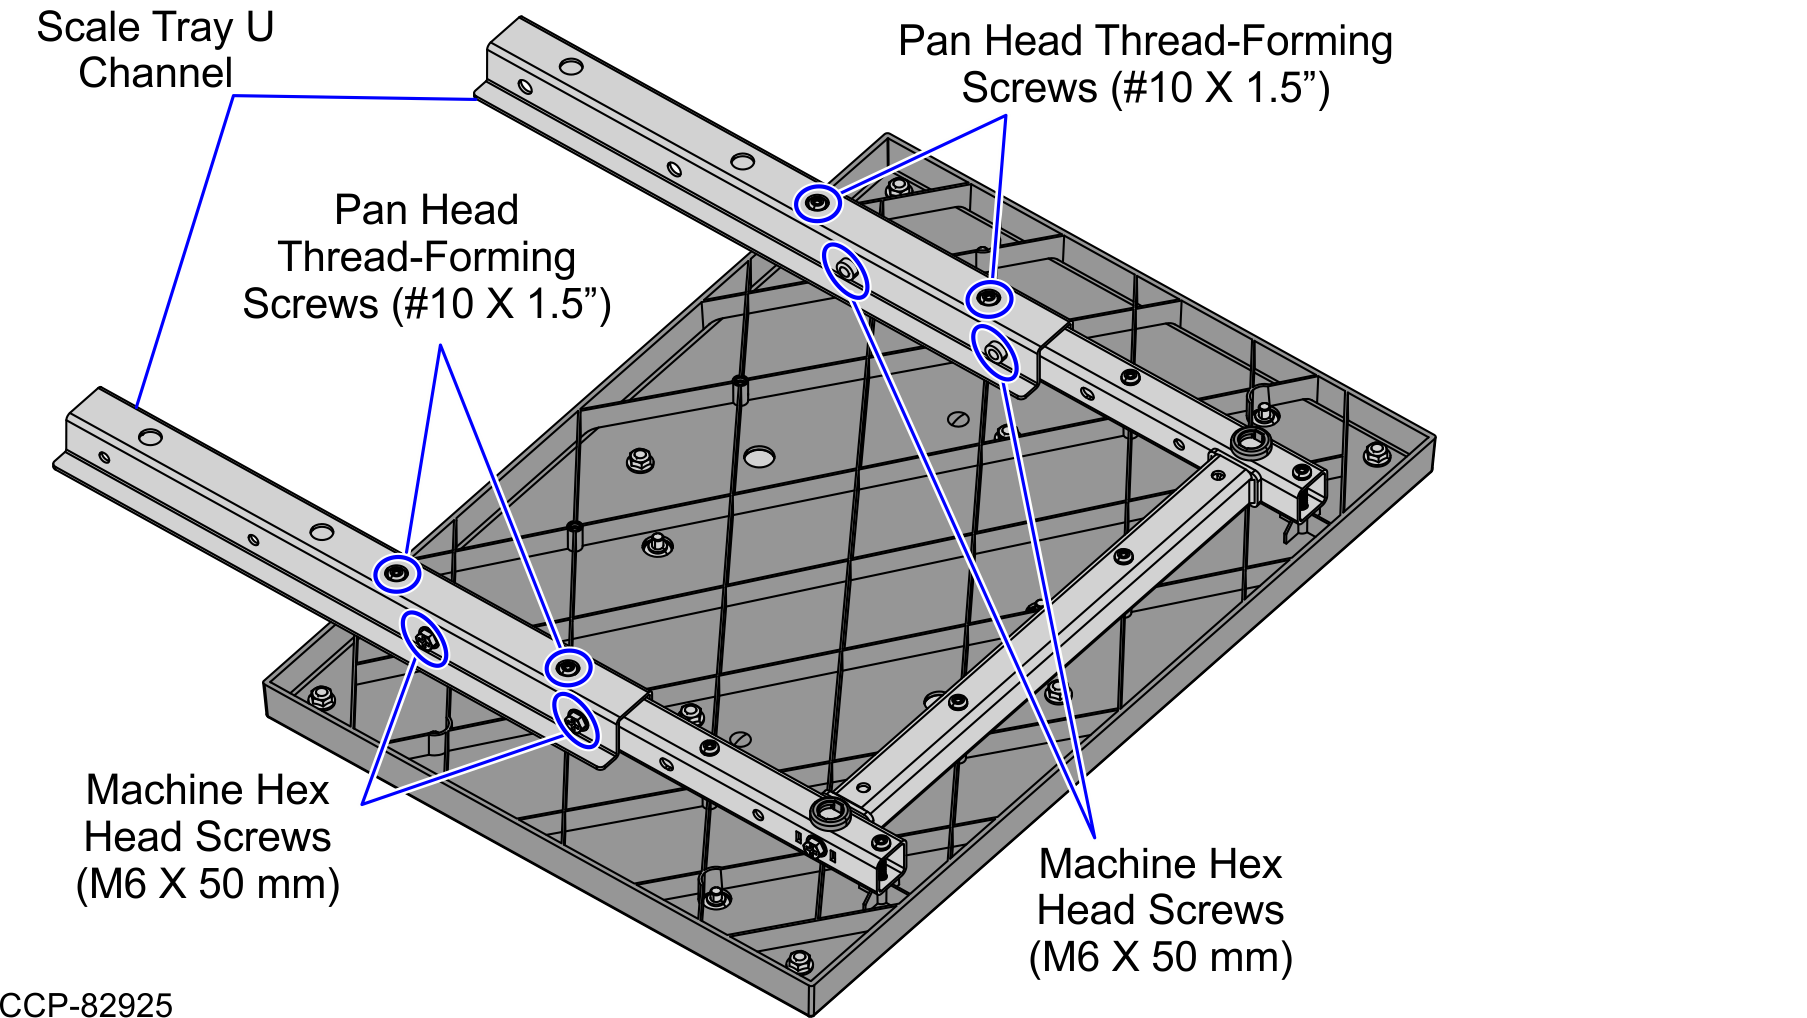
- Attach a Scale Tray U Channel at each end of the Scale Tray Tube and secure each channel using four (4) screws, as shown in the image below.
- Install two (2) Scale Pod Constraints by using your fingers to push and attach each Constraint into the corresponding cutouts on the Scale Tray Tubes.
- Place the Scale Tray Filler on the edge of the Scale Tray Expansion, as shown in the image below.
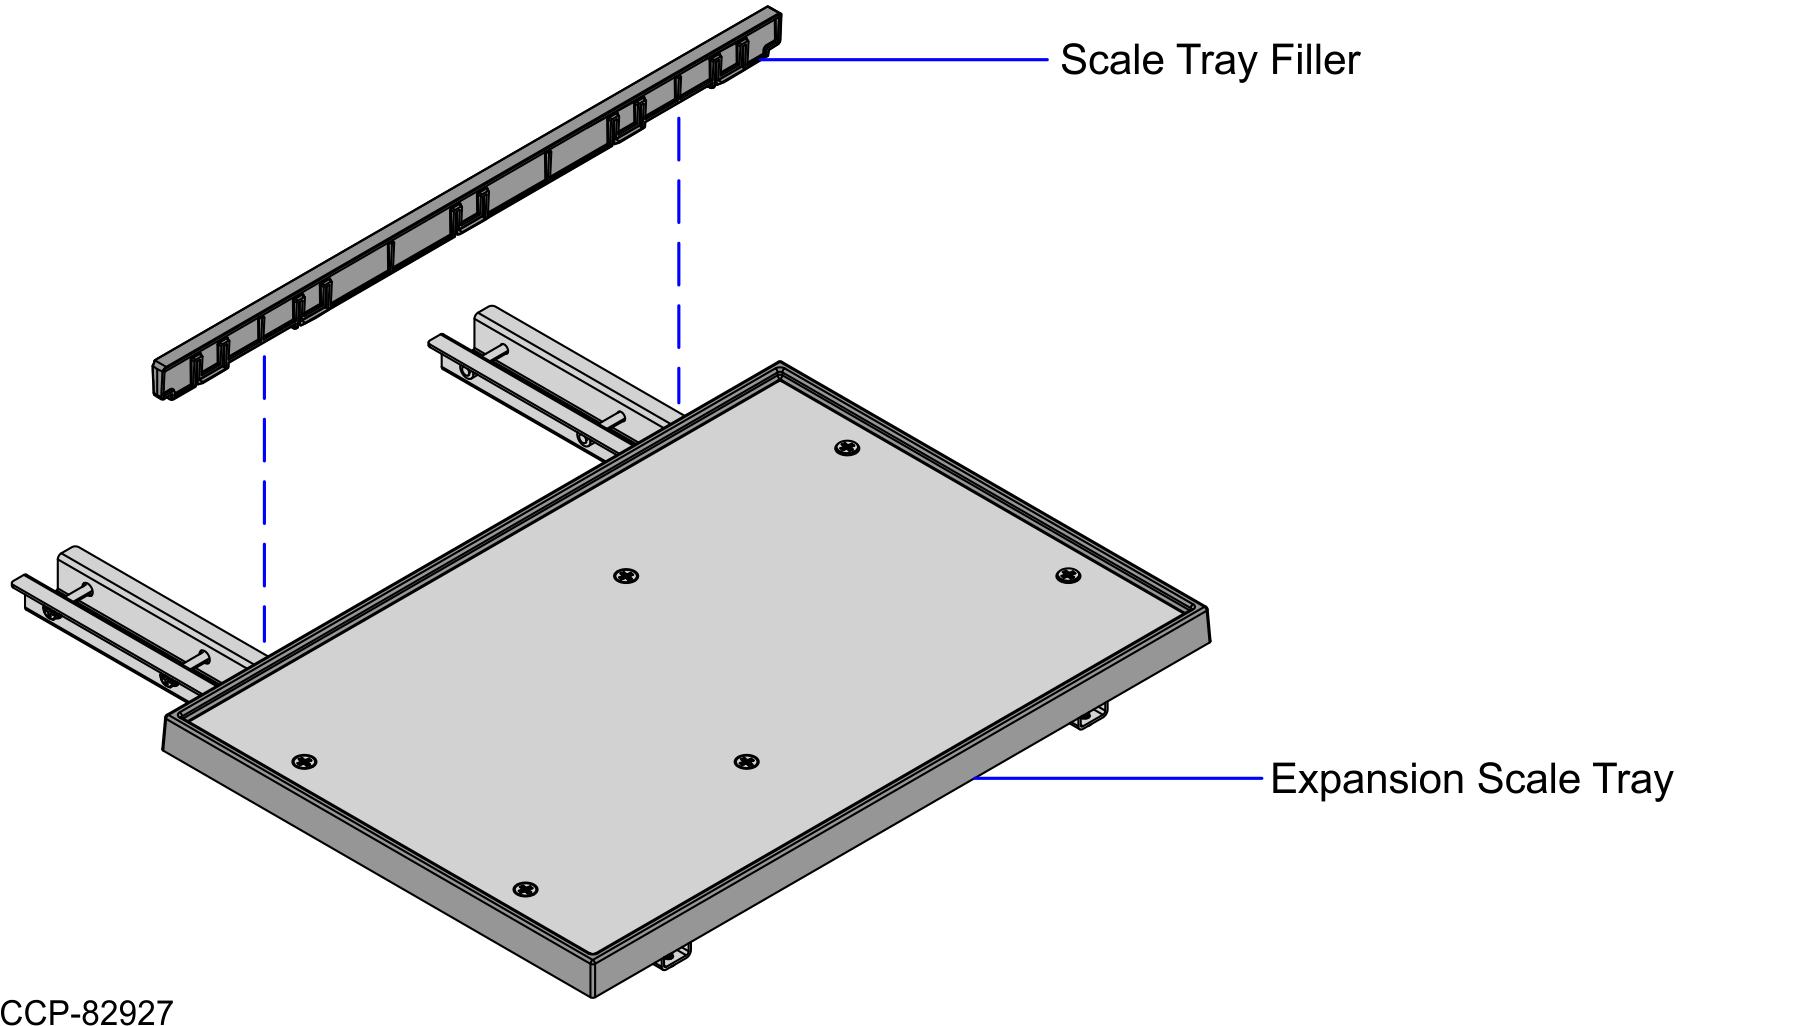 Note
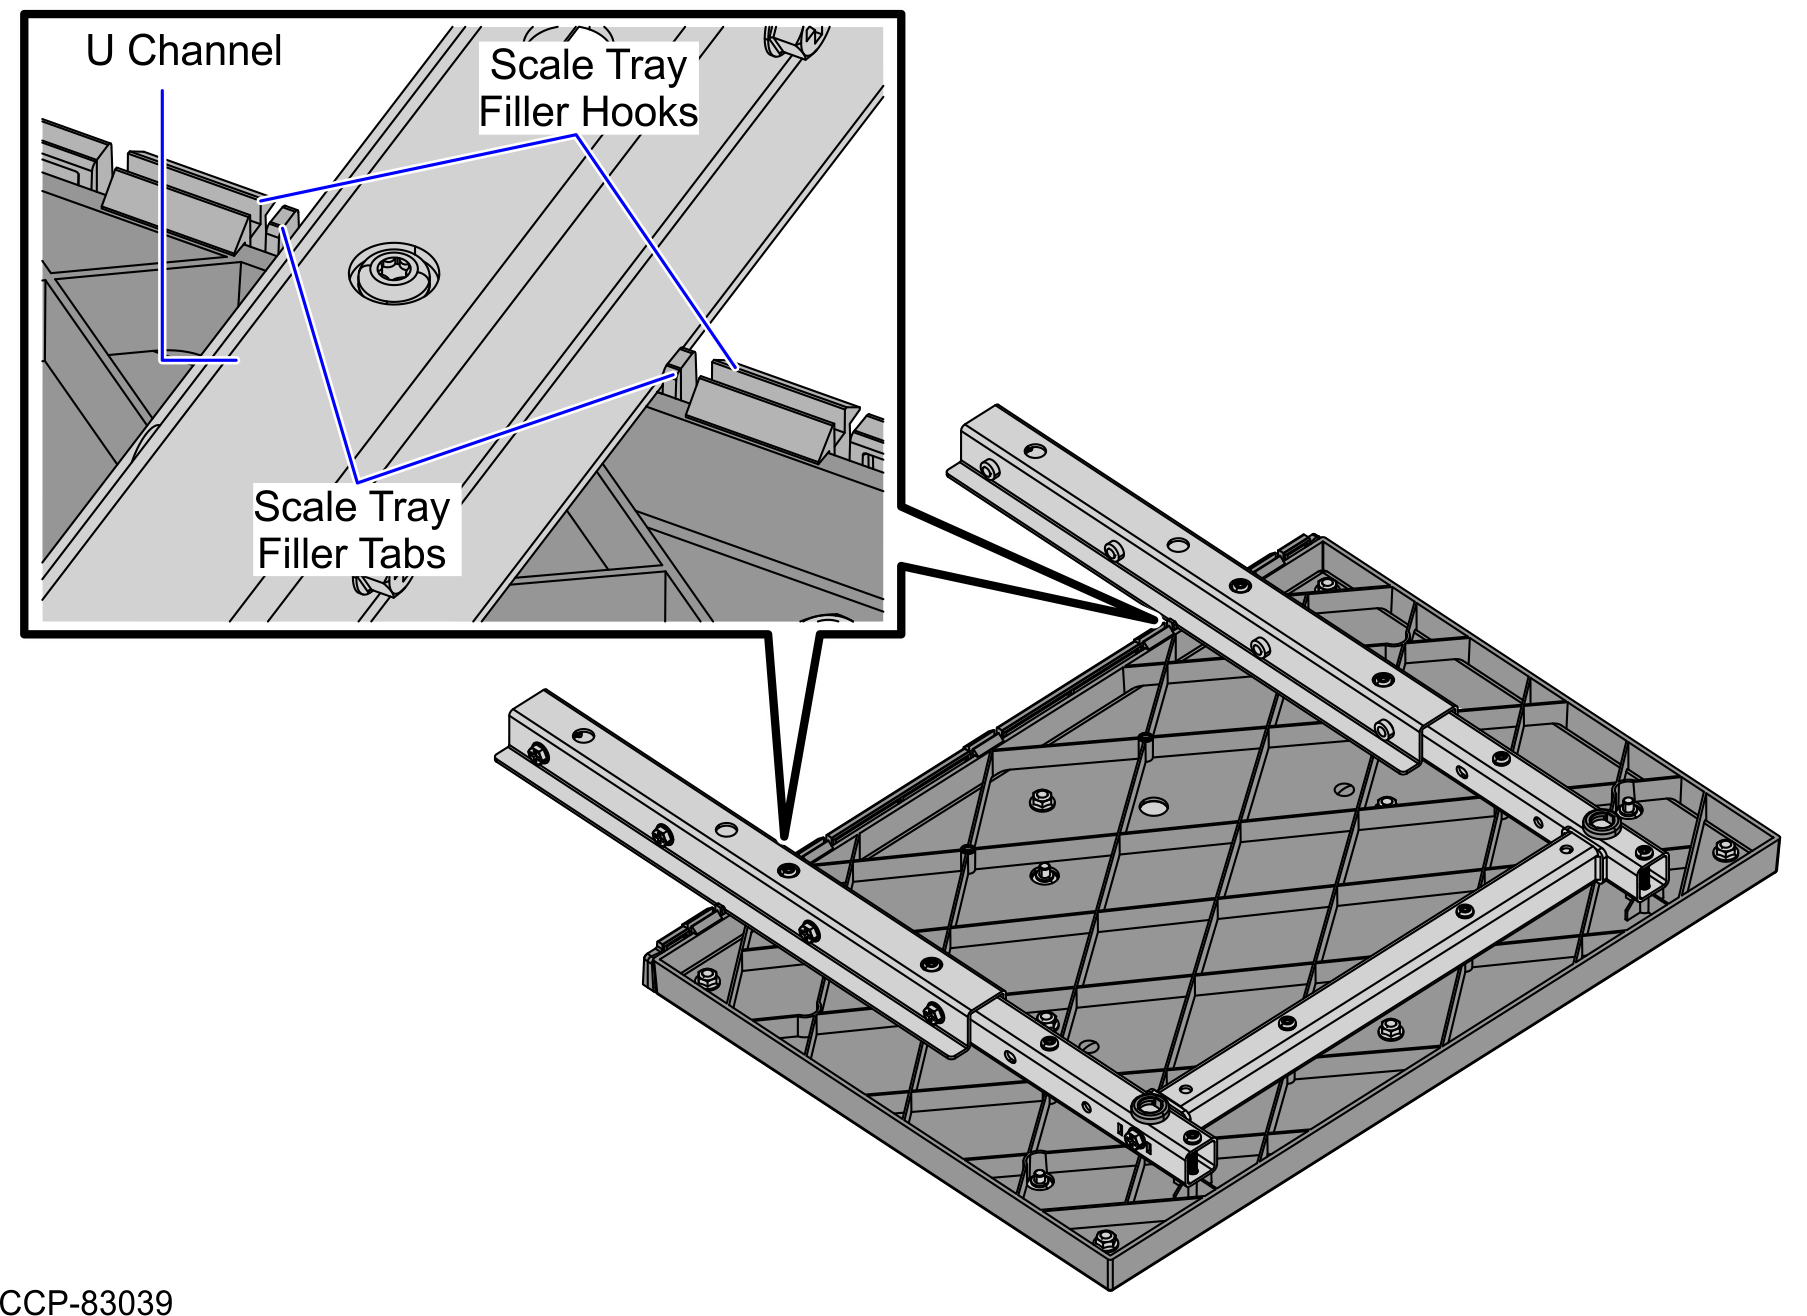
NoteThe Scale Tray Filler tabs should attach to each U Channel and the Scale Tray Filler hooks should attach to the Scale Trays on each side. Refer to the image below for the tabs and hooks.
- Attach one (1) Scale Tray Tube (End Tie) using two (2) screws.
- Insert the Scale Tray Tube of the existing Scale Tray into each Scale Tray U Channel on the Scale Tray Expansion.
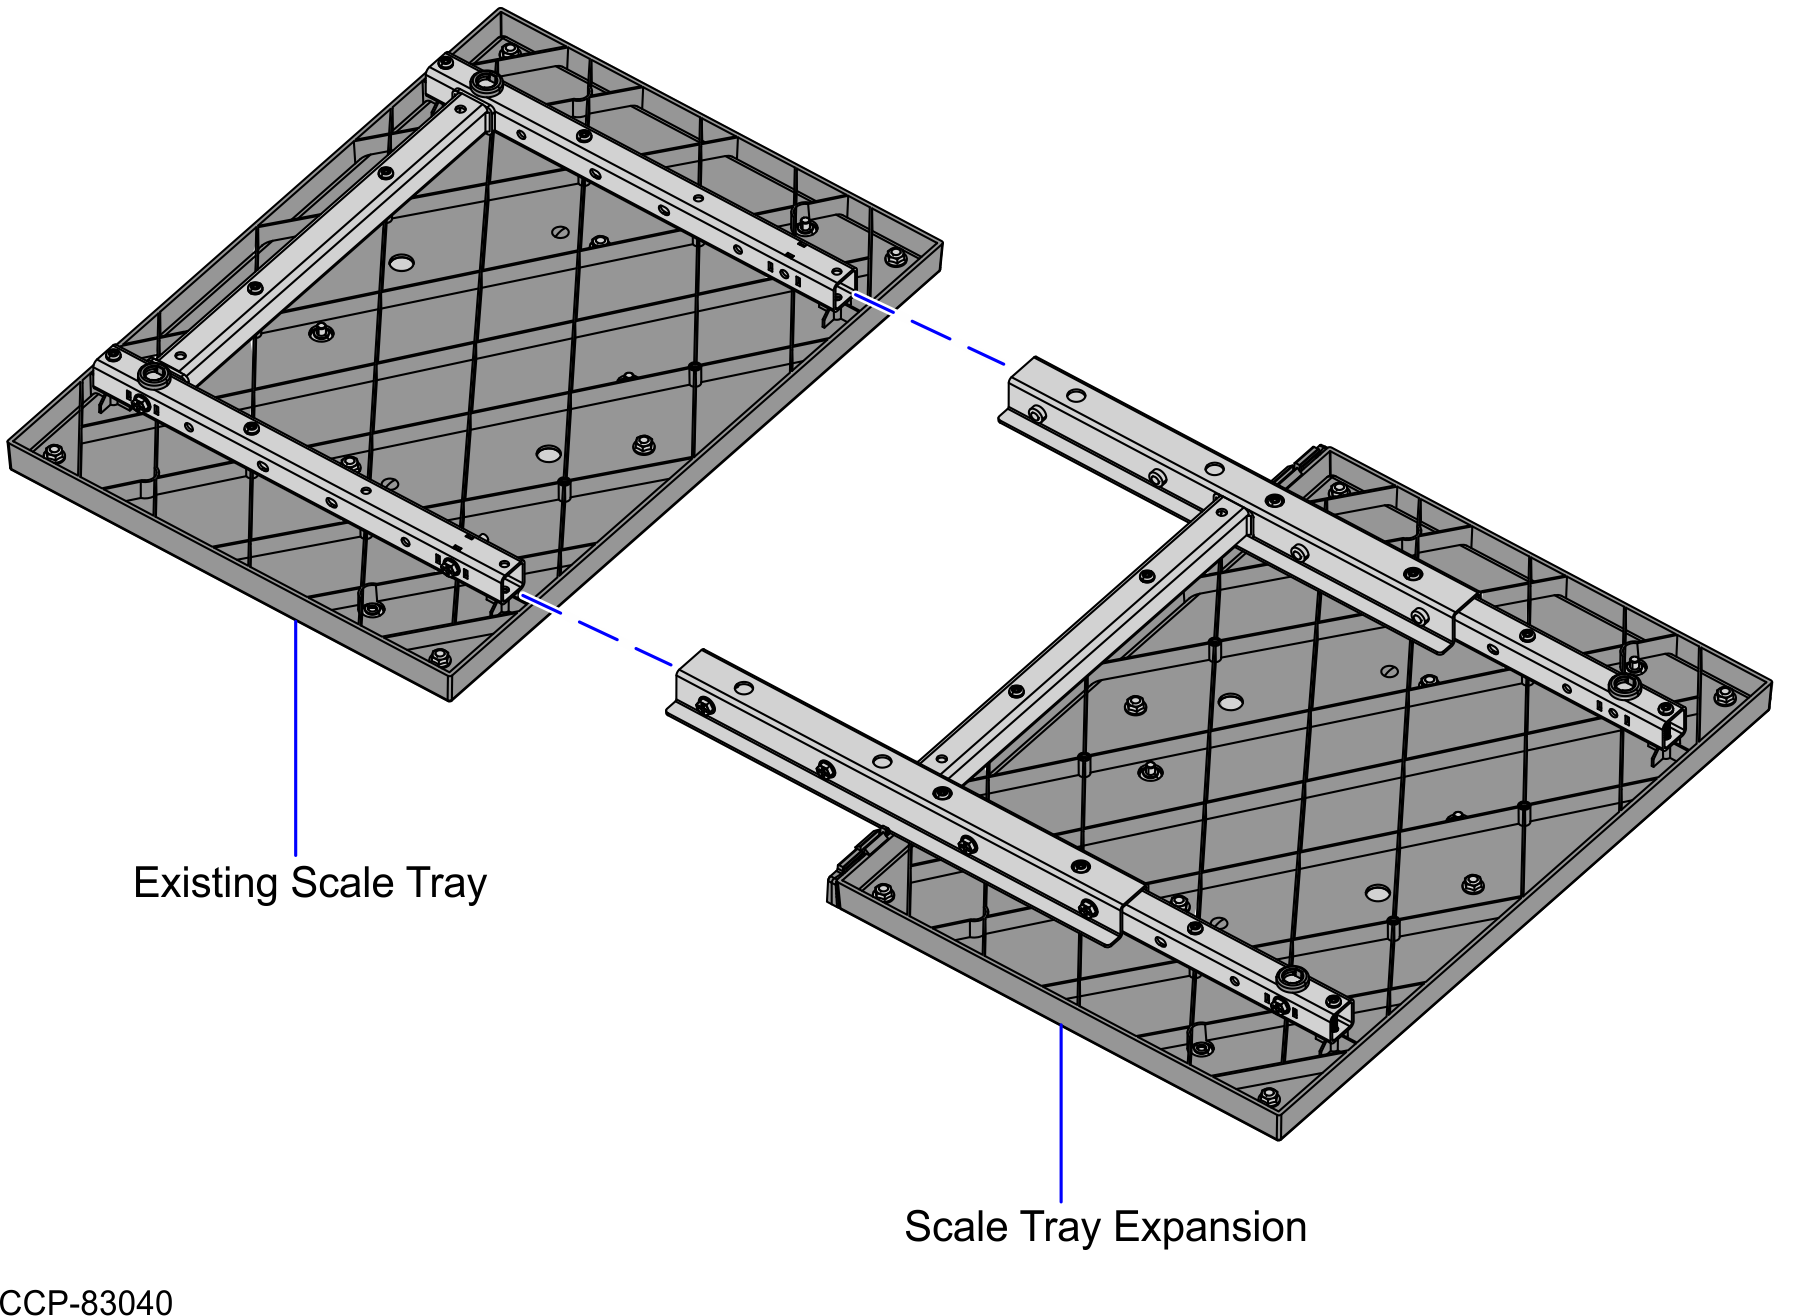
- Secure the Scale Tray assembly using eight (8) screws, as shown in the image below.Note
The Scale Tray Filler sits between the existing Scale Tray and Expansion Scale Tray.
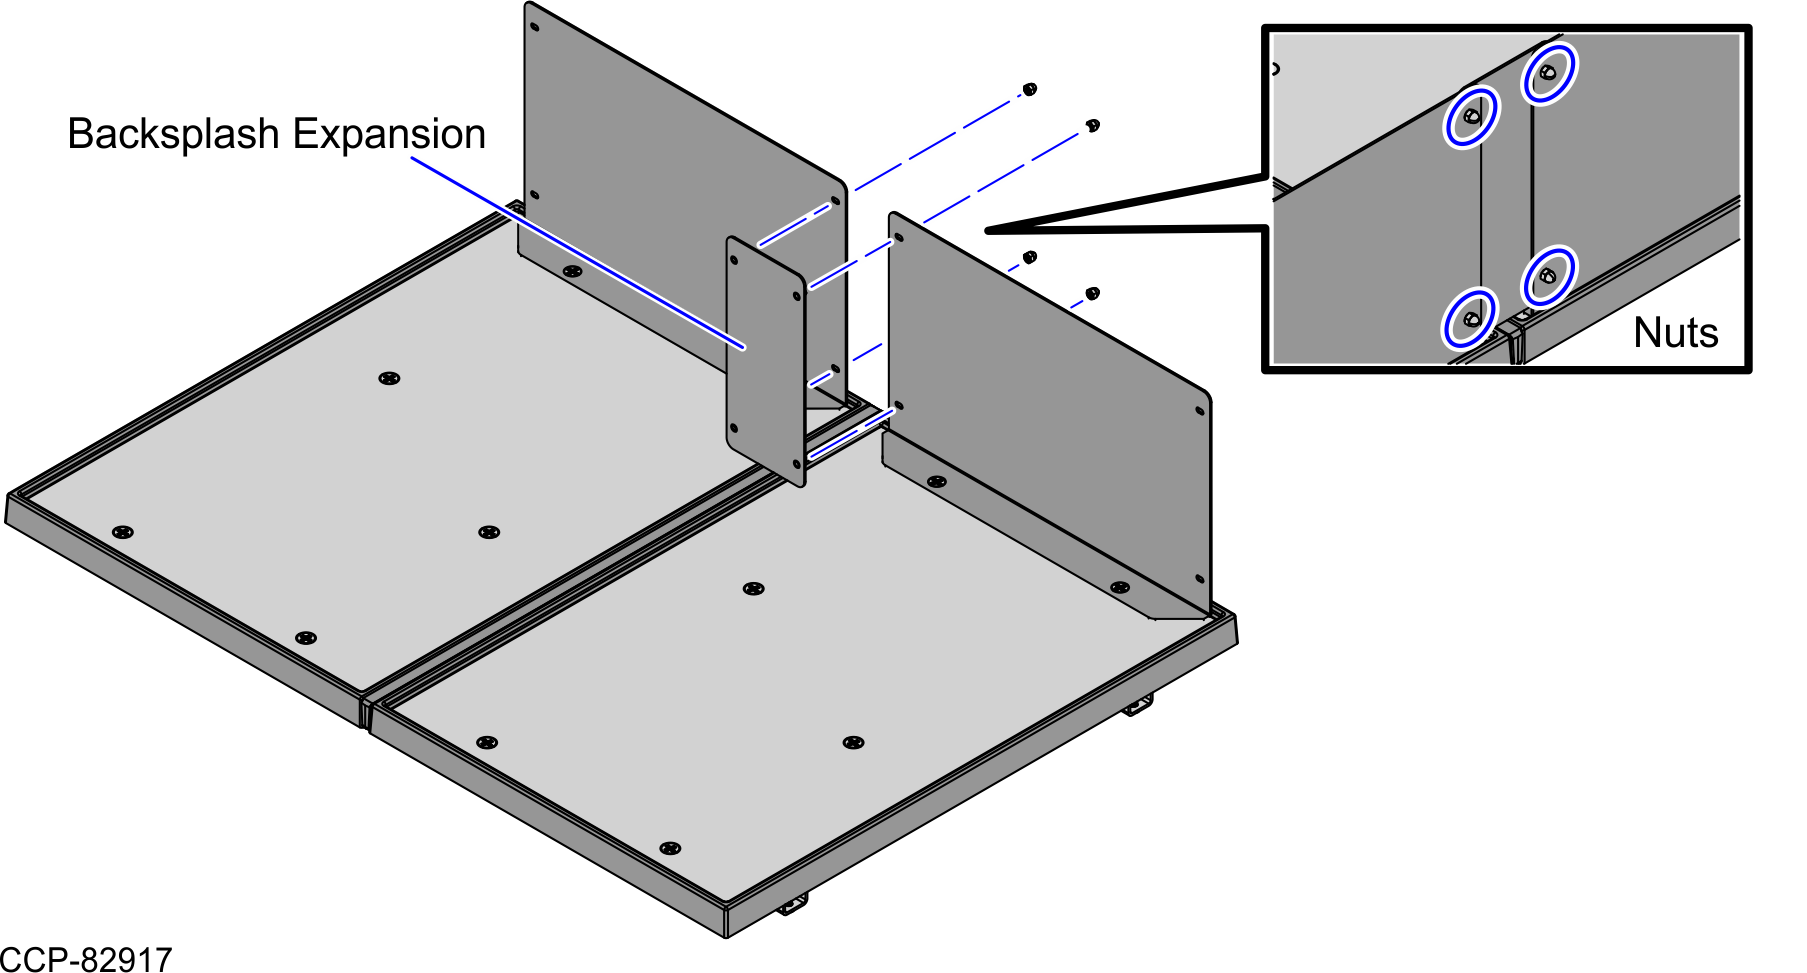
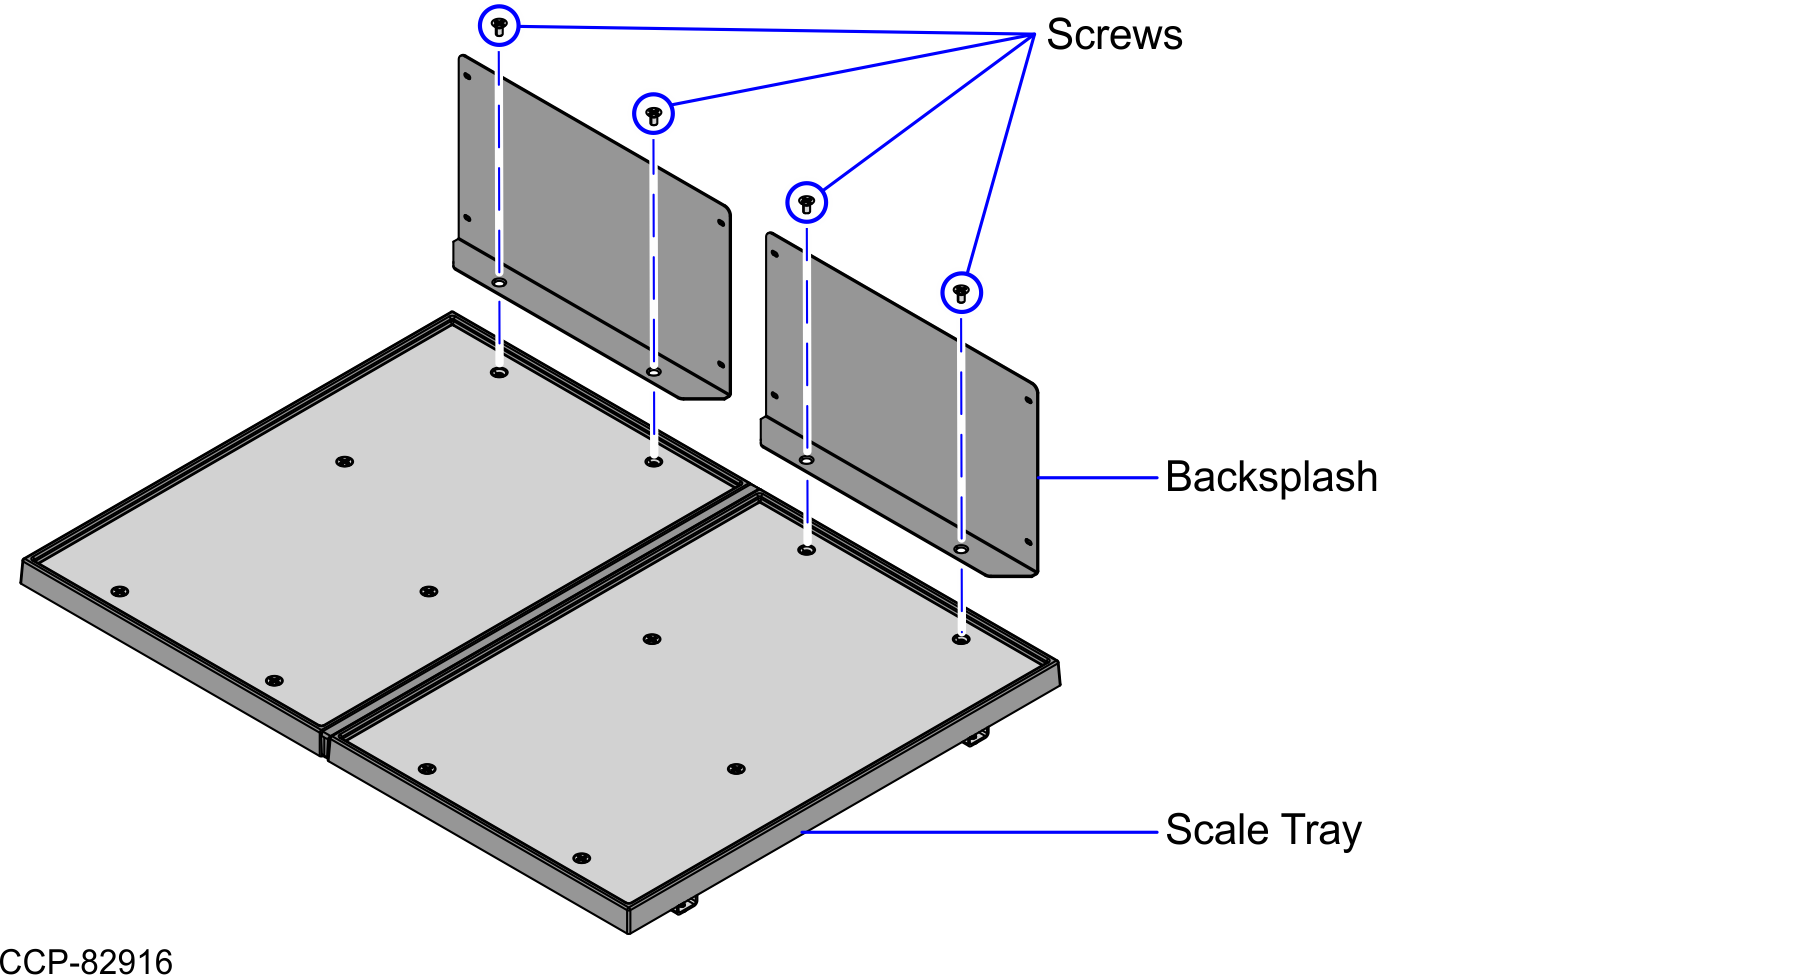
- Attach two (2) Backsplash to the Scale Tray Expansion assembly. Each Backsplash has two (2) screws.
- Attach the Backsplash Expansion in between the two (2) Backsplash using four (4) acorn nuts.
