Installing the NCR RealScan™ 79 Bi-Optic Imager Scanner/Scale (7879e)
To install the NCR RealScan™ 79 Bi-Optic Imager Scanner/Scale (7879), follow these steps:
Ensure that the host terminal is turned off before connecting the USB cable.
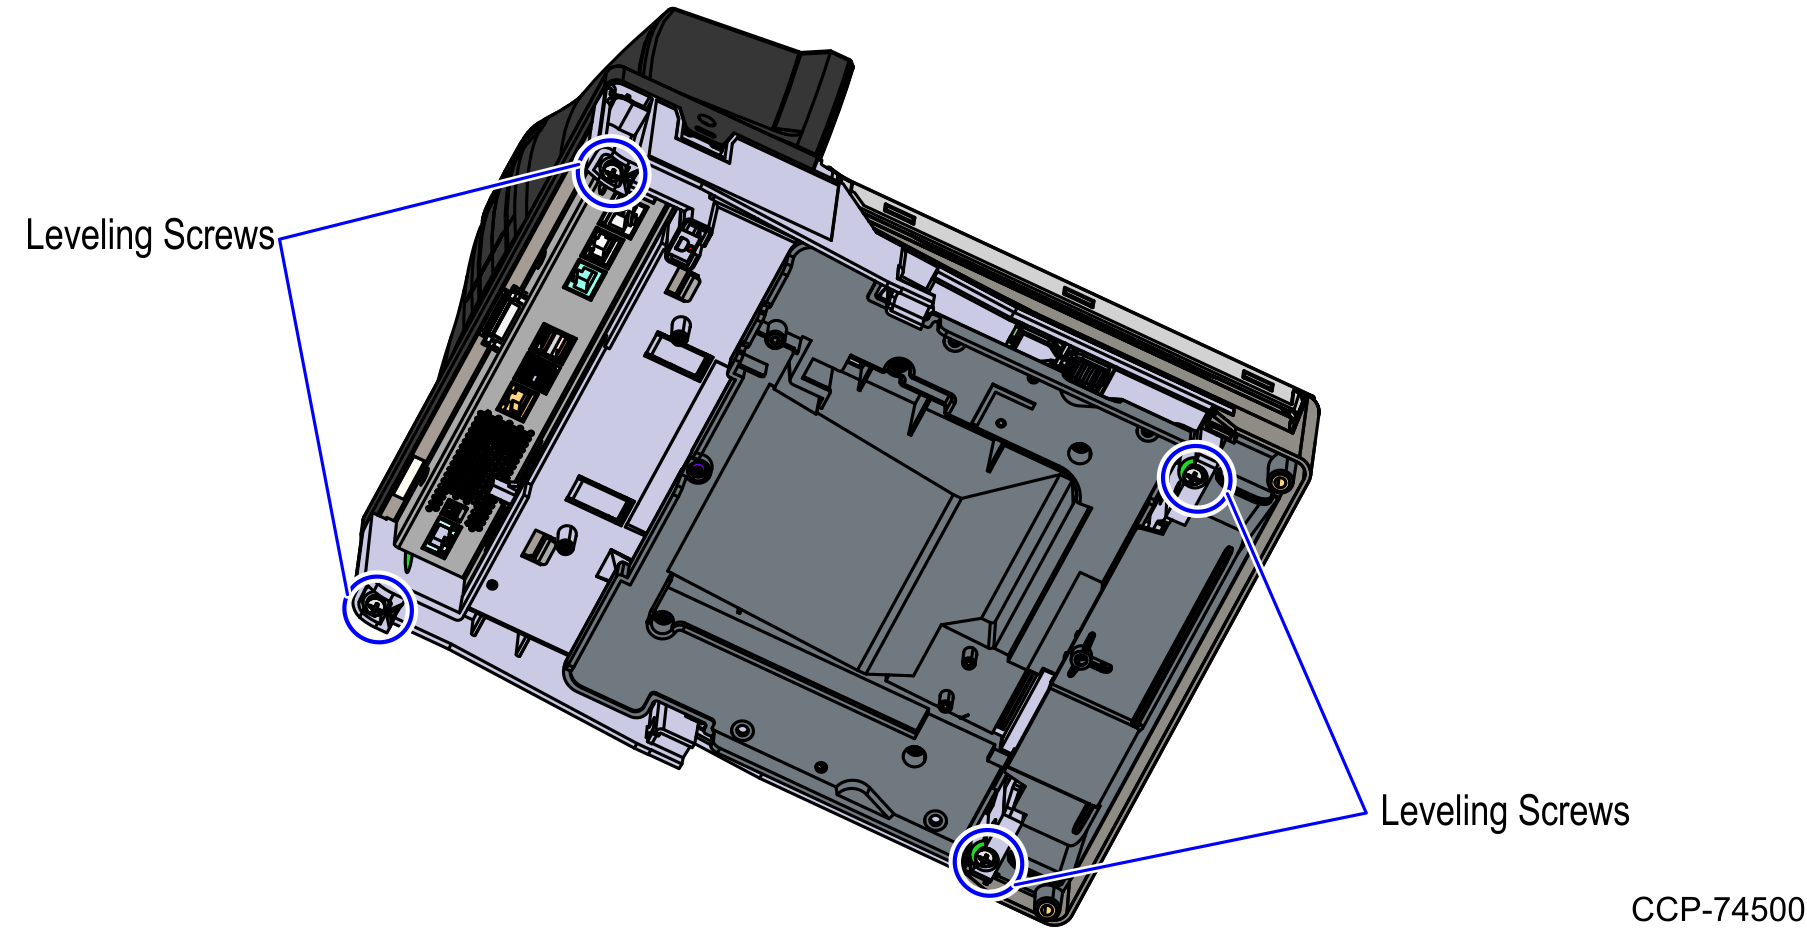
- Check and ensure that the leveling screws of the Scanner/Scale are leveled. If necessary, adjust the four (4) leveling screws located on the bottom of the device.
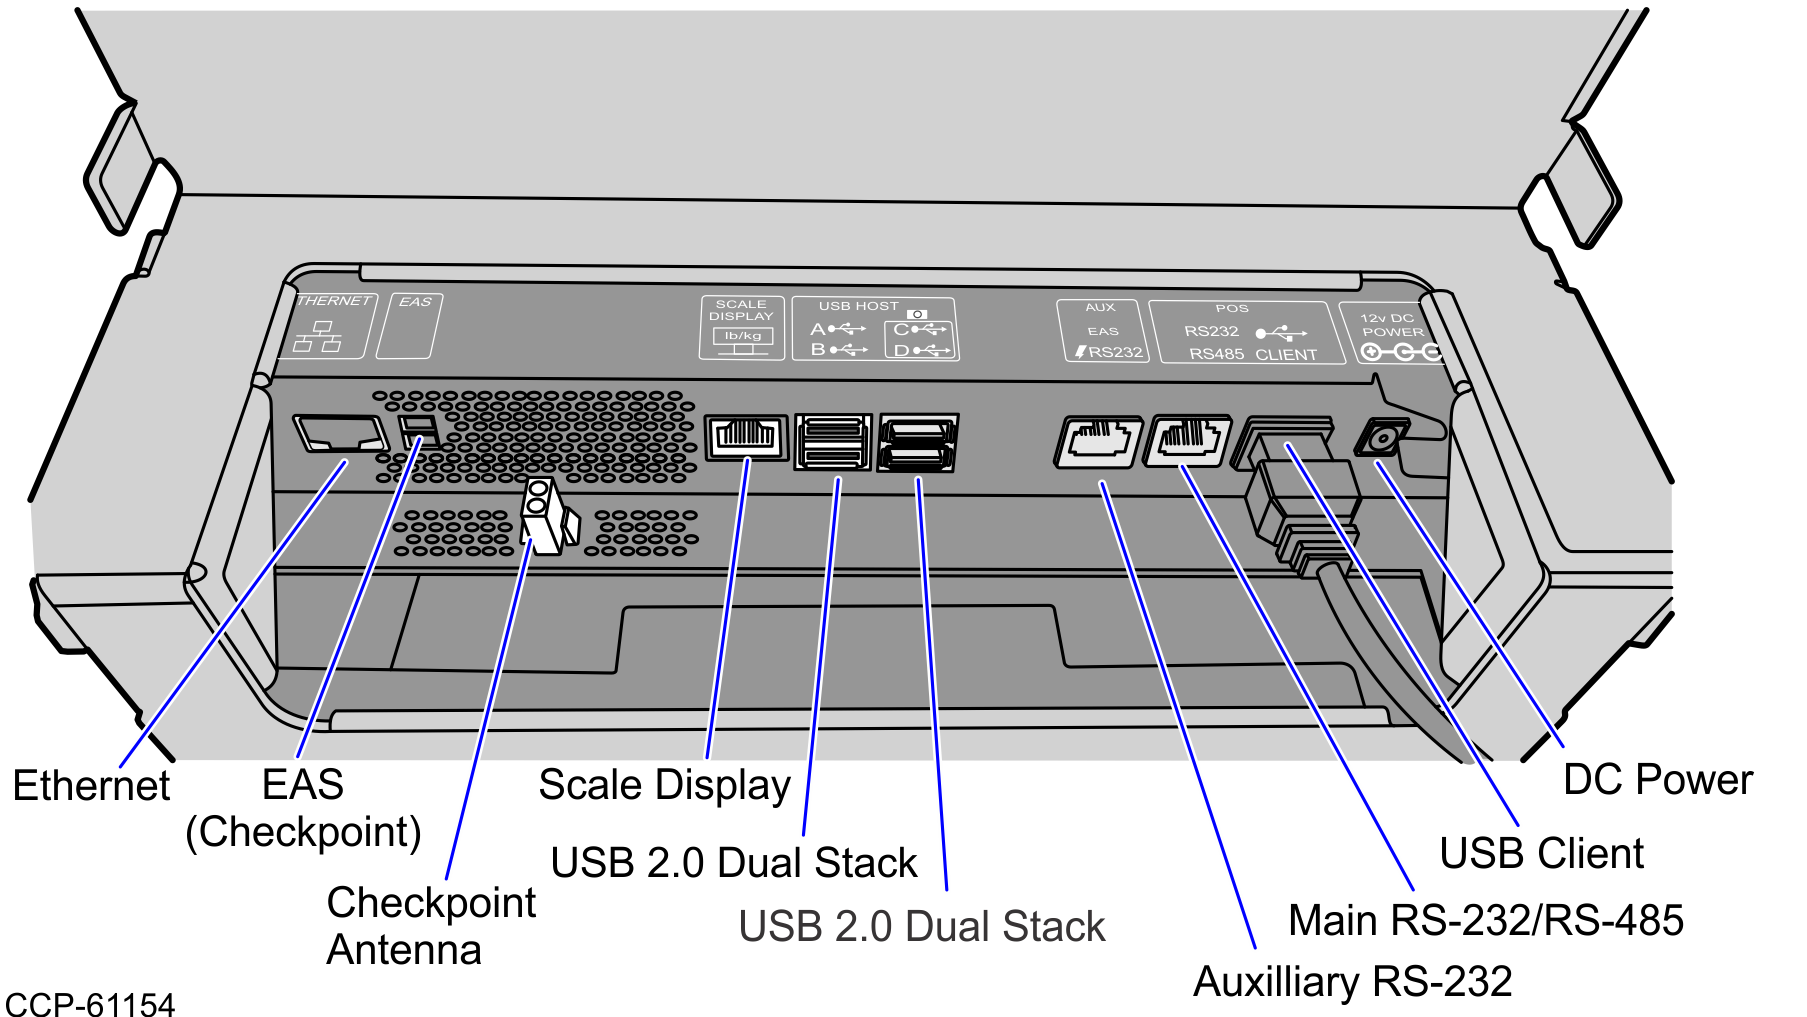
- Connect the scanner cable to the USB Client port on the RealScan 79 (7879).
 Caution
Check and ensure that the right cable is correctly plugged into the 7879e Scanner/Scale.
NoteTo streamline the installation procedure, install the Sensormatic® components before installing the Scanner/Scale in the Self-Checkout unit. For more information about installing the Sensormatic®, refer to NCR RealScan™ 79 (7879) User Documentation (B005-0000-2299).
- Place the Scanner/Scale in the scanner bucket.
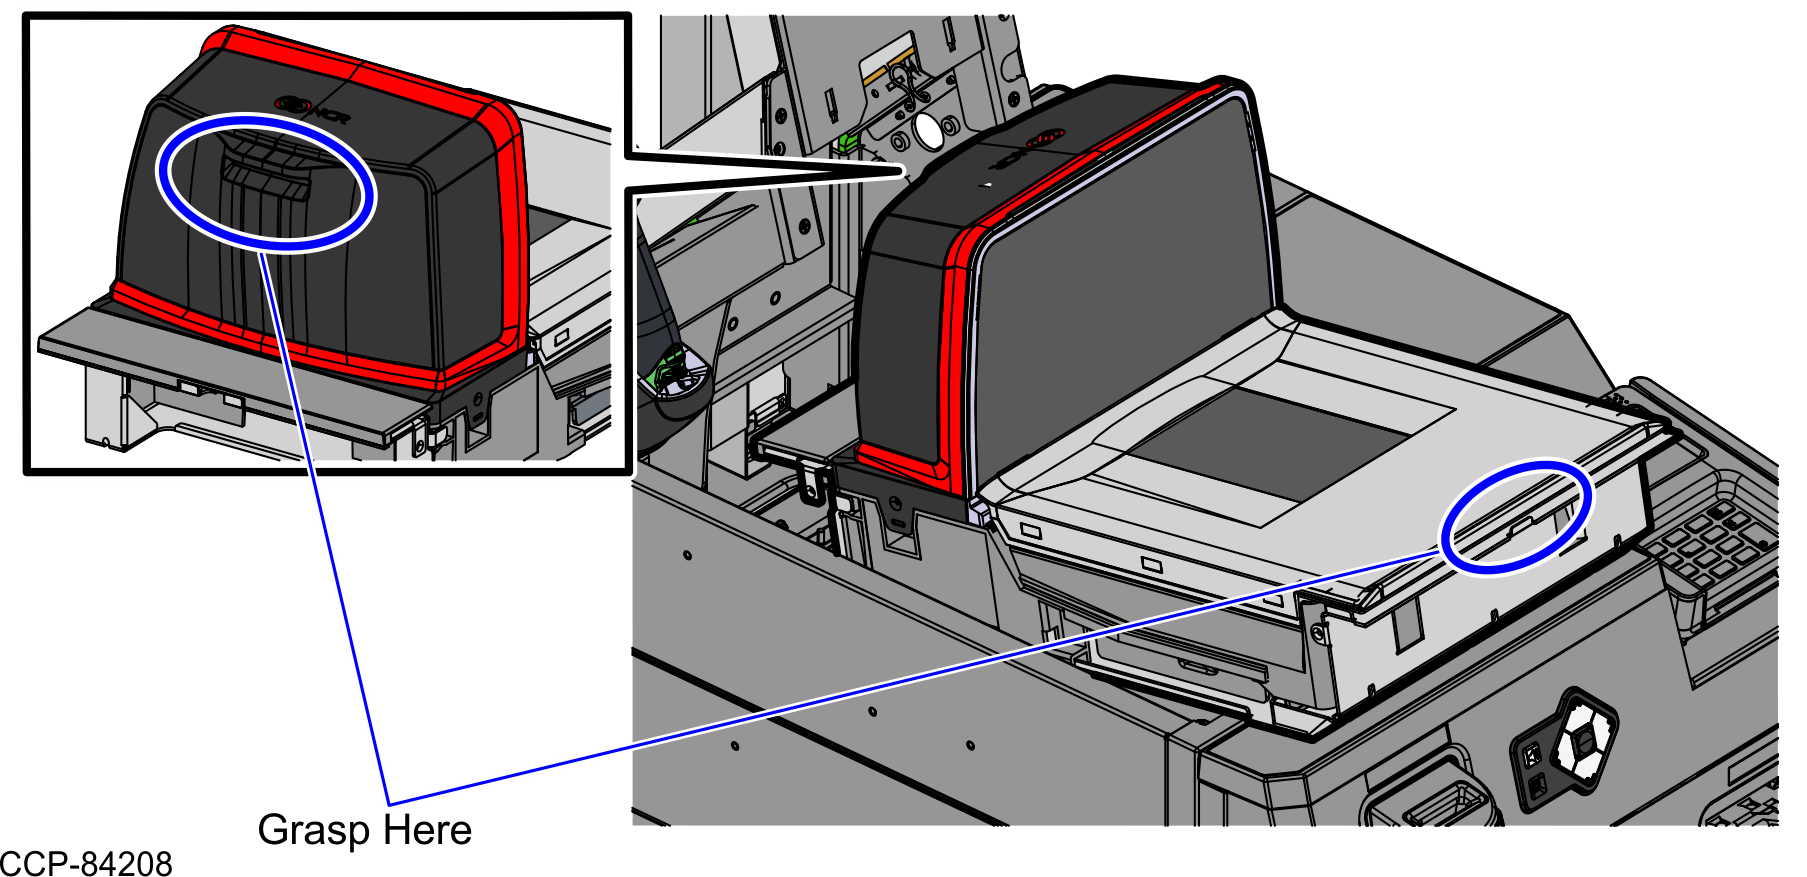
- Verify that the Scanner/Scale Top Plate is correctly aligned with the top of the Scanner Bucket. The sides of the Top Plate must not be higher than the top surface of the SelfServ Checkout unit.Note
If necessary, remove the Scanner/Scale from the unit and adjust the leveling feet.
- Place the Top Plate on the Scanner/Scale.
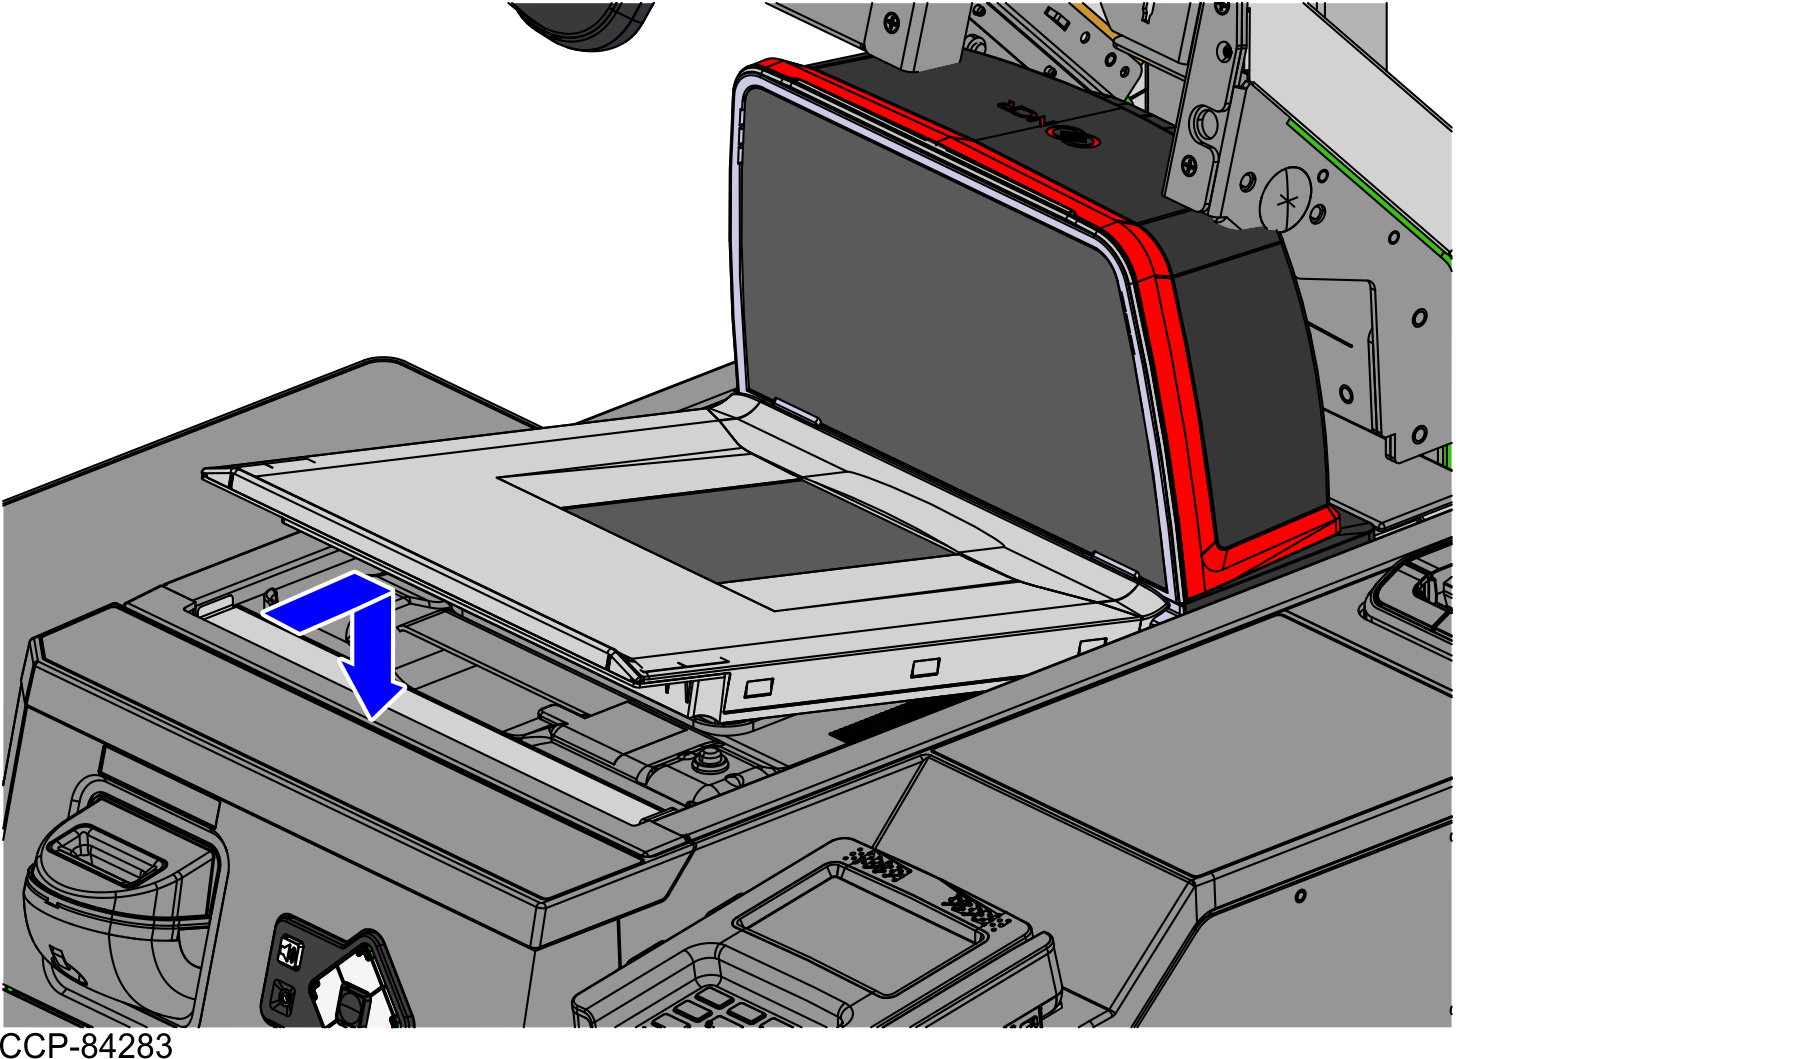
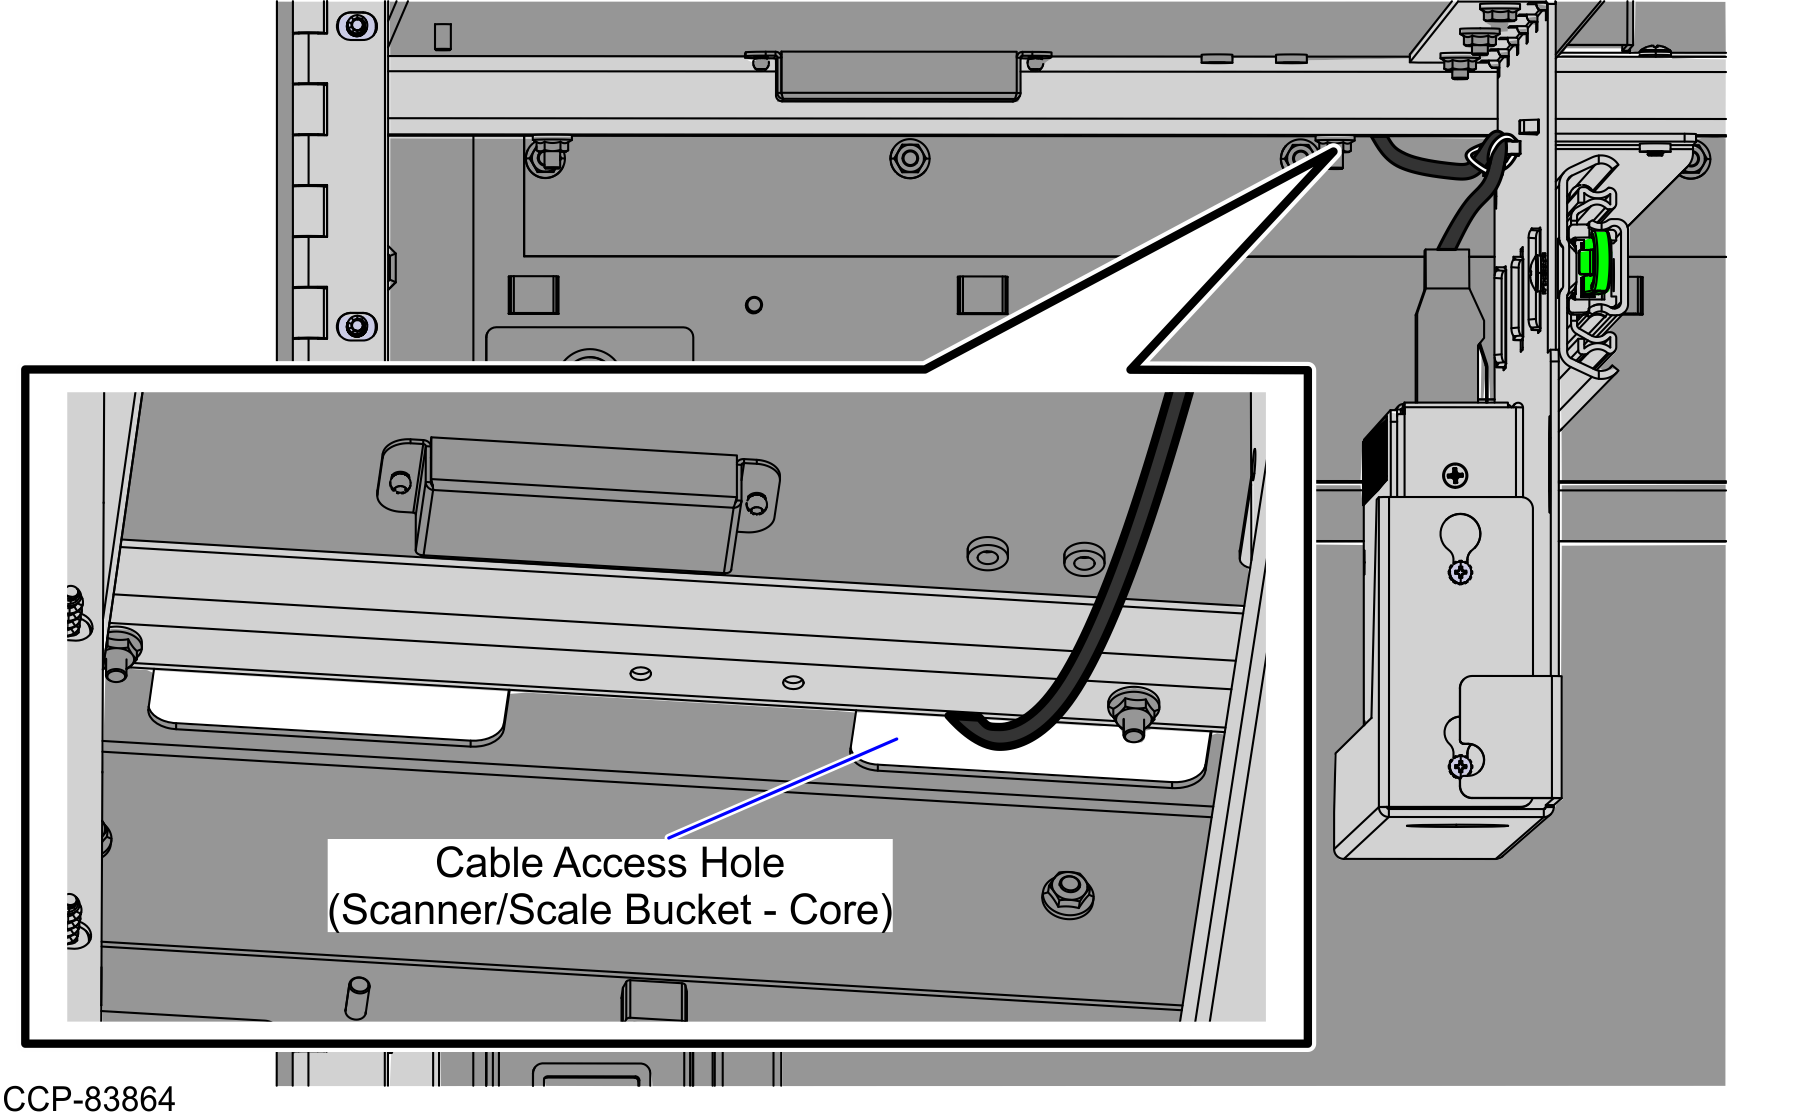
- From the Scanner Bucket, route the cable down through the cable access hole going to the Core (Cabinet), as shown in the image below.
- Connect the other end of the Scanner/Scale cable to the Retail I/O Box USB Power Port C +12V.Caution
Check and ensure that the right cable is correctly plugged into the Scanner/Scale.
NoteThe Scanner/Scale must be calibrated before the system goes live. For more information, refer to NCR RealScan™ 79 (7879) User Documentation (B005-0000-2299).