Routing the cables
To route the cables in the NCR Voyix Self-Checkout (7358) R6L Plus unit, follow these steps:
- Route the Interactive Status Light Cable by doing the following:
- From the Tri-Light/Lane Light Pole, route the Interactive Status Light Cable up into the Upper Cabinet Door.
- Route the cable through the P-Loops and the Cable Clip.
- Connect the cable to the XR7 24V+USB Port F of the Terminal Display.

- Route the LAN Cable. Depending on the configuration, refer to the following:
Routing the LAN Cable: No-Bag Unit
To route the LAN Cable, follow these steps:
- From the Tri-Light/Lane Light Pole, route the cable down to the rear of the Core (Cabinet) and out through the left side cable exit hole.
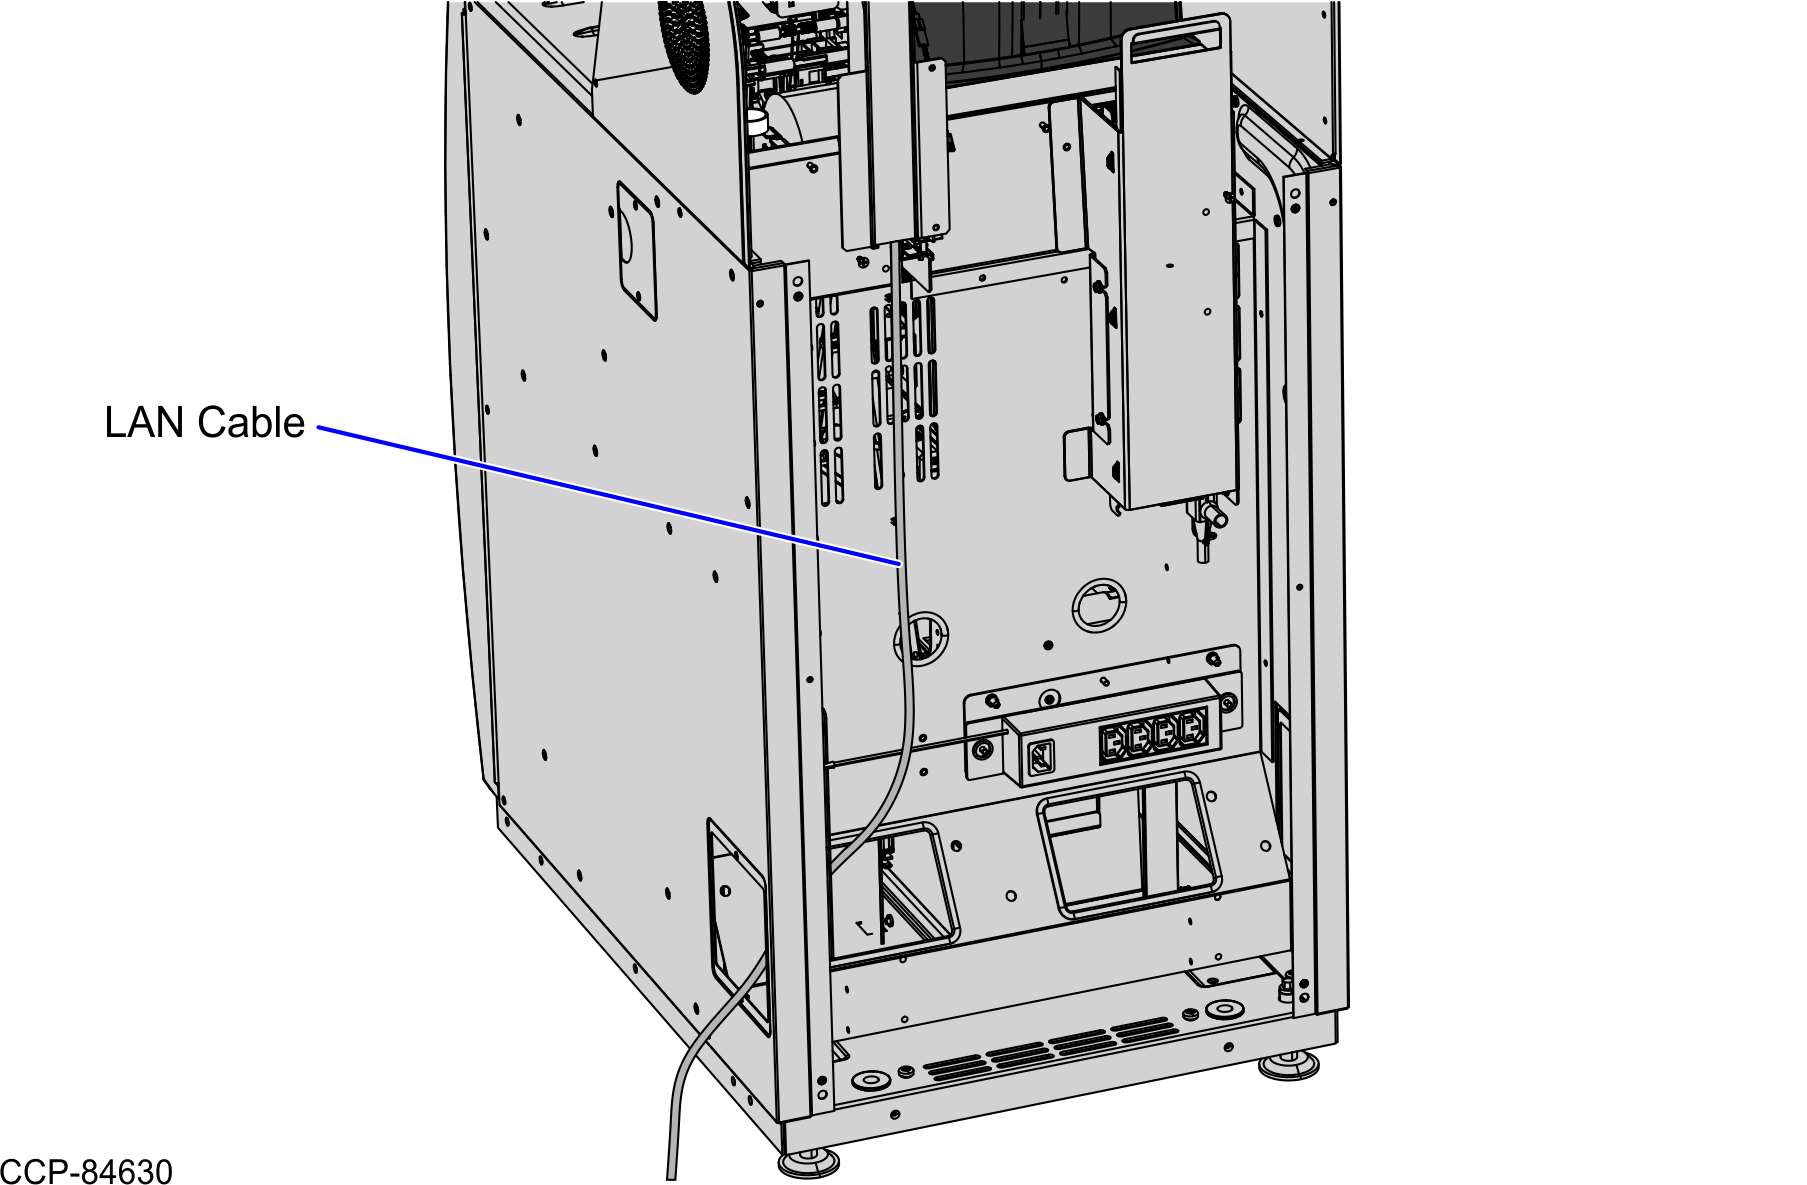
- Connect the cable to the PoE Switch.
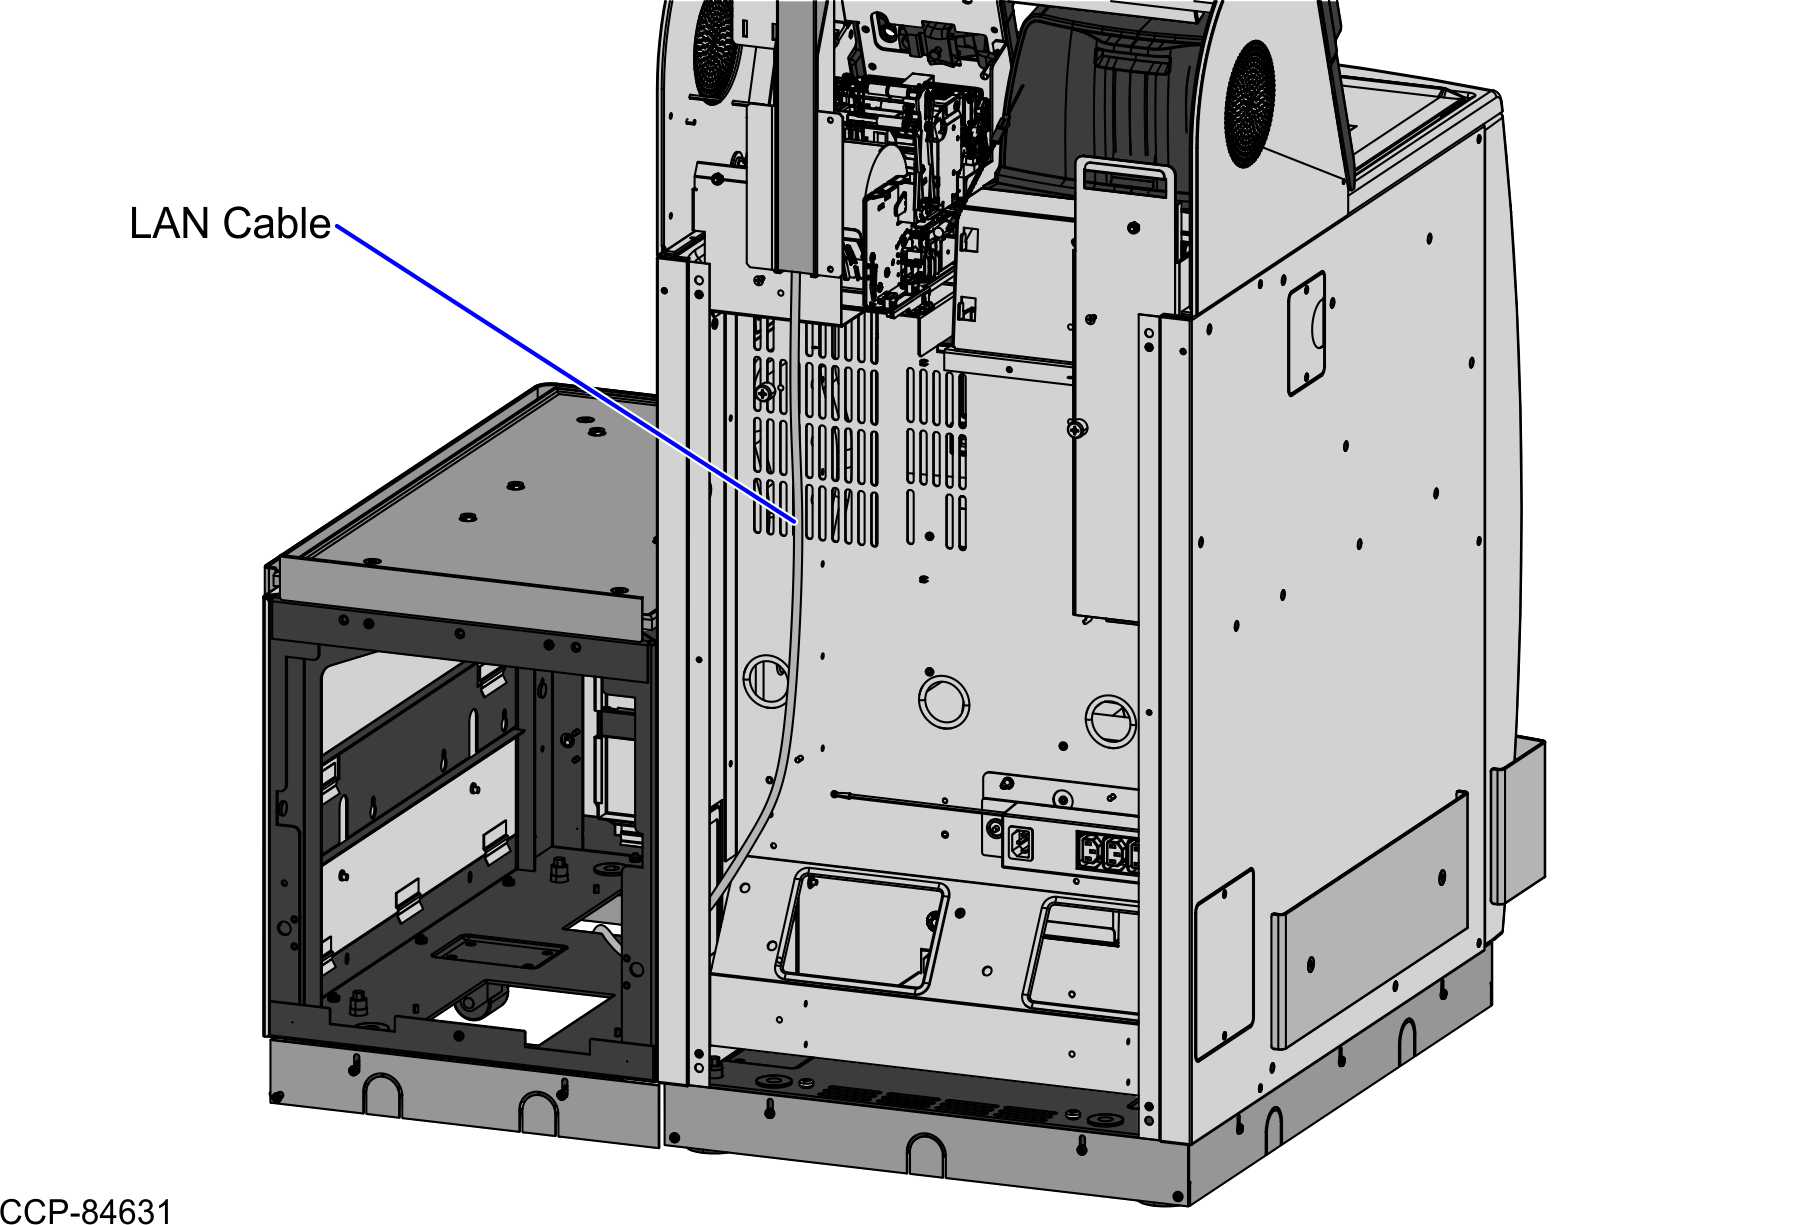
Routing the LAN Cable: Left-Hand Unit
To route the LAN Cable, follow these steps:
- From the Tri-Light/Lane Light Pole, route the cable down the rear of the Core Cabinet and into the Bagwell through the left side cable exit hole.
- Continue to route the cable out through the bottom cable exit hole and connect it to the PoE Switch.
Routing the LAN Cable: Right-Hand Unit
To route the LAN Cable, follow these steps:
- From the Tri-Light/Lane Light Pole, route the cable down the rear of the Core Cabinet and into the Bagwell through the left side cable exit hole.
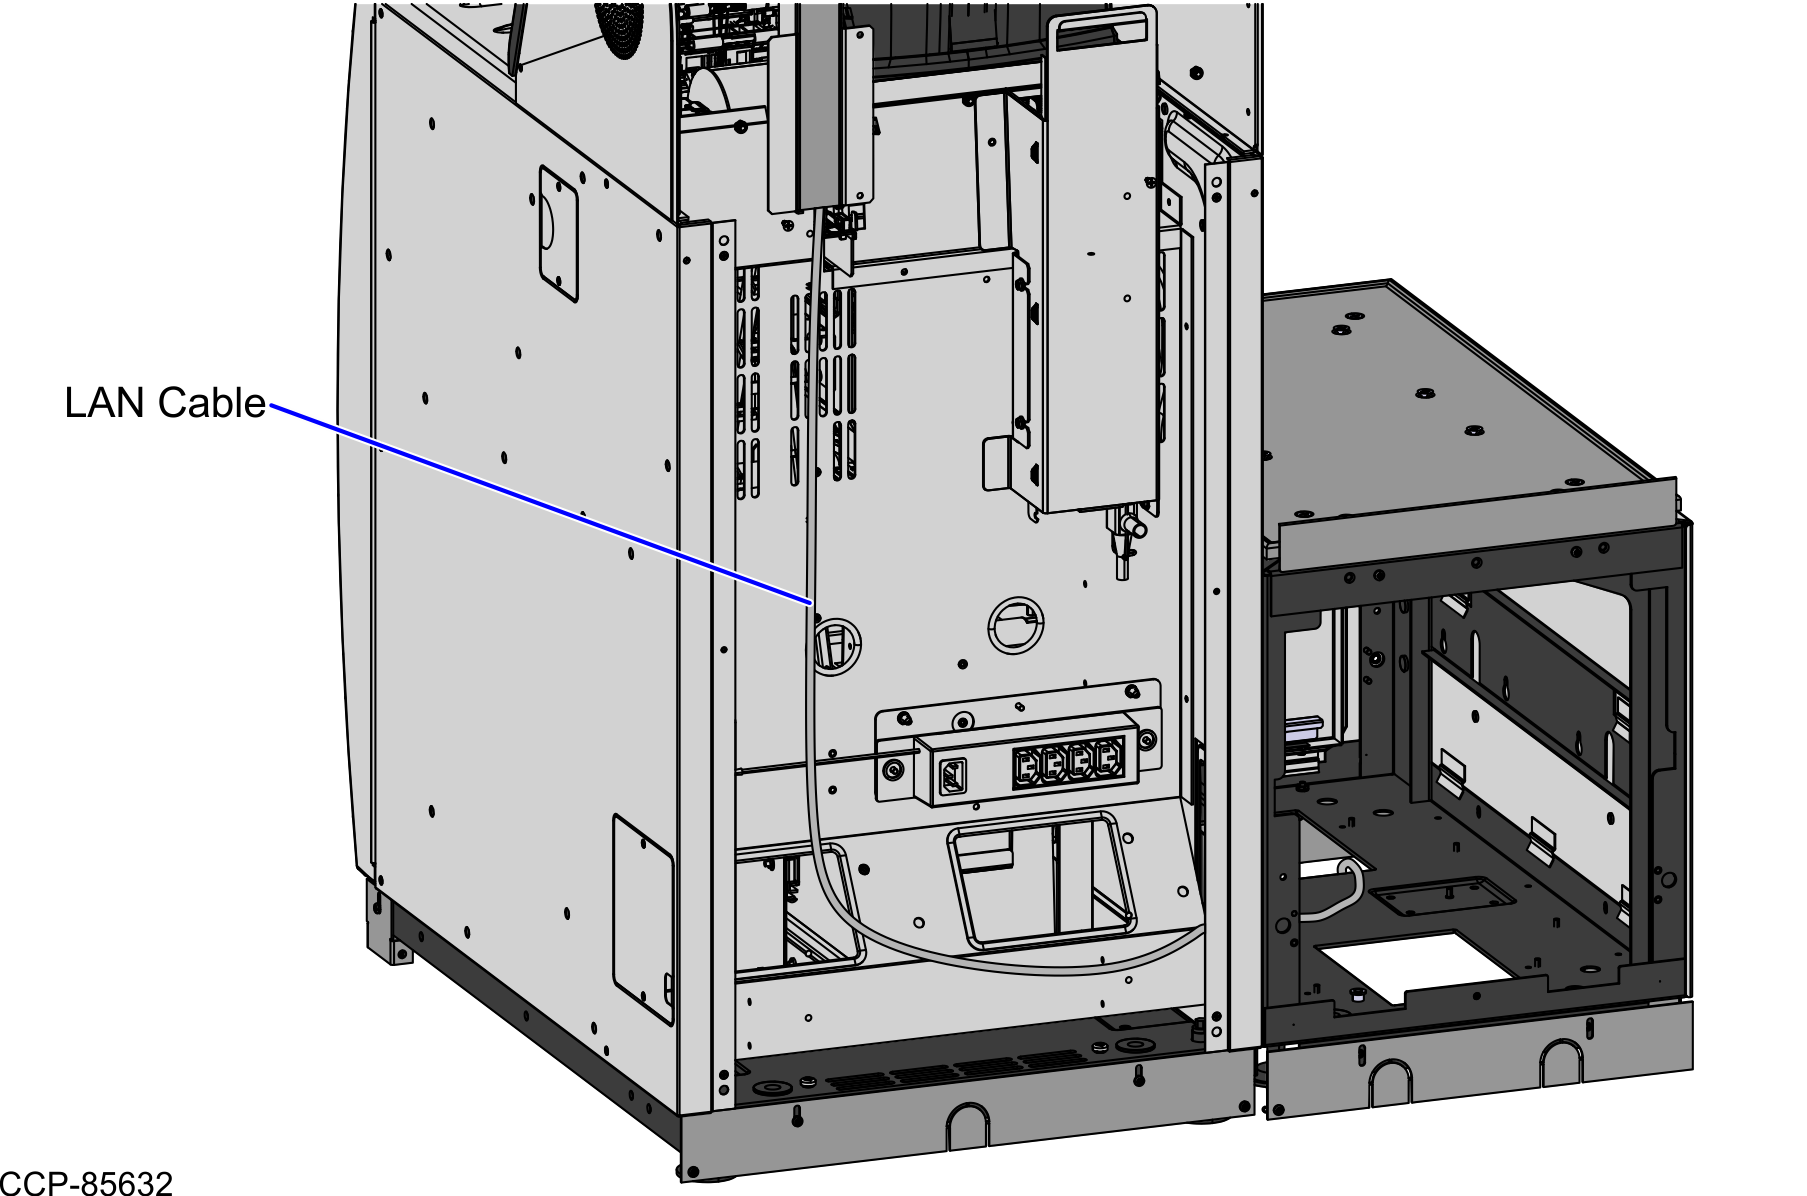
- Continue to route the cable out through the bottom cable exit hole and connect it to the PoE Switch.