7772-K241/K253/K255 Solid State Drive (SSD)
This kit provides a Solid State Drive for:
- NCR CX7 All-in-One POS (7772) or NCR CX8 POS (7736)
- 7772-K241 – 120GB SSD
- 7772-K253 – 240GB SSD
- 7772-K255 – 480GB SSD
- NCR CX5 All-in-One POS (7773)
- 7772-K241 – 120GB SSD
Kit Contents
| Item | Part Number | Description |
|---|---|---|
| 7772-K241 120GB SSD | ||
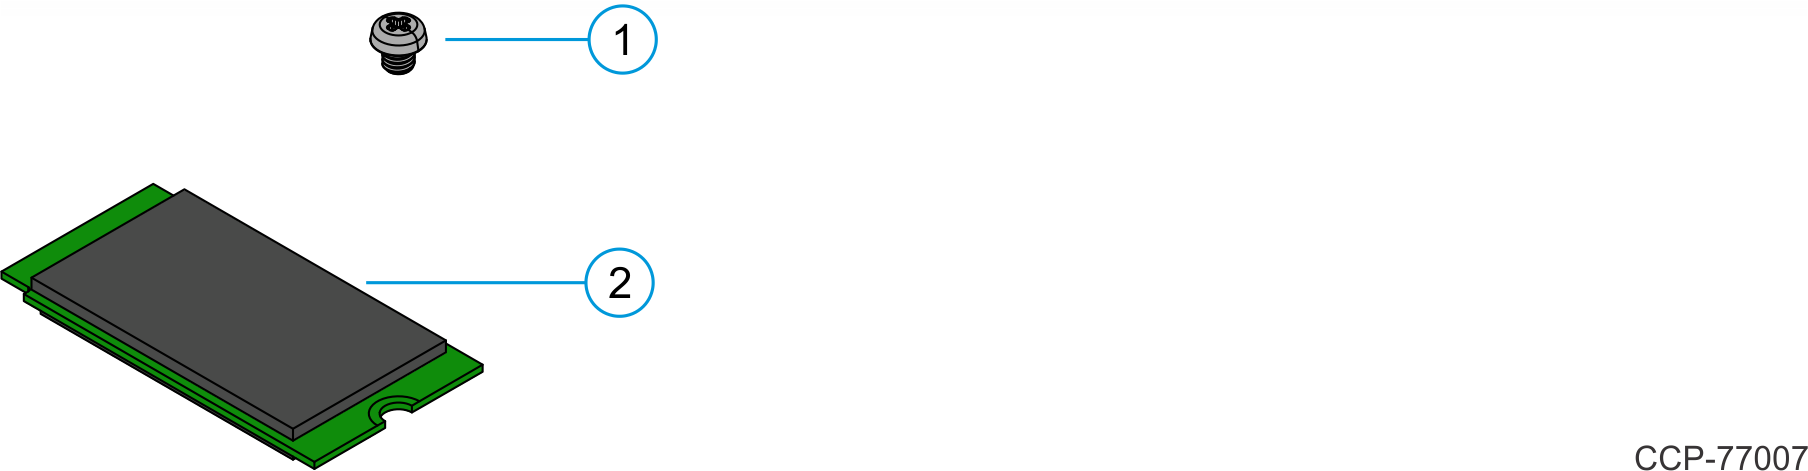
| 1 | 006-8627556 | Screw, M3x4mm Phillips, Low Profile, Black |
| 2 | 006-8627411 | Storage, Apacer, 120GB M.2 42mm SATA 3D NAND Module |
| 7772-K253 240GB SSD | ||
| 1 | 006-8627556 | Screw, M3x4mm Phillips, Low Profile, Black |
| 2 | 006-8628119 | Apacer 240GB 4-channel BiCs4 NVMe M.2 Module (PNPE1B3A) |
| 7772-K255 480GB SSD | ||
| 1 | 006-8627556 | Screw, M3x4mm Phillips, Low Profile, Black |
| 2 | 006-8628118 | Apacer 480GB 4-channel BiCs4 NVMe M.2 Module (PNPE1B3A) |
| 7772-K256 480GB NVMe 4-channel SSD | ||
| 1 | 006-8627556 | Screw, M3x4mm Phillips, Low Profile, Black |
| 2 | 006-8627767 | Storage, Apacer, 480GB M.2 42mm NVME PCIe Gen3 X4 Module |
Installation Procedure
Disconnect the AC power cord from the AC outlet and wait 30 seconds before servicing the terminal.
NCR CX7 All-in-One POS (7772)/NCR CX5 All-in-One POS (7773)
- Lay the Display face down on a flat surface.Note
Always use a soft material (cloth, foam) to protect the display screen when placing the terminal face down.
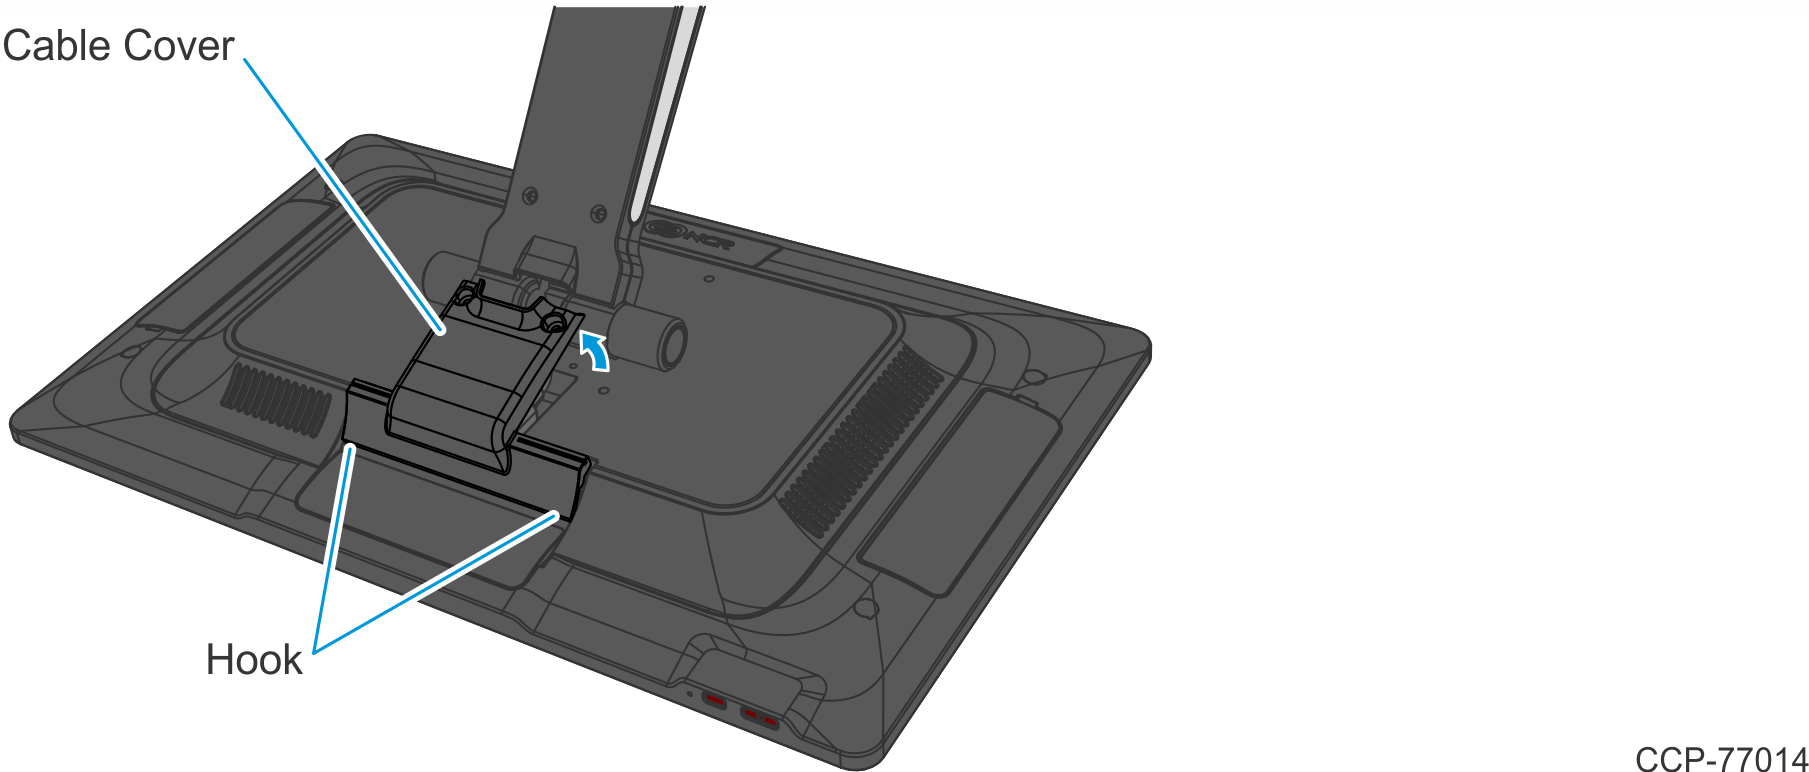
- Remove the Cable Cover.
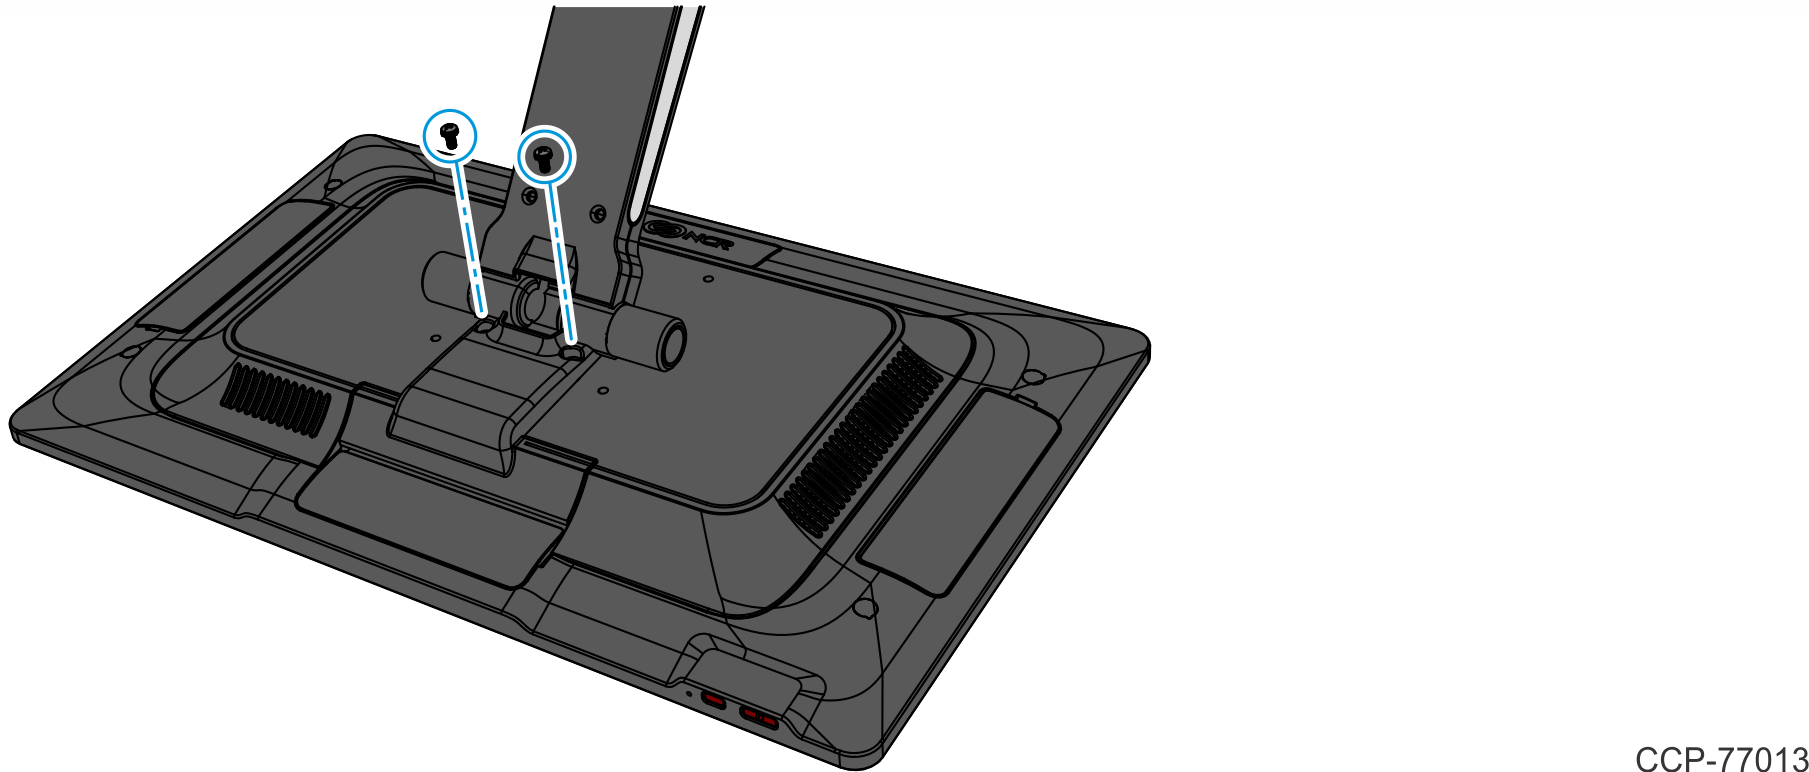
- Remove the two (2) screws that secure the Cable Cover to the Back Cover.
- Rotate and unhook the Cable Cover from the Back Cover.
- Remove the two (2) screws that secure the Cable Cover to the Back Cover.
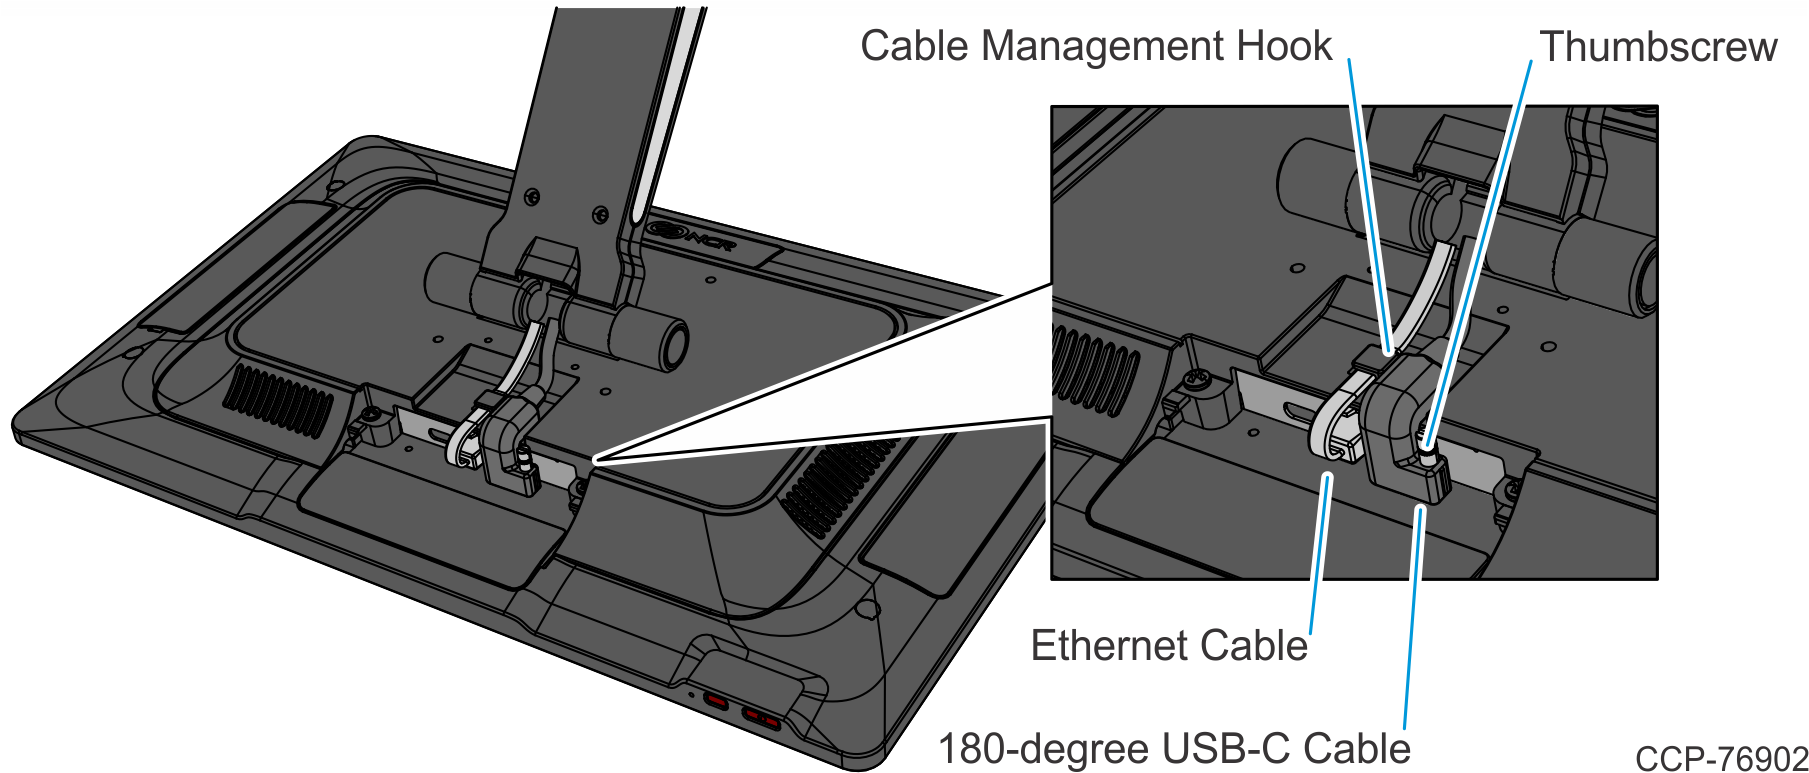
- Disconnect the Cables.
- Loosen the thumbscrew of the 180-degree USB-C Cable then disconnect the Cable.
- Remove the Ethernet Cable from the Cable Management Hook then disconnect the Cable.
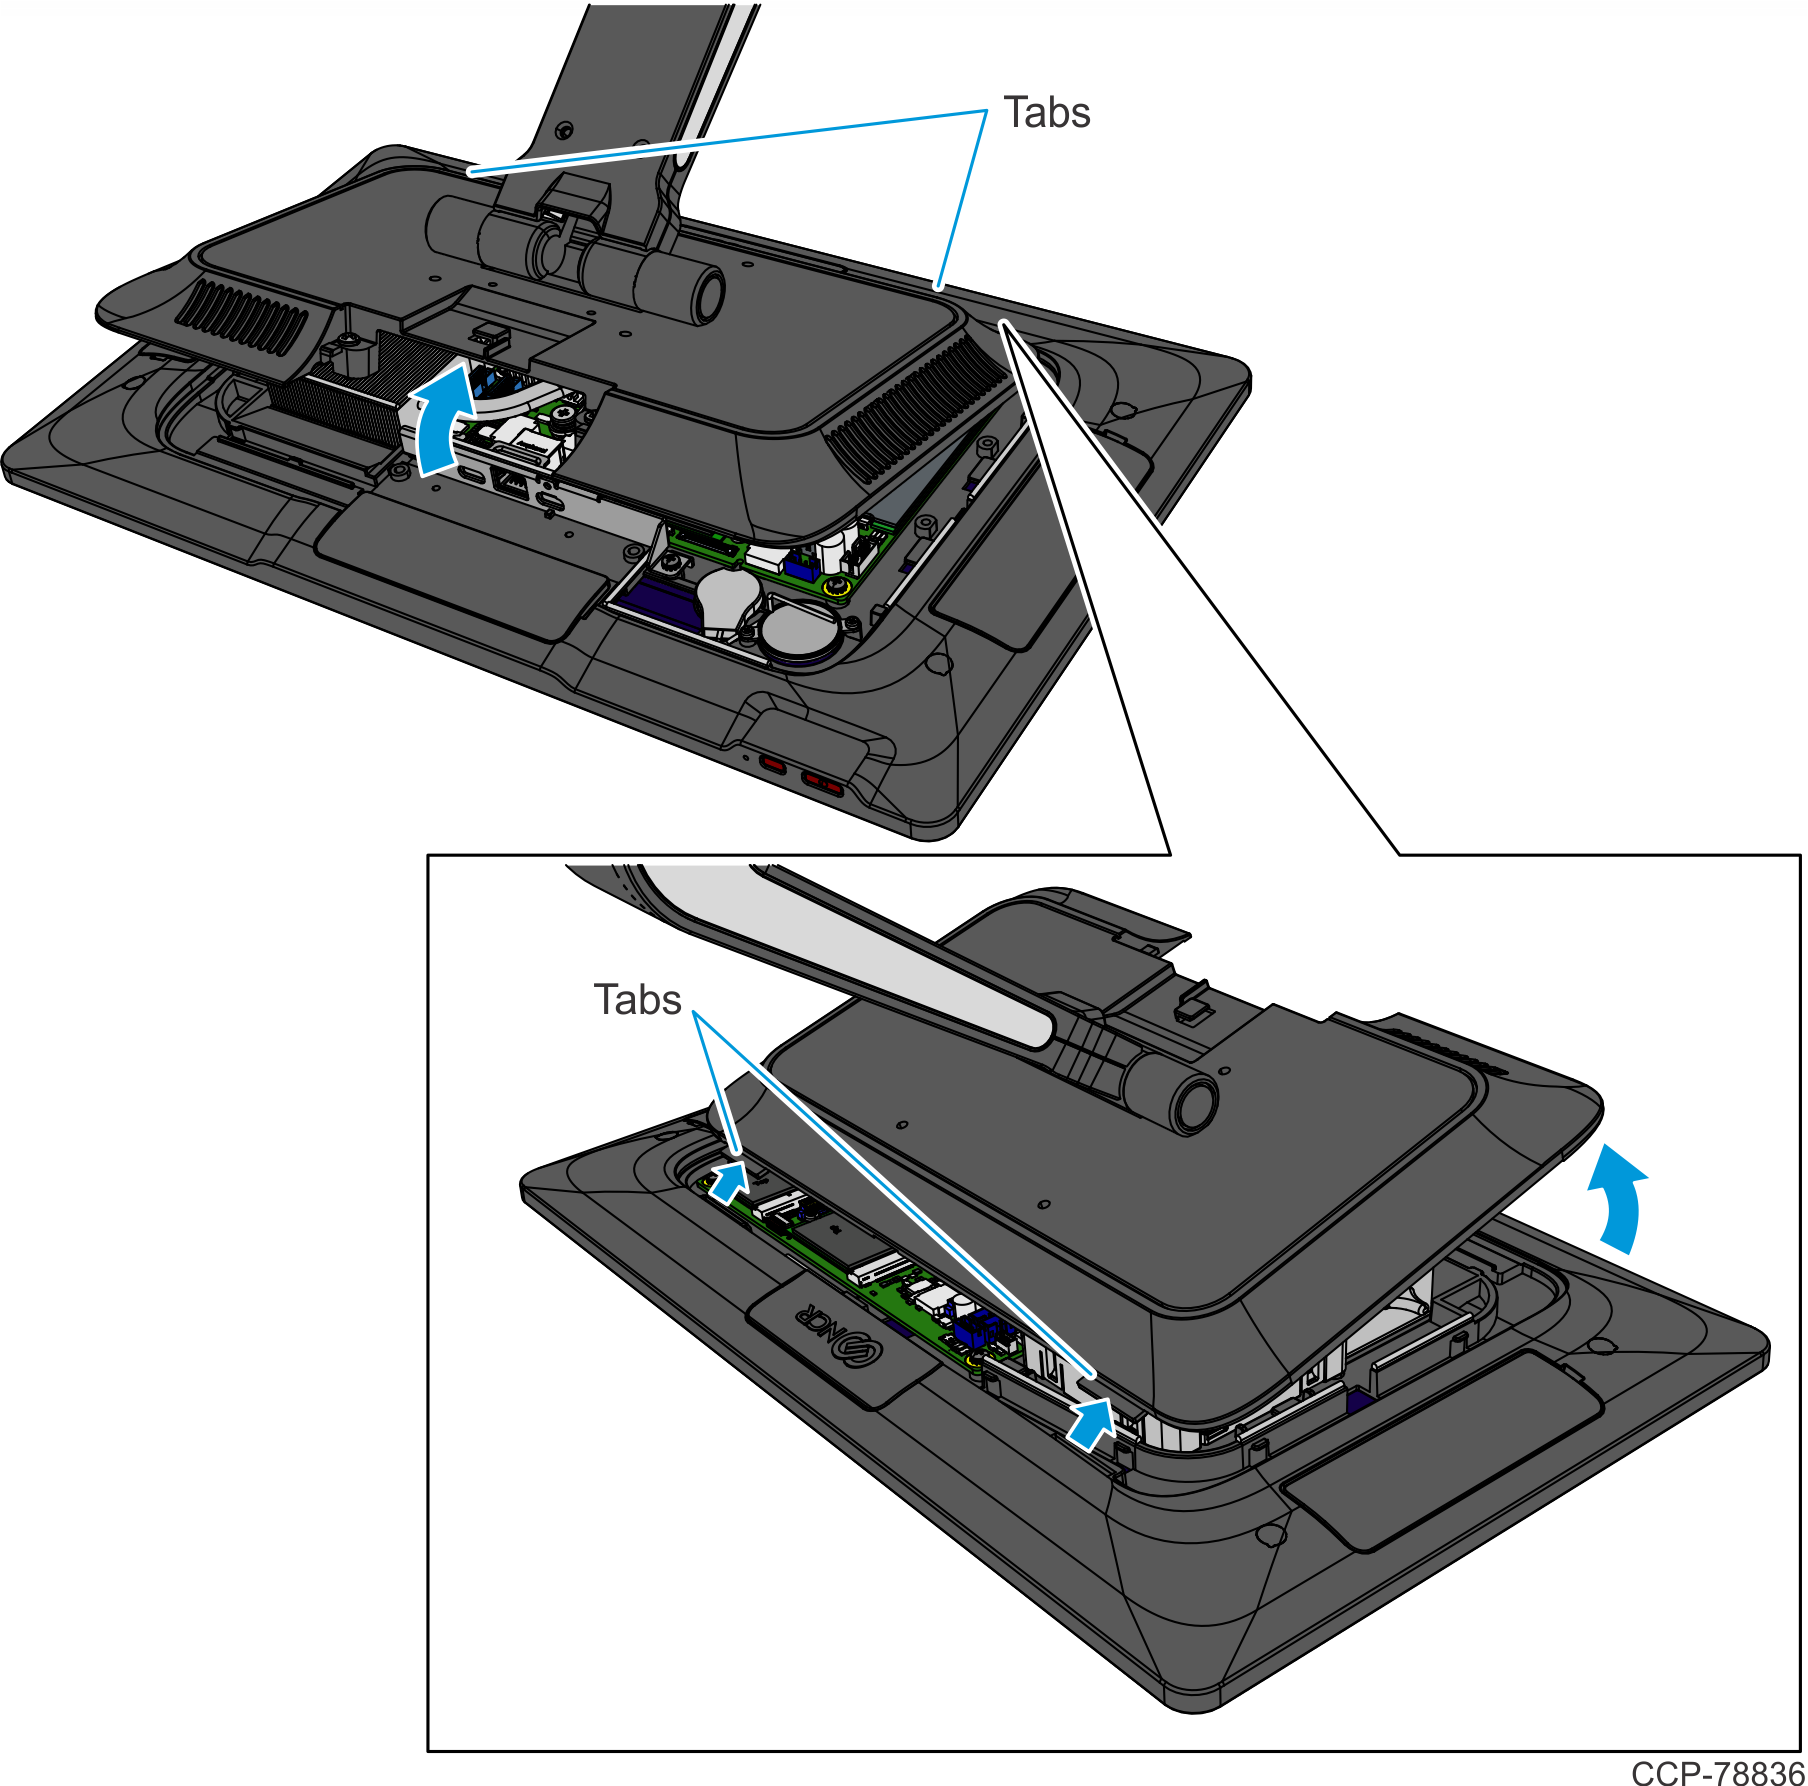
- Loosen the two (2) captive screws that secure the Back Cover to the Display.

- Rotate the Back Cover away from the Display and unhook the Back Cover Tabs.
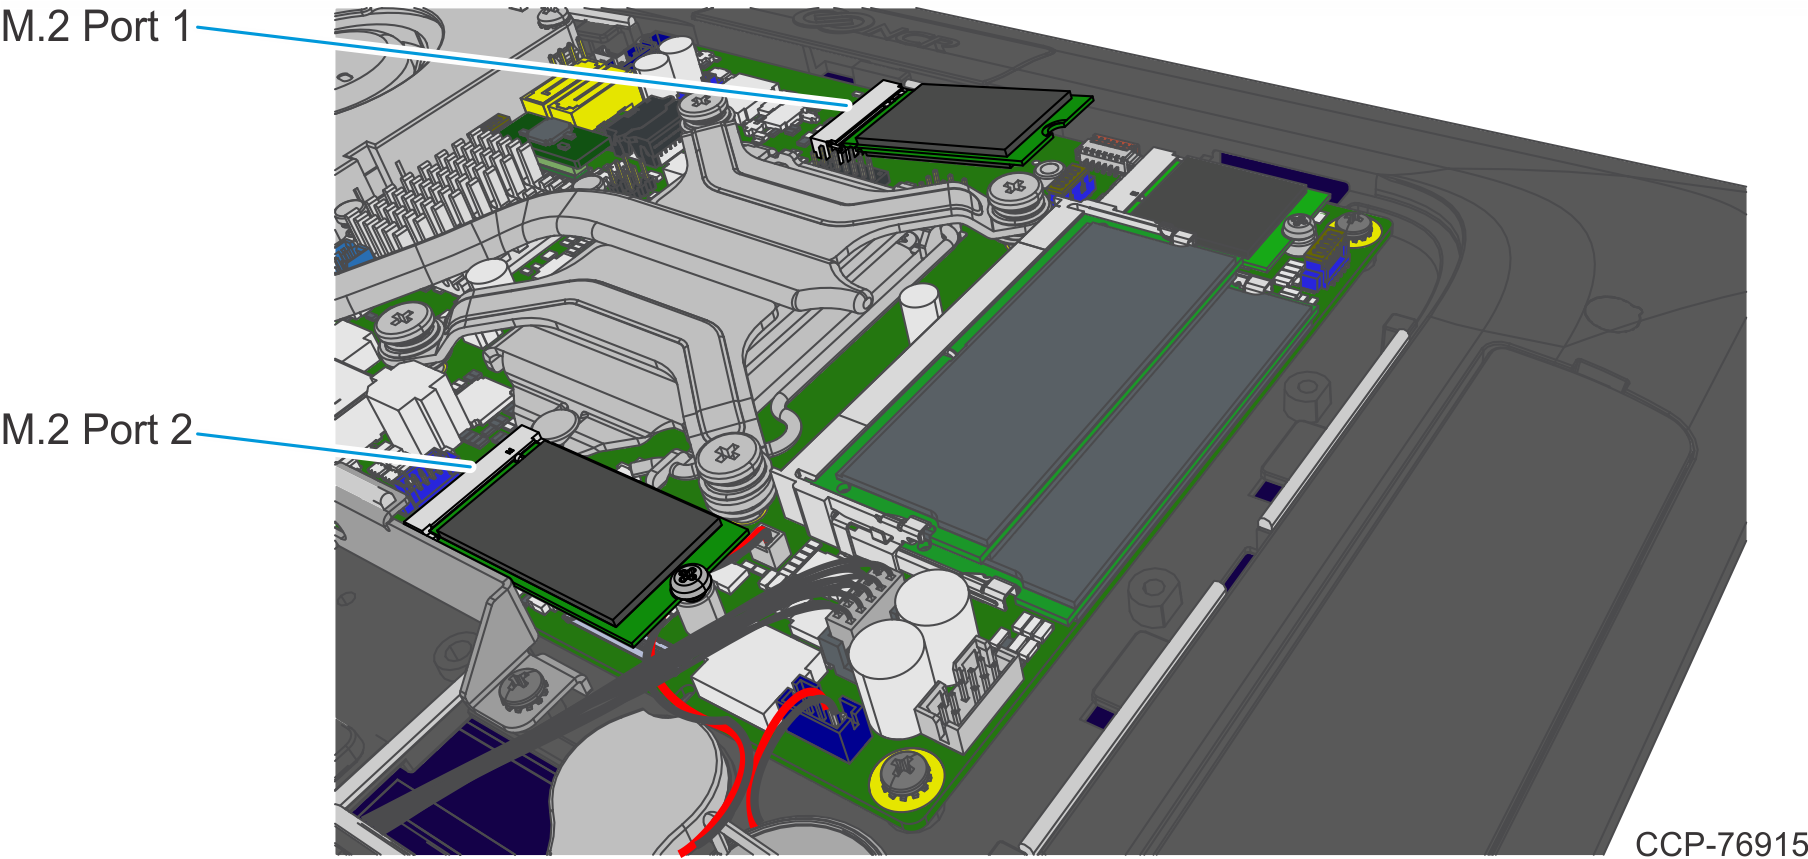
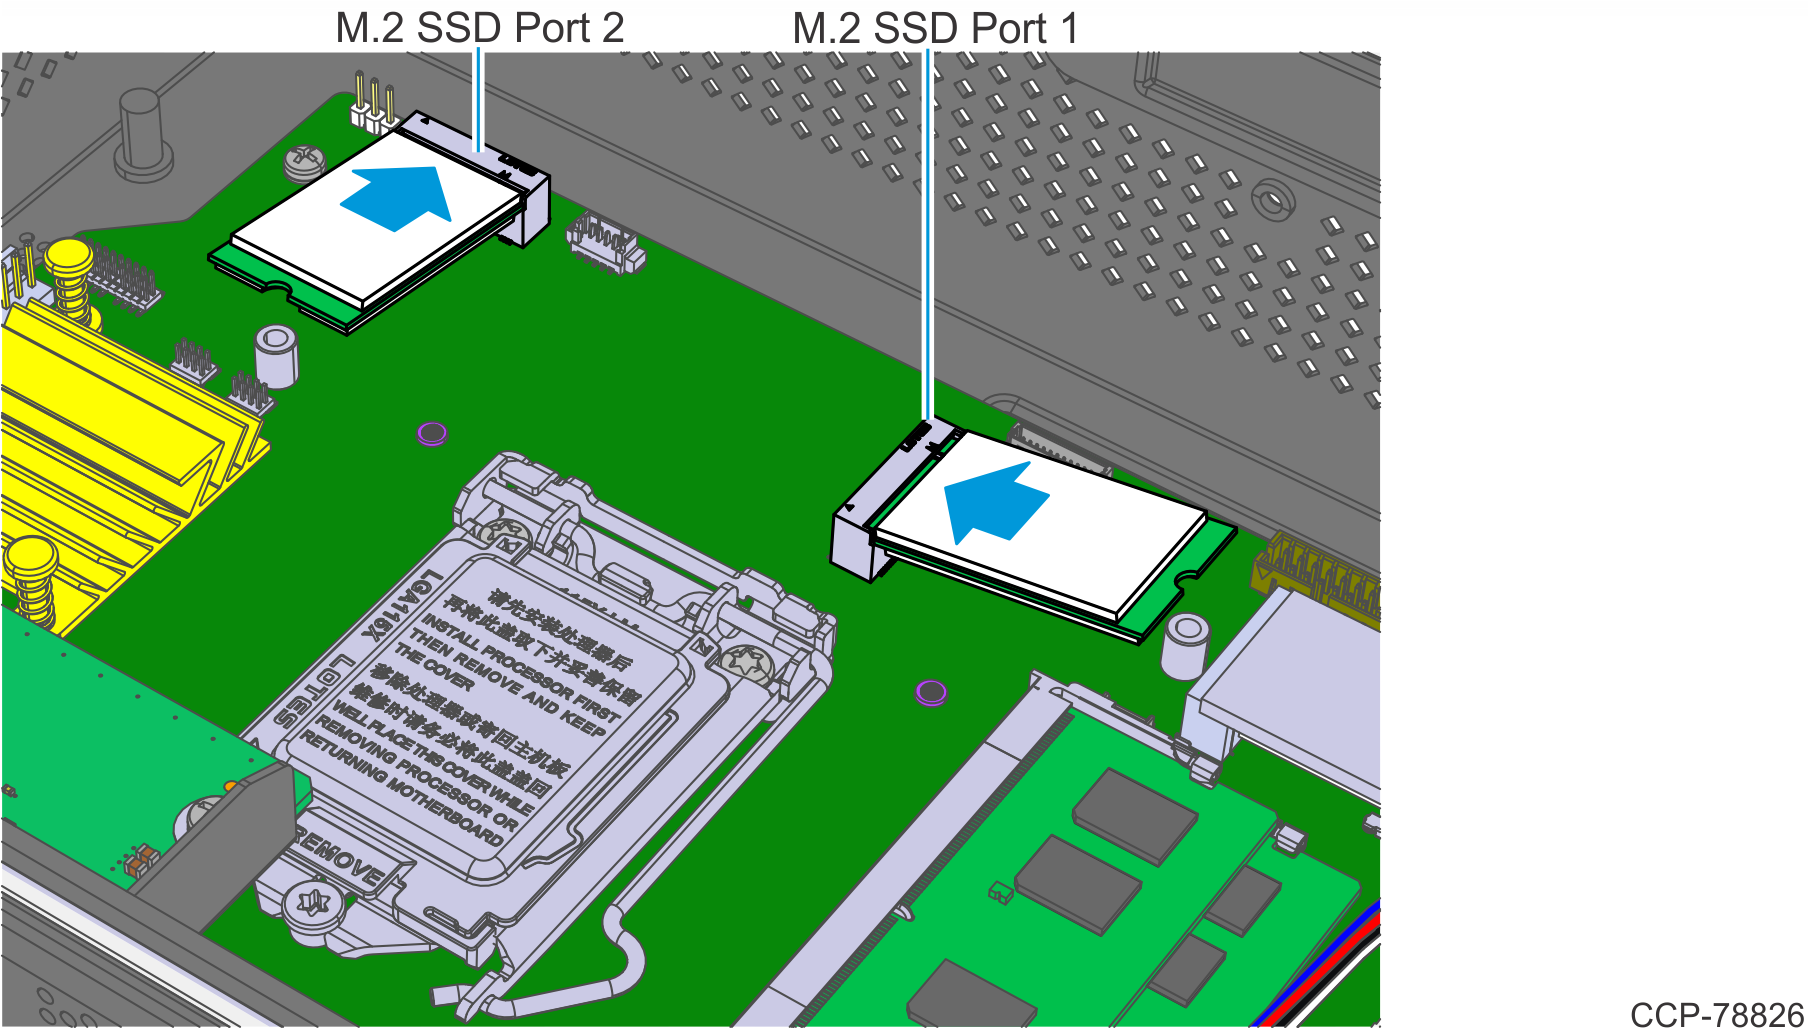
- Insert the M.2 SSD at an angle and slide it into the connector.Note
There are two M.2 Ports on the Motherboard. The primary M.2 SSD should be installed in the M.2 Port 1, and the secondary M.2 SSD (for dual media) should be installed in the M.2 Port 2.
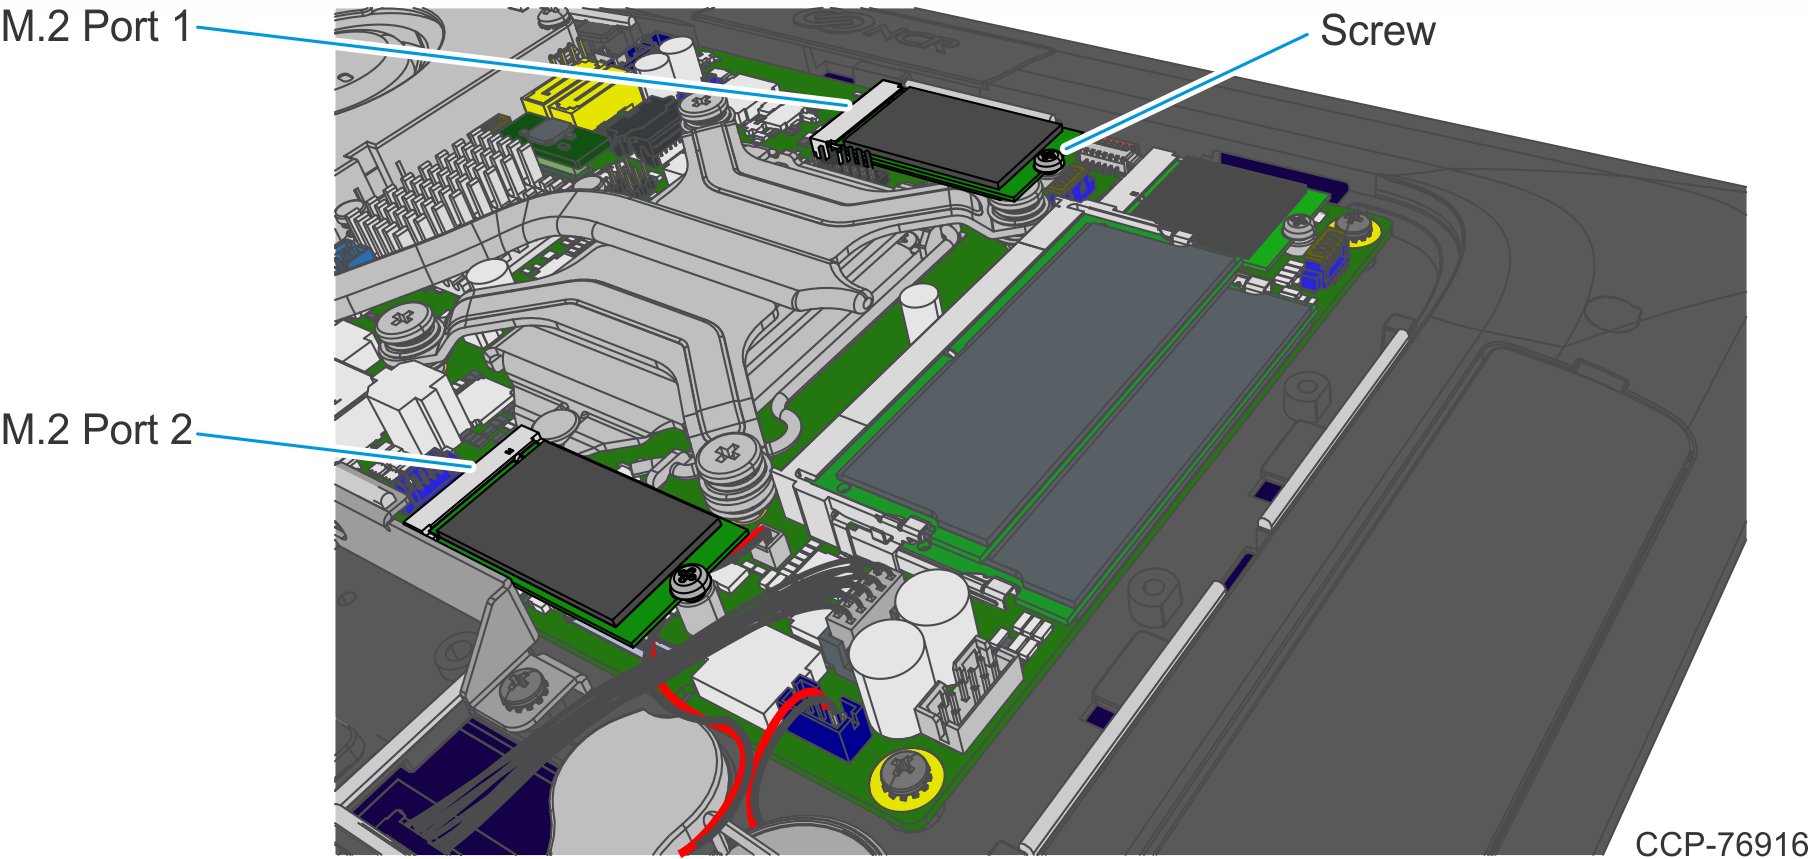
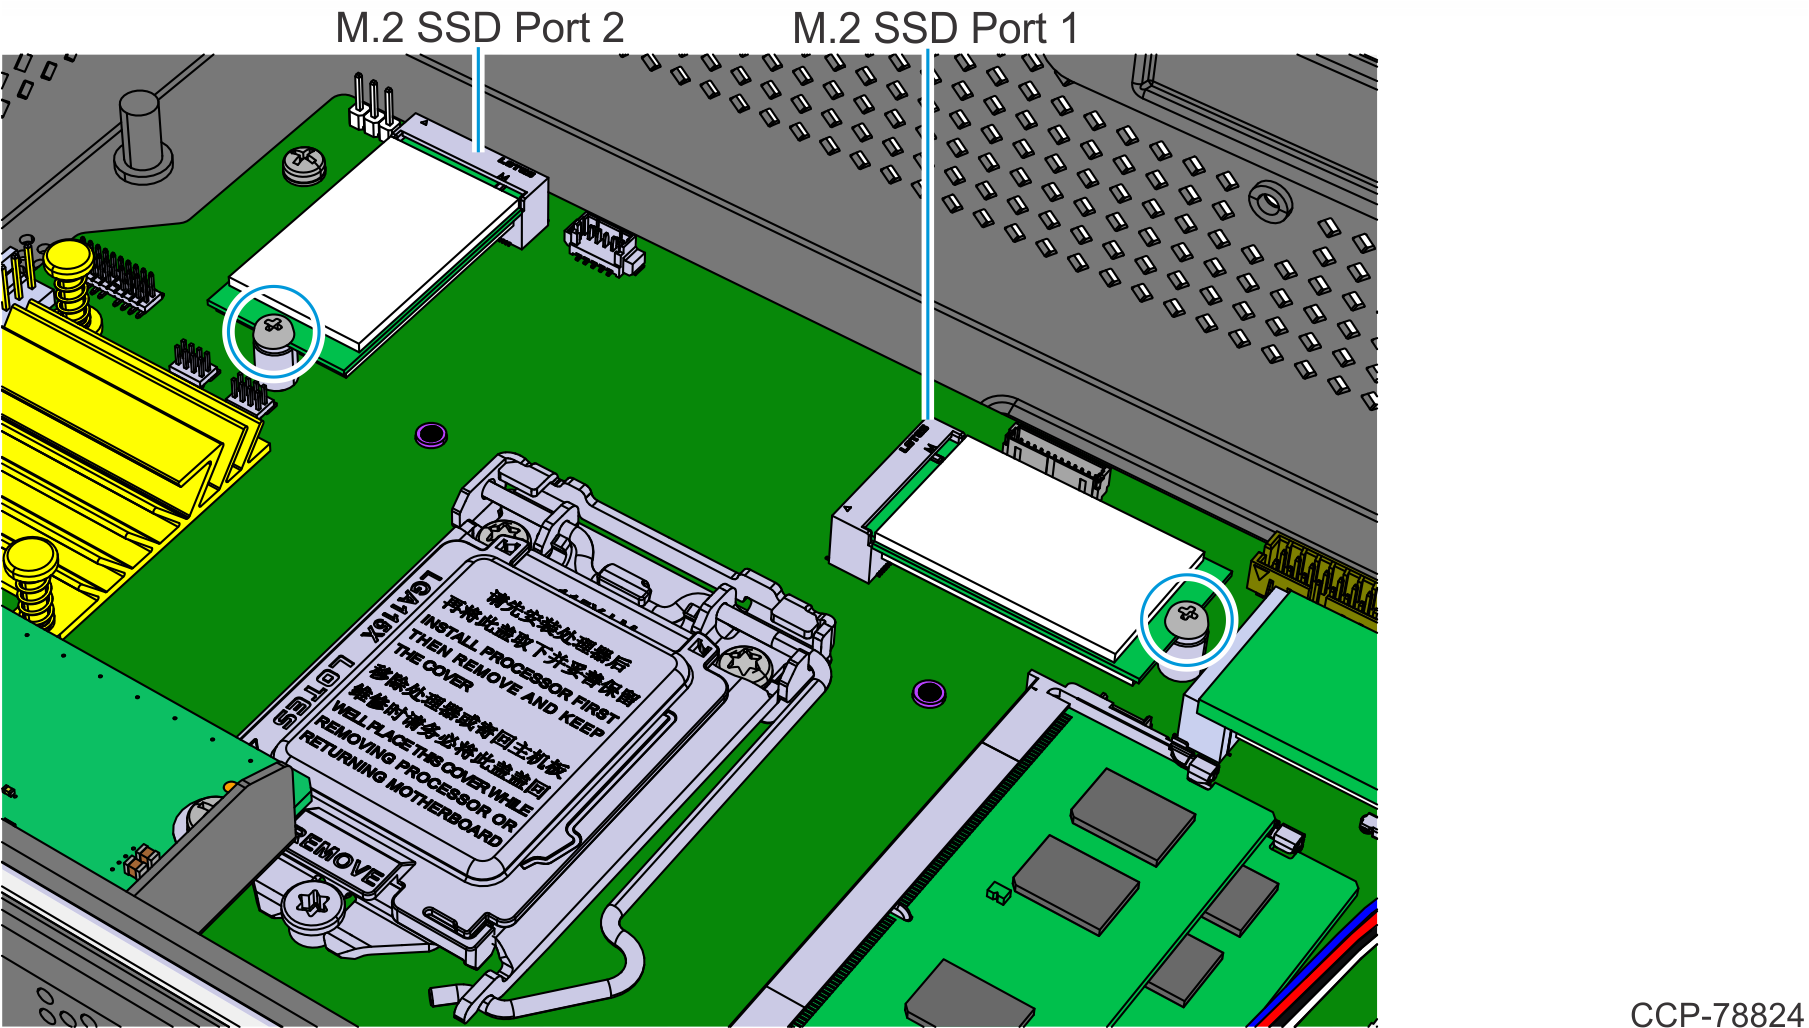
- Secure the M.2 SSD to the Motherboard with a screw.Note
When installing the secondary M.2 SSD in M.2 Port 2, ensure cables are not pinched by the SSD and the SSD’s mounting screw.
- Reinstall the Display Back Cover.
- Reconnect the 180-degree USB-C Cable and Ethernet Cable.
- Reinstall the Cable Cover.
NCR CX8 POS (7736)
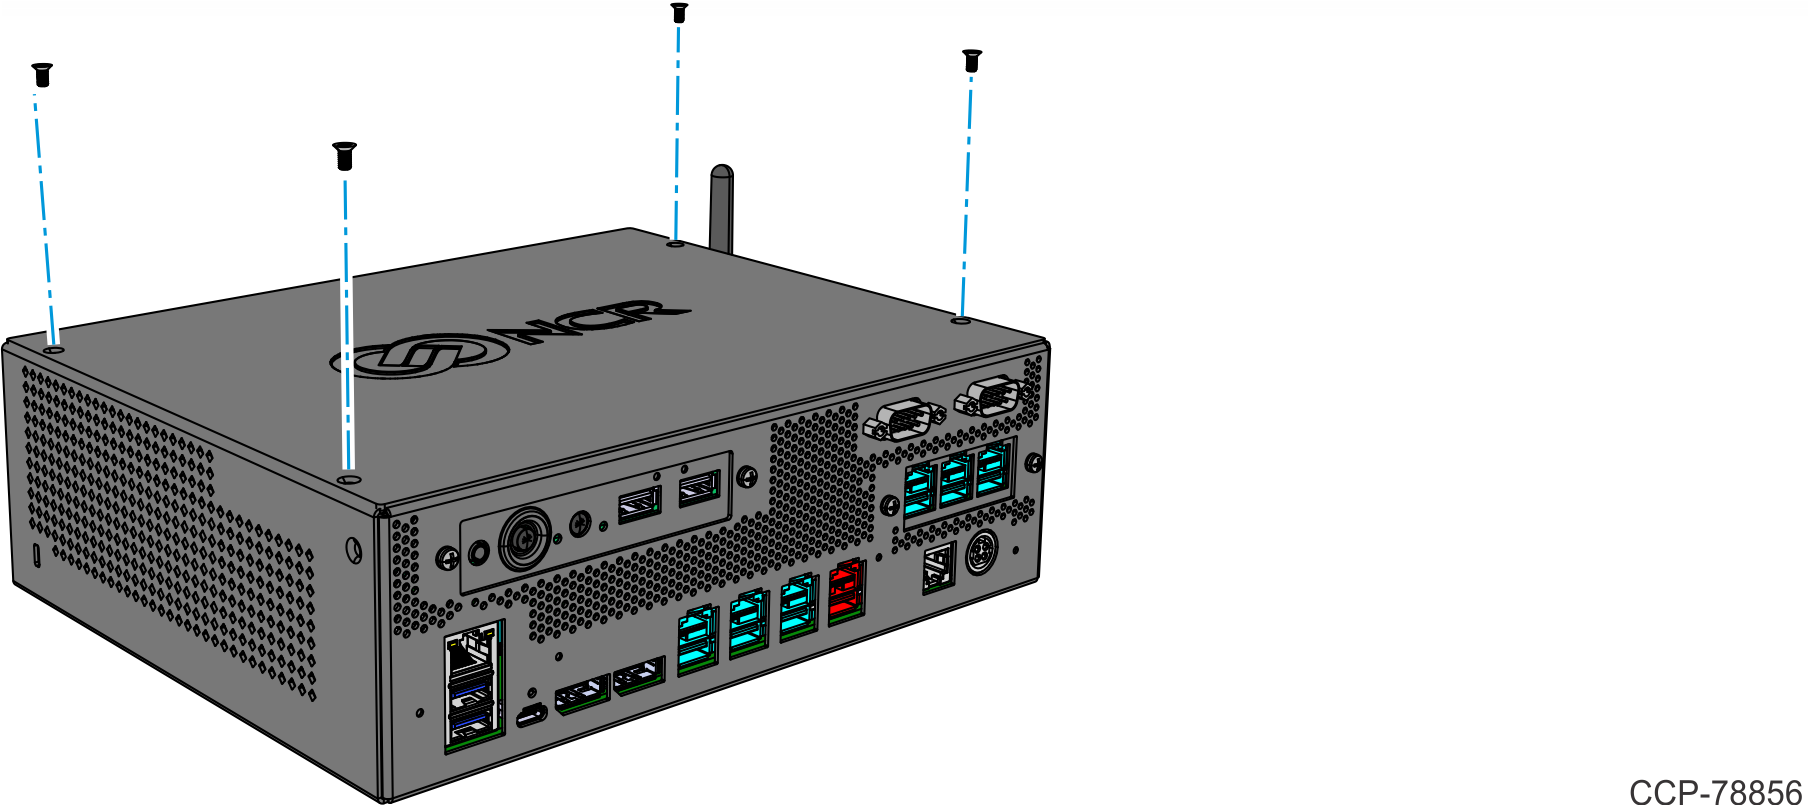
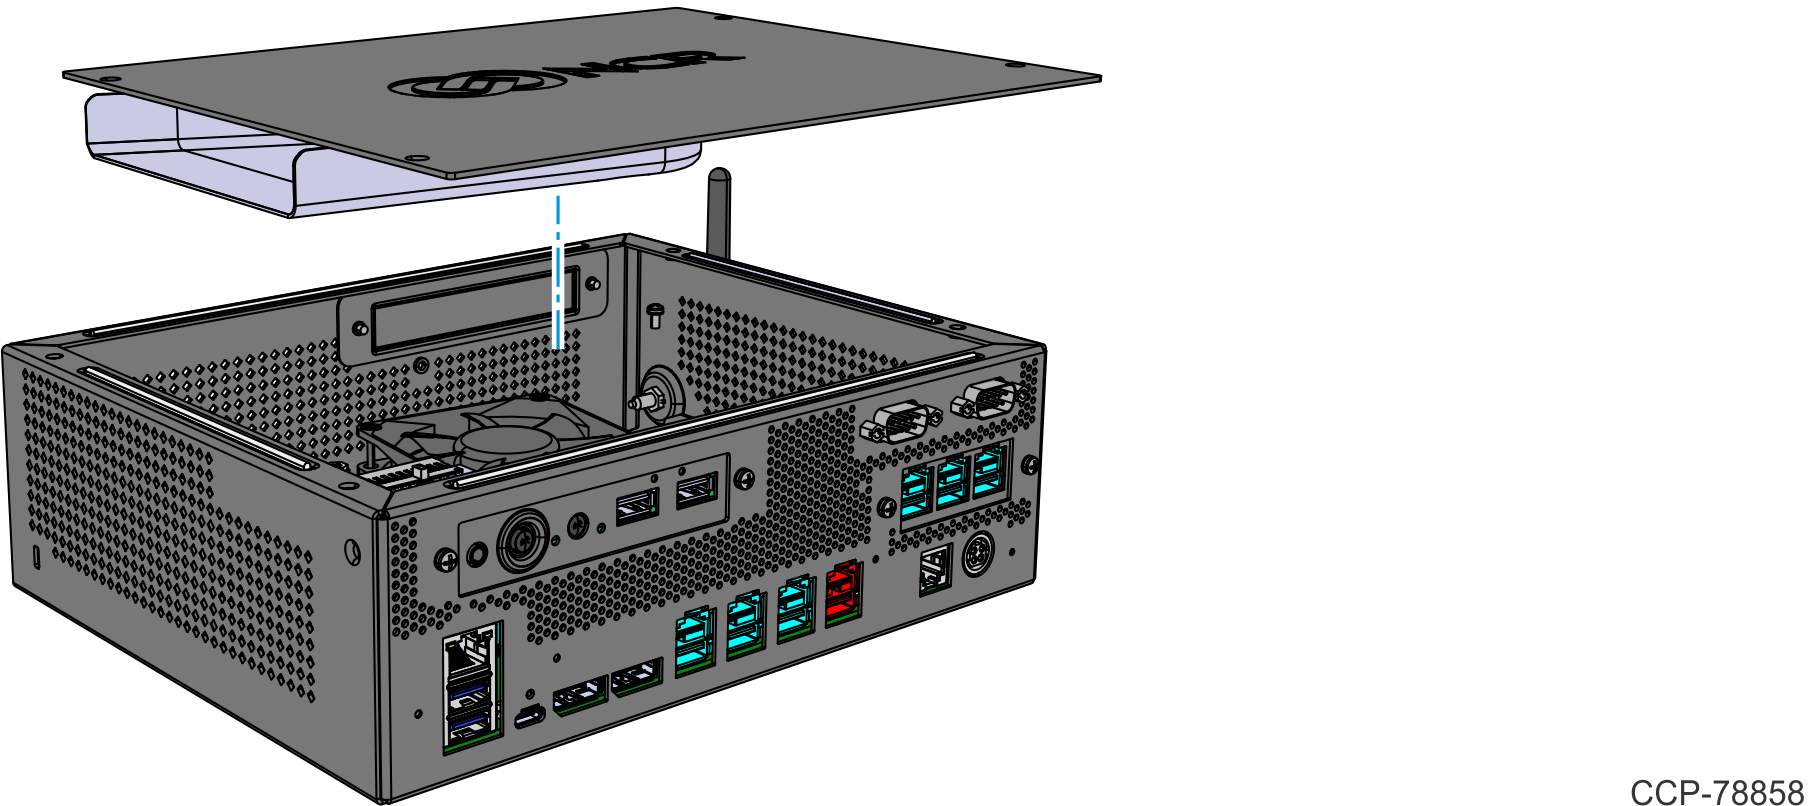
- Remove the Top Cover. There are two types of Top Covers:
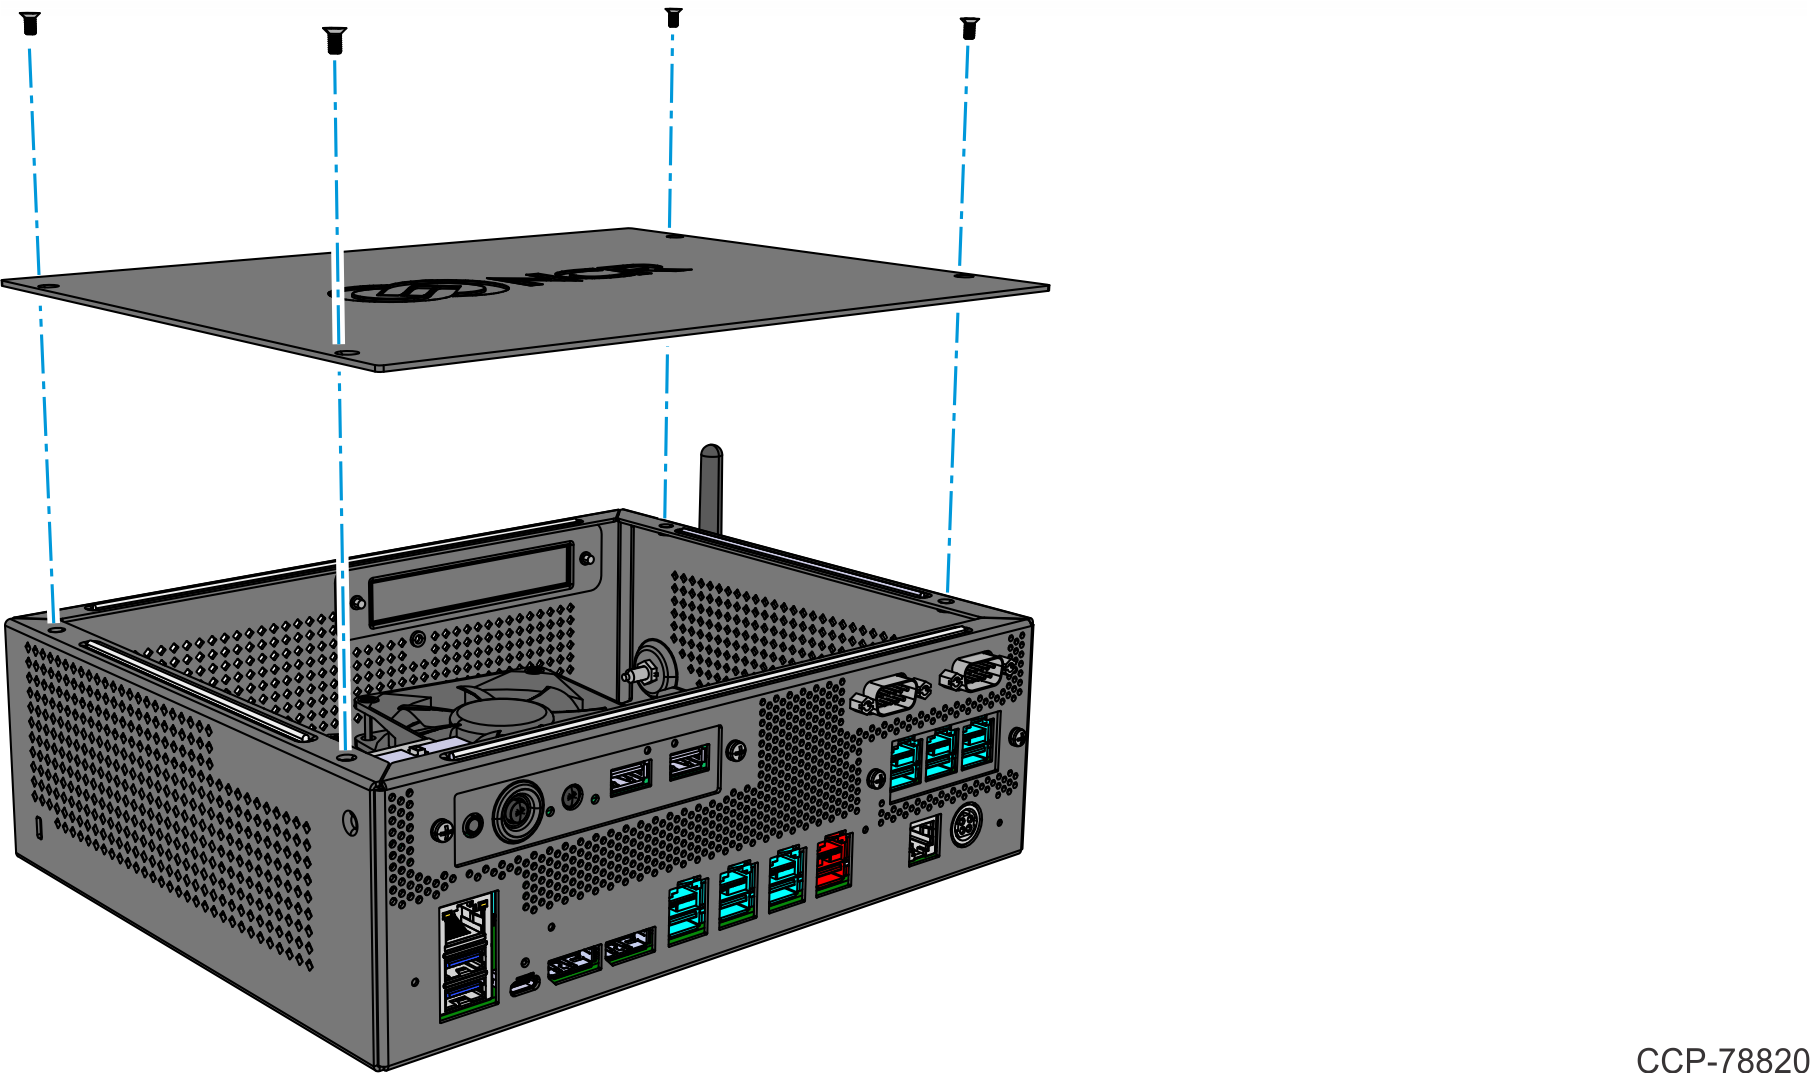
- Top Cover without Duct — Remove the four (4) screws securing the Top Cover to the chassis.
- Top Cover with Duct
- Remove the four (4) screws securing the Top Cover to the chassis.
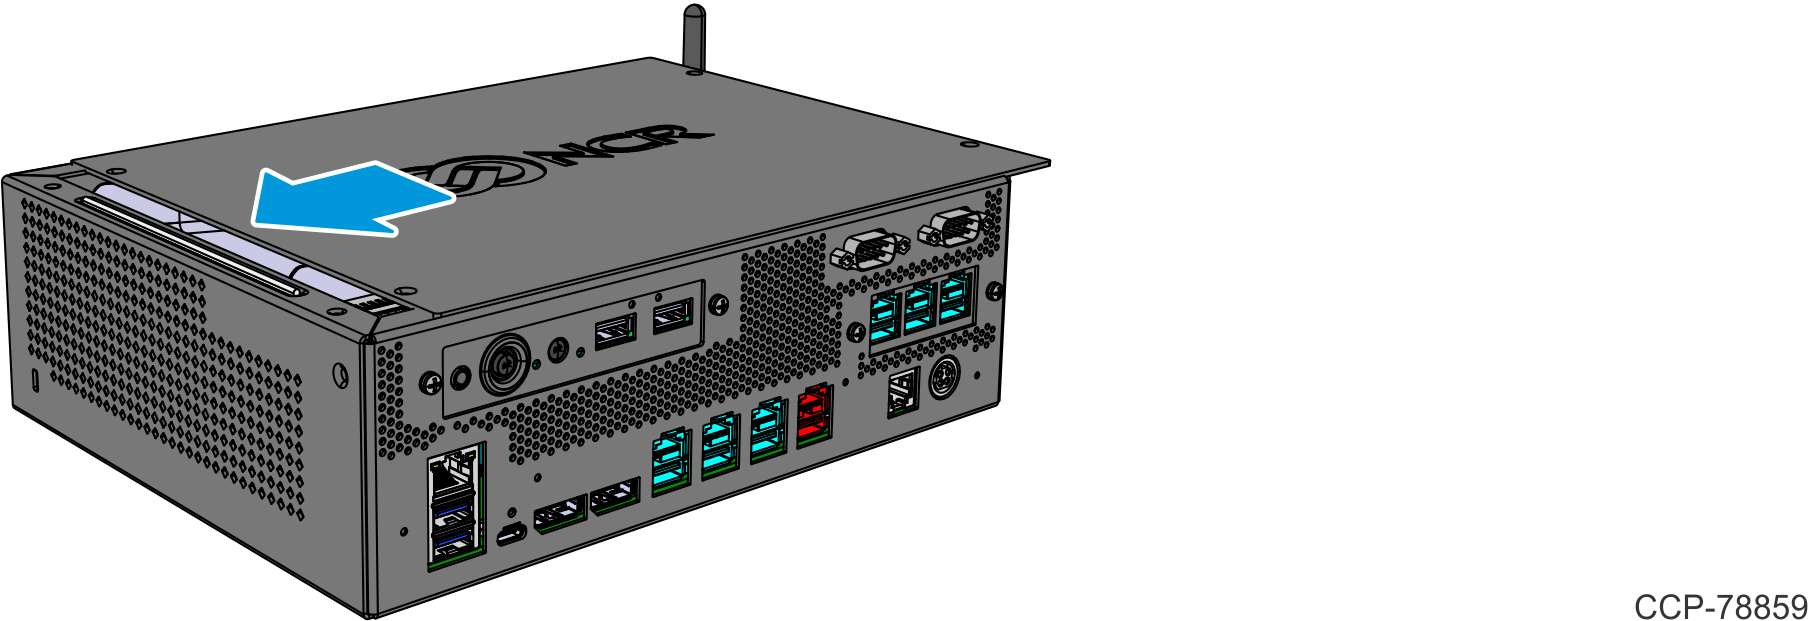
Slide the Top Cover in the direction shown.

- Top Cover without Duct — Remove the four (4) screws securing the Top Cover to the chassis.
- Insert the M.2 SSD at an angle and slide it into the connector.Note
There are two M.2 Ports on the Motherboard. The primary M.2 SSD should be installed in the M.2 Port 1, and the secondary M.2 SSD (for dual media) should be installed in the M.2 Port 2.
- Secure the M.2 SSD to the Motherboard with a screw.
- Reinstall the Top Cover.
- Top Cover without Duct – Install the Top Cover on the chassis using four (4) screws.
- Top Cover with Duct
- Set the Top Cover on the chassis.
- Slide the Top Cover in the direction shown to align the screw holes of the Cover with the screw holes of the chassis.
- Secure the Top Cover with four (4) screws.
- Top Cover without Duct – Install the Top Cover on the chassis using four (4) screws.
