7772-K452 XL7 Hinge Mount w/ USB-C Cable
This kit provides a hinge mount and cable to install the XL7 Customer Display on the NCR CX7 All-in-One POS (7772).
Kit Contents
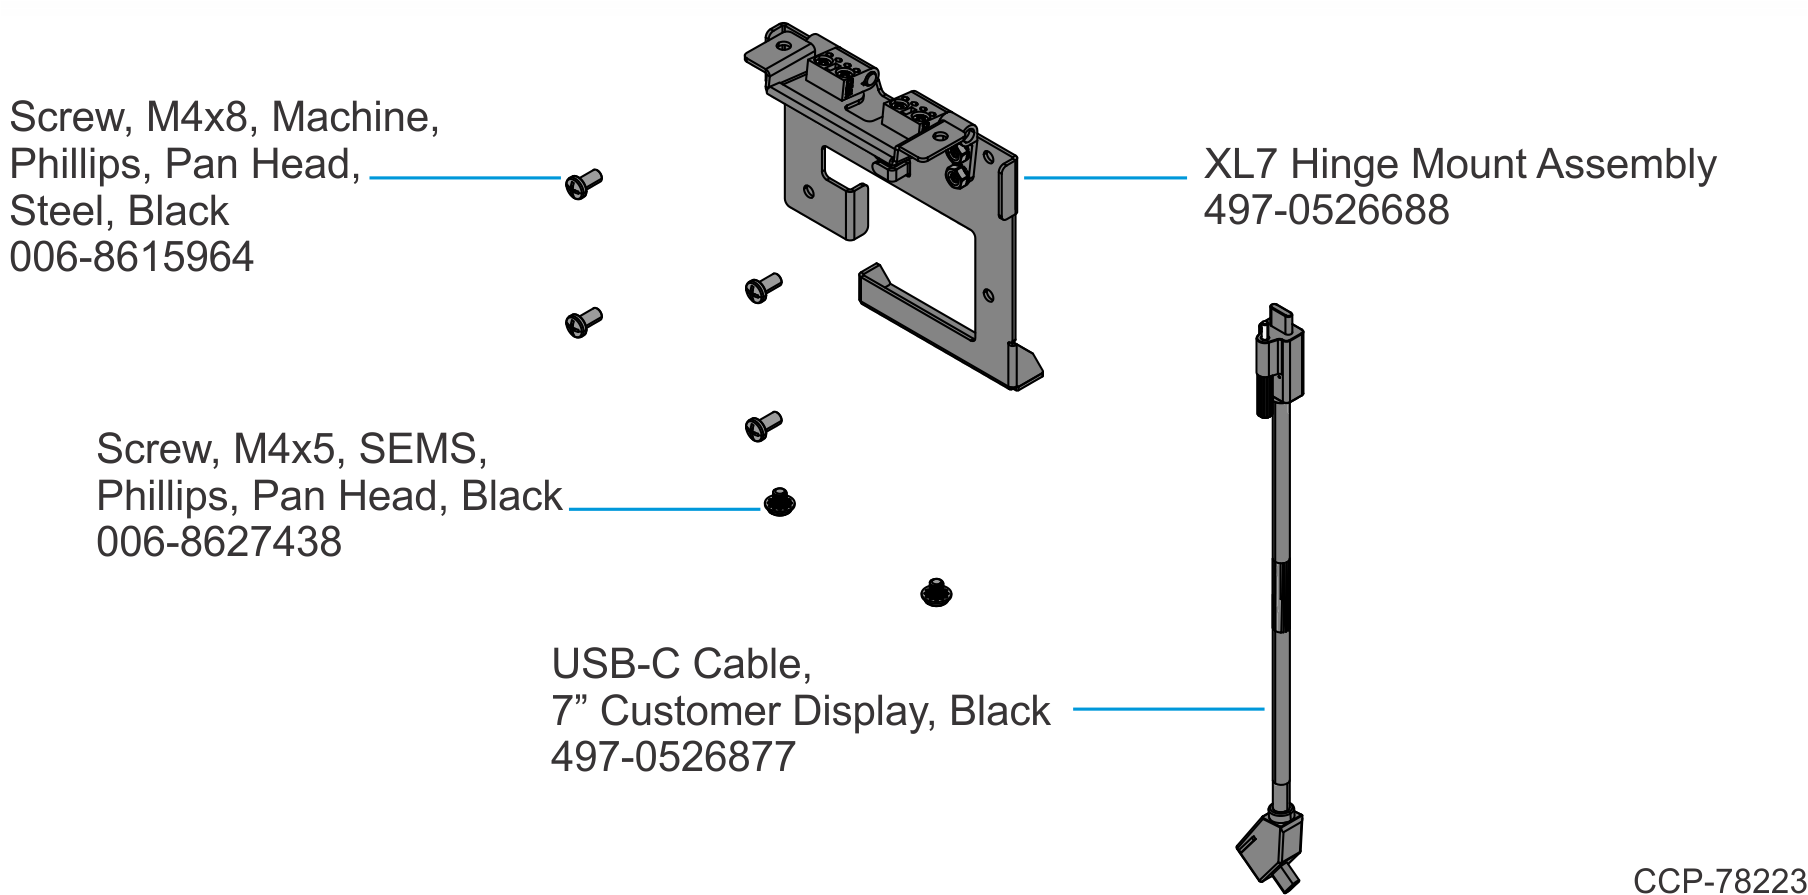
Installation Procedure
Warning
Disconnect the AC power cord from the AC outlet and wait 30 seconds before servicing the terminal.
- Lay the Display face down on a flat surface.Note
Always use a soft material (cloth, foam) to protect the display screen when placing the terminal face down.
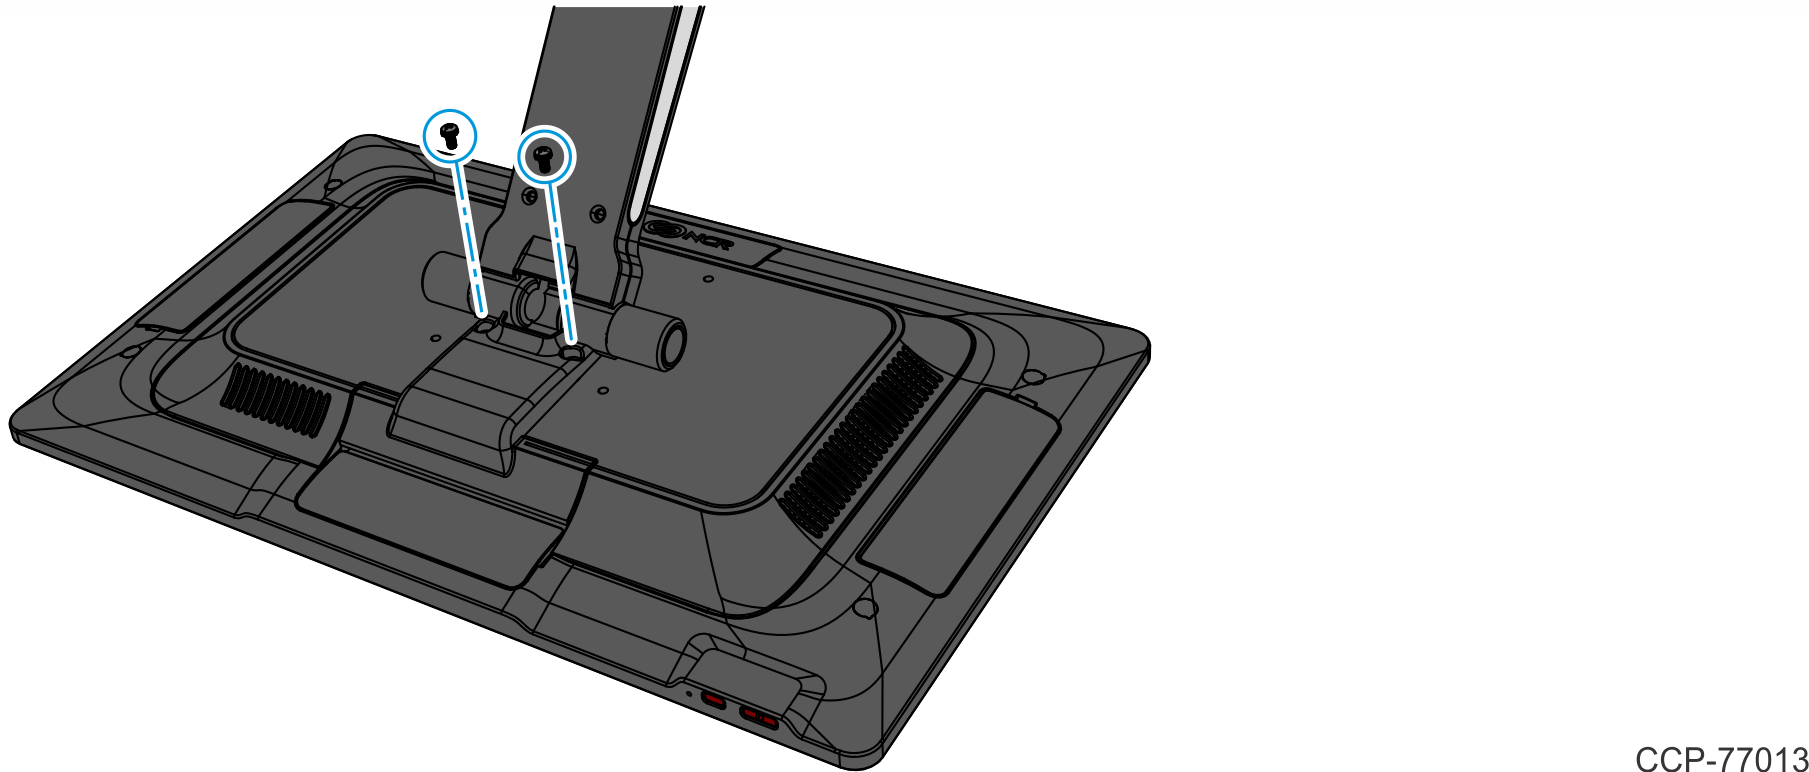
- Remove the Cable Cover.
- Remove the two (2) screws that secure the Cable Cover to the Back Cover.
- Rotate and unhook the Cable Cover from the Back Cover.
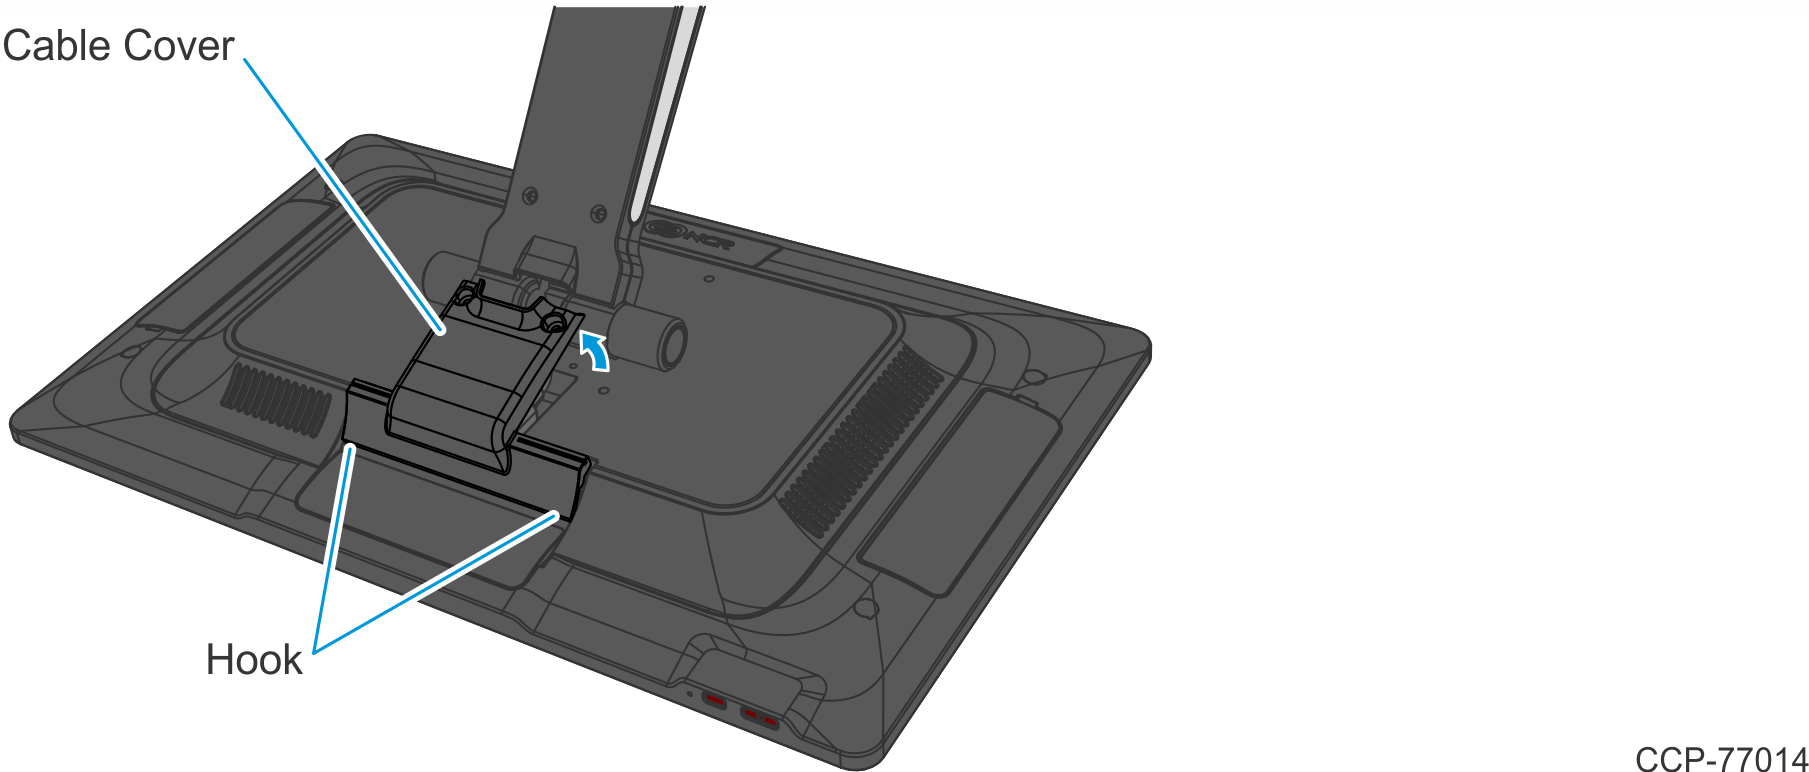
- Remove the two (2) screws that secure the Cable Cover to the Back Cover.
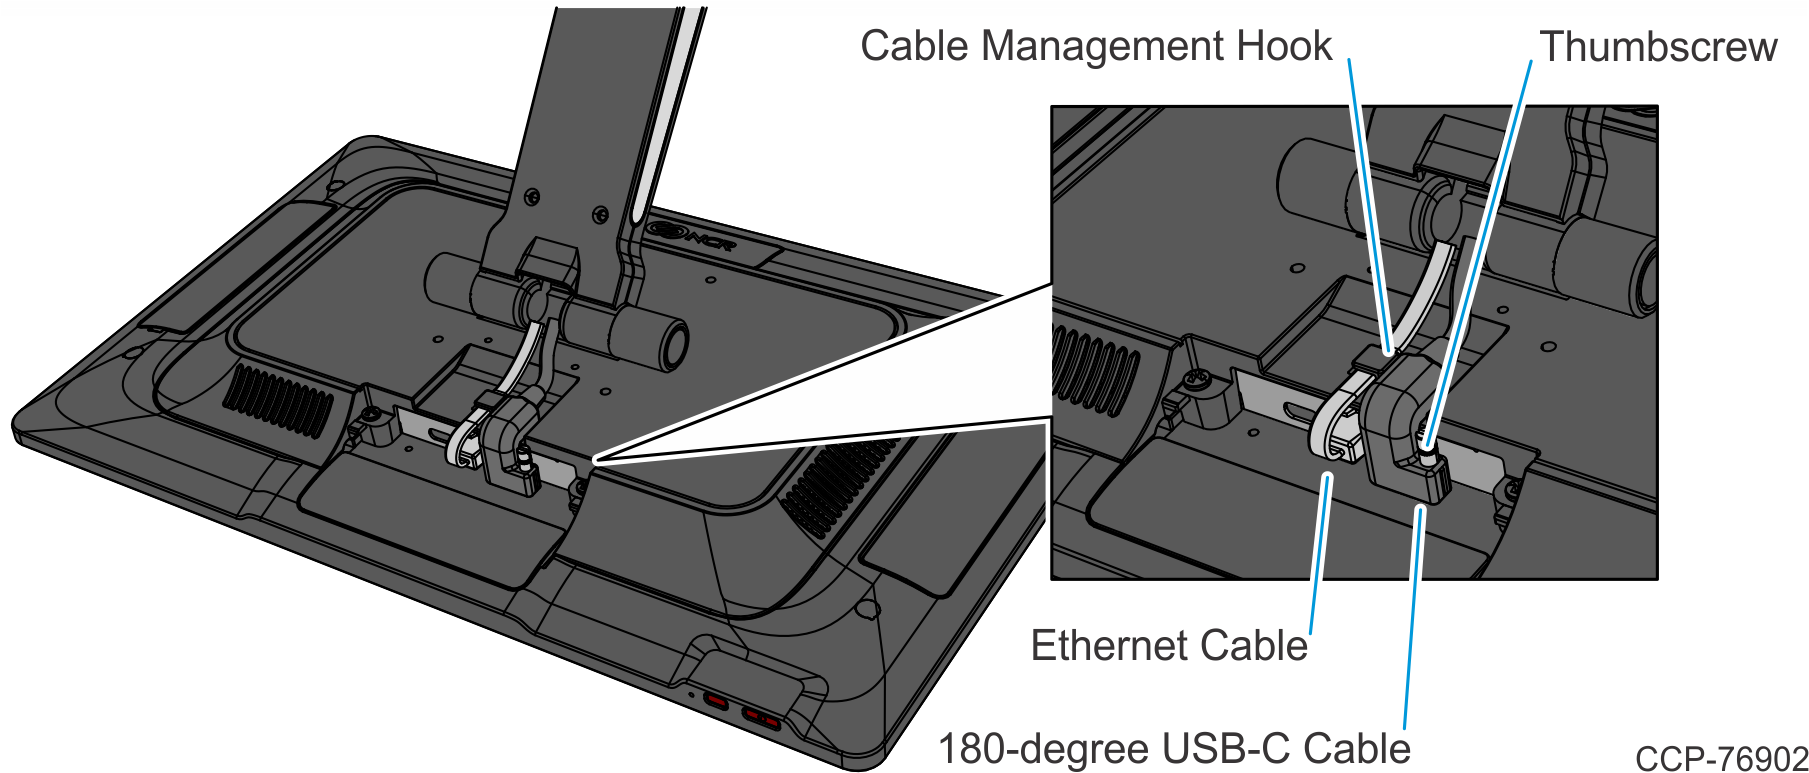
- Disconnect the Cables.
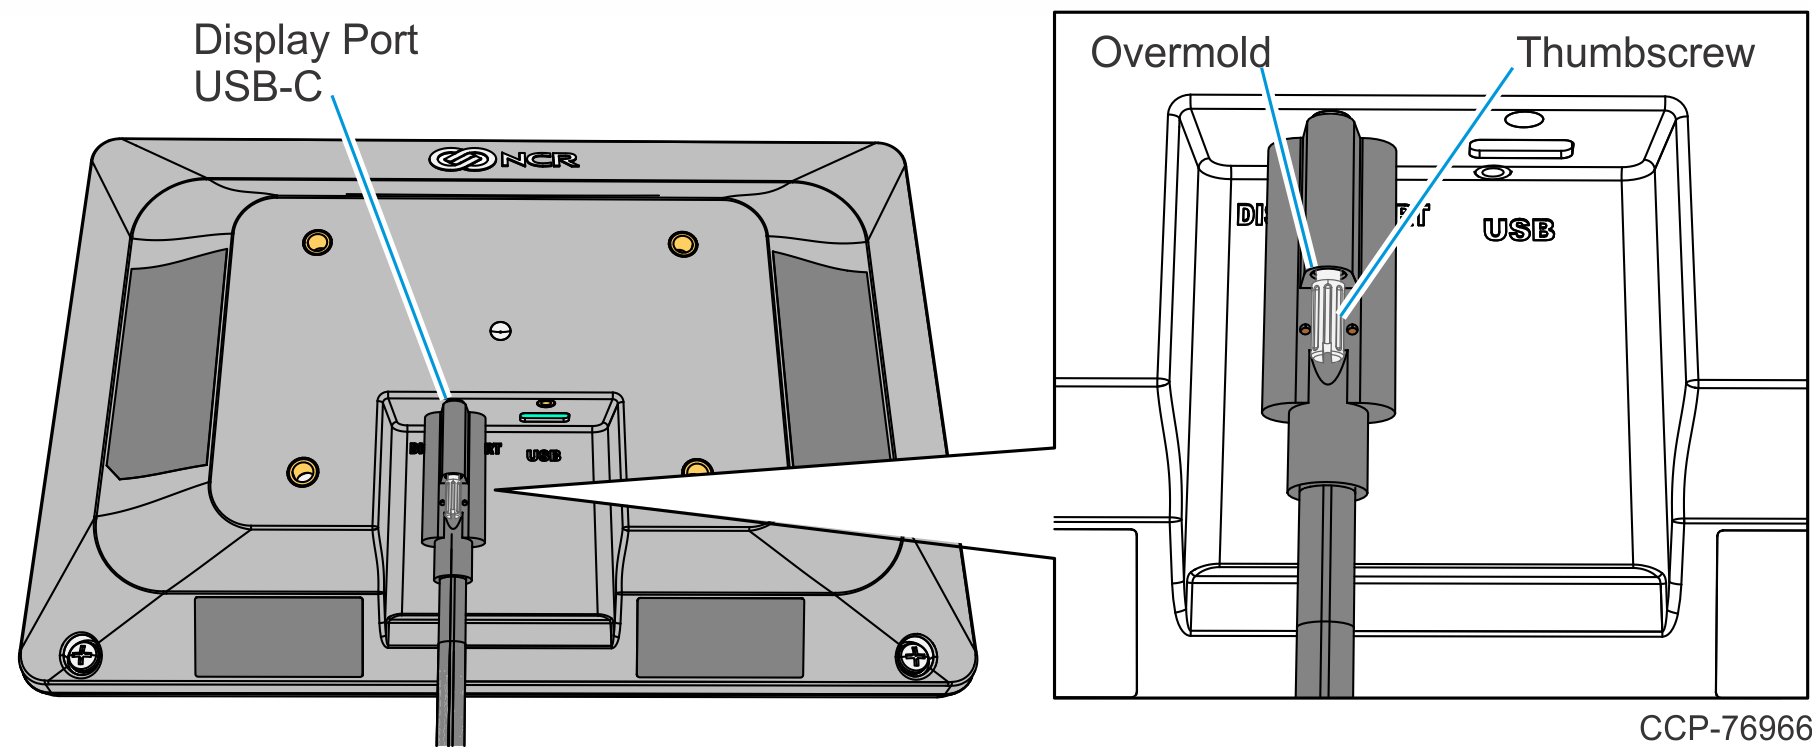
- Loosen the thumbscrew of the 180-degree USB-C Cable then disconnect the Cable.
- Remove the Ethernet Cable from the Cable Management Hook then disconnect the Cable.
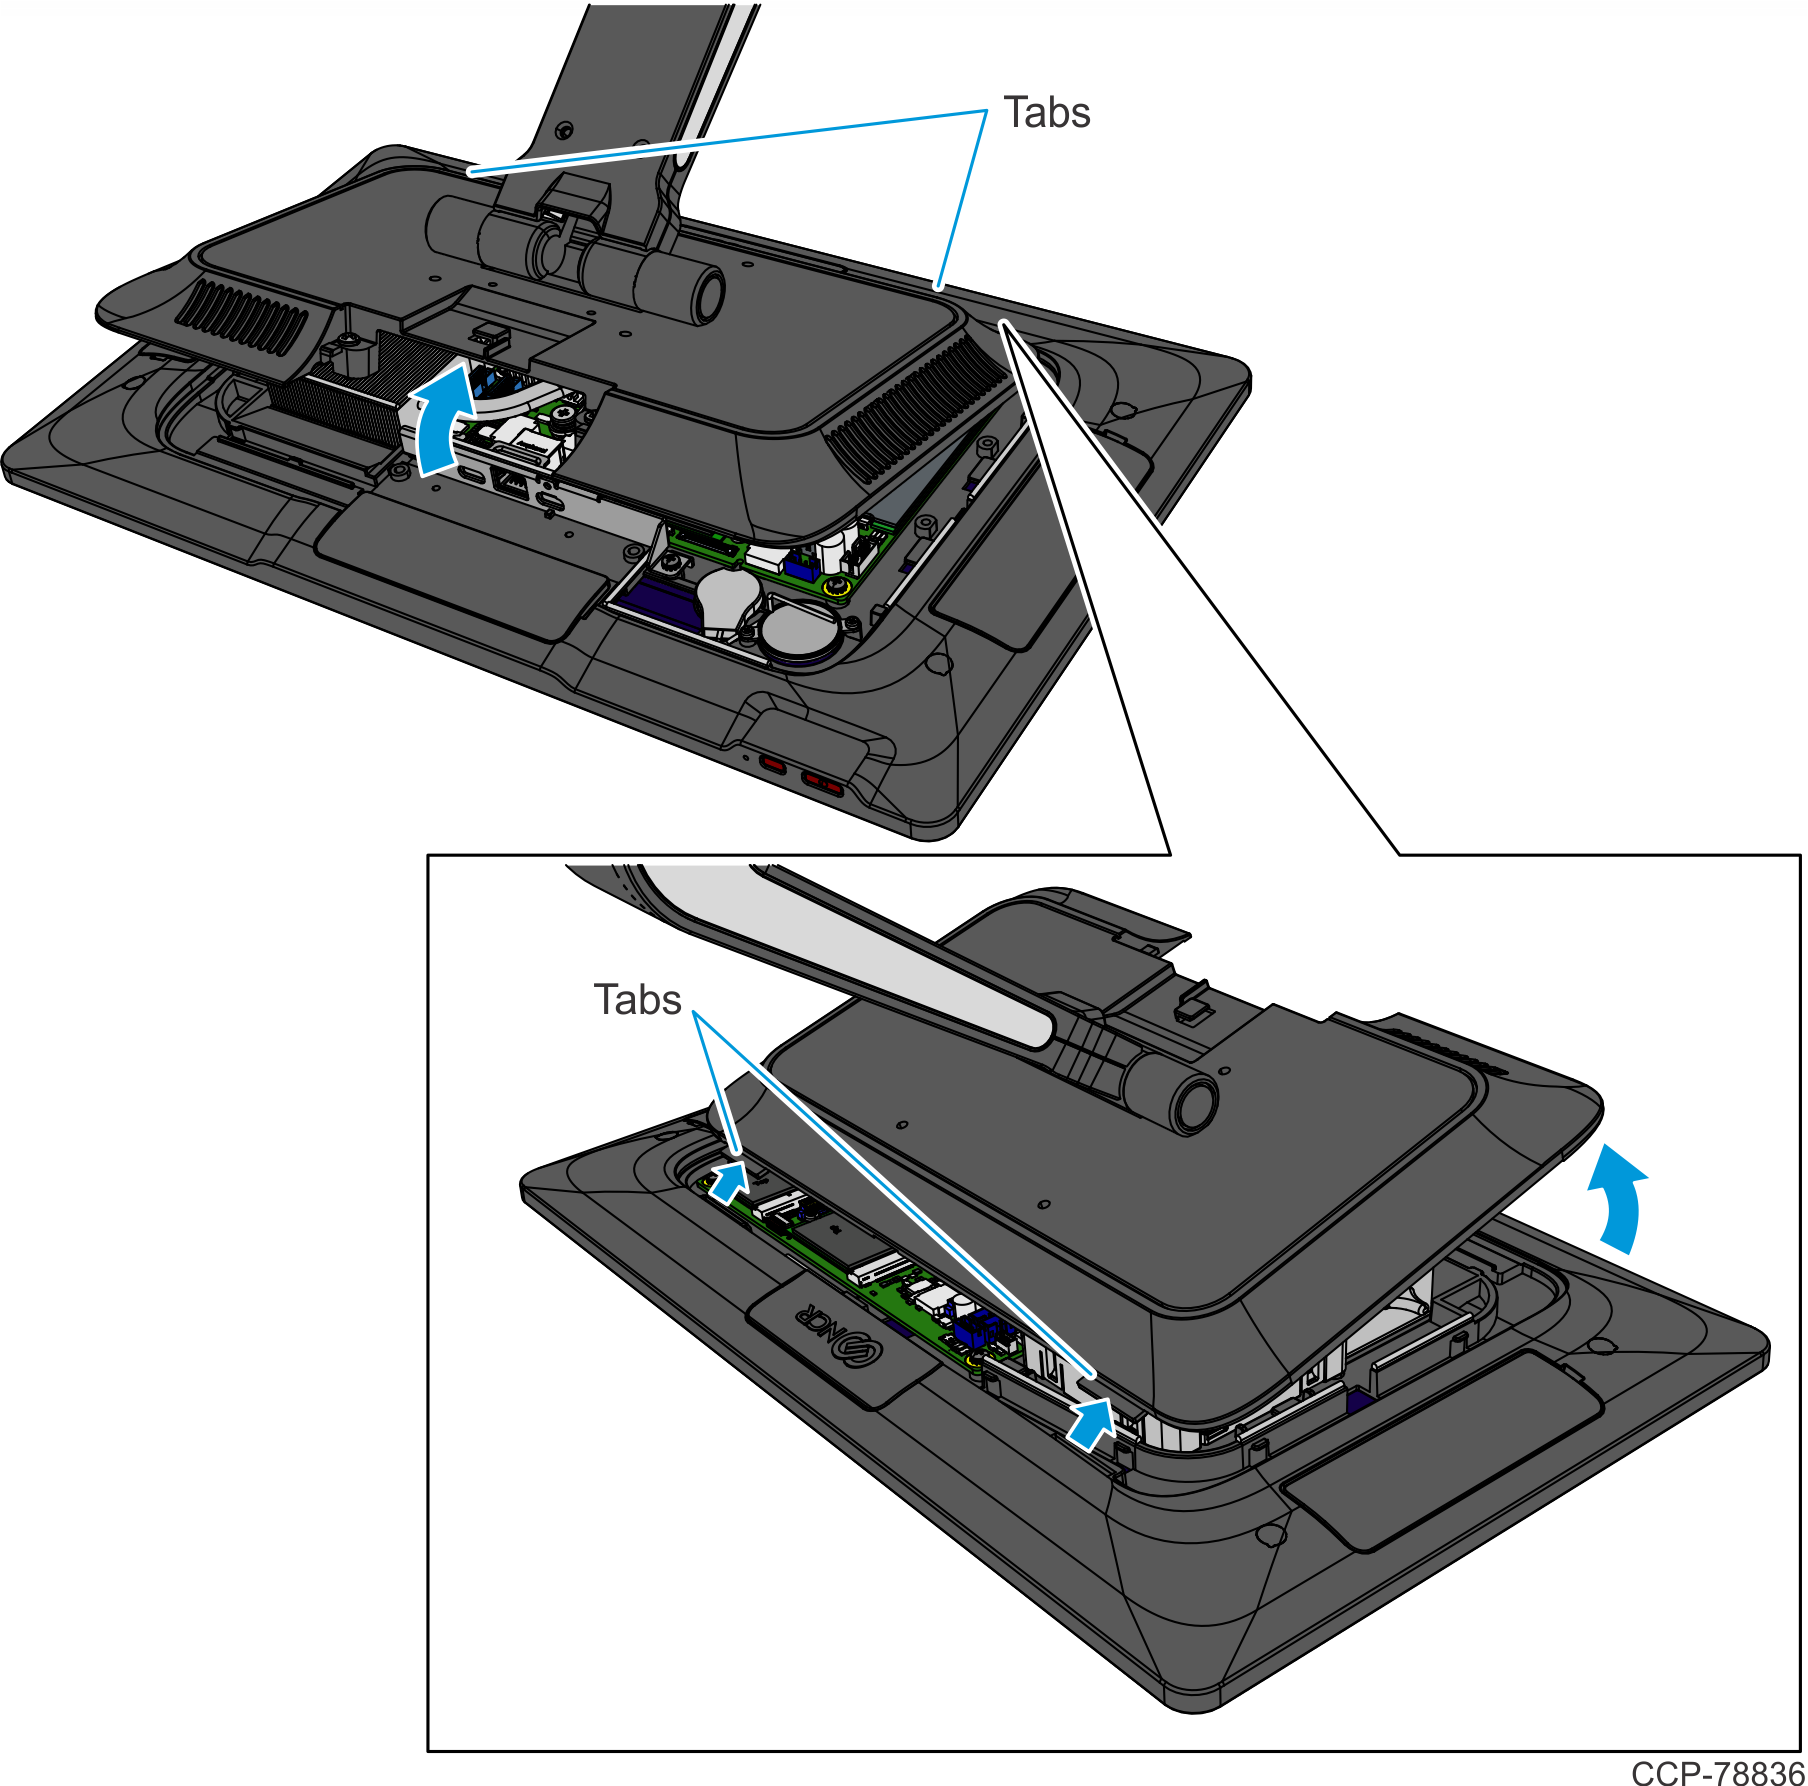
- Loosen the two (2) captive screws that secure the Back Cover to the Display.

- Rotate the Back Cover away from the Display and unhook the Back Cover Tabs.
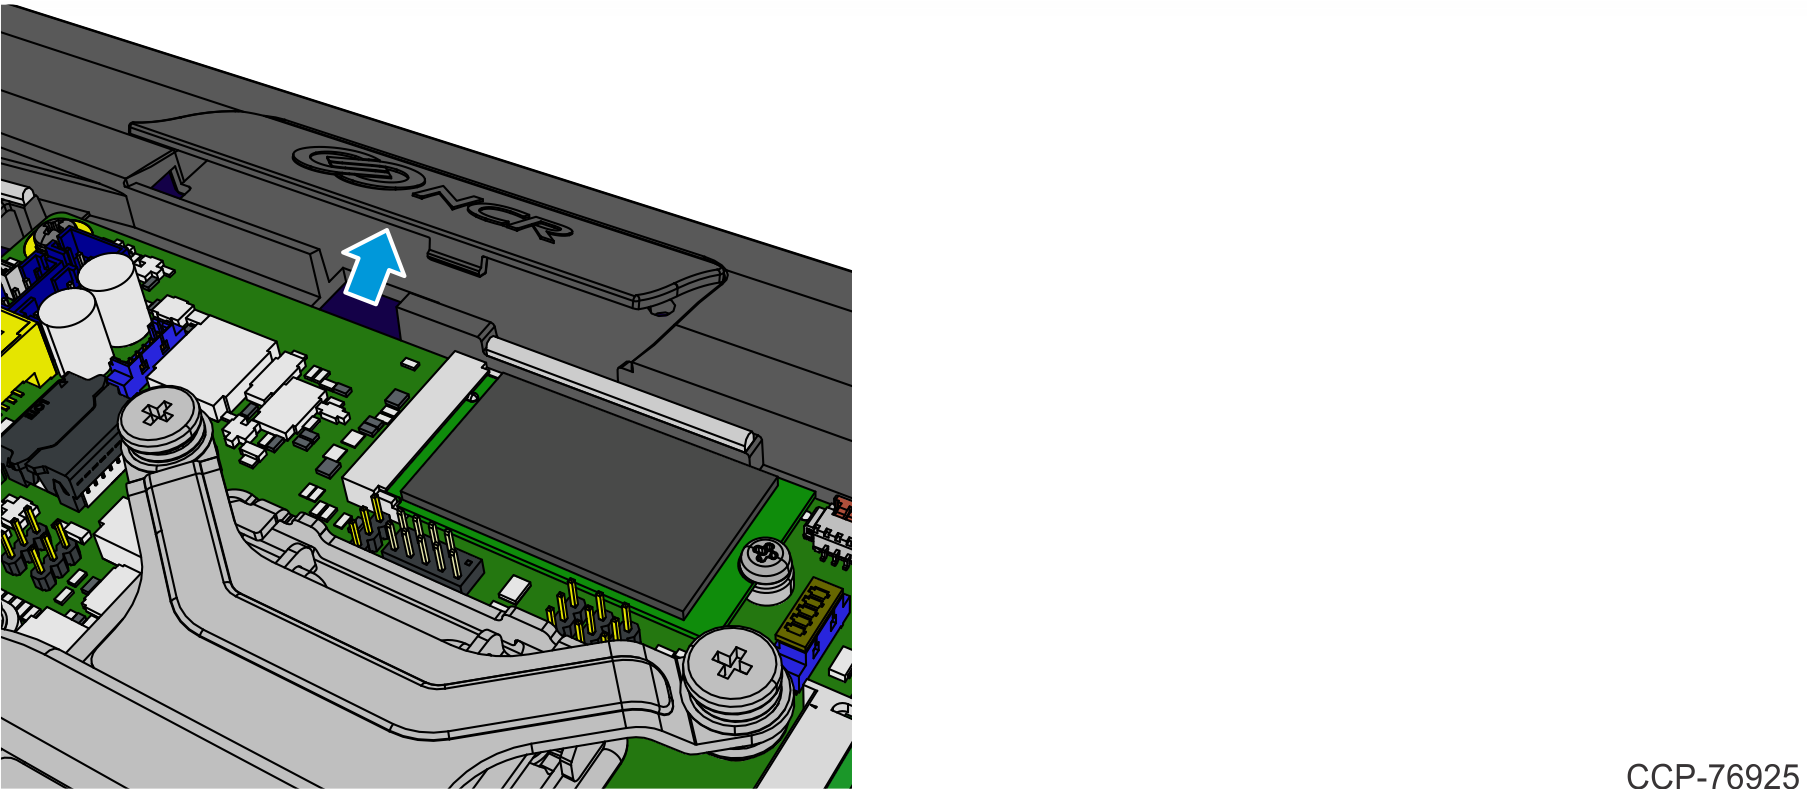
- Lift the bottom of the Logo Badge to unsnap it from Port D of the display housing.
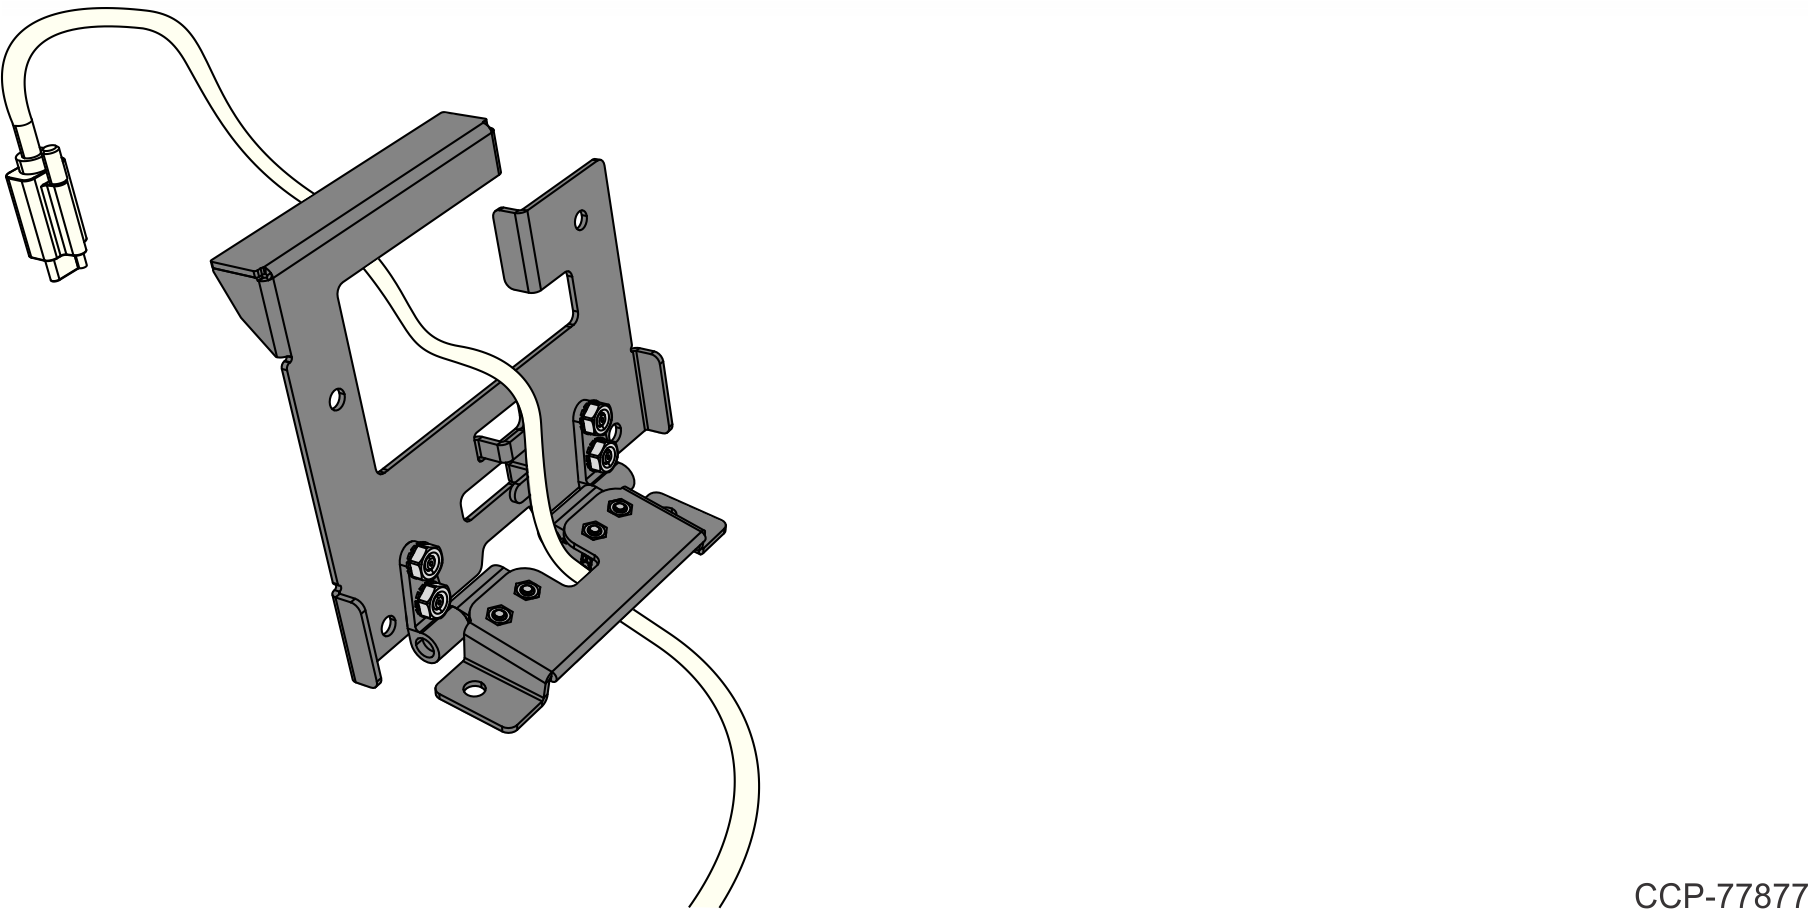
- Route the USB-C Cable through the Bracket as shown.Note
Do not hook the Cable on the Cable Management Hooks.
- Connect the Cable to the XL7 Customer Display. Tighten the thumbscrew.Note
Avoid overtightening the thumbscrew by turning it only until the silver knurled portion touches the black plastic overmold. Overtightening the thumbscrew damages the connector on the board.
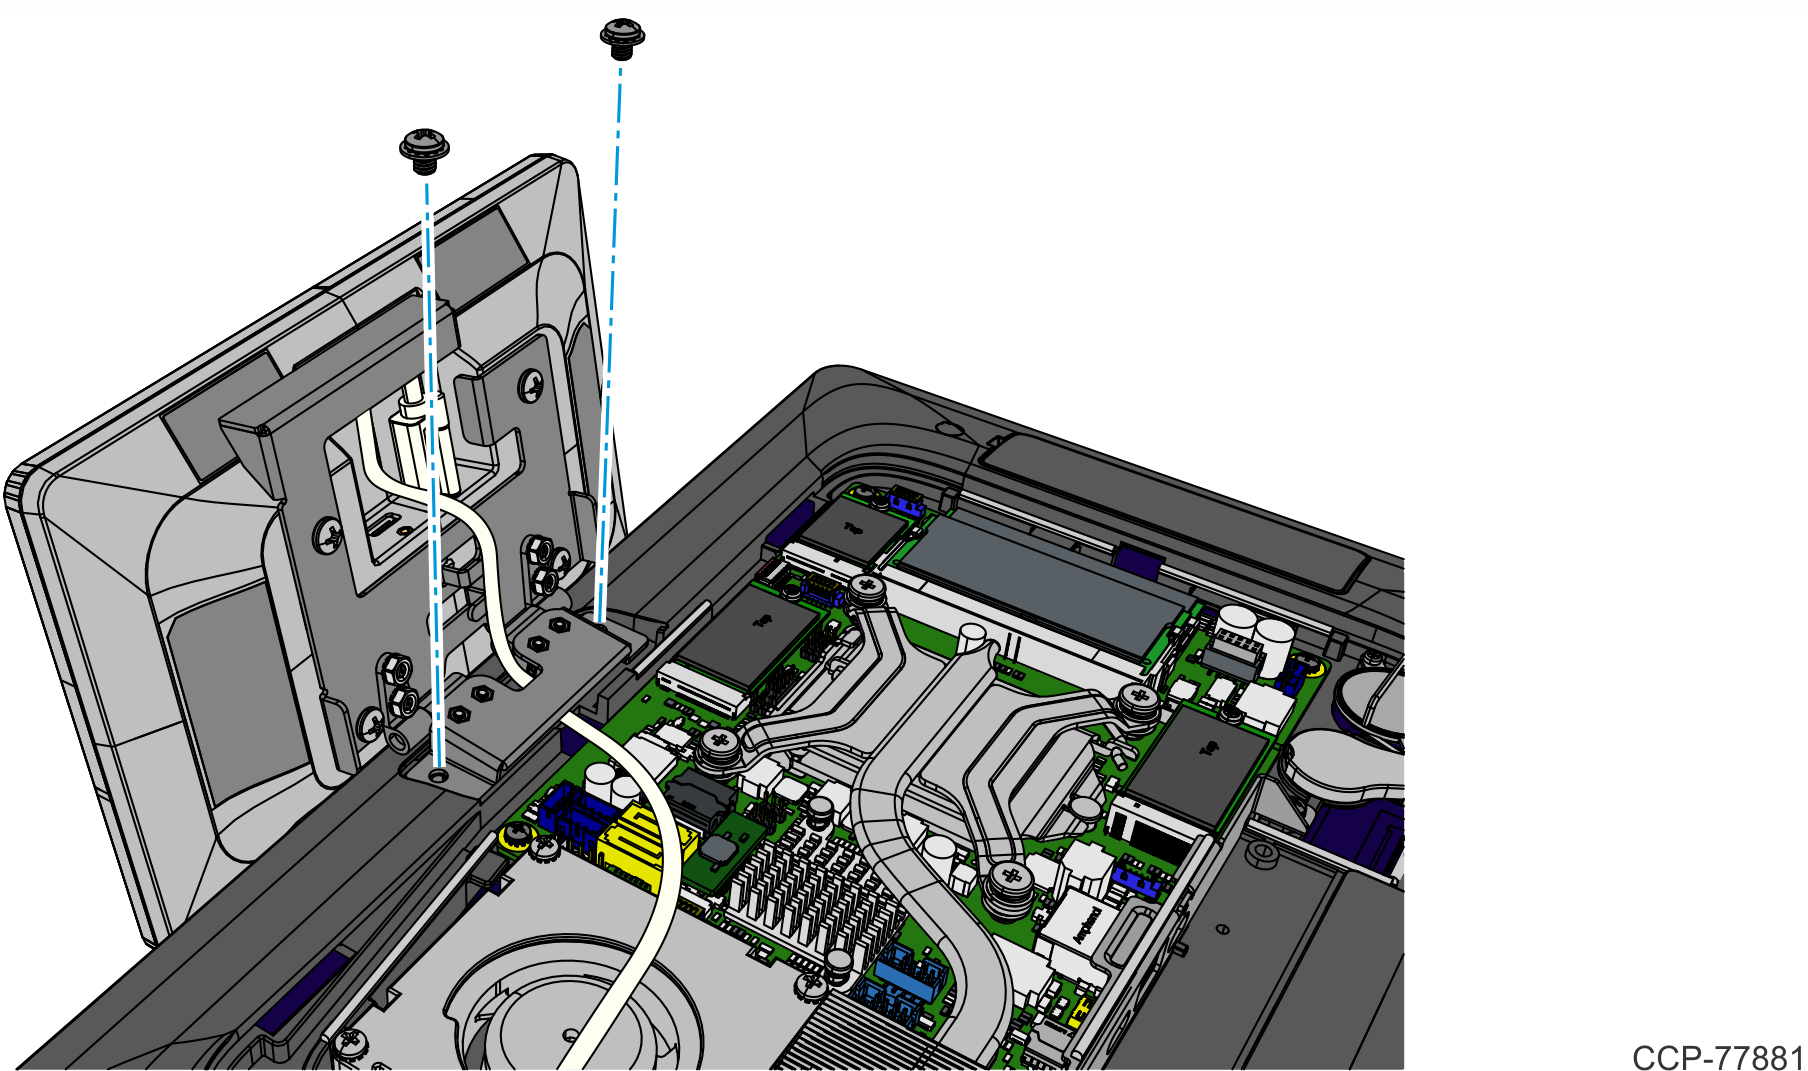
- Install the Bracket on the back of the XL7 Customer Display (4 screws).

- Install the Customer Display and Bracket assembly on the CX7 Display (2 screws).
- Connect the USB-C Cable to the Motherboard and route the Cable through the channel as shown.Note
When routing the Cable through the channel, start from the motherboard connector end of the Cable so that the excess cable is at the customer display end of the cable.
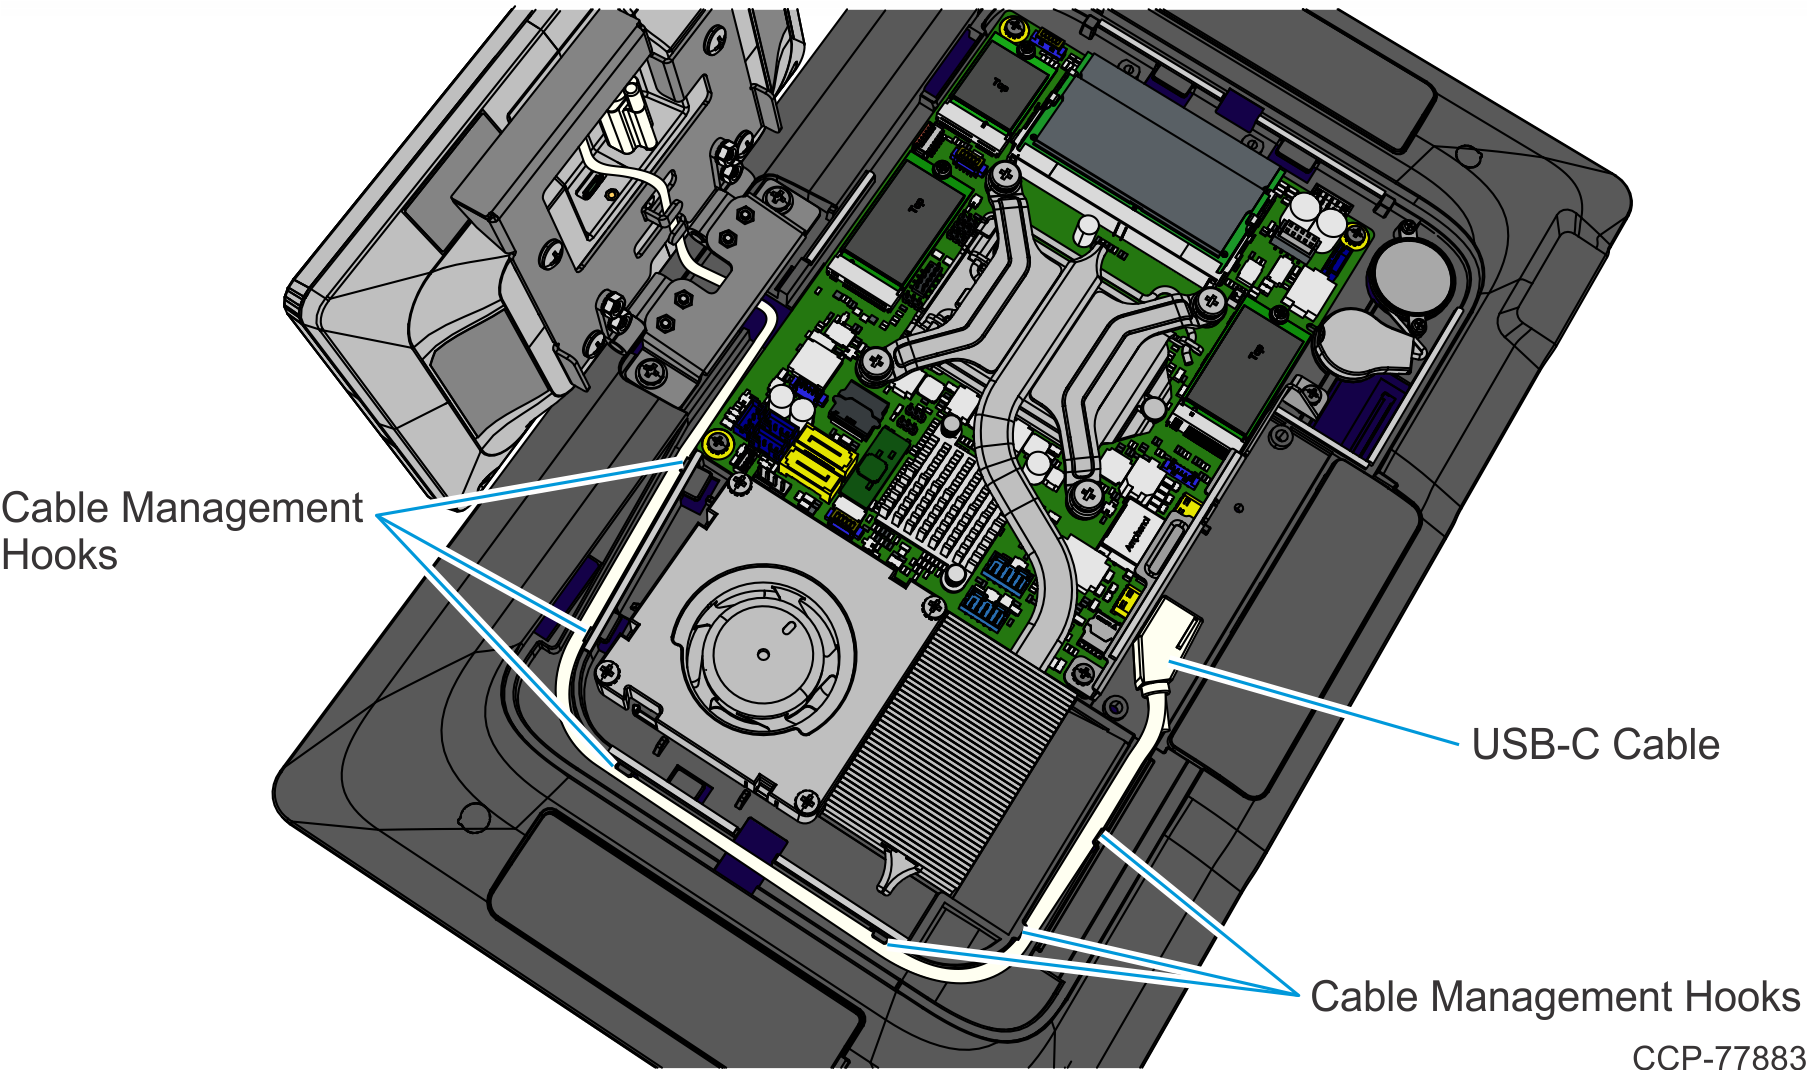
- Secure the Cable under the Cable Management Hooks of the Bracket.

- Reinstall the Display Back Cover.
- Reconnect the 180-degree USB-C Cable and Ethernet Cable.
- Reinstall the Cable Cover.
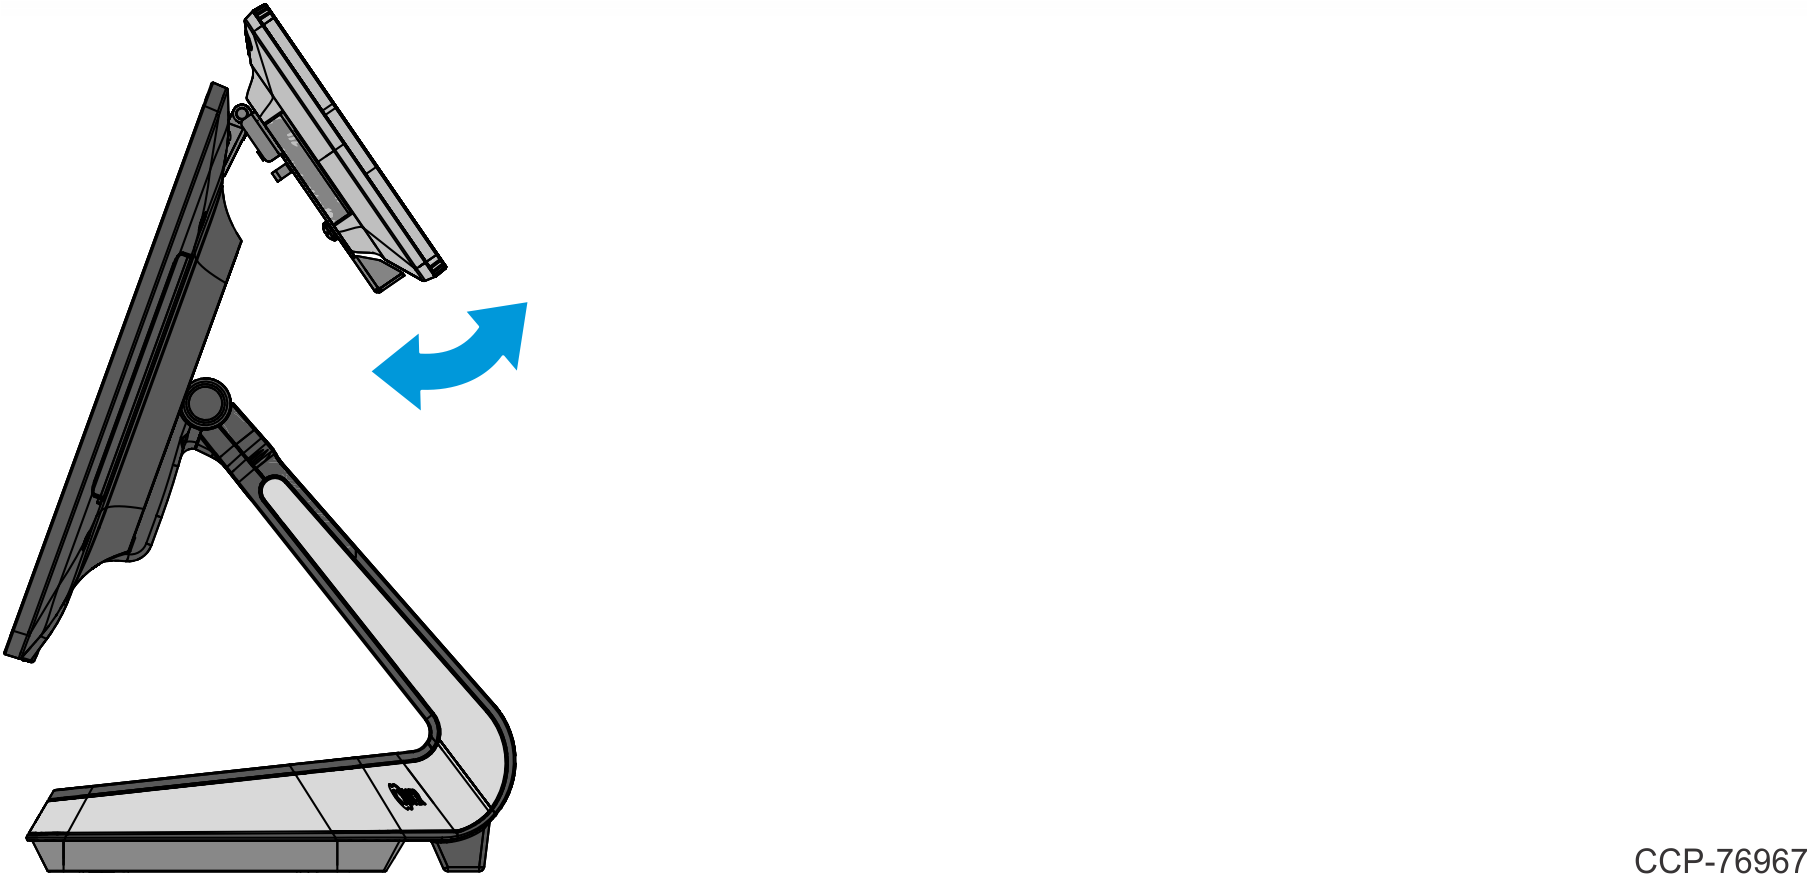
- Pivot the XL7 Customer Display into position.