7772-K455 XL10 Mounting Bracket with Cable
This kit provides a mounting bracket and cable to install the XL10 Customer Display on the neck of the NCR CX7 All-in-One POS (7772).
Kit Contents
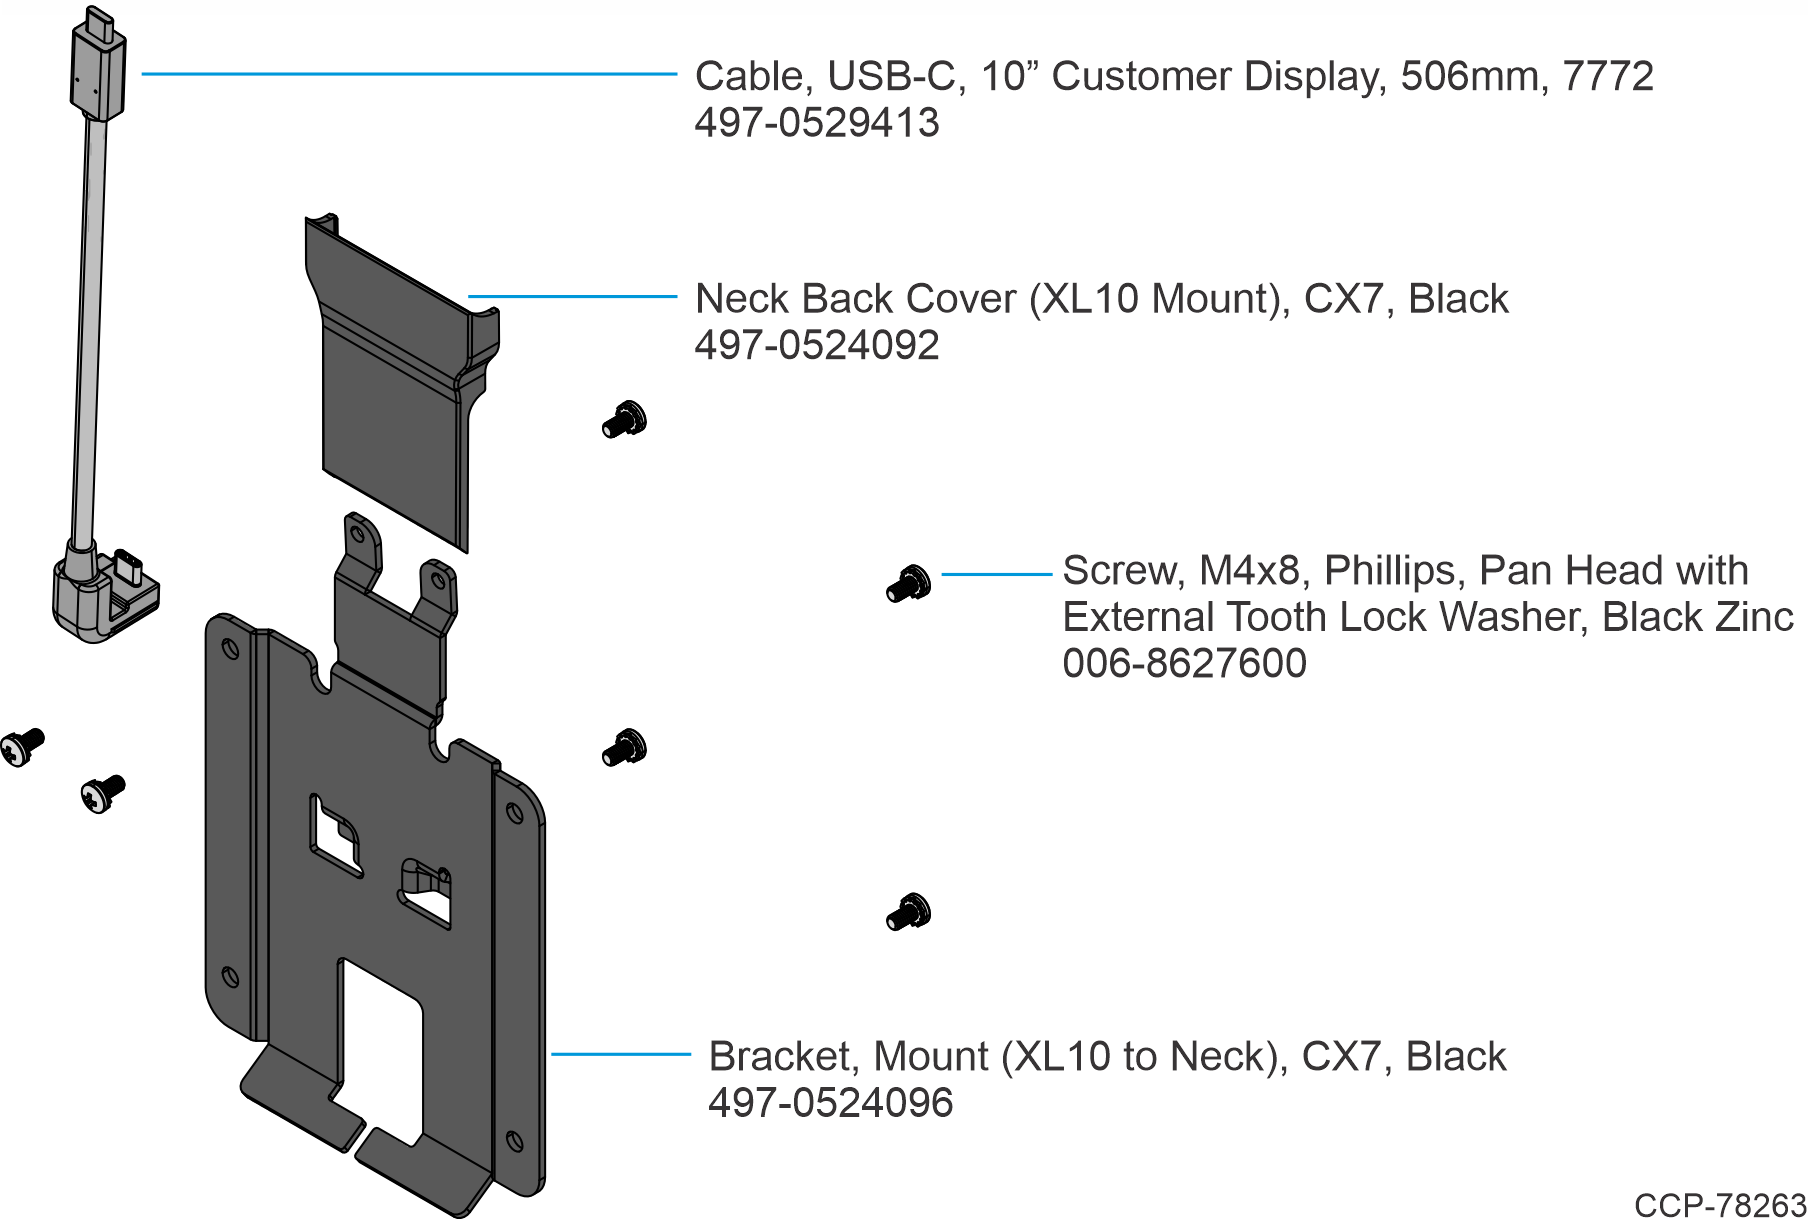
Installation Procedure
Warning
Disconnect the AC power cord from the AC outlet and wait 30 seconds before servicing the terminal.
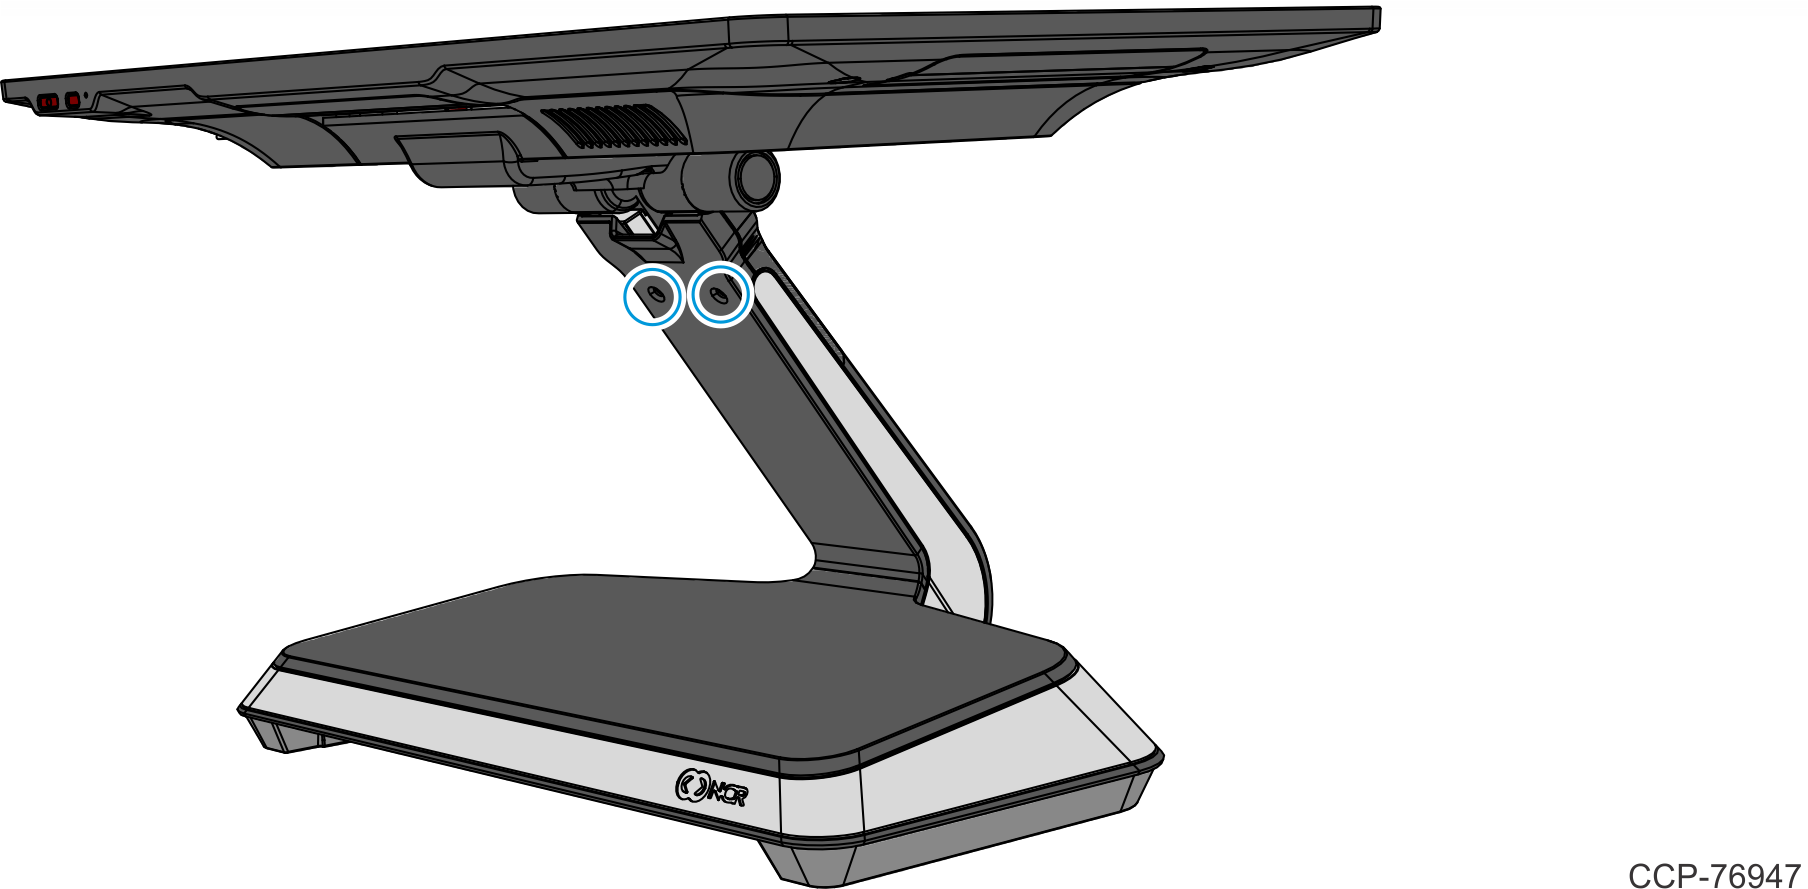
- Remove the two (2) screws that secure the Front Neck Cover to the Neck.
- flat head screws for Base without Integrated Power Supply
- thumbscrews for Base with Integrated Power Supply
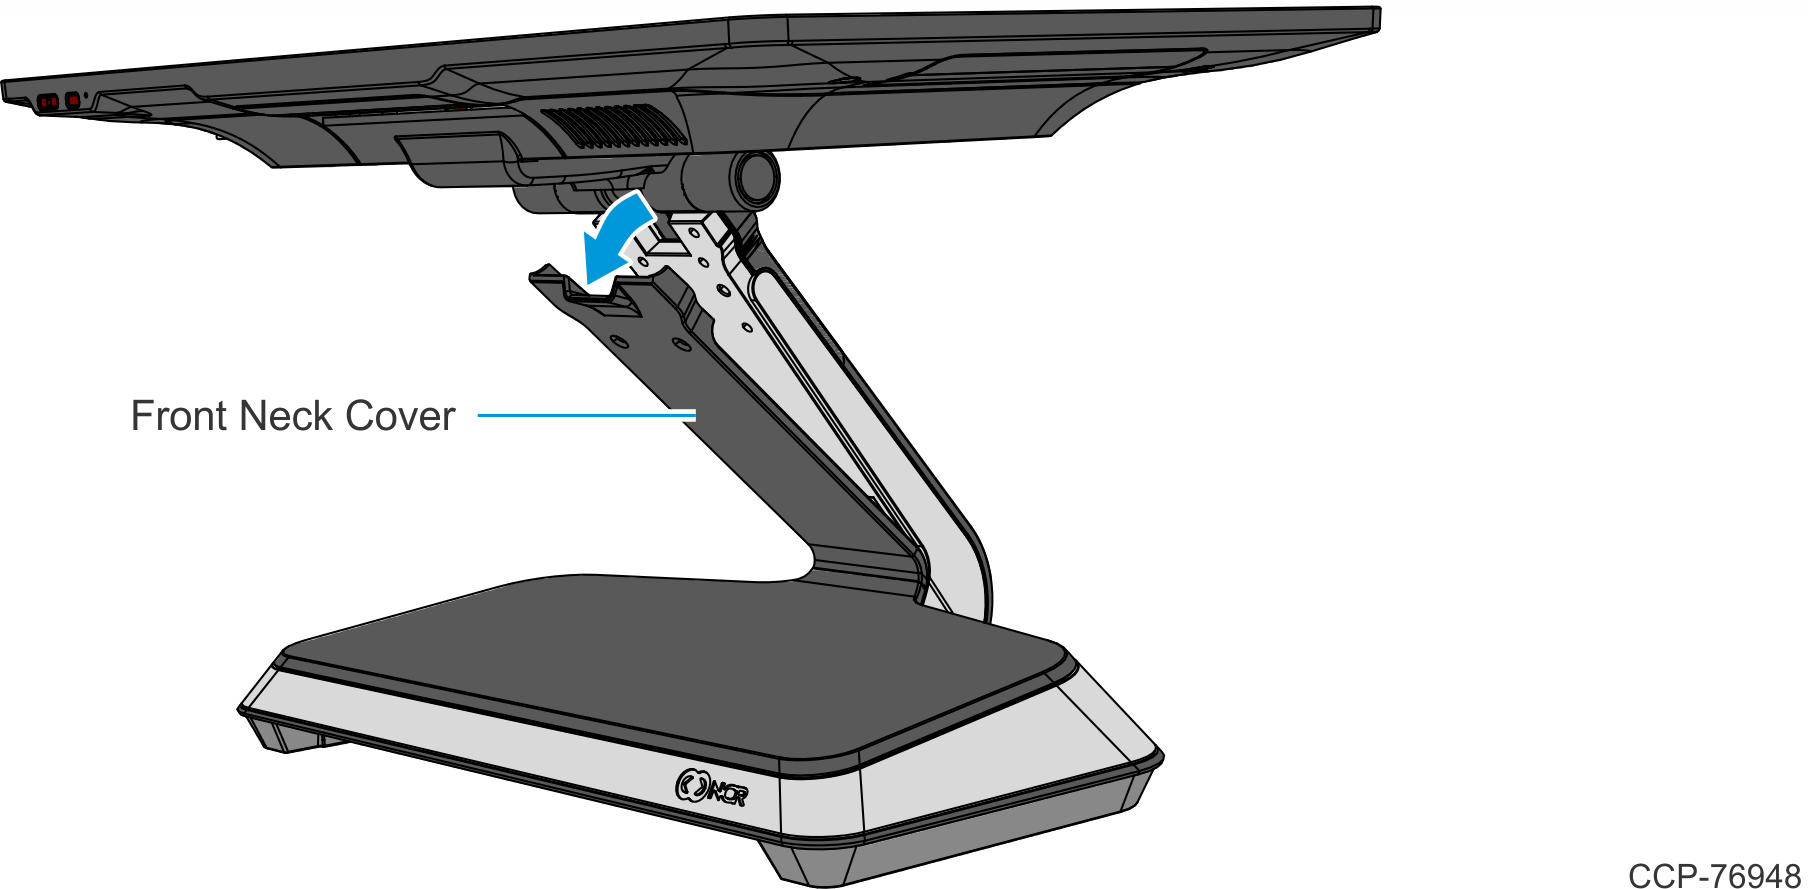
- Pivot the Front Neck Cover away from the Neck.
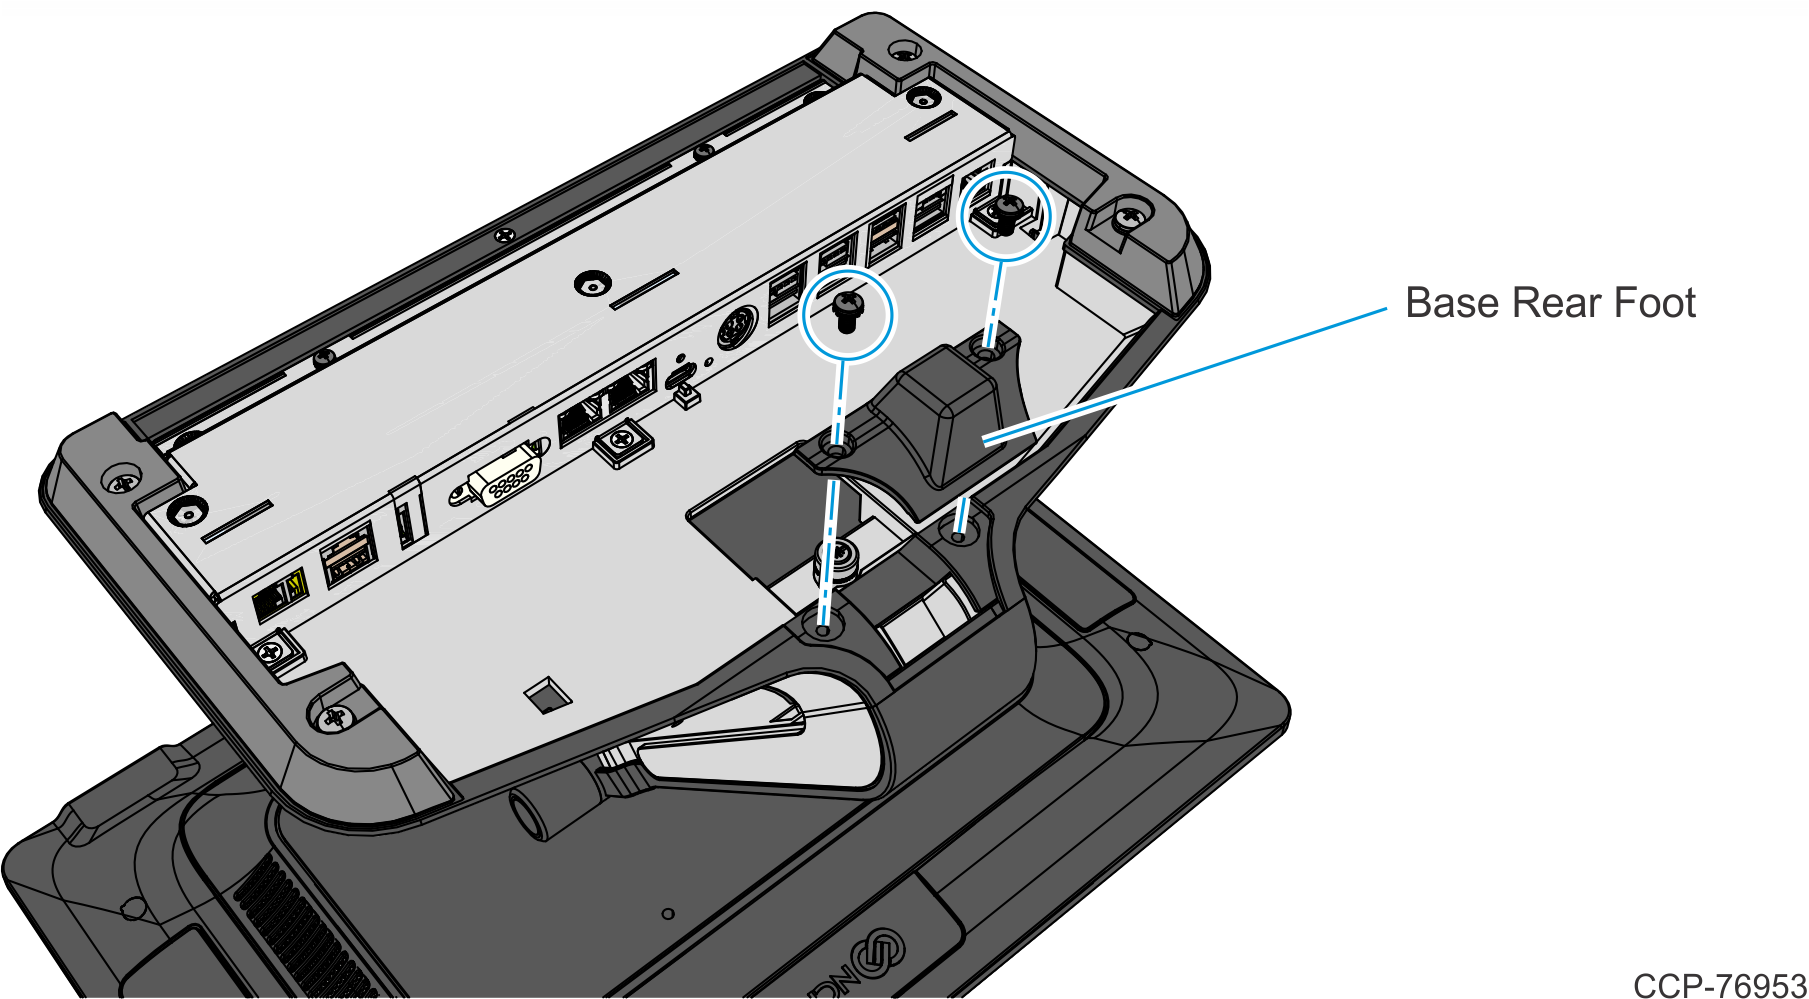
- Lay the Display face down on a flat surface.Note
Always use a soft material (cloth, foam) to protect the display screen when placing the terminal face down.
- Remove the Base Rear Foot (2 screws).
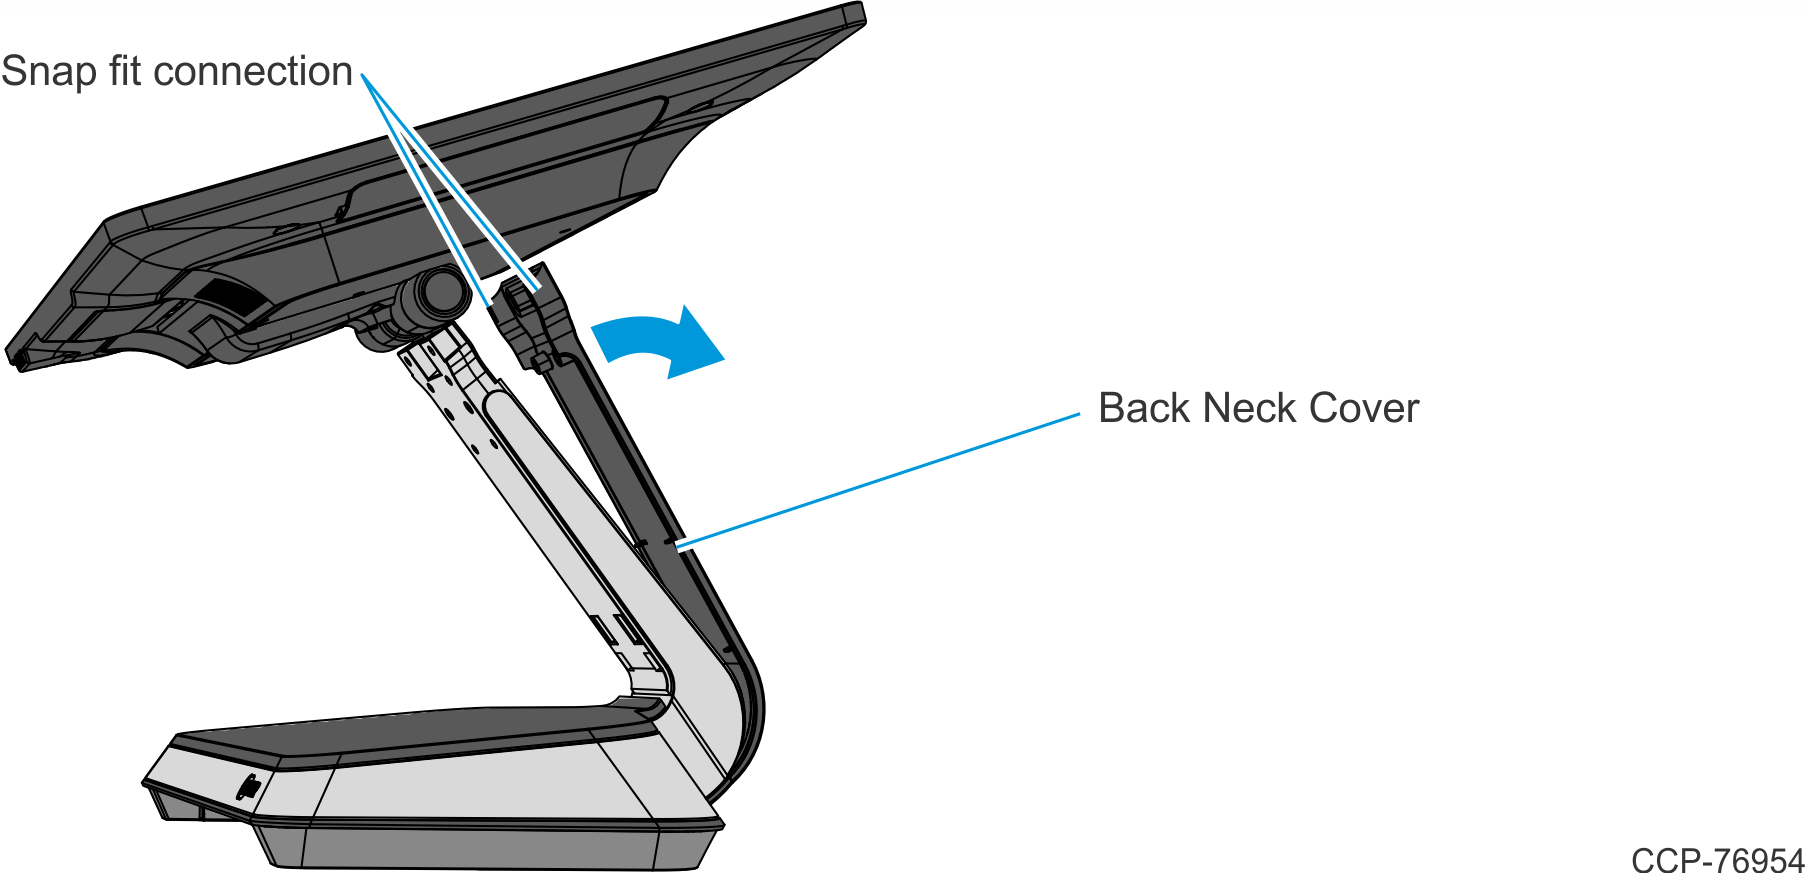
- Pivot the Back Neck Cover away from the Neck. The Cover has a simple snap fit connection at the top.
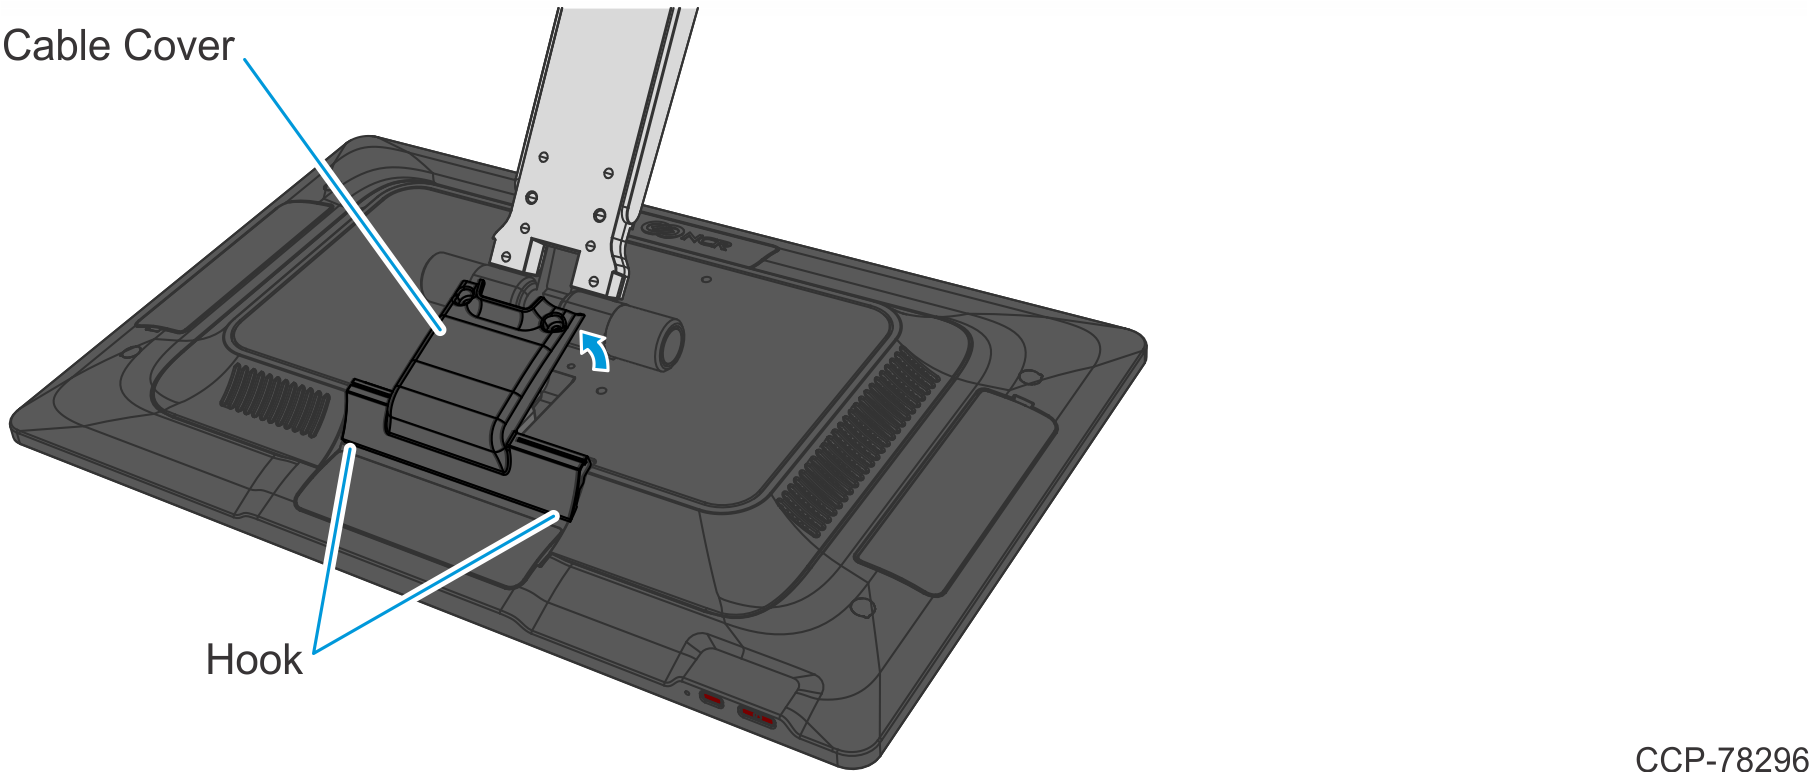
- Remove the Cable Cover.
- Remove the two (2) screws that secure the Cable Cover to the Back Cover.
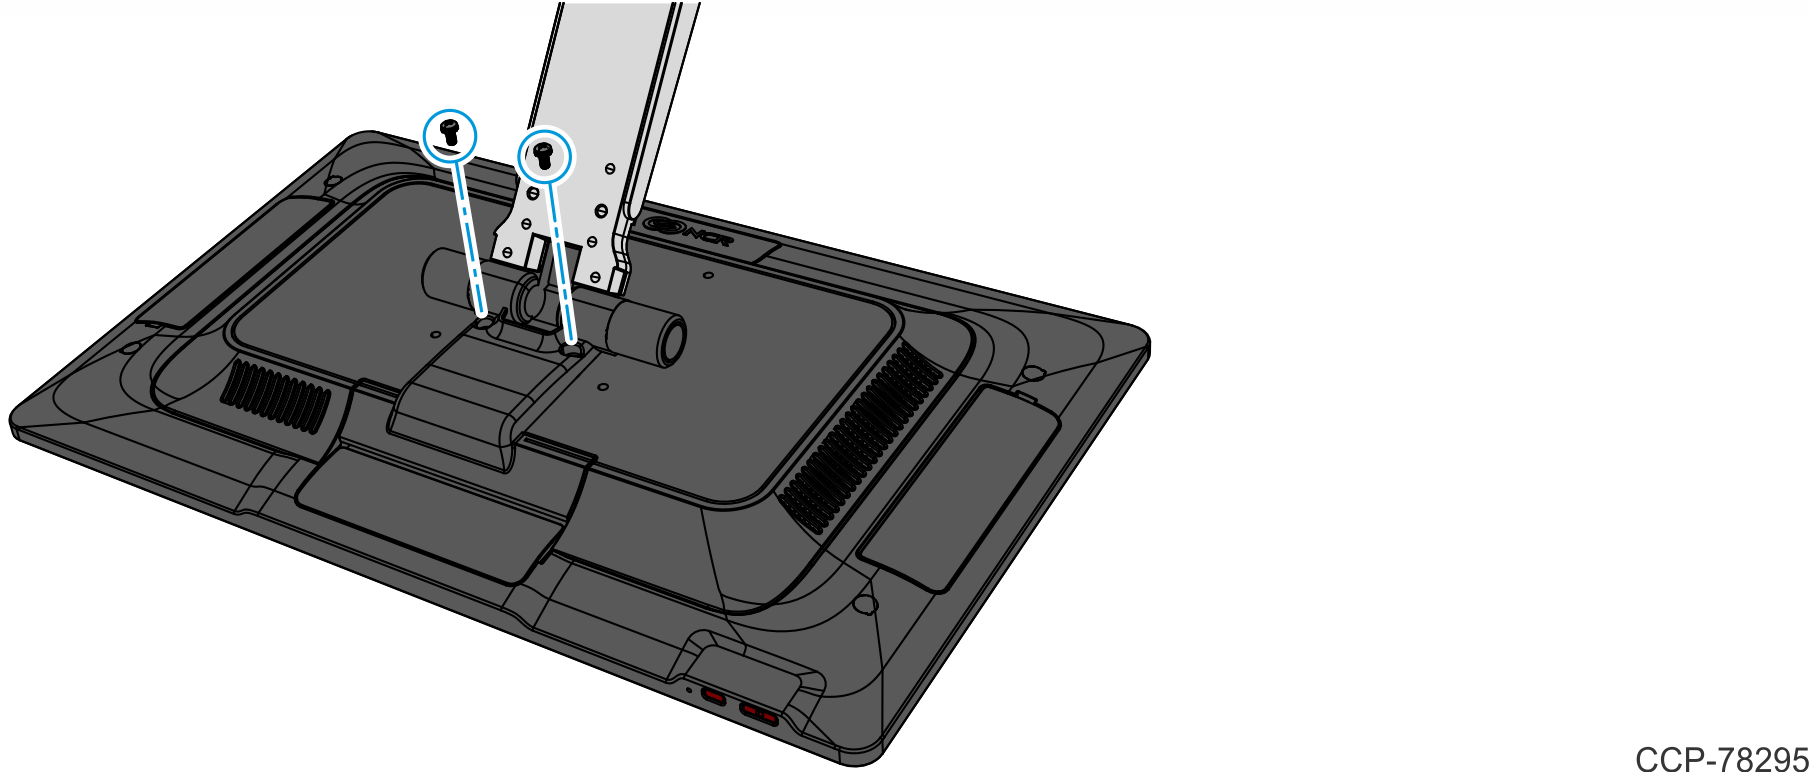
- Rotate and unhook the Cable Cover from the Back Cover.
- Remove the two (2) screws that secure the Cable Cover to the Back Cover.
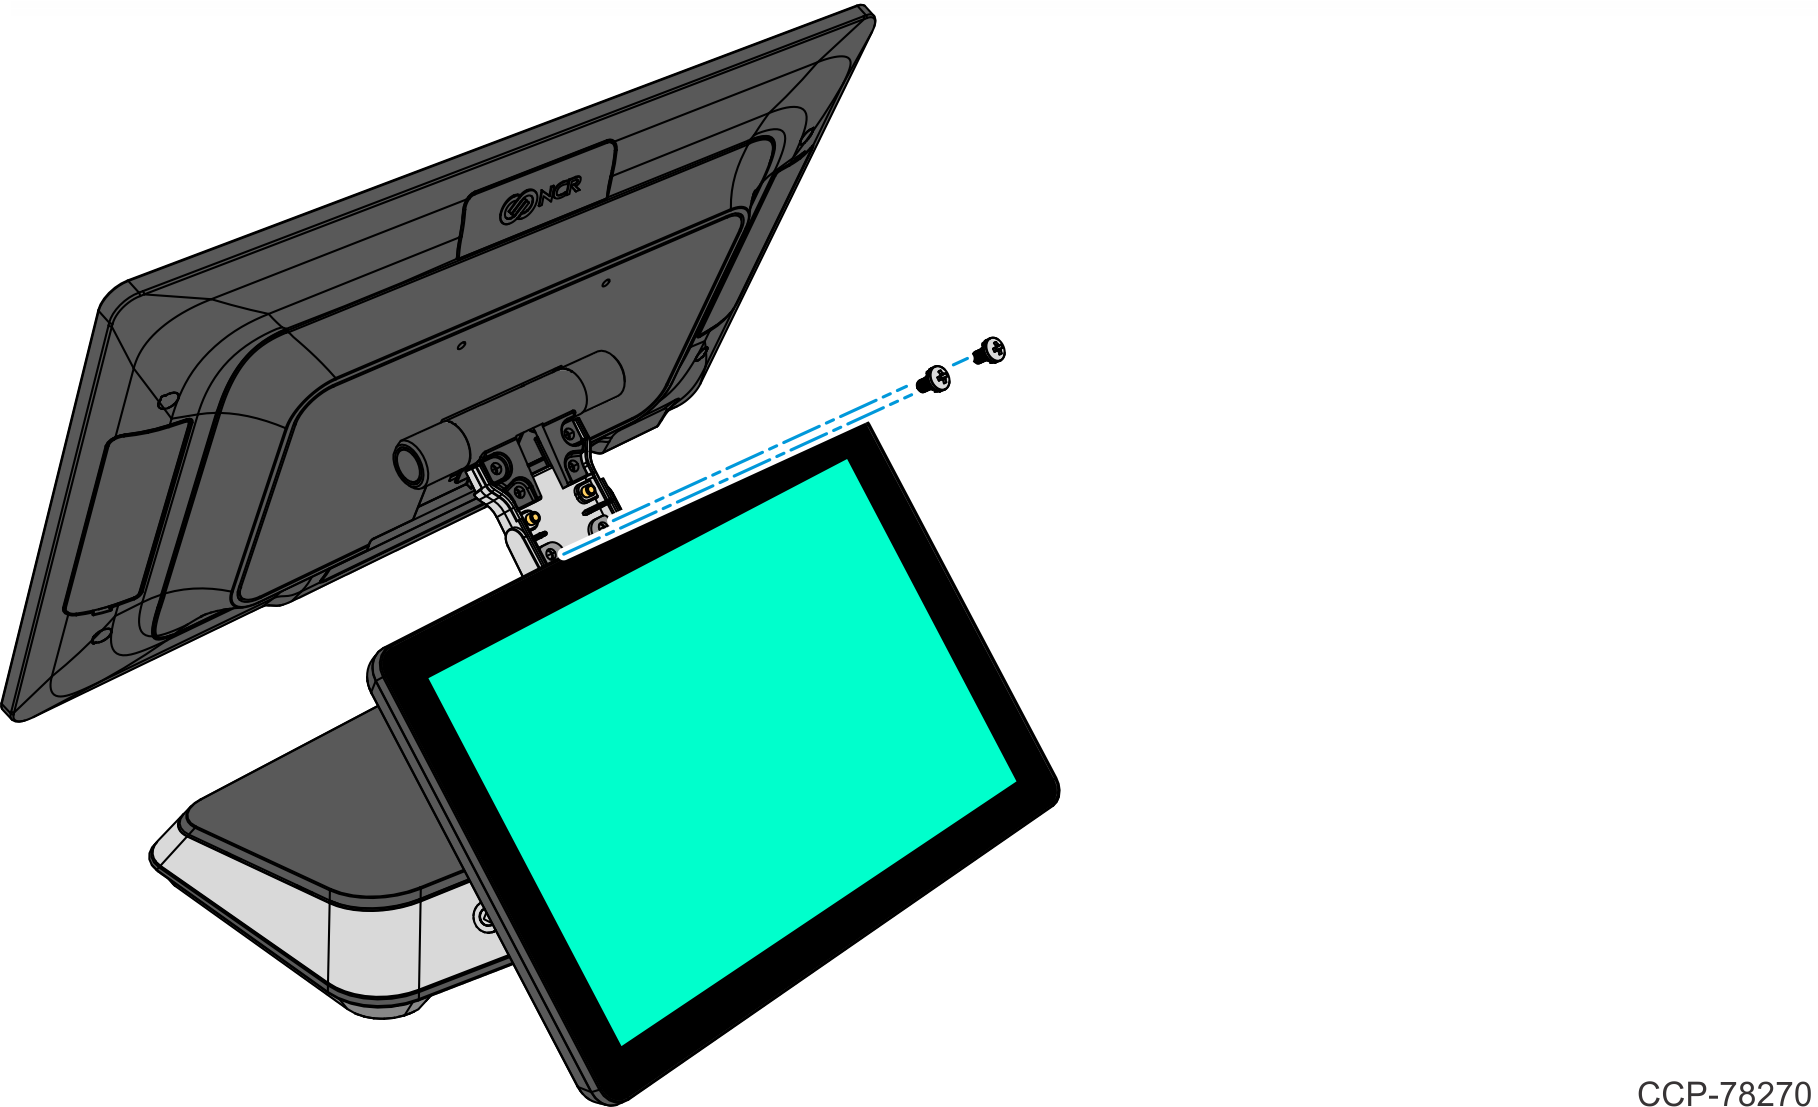
- Route the USB-C Cable through the Neck opening, then connect the USB-C Cable on the CX7 Display and tighten the thumbscrew.

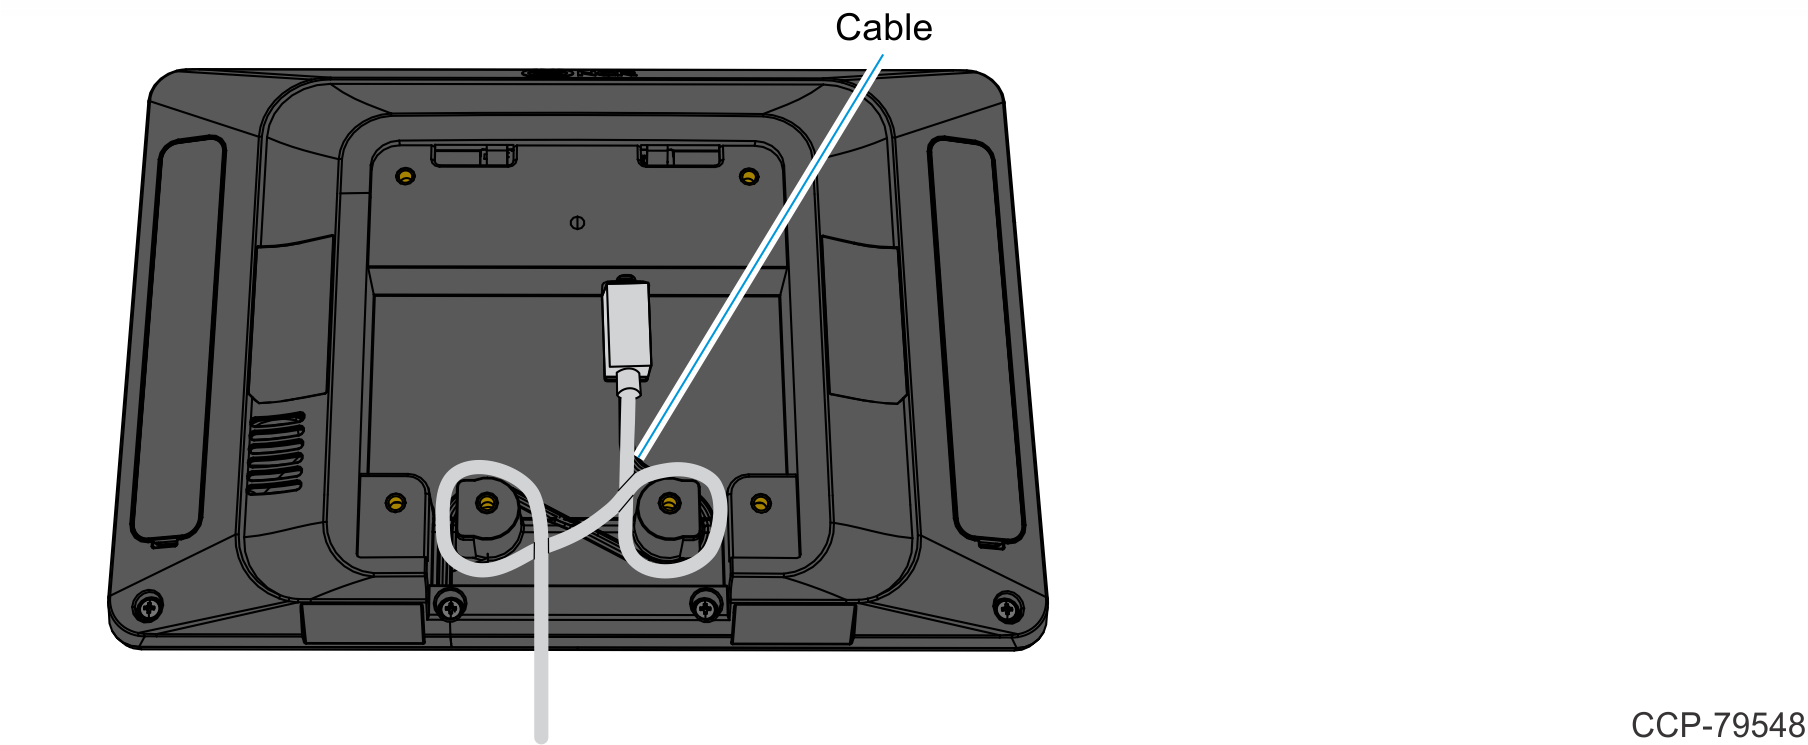
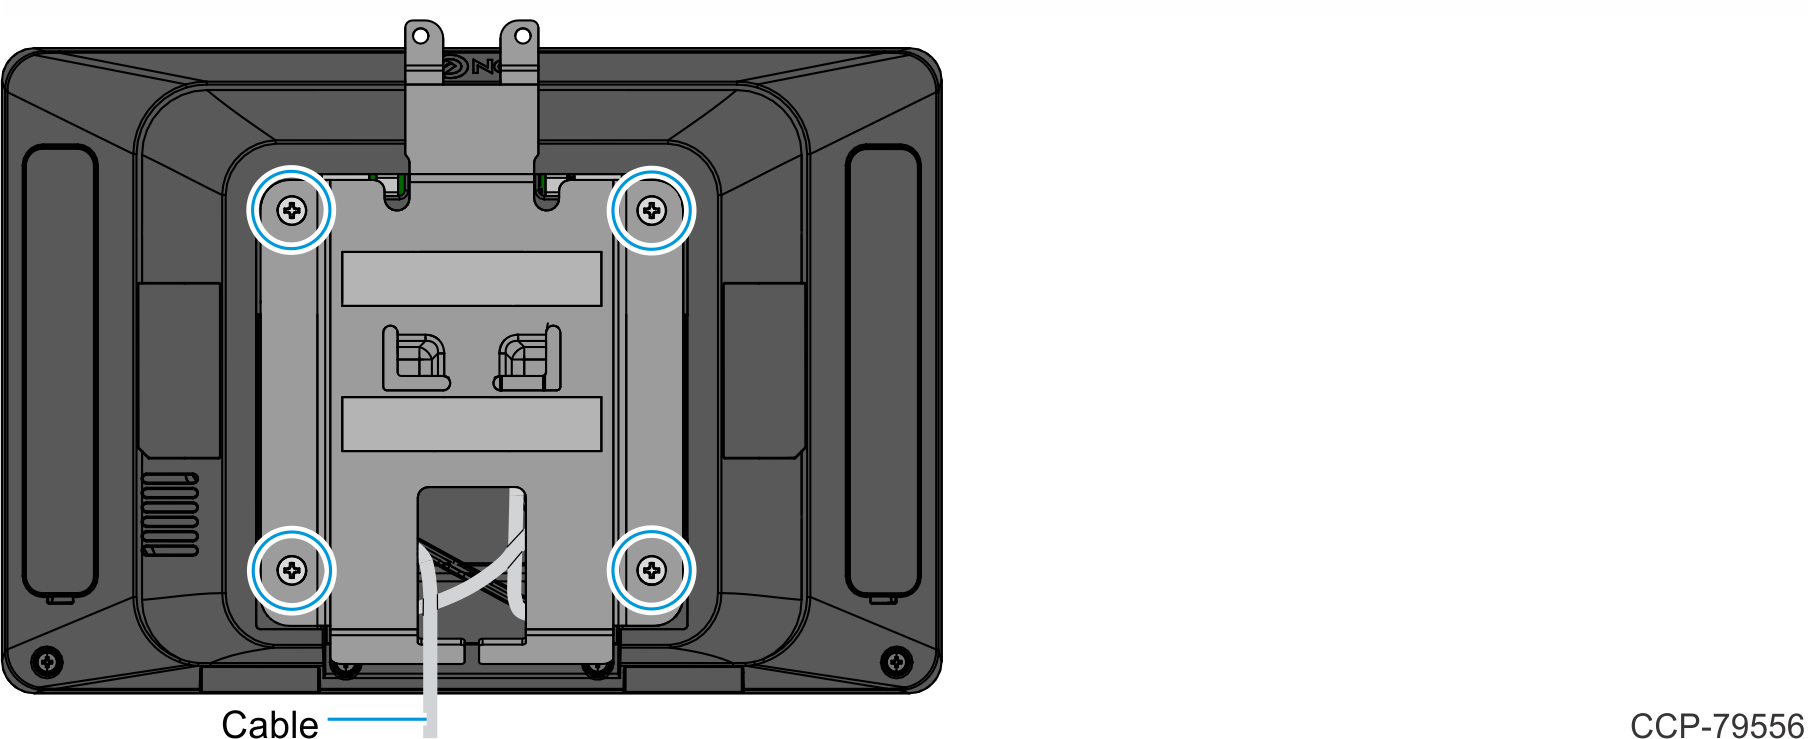
- Connect the other end of the Cable to the back of the XL10 Display and route the Cable around the cable strain relief posts as shown.
- Route the Cable through the Bracket as shown and install the Bracket on the back of the XL10 Display (4 screws).
- Install the XL10 Display and Bracket assembly on the Neck.
- Insert the Bracket Hooks on the Neck.Note
For clarity, the XL10 Display is not shown in the illustration.
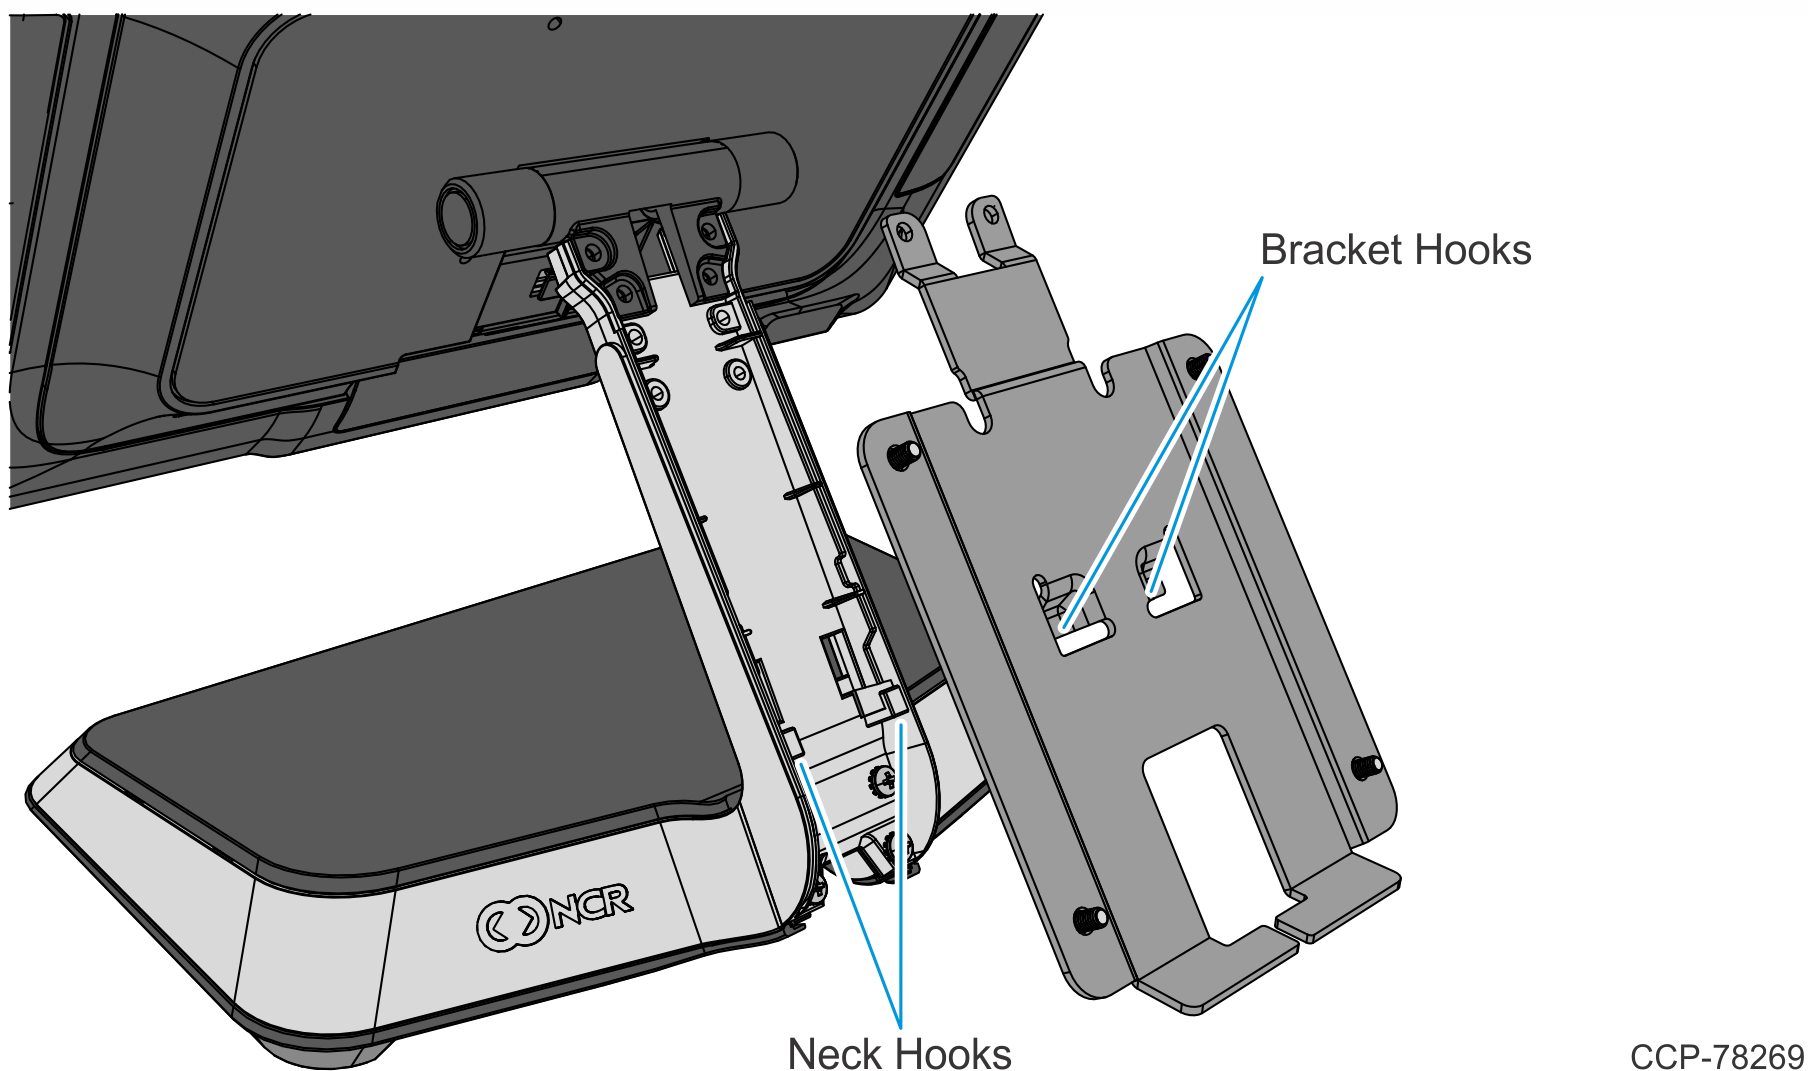
- Secure the Bracket to the Neck with two (2) screws.Note
Ensure no cables are pinched.
- Insert the Bracket Hooks on the Neck.
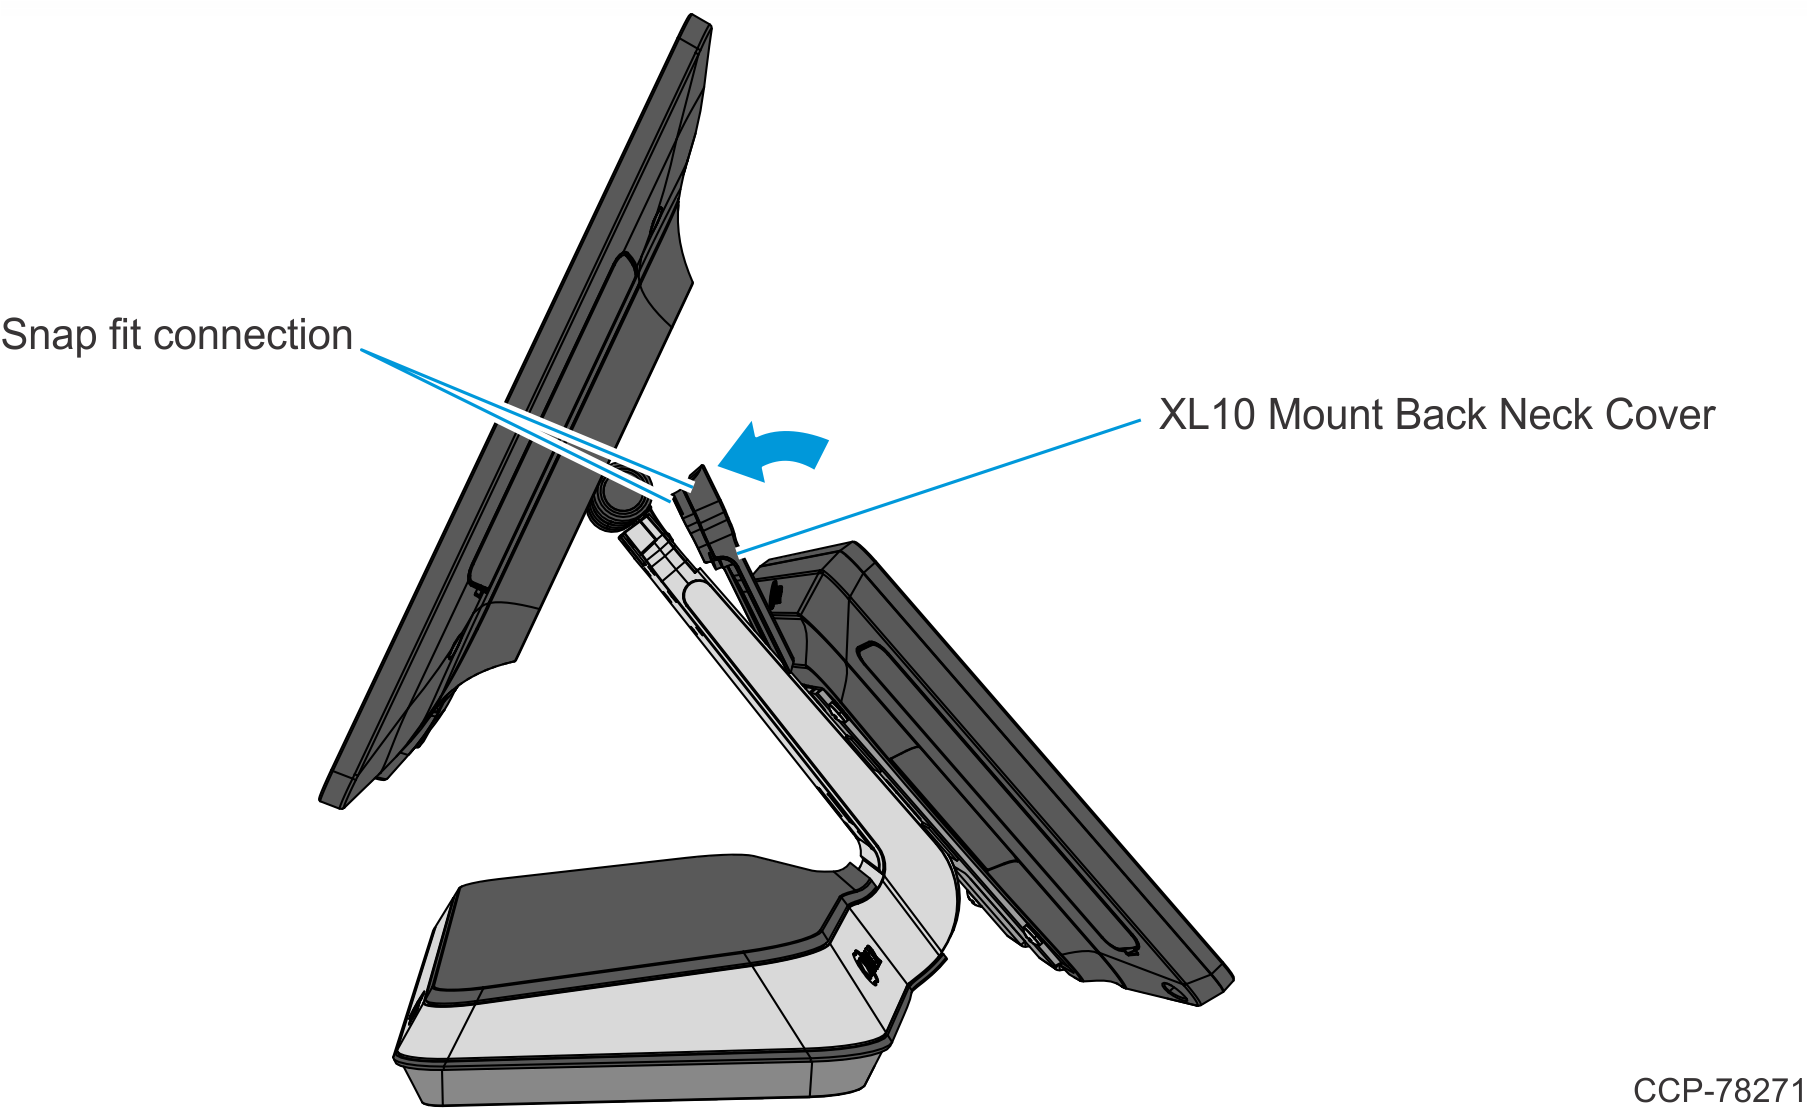
- Mount the XL10 Mount Back Neck Cover on the Neck. The Cover has a simple snap fit connection at the top.
- Reinstall the Base Rear Foot.
- Reinstall the Cable Cover.
- Reinstall the Front Neck Cover.
