Checkpoint Deactivation System
The Checkpoint Antenna is installed below the Top Plate. The antenna leads are routed through the side of the scanner to allow connection to the Checkpoint Controller leads.
The Checkpoint Horizontal Antenna Only Kit (7895-K942) is sold separately. It includes the following components:
- Horizontal Checkpoint antenna
- Three #4-24 HI-LO .375" long screws with a T8 torx head
Warning
If the Checkpoint Antennas are not installed correctly, they can cause issues with scale functionality.
Note
The Checkpoint Antennas and Cables are installed by a Checkpoint Service Technician. Contact Checkpoint for installation and setup.
To install the Checkpoint Antennas, follow these steps:
- Remove the Top Plate. For more information, refer to Accessing Scanner Components.
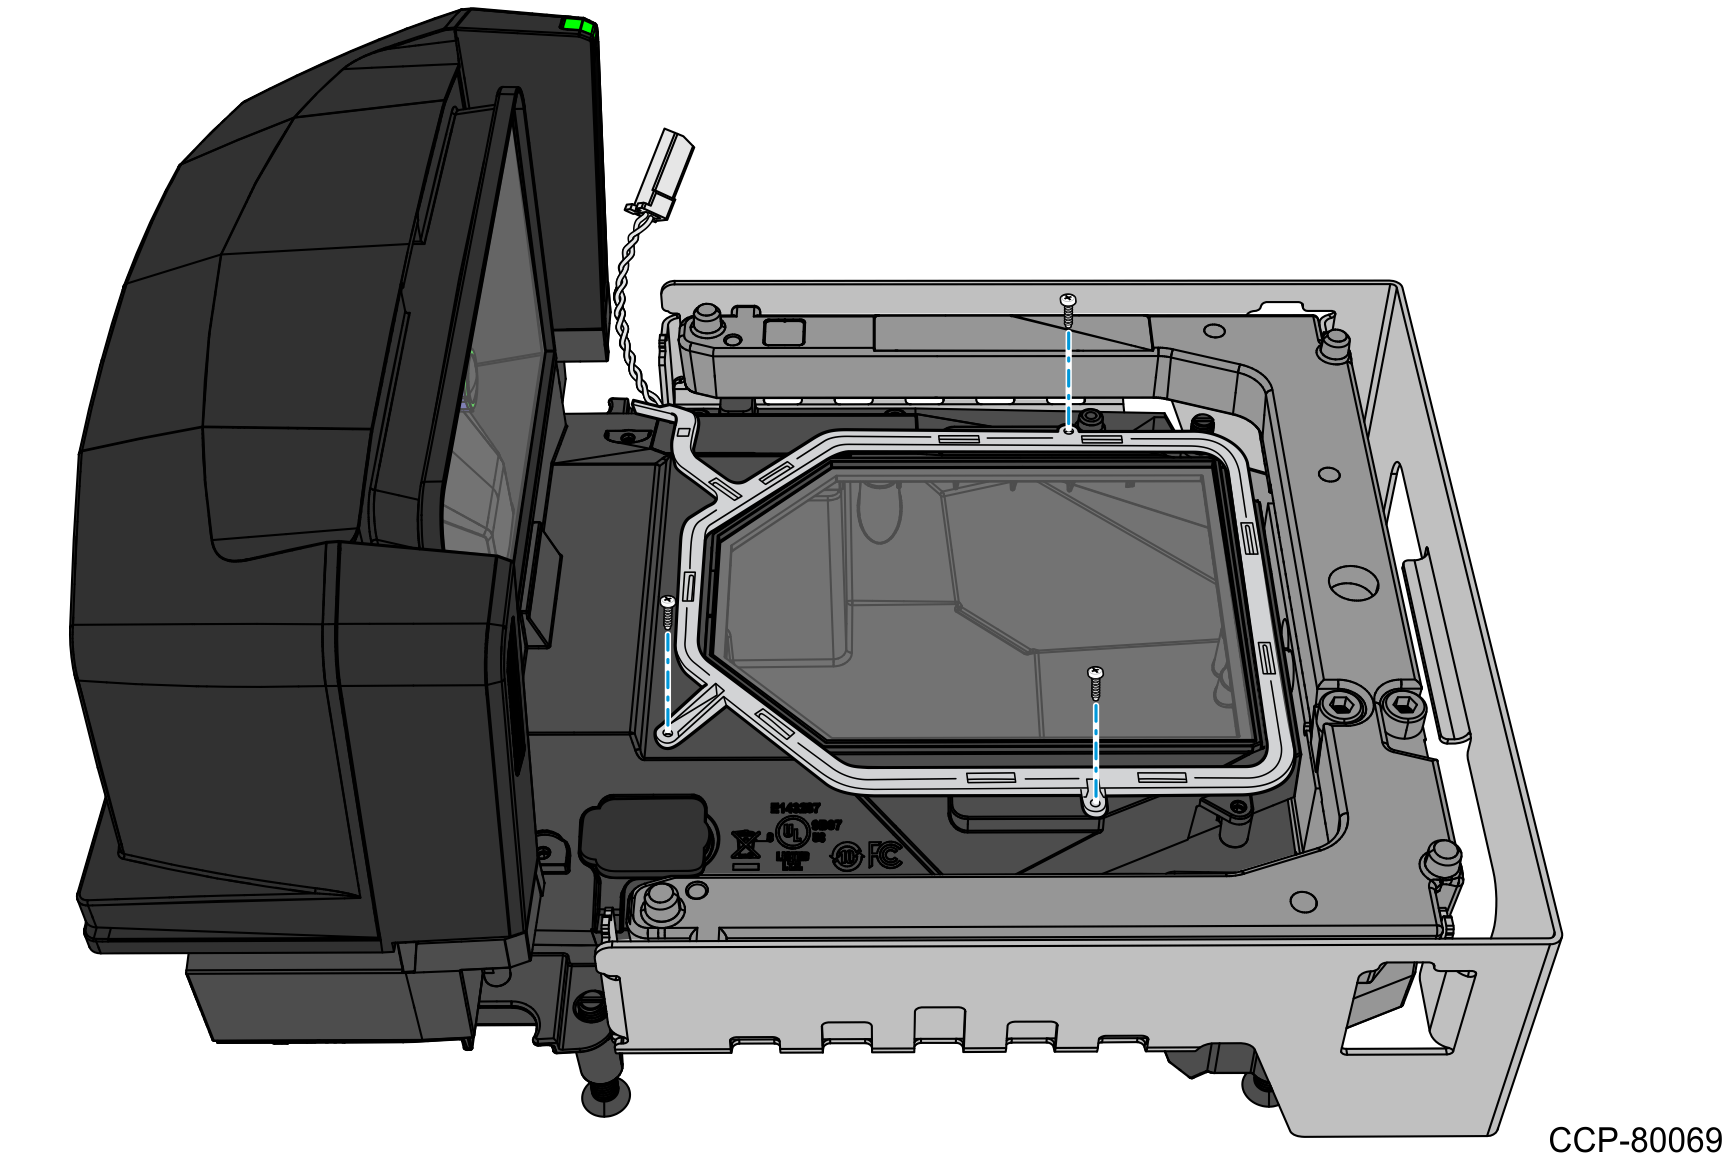
- Place the Horizontal Checkpoint Antenna into the scanner housing, with the antenna cable routed through the side of the scanner.
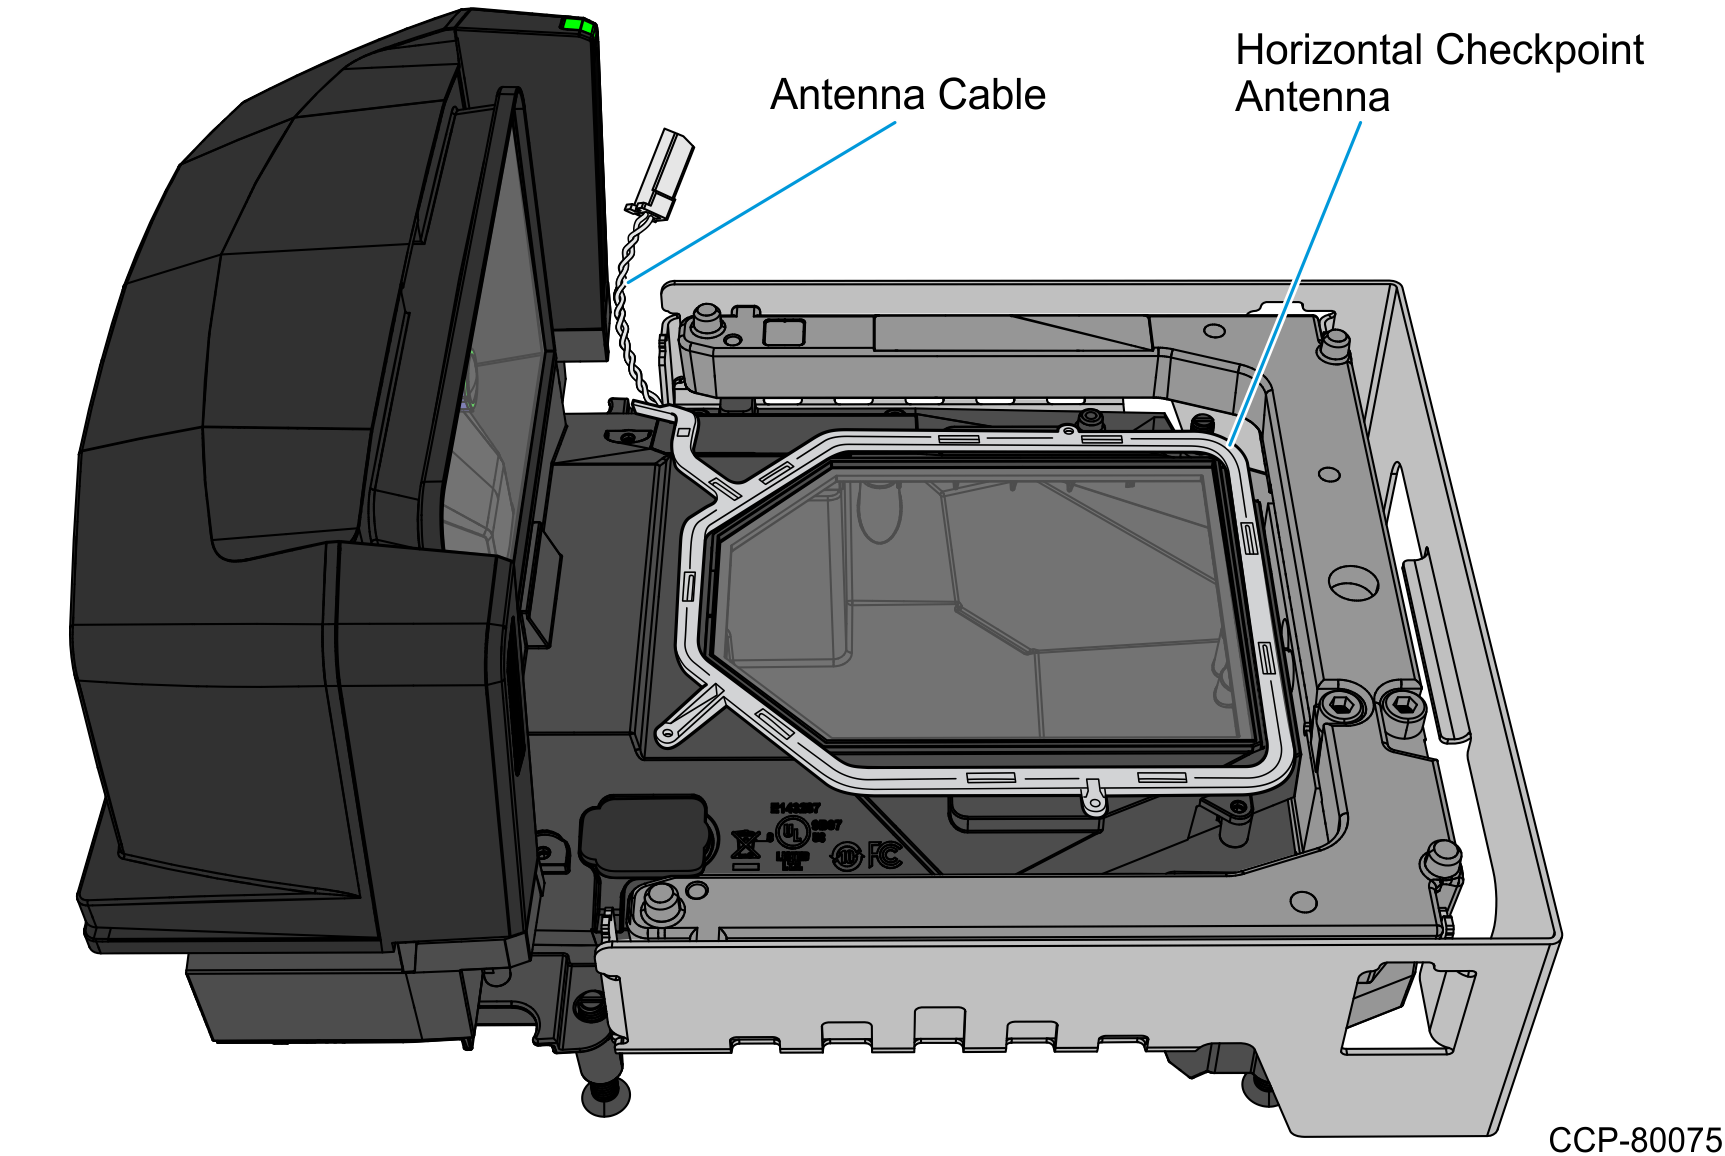
- Align the mounting holes on the Horizontal Checkpoint Antenna with the screw holes on the scanner housing, and then secure using three #4‑24 HI‑LO screws and a T8 Torx screwdriver.
- Re-install the Top Plate. For more information, refer to Accessing Scanner Components.
- Contact your local Checkpoint representative to install the EAS cable to the Checkpoint System. Refer to the Checkpoint device documentation for details about its functionality.
Note
The following cables are also required to complete the Checkpoint EAS installation:
- Checkpoint Interlock Cable (1432-C895-0004)—connects the Checkpoint Controller to the Checkpoint Interlock port of the NCR 7895.
- Checkpoint Antenna Extender (1432-C893-0030)—connects the Antenna Cable to the Checkpoint Controller.