Sensormatic Deactivation System
The Sensormatic Antenna is installed behind the Vertical Scan Window and below the Top Plate. The antenna pigtail cable is routed through the side of the scanner to allow connection to the Sensormatic Controller.
Make sure that the Sensormatic Controller is powered OFF. Do NOT connect or disconnect the Sensormatic Cables or Antenna from the Sensormatic Controller when power is ON as this could damage the controller.
The Sensormatic Antenna and Cables are installed by a Sensormatic Service Technician. Contact Sensormatic for installation and setup.
To install the Sensormatic Antenna and Cables, follow these steps:
- Remove the Top Plate. For more information, refer to Accessing Scanner Components.
- Place the Sensormatic Antenna around the Vertical Scan Window and into the scanner housing, with the antenna pigtail cable routed through the side of the scanner. Ensure that the top of the Sensormatic Antenna does not extend above the top surface of the scanner.

- Attach four P-clamps to the Sensormatic Antenna on the locations indicated in the following image.Note
Ensure that the P-clamps are in the correct orientation.
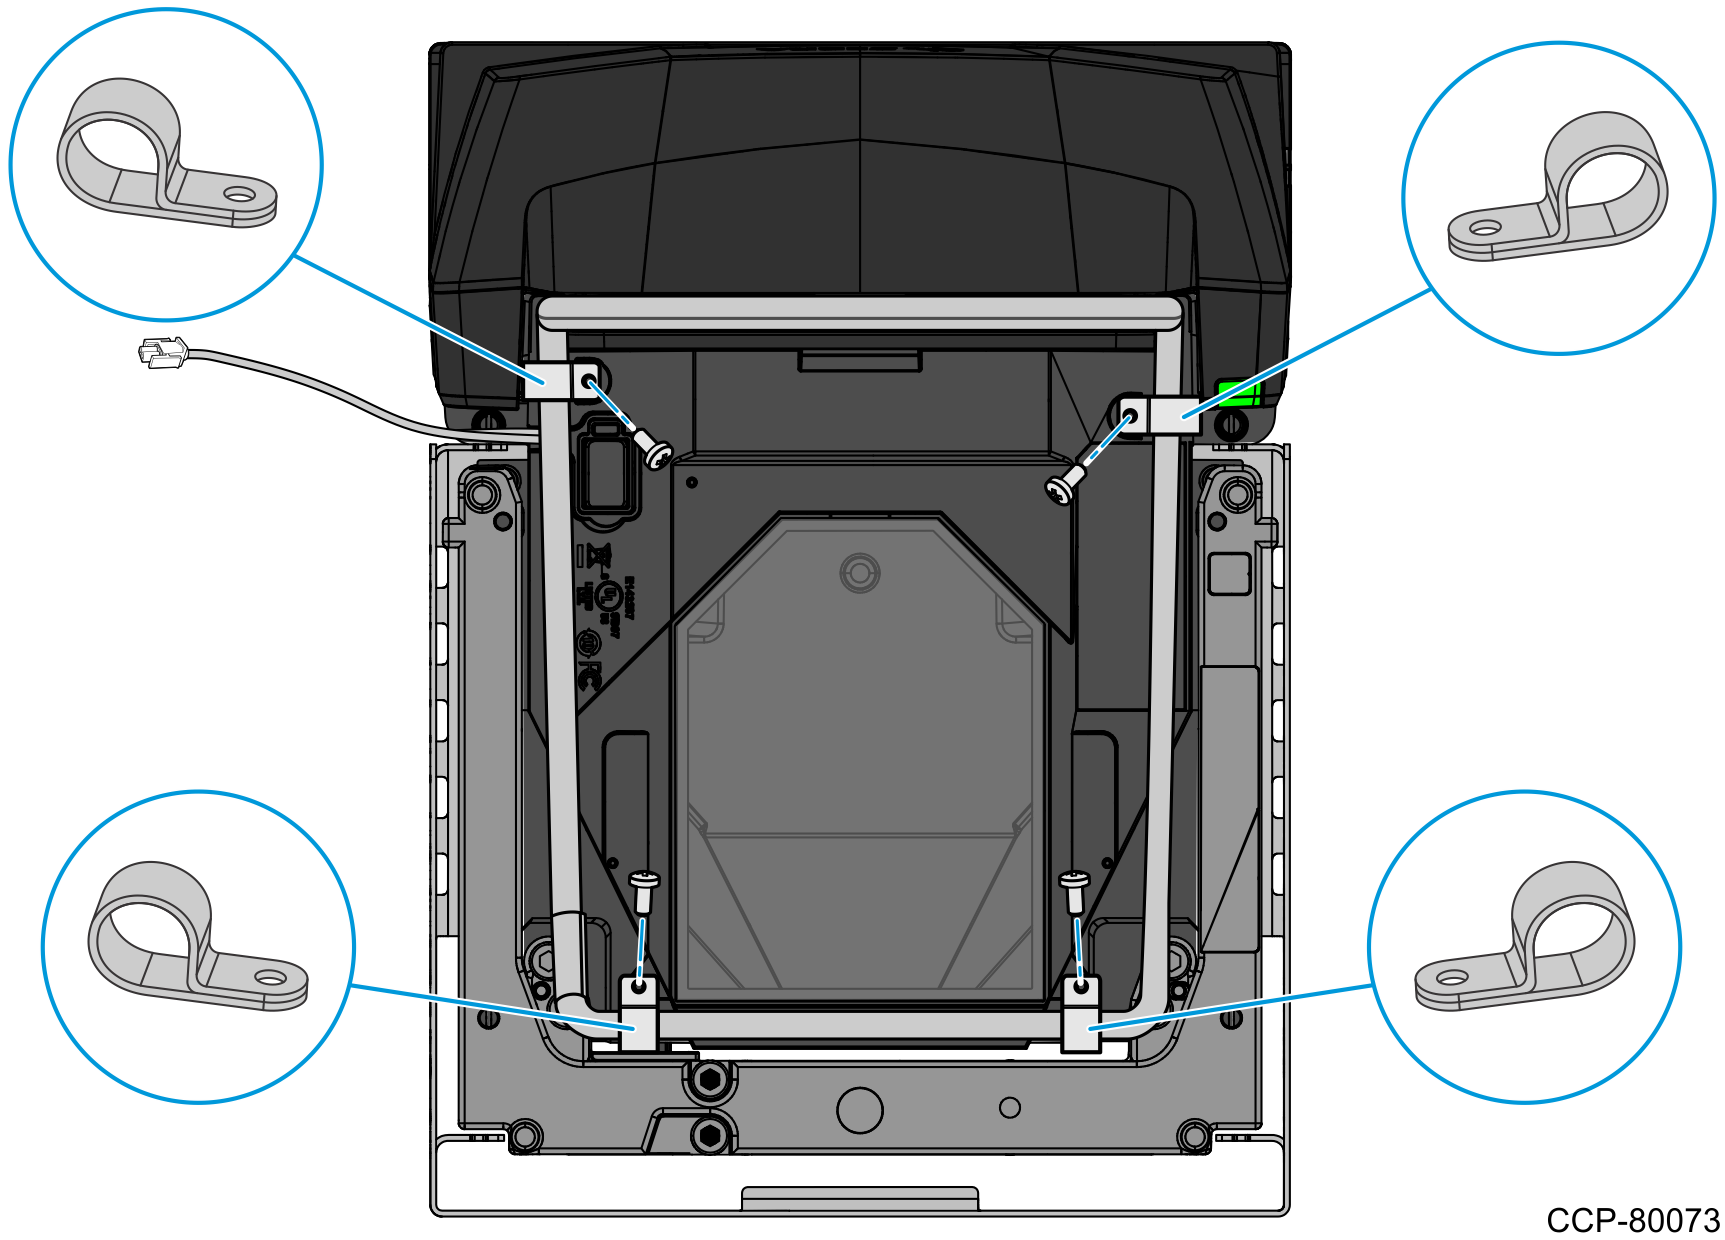
Align the P-clamps with the screw holes on the scanner housing, and then secure with screws.
NoteEnsure that the Sensormatic Antenna is centered in the scanner housing and away from the scale arm.
- Connect the EEPROM cable to the antenna pigtail cable connector and route the other end of the EEPROM cable to the Sensormatic Controller.
- Connect the 10-pin side of the interlock cable to the RS-232 Aux 1 port of the scanner. Route the other end of the cable to the Sensormatic Controller.
- Re-install the Top Plate. For more information, refer to Accessing Scanner Components.