Configuring Priority Roles for EOM, ETS, and POS
When using Active Directory for user authentication, the EOM, ETS, and POS applications are each assigned with a configurable role codes priority list. These priority lists enables the specified applications to handle login requests of users assigned with multiple roles based on a prioritized order.
For example, configure the EOM application to use a role codes priority list of 93, 91, 90, 70, 10, 20, 30, 40, 0. The first listed role code is considered as the top prioritized role and the last role code is considered the least prioritized role. When a user with the roles Cashier (30), Department Manager (20), and EOM Admin (93) logs in, the EOM application recognizes the user primarily as an EOM administrator as the role code 93 is placed first in its role codes priority list. The EOM application will then log the user as an administrator. Consequently, the user's cashier and department manager roles are respectively recognized as the user's second and third role as configured in the priority list.
This section uses the base role code definitions in the Advanced Store solution for example purposes. The following table identifies the base role names and role codes in the solution.
| Role Name | Role Code |
|---|---|
| Unknown | 0 |
| Store Manager | 10 |
| Department Manager | 20 |
| Cashier | 30 |
| Other | 40 |
| Terminated | 50 |
| Inactive | 60 |
| Regional and District Manager | 70 |
| Store Support/Administrator | 90 |
| EOM User | 91 |
| EOM Admin | 93 |
| ETS User | 92 |
| ETS Admin | 94 |
The role codes list configuration for the POS application does not support the Store Support (90) role. Even when added to the role codes list of the POS application, a user that is only assigned with the role code 90 will not be authorized to log in to any POS application in the store.
Prerequisites
To enable the configuration of role codes priority lists, ensure that the following conditions are met:
- The Advanced Store Web Server installed is version R24 or later.Note
For upgrading an earlier version of the Web Server, this configuration must be manually enabled in the system, as the <RoleCodePriorityList> code block will not be available in the web.config file by default.
- The LDAP Role Validation Type is set to use RoleCode in the web.config file on the Web (API) Server.

For more information about LDAP Role Validation Types, refer to the following sections:
- The EOM Server must be enabled to support the configuration of its role codes list. For more information, refer to Enabling the EOM Server to support role codes list configuration.
Configuring a role codes priority list
To configure the role codes priority list configuration for the EOM, ETS, and POS applications add the role codes in priority order to the web.config file located on the Web (API) Server.
If planning to add the Terminated role (50) to an application's role codes list, make sure to place its role code first in the list. This will enable the configured application to block any terminated user's login attempts.
<add app="EOM" roleCodes="50, 93, 91, 90, 0"></add>
This task uses the following file.
| File name | Location |
|---|---|
| web.config | C:\inetpub\wwwroot\NCRRetailOne |
To configure the role codes priority list of any of the specified applications, follow these steps:
- On the Web (API) Server, open the web.config file using a text editor.
- Locate the <RoleCodePriorityOrder> section. By default, after a fresh installation, the role codes priority list of each application is empty.
 Note
NoteWhen upgrading to release version 24 or later from previous releases, this section will not exist in the web.config file.
- If the <RoleCodePriorityOrder> section doesn't exist, add the following rows after the <RoleCodes> section.
<RoleCodePriorityOrder>
 <add app="EOM" roleCodes=""></add>
 <add app="ETS" roleCodes=""></add>
 <add app="POS" roleCodes=""></add>
</RoleCodePriorityOrder>
- Add the desired role codes to the corresponding roleCodes attribute for the desired application. Separate each role code using a comma, followed by a single space. Example
<add app="POS" roleCodes="100, 10, 20, 30, 40, 70"></add>
For more information about role codes and user restrictions, refer to Understanding User Role Restrictions.
The edited file will look similar to the following sample image.
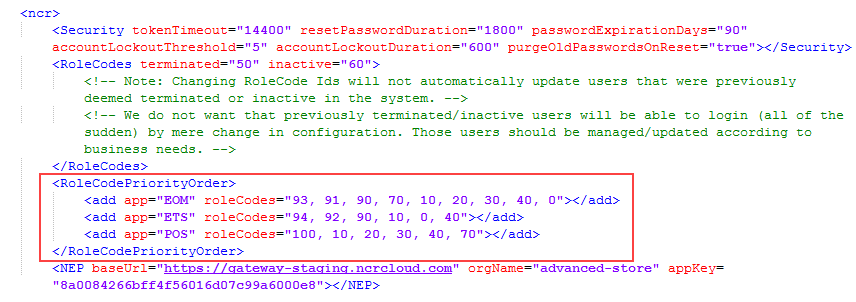
- Save the file.
Enabling the EOM Server to support role codes list configuration
To enable the EOM Server to support the configuration of its assigned role codes priority list, follow these steps:
- In EOM Server, open the Advanced Store - Administration Console application.
- From the System Definition panel, select Advanced Configuration > Configuration Management. The Configuration Management window is displayed.
- From the Server tab in the Configuration Management window, select System Configuration > App Authorization Configuration.
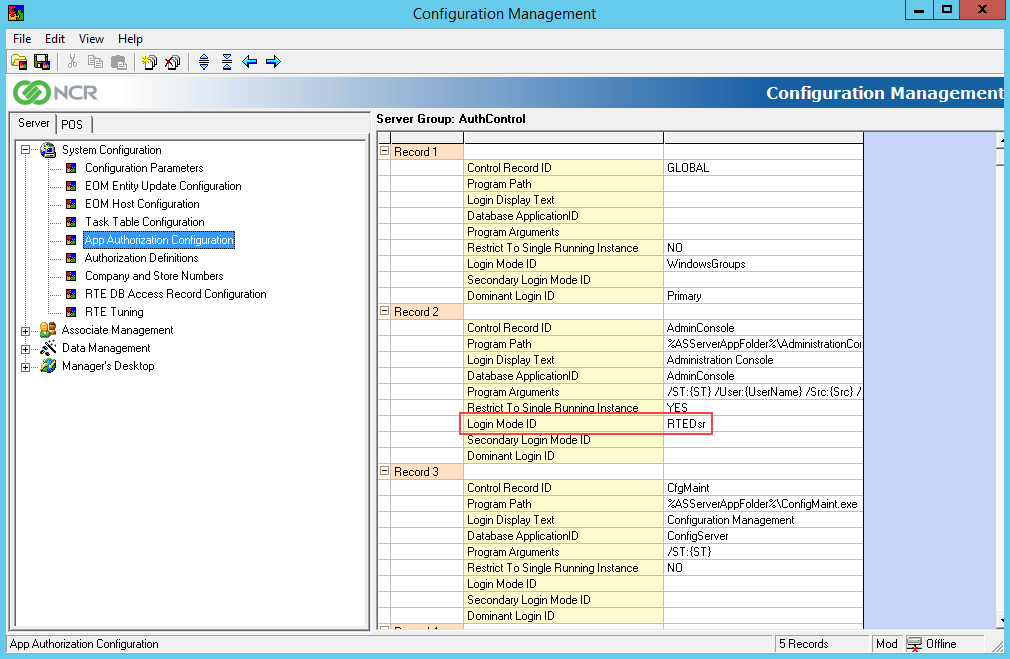
- At the Login Mode ID field in the Record 2: Admin Console section, enter RTEDsr, and then save the changes.
- From the Server tab in the Configuration Management window, select System Configuration > Authorization Definitions.
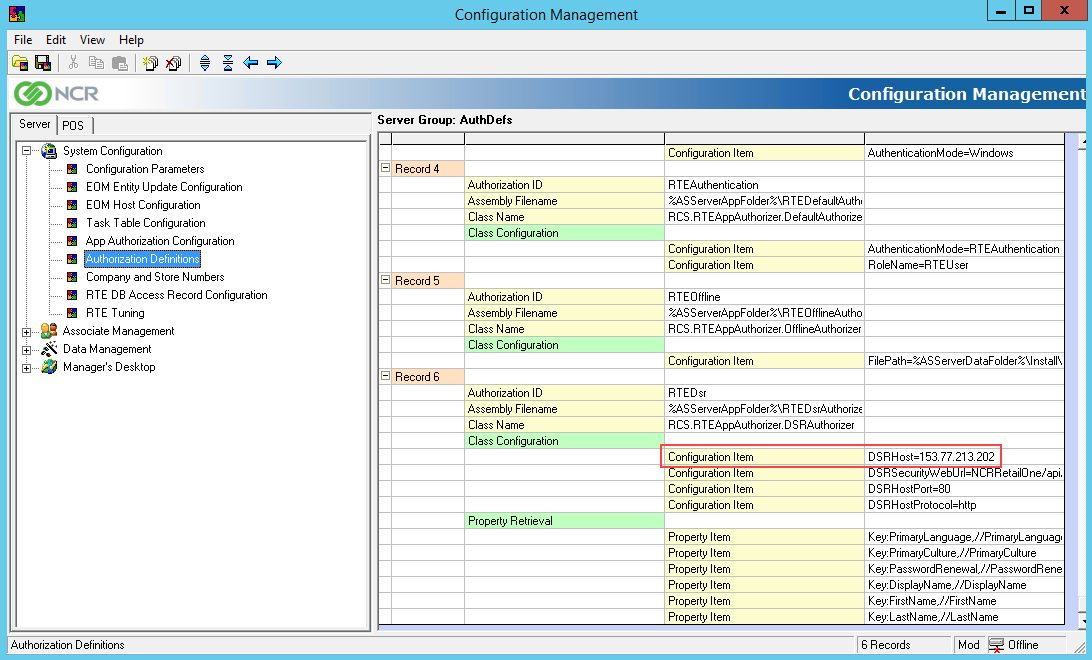
- Scroll down to the Record 6: RTEDsr section. At the DSRHost field of the Class Configuration > Configuration Item section, enter the IP address or name of the Web (API) Server, and then save the changes.
- Close the Configuration Management window.