Customizing the POS function icons section
The POS function icons can be configured depending on the retailer’s needs. The following modifications can be applied to the POS application:
- Modify the function icons
- Add third line to the Client Lookup panel
This task uses the following files.
| File name | Folder |
|---|---|
|
UiManager.Config.sample.xml |
%PROGRAMFILES%\NCR\AdvancedStore\POS\HtmlPsxClient\config
%PROGRAMFILES(X86)%\NCR\AdvancedStore\POS\HtmlPsxClient\config |
|
UiManager.Config.xml |
%PROGRAMFILES%\NCR\AdvancedStore\POS\HtmlPsxClient\config
%PROGRAMFILES(X86)%\NCR\AdvancedStore\POS\HtmlPsxClient\config |
|
Control.Config.xml |
%PROGRAMFILES%\NCR\AdvancedStore\POS\HtmlPsxClient\config
%PROGRAMFILES(X86)%\NCR\AdvancedStore\POS\HtmlPsxClient\config |
Modifying the function icons
The function icons and numeric touch keypad icons on the traditional POS can be configured to fit retailer requirements. For more information on supported icons, consult with an NCR Representative.
To configure the function icons, follow these steps:
- Ensure that the POS application has not been started.
- Open the UiManager.Config.sample.xml file and locate the button identifier in the name attribute of the Config element. The Config element is located in the following groups:
- Images
- TitleHelp
- Keypad
The Config elements used in the example below are located in the TitleHelp group.

- Copy the config name line requiring the icon configuration and paste in the UiManager.Config.xml file. Note
Paste the code before the </UiManagerConfiguration> line.
- Modify the icon values.
- Save the file.
- Start the POS application and then verify if the changes have been applied.
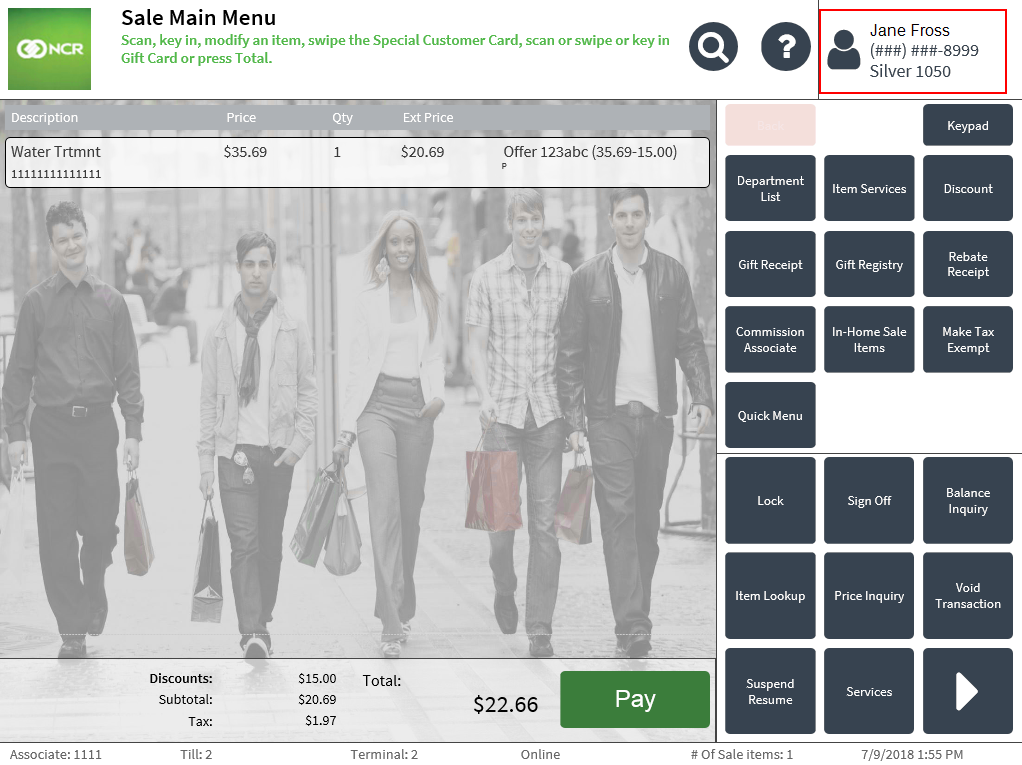
Adding a third line to the Client Lookup panel
Retailers can configure the POS to add a third line in the Client Lookup panel. The member information can display the monetary rewards balance and the phone number. The phone number can be masked if required.
To add a third line in the Client Lookup panel, follow these steps:
- Ensure that the POS application has not been started.
- Open the Control.Config.xml file.
- Locate the following codes.

- The values of the following lines must be set to "true".
<Property name="DisplayLine2Text" value="false"/>
<Property name="DisplayLine3Text" value="true"/>
- Save the file.
- Start the POS application, then verify that the changes have been applied. In this example, the Client Lookup panel displays the phone number and the rewards balance.