Installing the NCR DSR Enterprise Web Server (API)
The NCR DSR Enterprise Server.msi package installer is a comprehensive suite, comprised of the various components used to setup and configure the enterprise solution. The suite installation completes following tasks:
- Installation of the specific applications that are used to support each of the Enterprise Solution components.
- Setup of the database connection strings for each of the Enterprise Solution components.
- Setup of the Messaging Server (RabbitMQ Server) configurations for each of the Enterprise Solution components.
To install the NCR DSR Enterprise Web Server (API), follow these steps:
- On the Web Server, run the NCR DSR Enterprise Server.msi installer. The application displays the Welcome screen.
- Select Next. The application displays the Destination Folder screen with the default destination path.
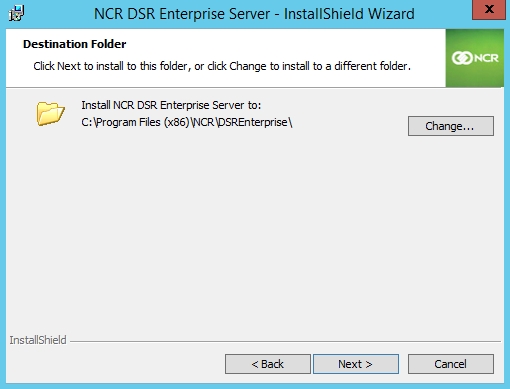 Note
NoteIf necessary, select Change to specify the destination path.
- Select Next. The application displays the Custom Setup screen.
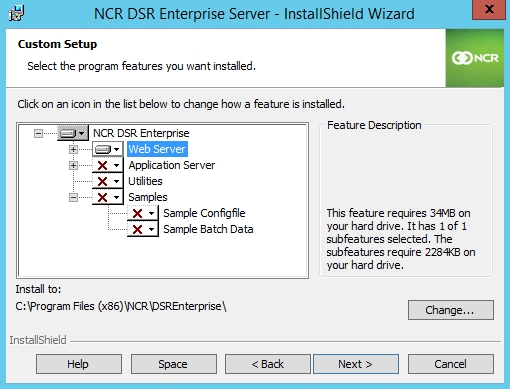
- Select the Web Server icon to display a drop-down menu.
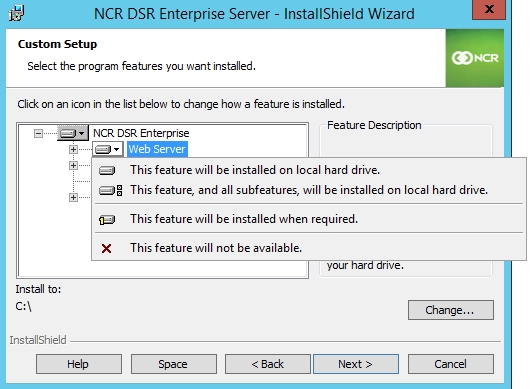
- Select This feature will be installed on local hard drive.
- Select This feature will not be available for the following features:
- Application Server
- Utilities
- Select Next. The application displays the first screen from the series of Database Connection screens.
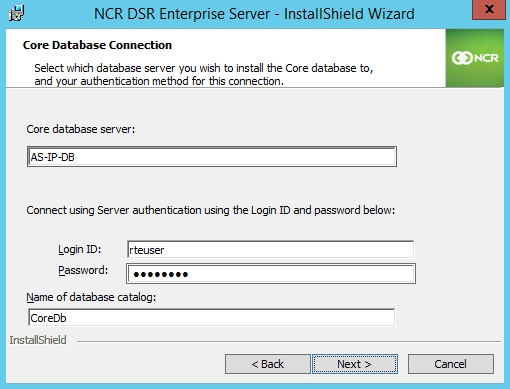
- Establish the Database Connection strings. Use the following table to provide the correct values for the Database Connection screens.Caution
This step is crucial to the installation of the NCR Advanced Store Enterprise Solution components. The database connection strings ensure that the distributed servers point to the correct Database Server and SQL instance, if applicable. Failure to accurately set up the database connection strings could result in miscommunication between the distributed servers.
Database connection strings Field name Value The installation wizard displays the Database Connection screen for each database:
- Core database server
- Product database server
- Transaction Log database server
- Transactions database server
- Electronic Journal database server
- EOM database server
- Trusted Customer database server
[Database name] database server Enter the DNS name or the IP address of the Enterprise Database Server.
Use the following format:
<SQL Server Name>, if SQL Server was installed as a default instance.
or
<SQL Server Name\Instance Name>, if SQL Server was installed as a named instance.
Login ID Enter the SQL user name that NCR applications use during run time. Password Enter the password associated with the login ID. Name of database catalog Leave the default database names as displayed. NoteBy default, the installation wizard remembers the entries from the previous screen. If no changes are required, leave the entries as displayed, and then select Next on the succeeding Database Connection screens. If it is necessary to update values, then enter the new values in the corresponding fields.
- After entering the details in all the Database Connection screens, select Next. The application displays the Rabbit MQ Server Setup screen.
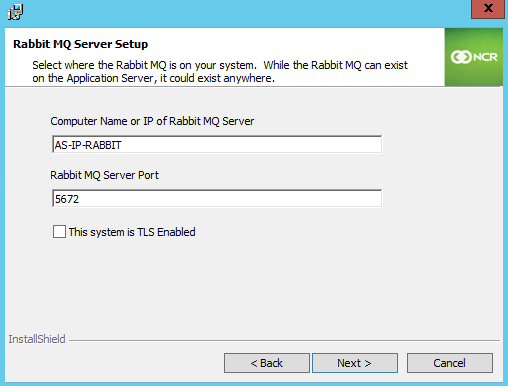
- Use the following table to provide the correct values for the RabbitMQ Server Setup screen.
Field name Value Computer Name or IP of Rabbit MQ Server Enter the computer name or the IP address of the Messaging Server, where the RabbitMQ Server application is installed. RabbitMQ Server Port Depending on the security protocol used in the system, use one of the following port numbers:
- 5672—
- 5671—
This system is TLS Enabled - 5672—
- Select Next. The application displays the Ready to Install the Program screen.
- Select Install. The application proceeds with the installation. When the installation is completed, the application displays the InstallShield Wizard Completed screen.
- Select Finish. The application exits the installation wizard.
- Restart the server.