Redeeming Loyalty Rewards
When the POS is integrated with a Customer Relationship Management service, members can exchange their loyalty reward points for items or discounts.
Customers can also use the equivalent monetary value of their reward points to pay for merchandise.
Rewards are earned through Loyalty Membership. The CRM software returns all the earned rewards displayed on the Rewards Information screen.
To enable customers to redeem their rewards, the following conditions must be satisfied:
- The POS is integrated with the retailer’s Customer Relationship Management service.
- The retailer has enabled the Loyalty Member Information parameter. For more information, refer to Loyalty Options.
Configurable features
The POS application can be configured with the following features.
- Determine which member information displays on the Member Information screen after performing a customer lookup. Refer to the following option:
- Loyalty Options > Member Information Fields
- Enable the POS to display the available rewards for a loyalty member on the Member Information screen after performing a customer lookup. Refer to the following option:
- Loyalty Options > Enable Rewards Button In Member Information View
- Set the maximum number of rewards that can be applied in each transaction. Refer to the following option:
- Loyalty Options > Maximum Rewards
- Set the maximum number of search results. By default, the POS application displays a maximum of 50 results per search. If the number of search results exceed the set value, the application displays an error message. Refer to the following option:
- Loyalty Options > Max Member Lookup Results
- Disable the POS application from printing the member information on the receipt when a loyalty member is added to a transaction and the Loyalty Member Information screen is displayed. Refer to the following option:
- Loyalty Options > Disable Print Member Info On Receipt
- Display the member’s information and the rewards available for redemption on the PIN pad device. For more information, consult with an NCR Representative.Note
Applies to POS systems that are integrated with a PIN pad device.
To redeem the member’s loyalty rewards, follow these steps:
-
Perform a member loyalty search. For more information, refer to Looking up customers. The application displays the Member Information screen, and the member is added to the transaction.
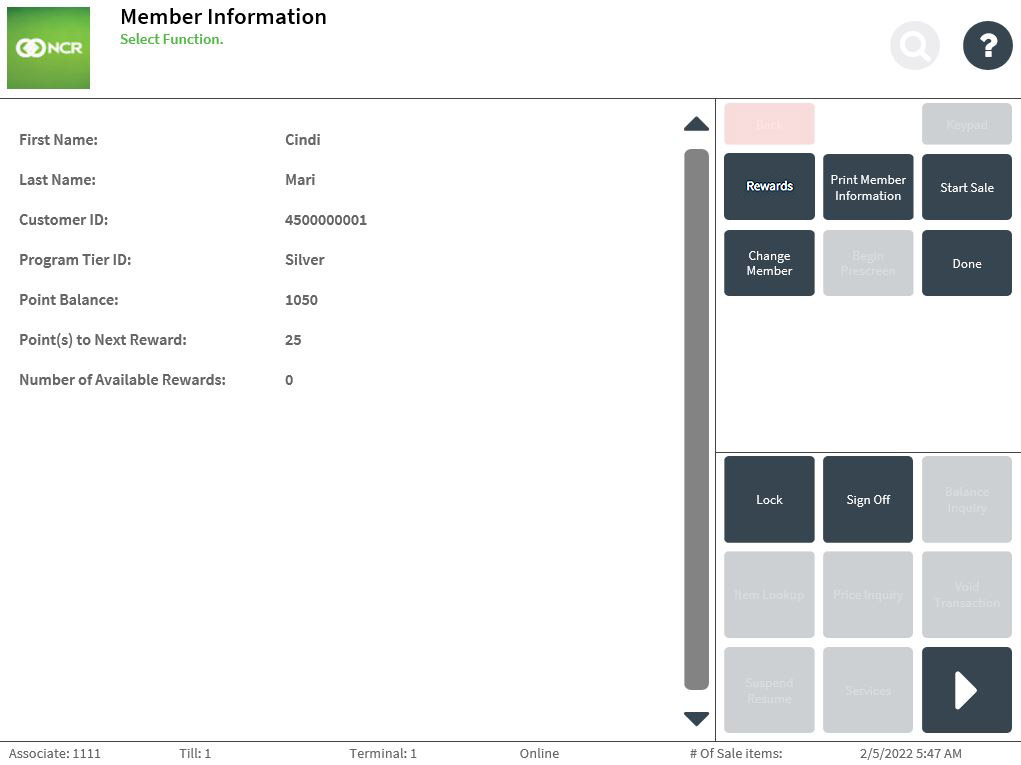
- Select Rewards. The application displays the Rewards Information screen.
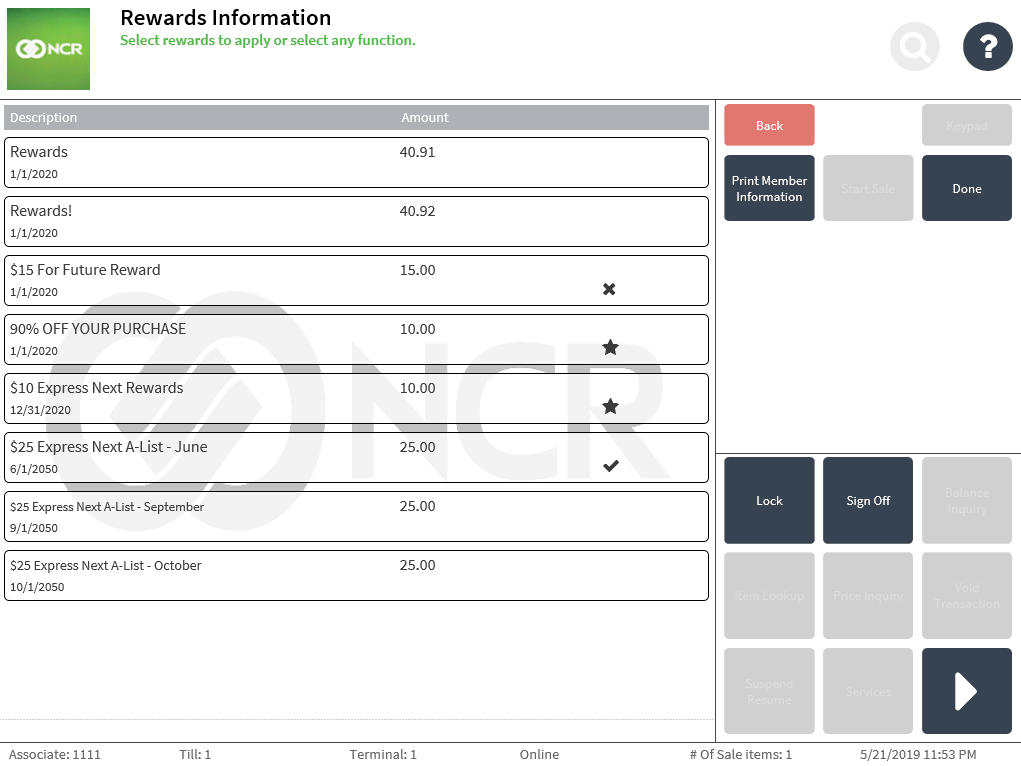
- Select which rewards to apply and remove from the transaction. Refer to the following table to identify the status icons.
Status icon Deployment status Description 
Apply Indicates that the reward has been selected and applied in the current transaction. 
Select Indicates that the reward has been selected and would be applied in the transaction. 
Unapply Indicates that an applied reward would be unapplied in the transaction. - Select Done. The application displays the Sale Main Menu screen. Selected rewards are applied to the transaction.Important
Only one member can be added to the transaction. Associates cannot replace the added member with another member when a reward has already been applied to the transaction.
- Complete the transaction. The application prints the receipt with the redeemed rewards reflected on the receipt.
Possible POS responses
During the redemption process, the application may respond with one of the following actions.
| Condition | POS response |
|---|---|
| When the member is not found. Note
One of the following reasons may have caused the error:
|
The POS displays an error message. Select OK. The application displays the Customer Lookup screen.
When the POS is integrated with Verifone Point payment solution, the PIN pad device displays an error message on the left panel. Do one of the following:
|
| When multiple results are found. | The application displays the Member Lookup Result screen with a list of members that match the member lookup criteria. Do one of the following:
Select OK. The application displays the Customer Lookup screen. |
| When the number of search results exceeds the configured maximum search result value. | The application displays an error message indicating that additional information is needed to refine the search. Select OK. The application displays the Customer Lookup screen. |
| When the system is not available. Note
One of the following reasons may have caused the POS to display the message:
|
The POS application displays an error message. Select OK. The application displays the Customer Lookup screen. |
Applying redeemable points in a transaction
When the loyalty have accumulated, members can redeem them with an equivalent monetary value. Retailers specify the number of points a customer needs to be able to redeem it. They can also configure the increments of the loyalty point balance that can be applied to a transaction.
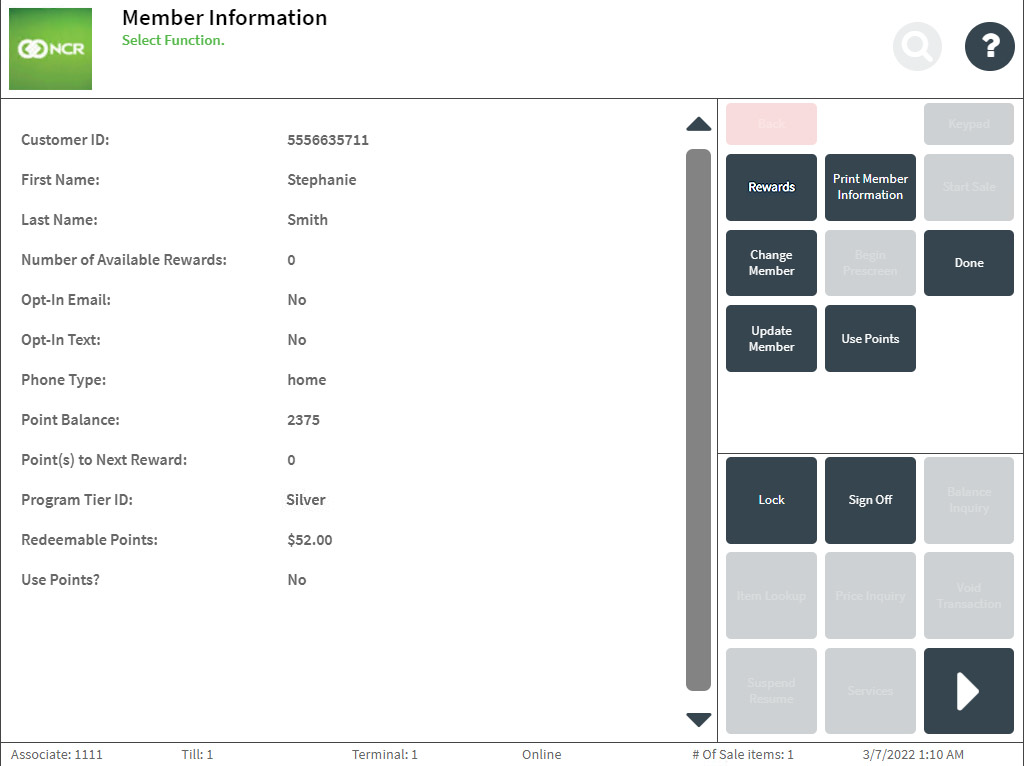
The Member Information screen displays the loyalty reward points the customers can redeem. The Use Points button is enabled when the customer has enough redeemable points and the EnableUsePointsFlag value is set to Yes in the Loyalty Lookup response. For more information, consult with an NCR Representative.
Configurable features
The POS application can be configured with the following option:
- Specify the increments of the member reward balance that can be applied to a transaction-level discount. Refer to the following option:
- Loyalty Options > Transaction-Level Discount Points Increment
- Set the specific parameter values needed when using the LoyaltyPoints markdown adjustment type for redeeming loyalty points in a transaction. Refer to the following:
- Markdown Properties > Sequence Number > 12
To apply redeemable points in the transaction, follow these steps:
- Perform a member loyalty search. For more information, refer to Looking up customers. The application displays the Member Information screen, and the member is added to the transaction.
- Select Use Points. On the Member Information screen, the Use Points button toggles to Do Not Use Points and the Use Points field displays Yes.
- Select Done. The application displays the Sale Main Menu.
- Add items to the transaction and select Pay. The application displays an information message with the amount redeemed for the transaction.
- Select OK. The application displays the Tender Menu screen and the discount details are applied to the transaction.

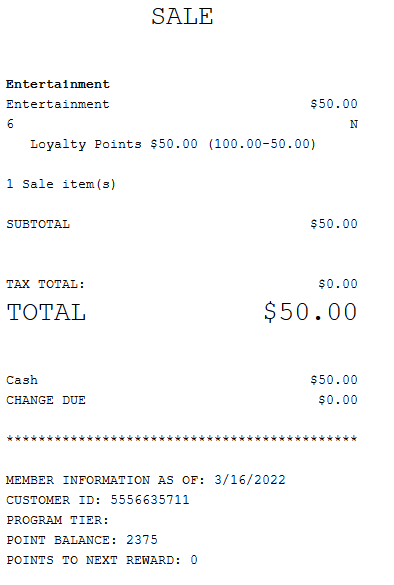
- Complete the transaction. The application prints the receipt with the redeemed amount reflected on the receipt.
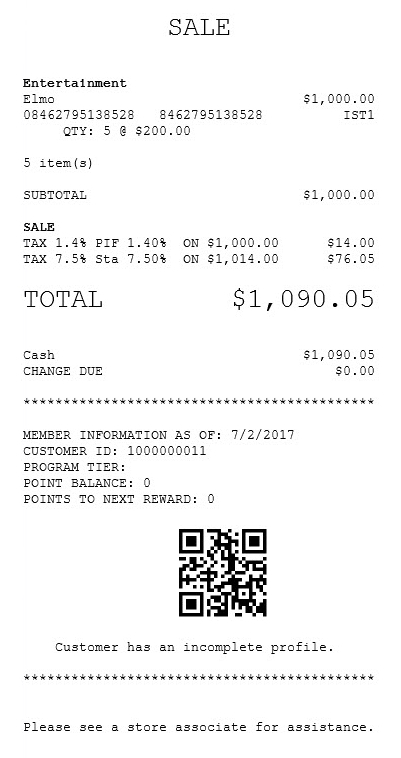
Receipt
When the Loyalty Member Information parameter is enabled, the application prints the member loyalty information on the receipt. When the newly added member has an incomplete profile, the receipt displays a QR code and the incomplete profile text as defined in EOM. However, when the newly added member has a complete profile, the member information chit only displays the member details and the complete profile text as defined in EOM.