Creating Windows environment variables for RabbitMQ
NCR recommends changing the default location for the RabbitMQ server’s database, log, and configuration files. Two Windows environment variables will be created. The first variable, RABBITMQ_BASE, specifies the recommended location for the RabbitMQ server database and log files. During the RabbitMQ installation, the second variable, RABBITMQ_CONFIG_FILE, specifies where to create the RabbitMQ configuration file.
This step should be completed before installing the RabbitMQ Server application.
To add an environment variable, follow these steps:
- Open the Windows Control Panel.
- Select System.
- On the System screen, select Advanced system settings. The System Properties window is displayed.
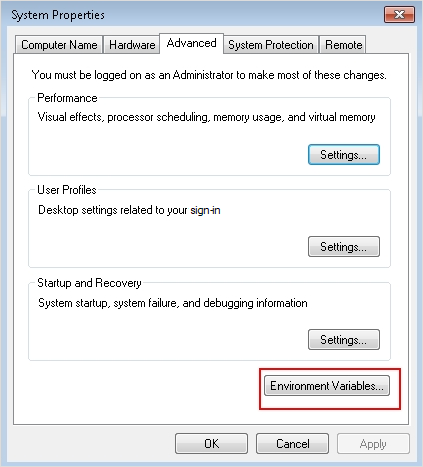
- On the Advanced tab, select Environment Variables. The Environment Variables window is displayed.
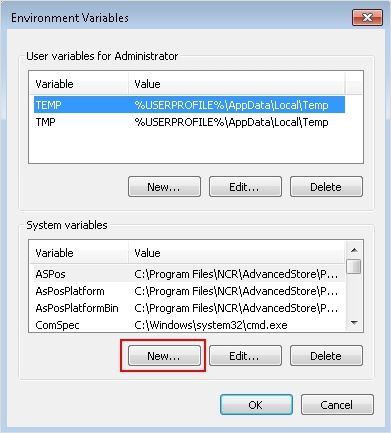
- In the System variables section, select New. The New System Variable window is displayed.
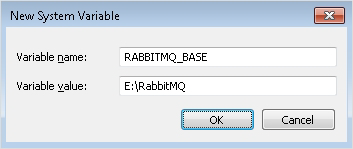
- Complete the following fields:
- Variable name—enter RABBITMQ_BASE.
- Variable value—enter the location to designate for the data and log files.
ExampleE:\RabbitMQ
- Select OK.
- Select New again to add the next environment variable.
- Complete the following fields:
- Variable name—enter RABBITMQ_CONFIG_FILE.
- Variable value—enter the desired location for the configuration file.
ExampleE:\RabbitMQ\rabbitmq
NoteMake sure the rabbitmq file name in the path does not have the .config extension.
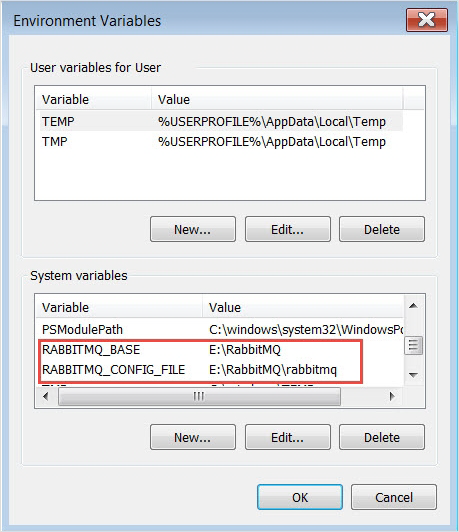
- Select OK. Both environment variables are added in the System variables section of the Environment Variables window.
If the recommended RabbitMQ environment variables are added after installing the RabbitMQ server application, the required Rabbit MQ config and log files may not be created or may not be in the correct location. To troubleshoot this issue, refer to RabbitMQ config and log files not found or not in correct location.