Multi-Lane Setup Utility
The MPOSSetupConsoleApp.exe is a command-line utility used to configure lanes for a headless POS system (HPOS).
Complete the steps in this section on the HPOS machine.
The follow applications are used in this task.
| Application name | Location |
|---|---|
| MPOSSetupConsoleApp.exe |
|
| Ncr.As.PosClientConnectionManager.exe |
To configure lanes using the utility, follow these steps:
- From the list of local services, right-click NCR AS Pos Client Connection Manager, and then select Stop.
- Open a Command Prompt window.
- At the command prompt, go to the directory where the MPOSSetupConsoleApp.exe application is saved.
- Enter the following command:
MPOSSetupConsoleApp.exe [computer name or IP address of the HPOS] [comma-separated list of lanes to configure]
The examples below show how the command can be written in different ways.
ExampleMPOSSetupConsoleApp.exe AS-IP-POS Lane1,Lane2,Lane3
ExampleMPOSSetupConsoleApp.exe AS-IP-POS "Lane1, Lane2, Lane3"
where:
Lane name—identifies the lane using an alphanumeric value unique to each lane. The list of lanes to configure are comma-separated. Add more lanes as necessary.
On the command line, a message about the successful setup of the multiple lane instances is displayed. The command also creates corresponding folders for the configured lanes in the Configuration folder in the POS folder location.
NoteThe computer name or IP address where the POS is installed should have an active network connection.
- Start the NCR AS Pos Client Connection Manager service. Do one of the following:
- From the list of local services, right-click NCR AS Pos Client Connection Manager, and then select Start.
- On the command line, enter the following command:
"[Location of the POS folder]\Ncr.As.PosClientConnectionManager.exe" -c
Example"%PROGRAMFILES%\NCR\AdvancedStore\POS\Ncr.As.PosClientConnectionManager.exe" -c
Validating the configuration
To validate the configuration, follow these steps:
- Validate that the configured lanes are displayed on the Client Connection Manager screen. Do the following:
- From any terminal at the store, open a web browser.
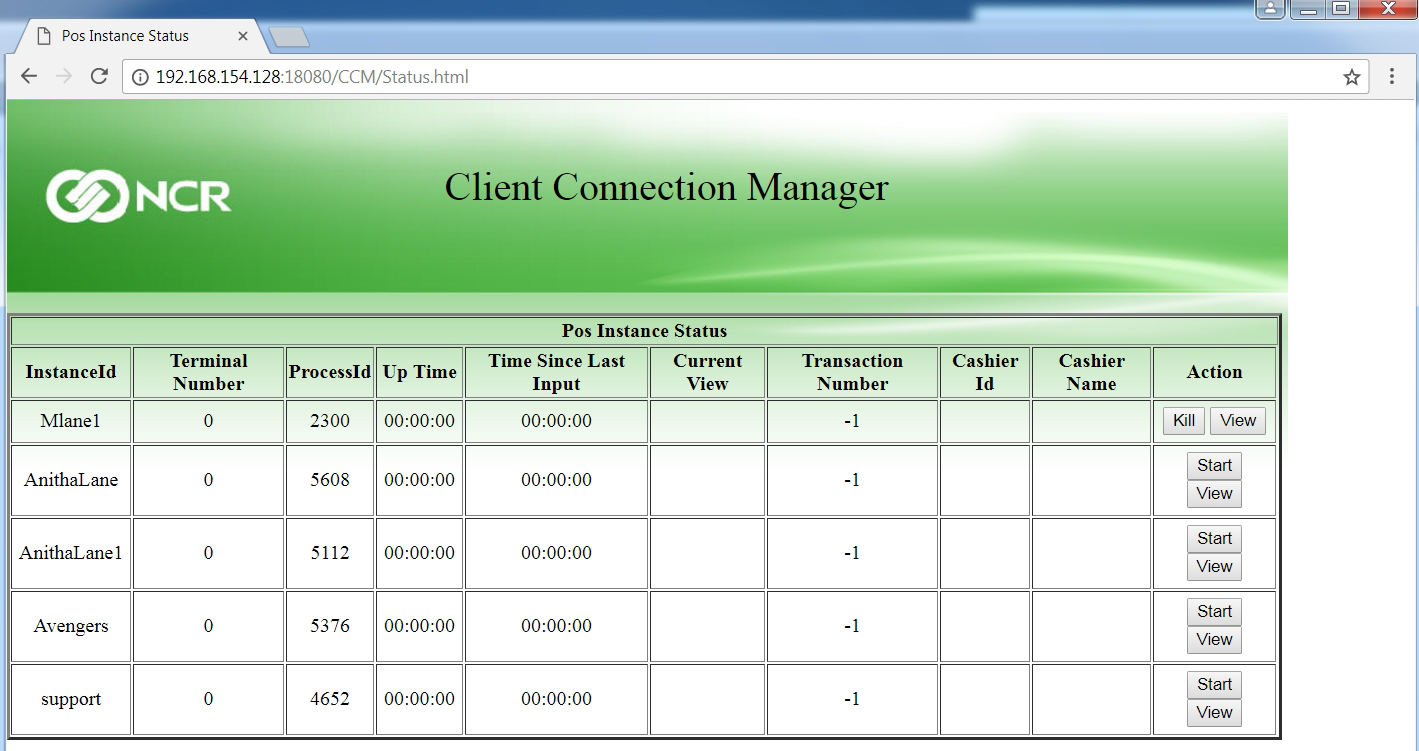
- Access the Client Connection Manager (CMM) page. On the web browser, go to the following URL:
http://[Machine name or the IP address of the HPOS]:[port number]/CCM/Status.html
Examplehttp://192.168.154.128:18080/CCM/Status.html
The following page is displayed.
- Validate the POS application on each configured POS lane.
- Open a web browser.
- Access the page for each configured lane. On the web browser, go to the following URL:
http://[Machine name or the IP address of the HPOS]/CCM/poshtmlui/index.html?config=[Lane name]
Examplehttp://192.168.154.128/CCM/poshtmlui/index.html?config=Lane1
The browser displays the POS application.
To add more lanes, repeat the steps described in this section.