Referring check payments
When the integrated payment solution has been configured to refer check payments, manual cashier intervention is needed to provide authorization information.
To refer check payments, follow these steps:
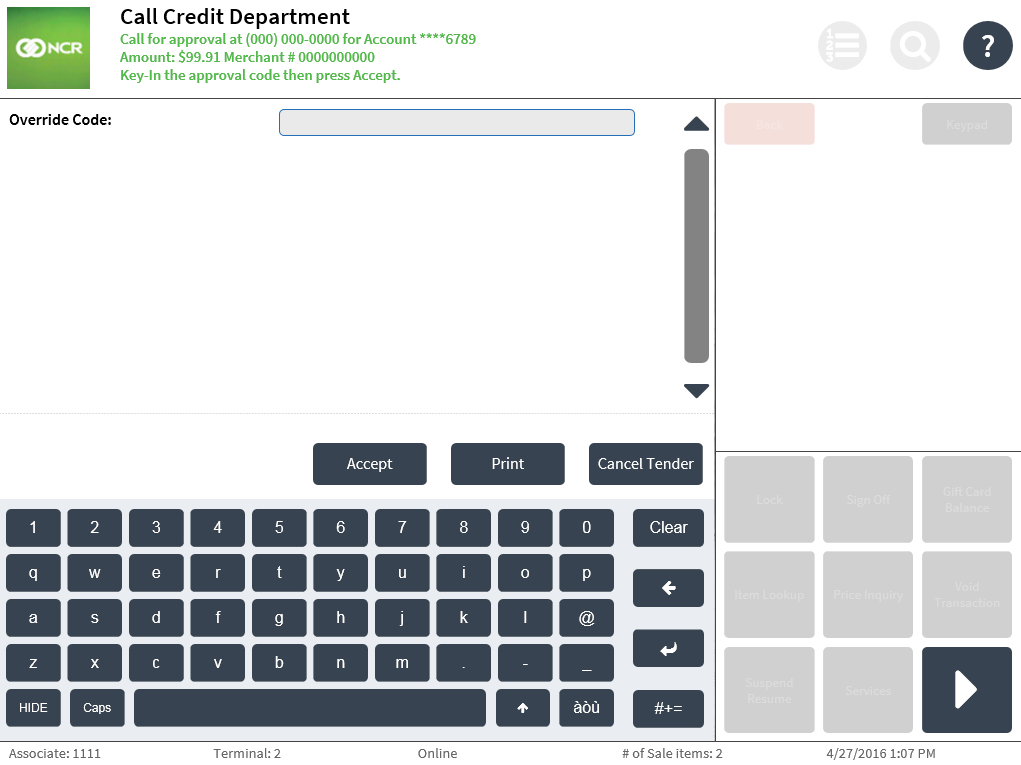
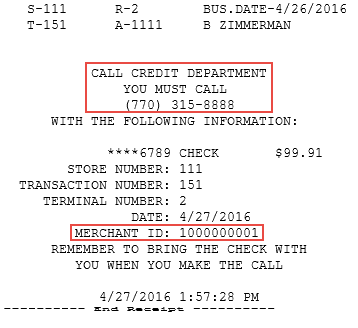
- After entering the check amount on the Check Amount screen, the application displays the Call Credit Department screen if the integrated payment solution refers the check payment request.
 Note
NoteSelect Cancel Tender to select another tender option on the Tender Menu screen to pay for the transaction.
- Enter the 3- to 6-digit Override Code.Note
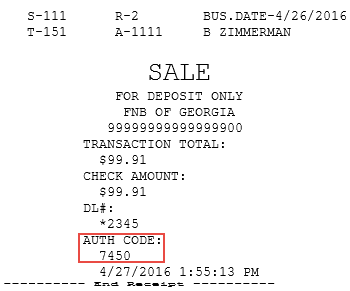
Select Print to print the check authorization chit.
- Select Accept. The application displays the Check Face Printing screen.
- Do one of the following:
- Insert the check face up into the check printer, and then select Begin Printing if the customer requests for a check amount confirmation text printed on the check.
- Select Skip Printing if the customer decides not to have the check amount confirmation text printed on the check.
The application displays a message confirming the check amount on the Check Verification screen.
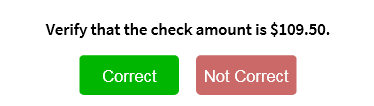
- Verify that the check has been signed by the customer and that the check amount matches the amount displayed on the confirmation message. Note
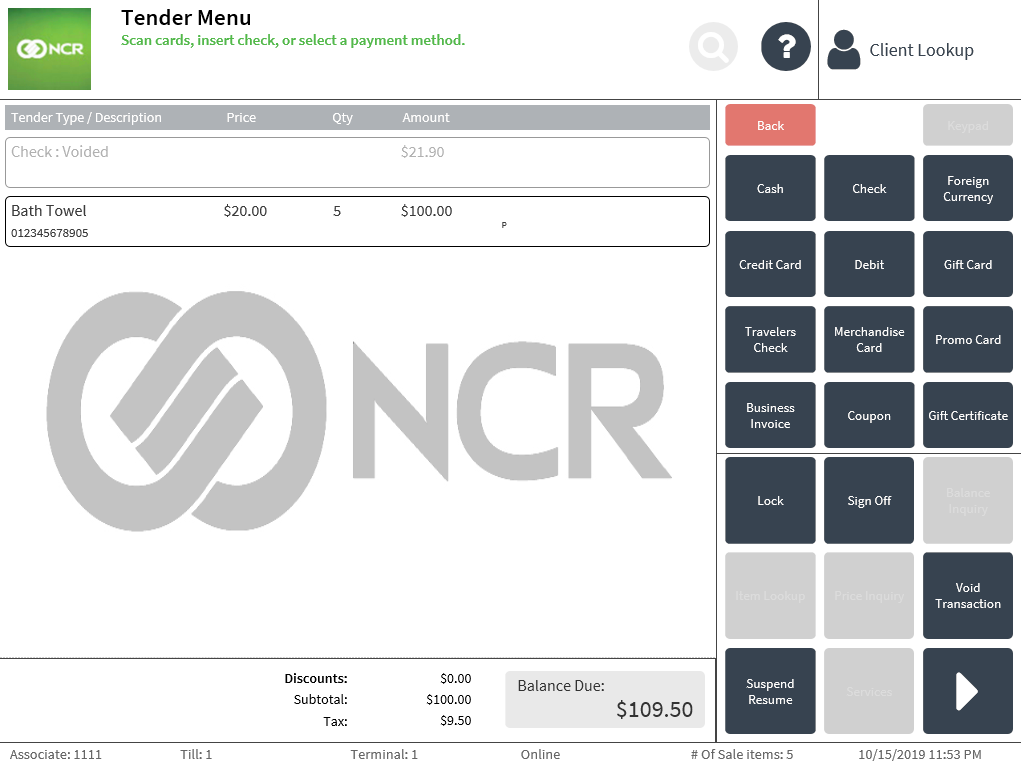
Select Not Correct if the check amount does not match the amount displayed on the confirmation message. The application returns to the Tender Menu screen and displays a Check: Voided line.
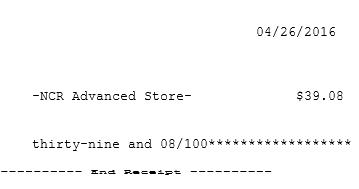
- Select Correct. If the Begin Printing option was selected in step 7, the application prints the check amount confirmation text on the face of the check and displays the Check Endorsement screen.
The following image displays sample check amount confirmation text.
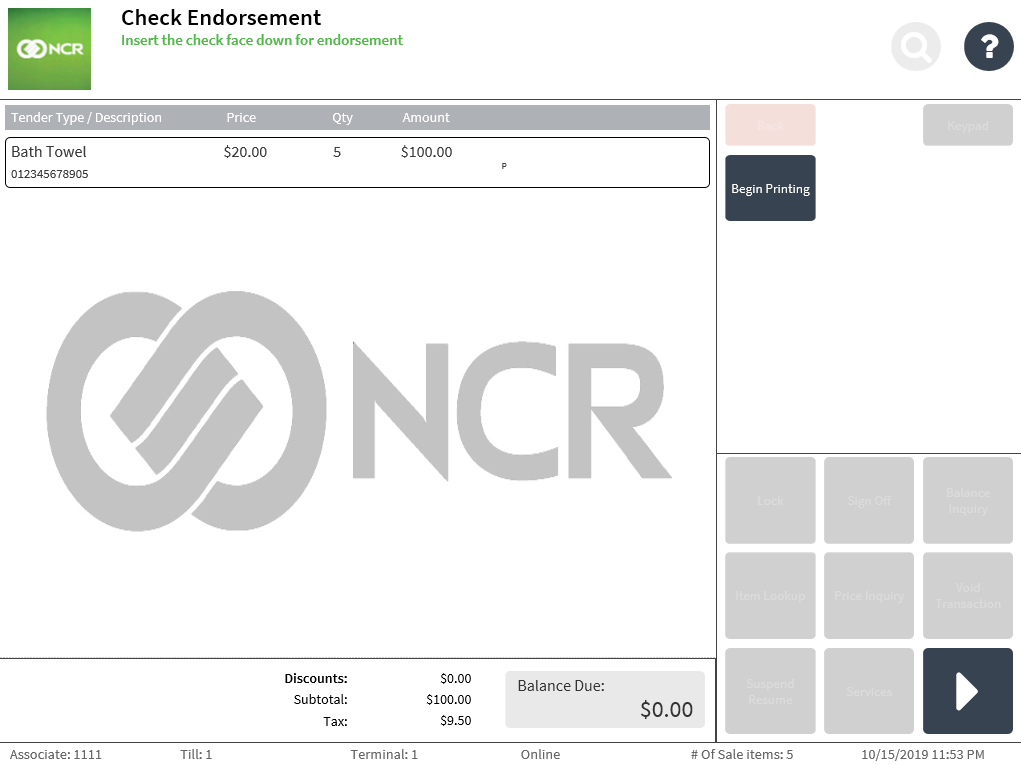
- Insert the check face down into the check printer, and then select Begin Printing. The application prints the company endorsement information text on the back of the check and displays an information message. The information message instructs the associate what to do with the accepted check.
The following image displays sample company endorsement information.
The following image display a sample information message that instructs associates what to do with accepted checks.
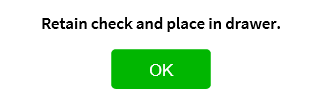
- Select OK on the information message. The application displays the Receipt Preference screen.
- Select a receipt type. The application prints the sales transaction receipt and displays the Change Due screen.
- Close the cash drawer. The application displays the Sign On screen.
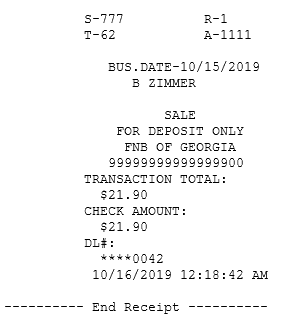
Sample receipts
Check authorization chit with check authorizer phone number and merchant ID
Company endorsement information chit with authorization code