Issuing standalone claim checks
Standalone claim checks are claim checks issued outside the store customers’ sales transaction. Customers who request a claim check for merchandise that has already been purchased can present their receipt. When the receipt is not available, associates can lookup the transaction through an alternate search method using information such as store number, receipt date, terminal number, or transaction number. Associates can also lookup a transaction using the Lookup Last 10 Transaction and Last Transaction options.
To issue standalone checks, ensure that the following condition is met:
- The Standalone Claim Check button must be enabled on the Services screen of the POS application. For more information, refer to Menu Buttons.
To issue claim checks for items that have already been purchased, follow these steps.
- From the POS global buttons, select Services. The application displays the Services screen.
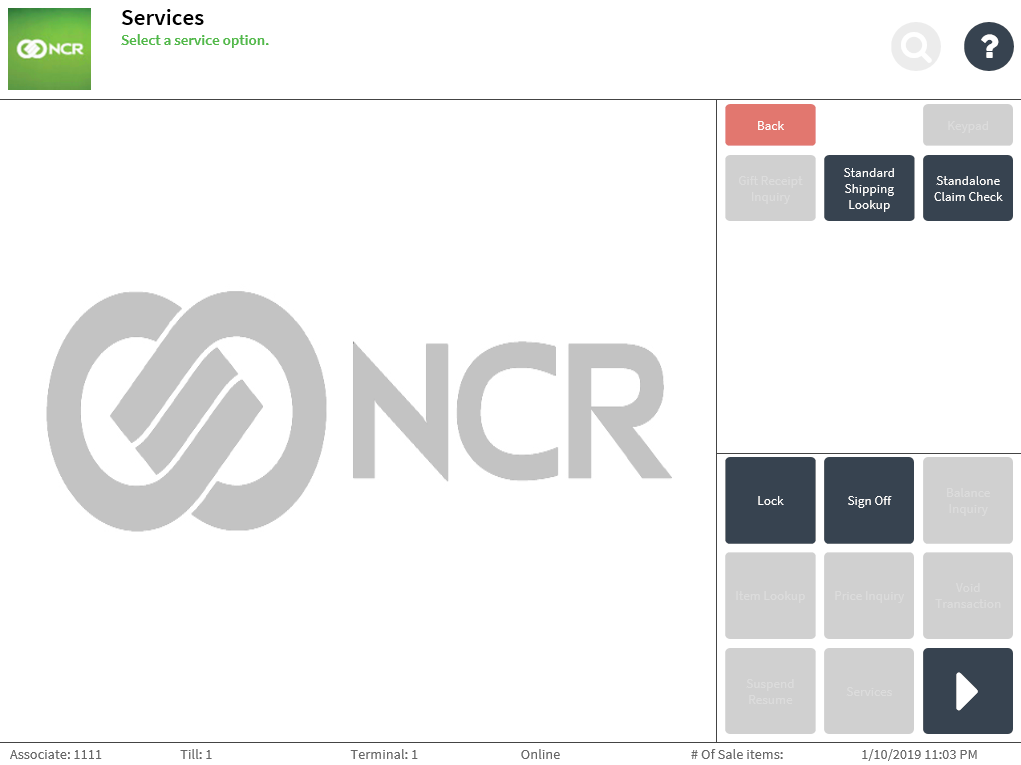
- Select Standalone Claim Check. The application displays the Standalone Claim Check screen.
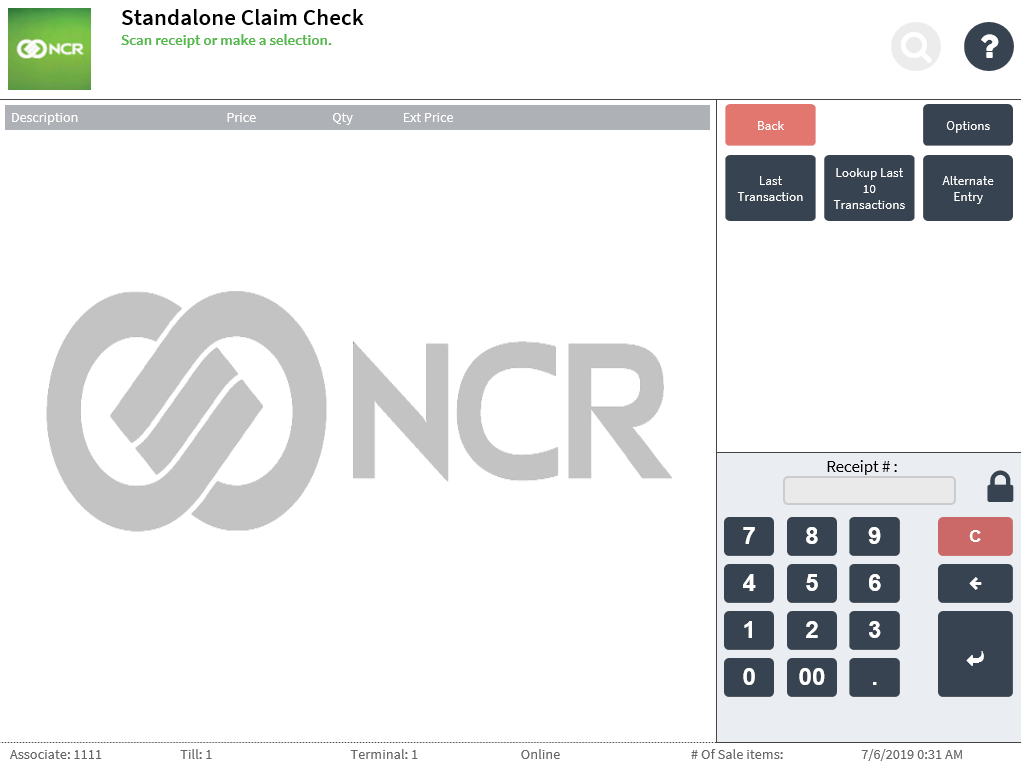
- Do one of the following:
- Scan the bar code of the sales receipt.
- Select Alternate Entry. The application displays the Standalone Claim Check Alternate Entry screen. Enter the required details.
- Select Lookup Last 10 Transactions. The application displays the Standalone Claim Check Receipt Lookup screen. Select a transaction.
- Select Last Transaction.
The application displays the purchased item on the Claim Check Item Selection screen.
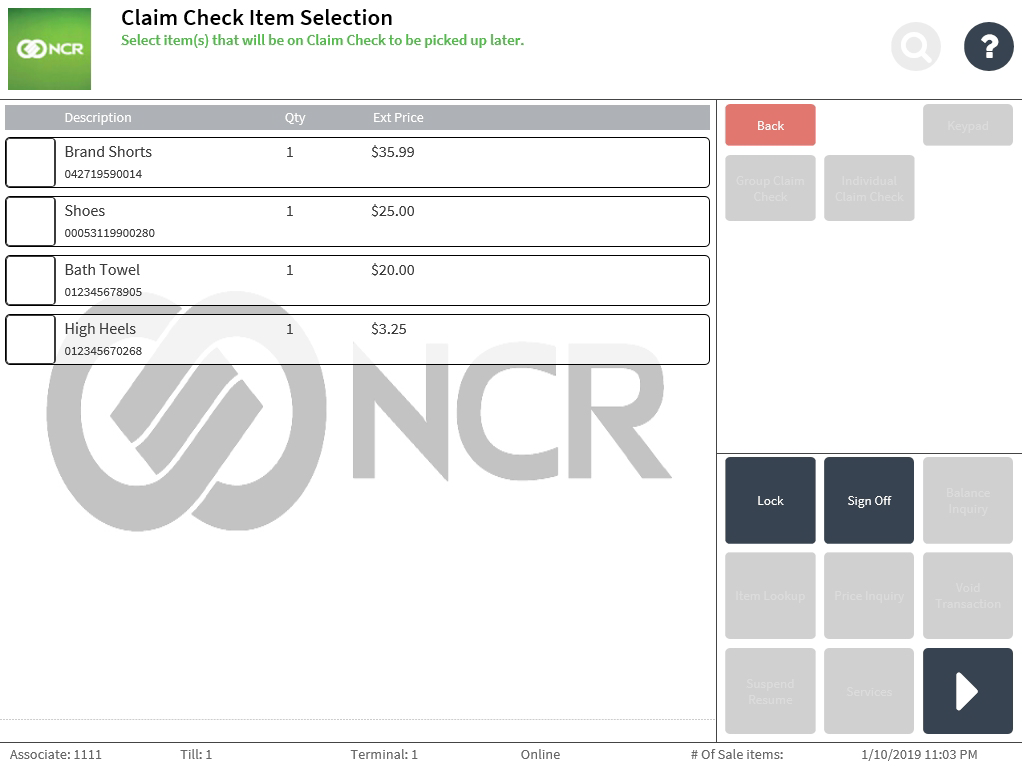
- Select the items to include in the claim check. Some items may be unavailable for claim check. When those items are selected, the application displays an error message, and the selected items are then grayed out.
- Do one of the following:
- Select Individual Claim Check to issue separate claim checks to each selected item.
- Select Group Claim Check to issue a single claim check to all the selected items.
The application displays the Claim Check Details screen.
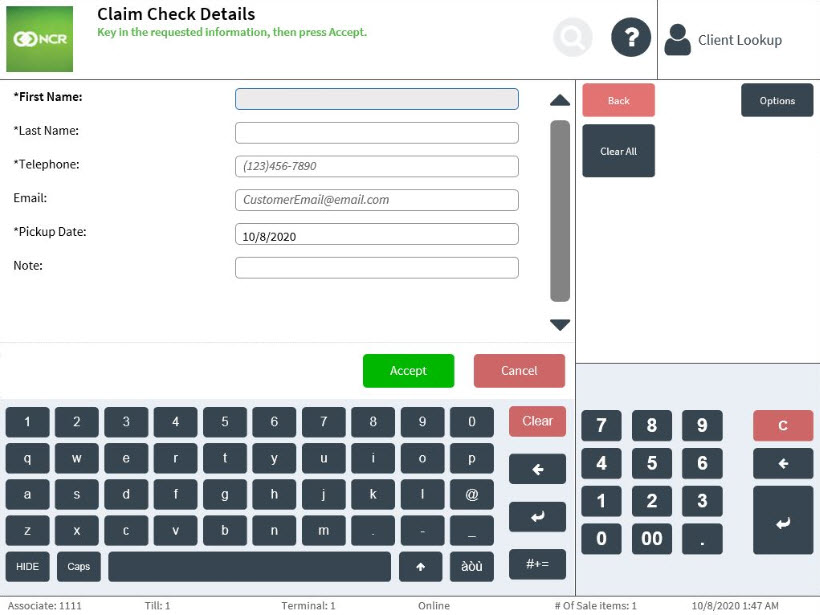
- Do one of the following:
- Enter the required information.
- Scan a valid ID when the POS application is integrated with IDScan.net. The customer information is then populated on the screen. For more information, refer to Entering and Validating Customer Information.
- Select Confirm. The application prints the claim check and redisplays the Transaction Types screen.
- To assign the remaining items of the sales transaction to another claim check, repeat this procedure. Note
Items that have been previously selected to be claimed by one customer can be reassigned to another customer or date.
- Complete the transaction.
- Close the cash drawer.
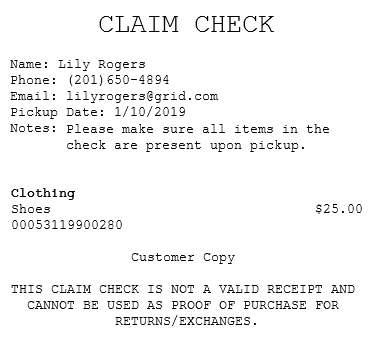
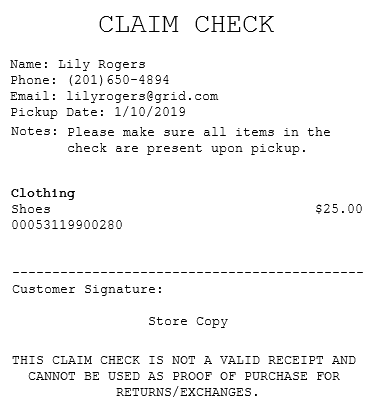
Sample receipts
Customer copy individual claim check
Store copy individual claim check
Customer copy group claim check

Store copy group claim check
