Gathering APTRA Trace Logs
The support team uses APTRA Trace logs to gather information on the specific area of the POS issue. APTRA Trace logs use customized templates, which the support team specifies when an issue is reported.
Opening the APTRA Trace application
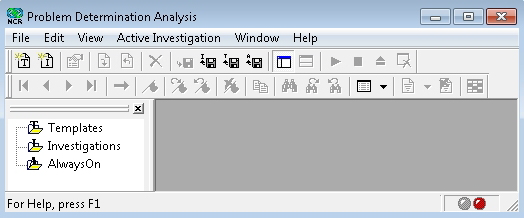
APTRA Trace is installed with the POS Suite. The application should be opened on the POS with the reported issue. To access the application, follow these steps:
- On the Windows taskbar, select Start > NCR APTRA > Problem Determination Analysis. The application displays the Problem Determination Analysis window.
 Note
NoteDepending on the user account permissions, the user may need to run the application as the Administrator. The application does not import a template or start a trace without the appropriate permissions.
Importing a template
To import the appropriate APTRA Trace log template, follow these steps:
- On the Problem Determination Analysis window, right-click the Templates folder and select Import Templates. The application displays the Select Template(s) To Import (First File In Set) window. Note
The default location for templates is %PROGRAMFILES(X86)%\NCR\AdvancedStore\POS\DiagnosticTemplates.
- Select the template specified by the support team. The application displays the imported template under the Templates folder.
Starting an investigation
To start investigating an issue using the APTRA Trace, follow these steps:
- On the Problem Determination Analysis window, right-click the template and select Create New Investigation. The application displays the investigation name under the Investigations folder.
- Run the POS application and repeat the steps to recreate the issue. Before triggering the problem, select Start (
 ) from the top menu of the APTRA Trace to start the investigation.
 - Trigger the issue then select Stop (
 ) from the top menu of the APTRA Trace to stop the investigation. The application displays a confirmation message. Select Yes to continue.
If the issue has not been triggered, repeat the steps to set up the unexpected behavior and try again.
Exporting trace logs
To export the trace logs, follow these steps:
- On the Problem Determination Analysis window, select Eject (
 ). The application displays a confirmation message. Select Yes to continue.
 - Right-click the investigation and select Export. The application displays the Export Investigation Trace To Selected Folder window.
- Locate the folder for the logs or create a new folder. Select the folder, then select Select. The application exports the trace logs to the selected folder.
- The application displays a confirmation message when the logs have been exported. Select OK to continue.
- Upload the exported trace log for the NCR support team.Note
NCR recommends zipping the logs before uploading the file.