Changing the names of UI components and receipt text
NCR recommends modifying the POS UI and receipt text before the POS application is started for the first time. However, retailers can still modify their POS UI and receipt text at any time.
This task uses the following files.
| File name | Folder |
|---|---|
| ConfigurableText.Ui.Base.csv | ConfigurableText folder %PROGRAMFILES(X86)%\NCR\AdvancedStore\POS\ConfigurableText |
| ConfigurableText.Base.csv | BaseStrings folder %PROGRAMDATA%\NCR\AdvancedStore\POS\Install\BaseStrings |
For more information about these files, refer to Renaming POS UI Elements and Receipt Text.
To modify the POS UI and receipt text, ensure that the following conditions are met:
- The POS application has not been started.
- Determine which of the two configurable text files contains the POS UI element to be renamed or the receipt text to be modified.
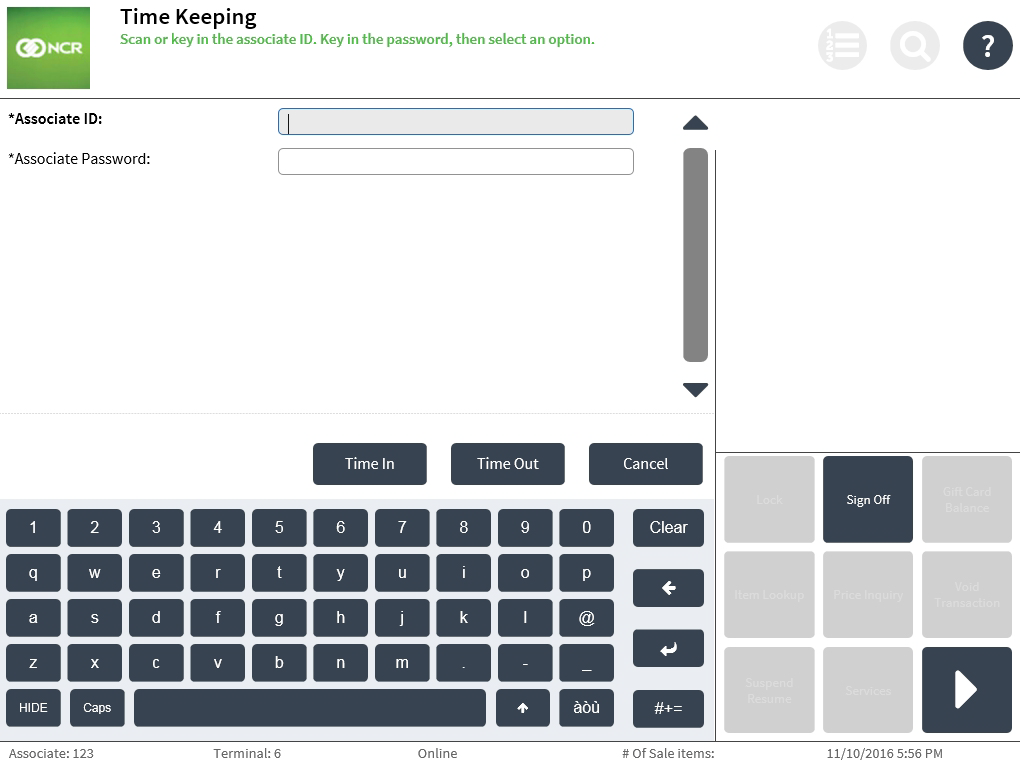
In the following example, two buttons on the POS Time Keeping screen will be customized for a retailer located in the US area. The lookup keys and default text values for these POS UI elements are in the ConfigurableText.Ui.Base.csv file.
To modify the POS user interface text or the receipt text, follow these steps:
- Locate the file that contains the text to be modified: either ConfigurableText.Ui.Base.csv or ConfigurableText.Base.csv.Note
In this example, the text is in the ConfigurableText.UI.Base.csv file.
- Create a blank RetailerX configurable text file. Save it in .csv format in the ConfigurableText folder. The new file name will be either ConfigurableText.UI.RetailerX.csv or ConfigurableText.RetailerX.csv, depending on which base file contains the values to be modified.Important
Do not substitute the letter X with the retailer’s name in the file name.
TipIf you have a significant number of UI elements to rename, try the following shortcut. Make a copy of the base configurable text file and rename it with the RetailerX file name. Then, open the copy of the file and delete the rows corresponding to UI elements that you do not want to rename. Save this file in the ConfigurableText folder.
- Open both the base configurable text file and the RetailerX copy of the file.
- Copy the row for the UI text to be modified from the base configurable text file to the RetailerX copy of the file.
- In the RetailerX file, edit the text value in Column B. Note
In this example, the default buttons on the POS Time Keeping screen, Clock In and Clock Out, are to be customized to Time In and Time Out, respectively.

- Save the file.
- Start the POS application, and then verify that the changes have been applied. In this example, the two buttons on the POS Time Keeping screen now display the customized text, Time In and Time Out.