No Base Plate
The kiosk is shipped out with a temporary Base Plate that can be removed before bolting the kiosk to the floor.
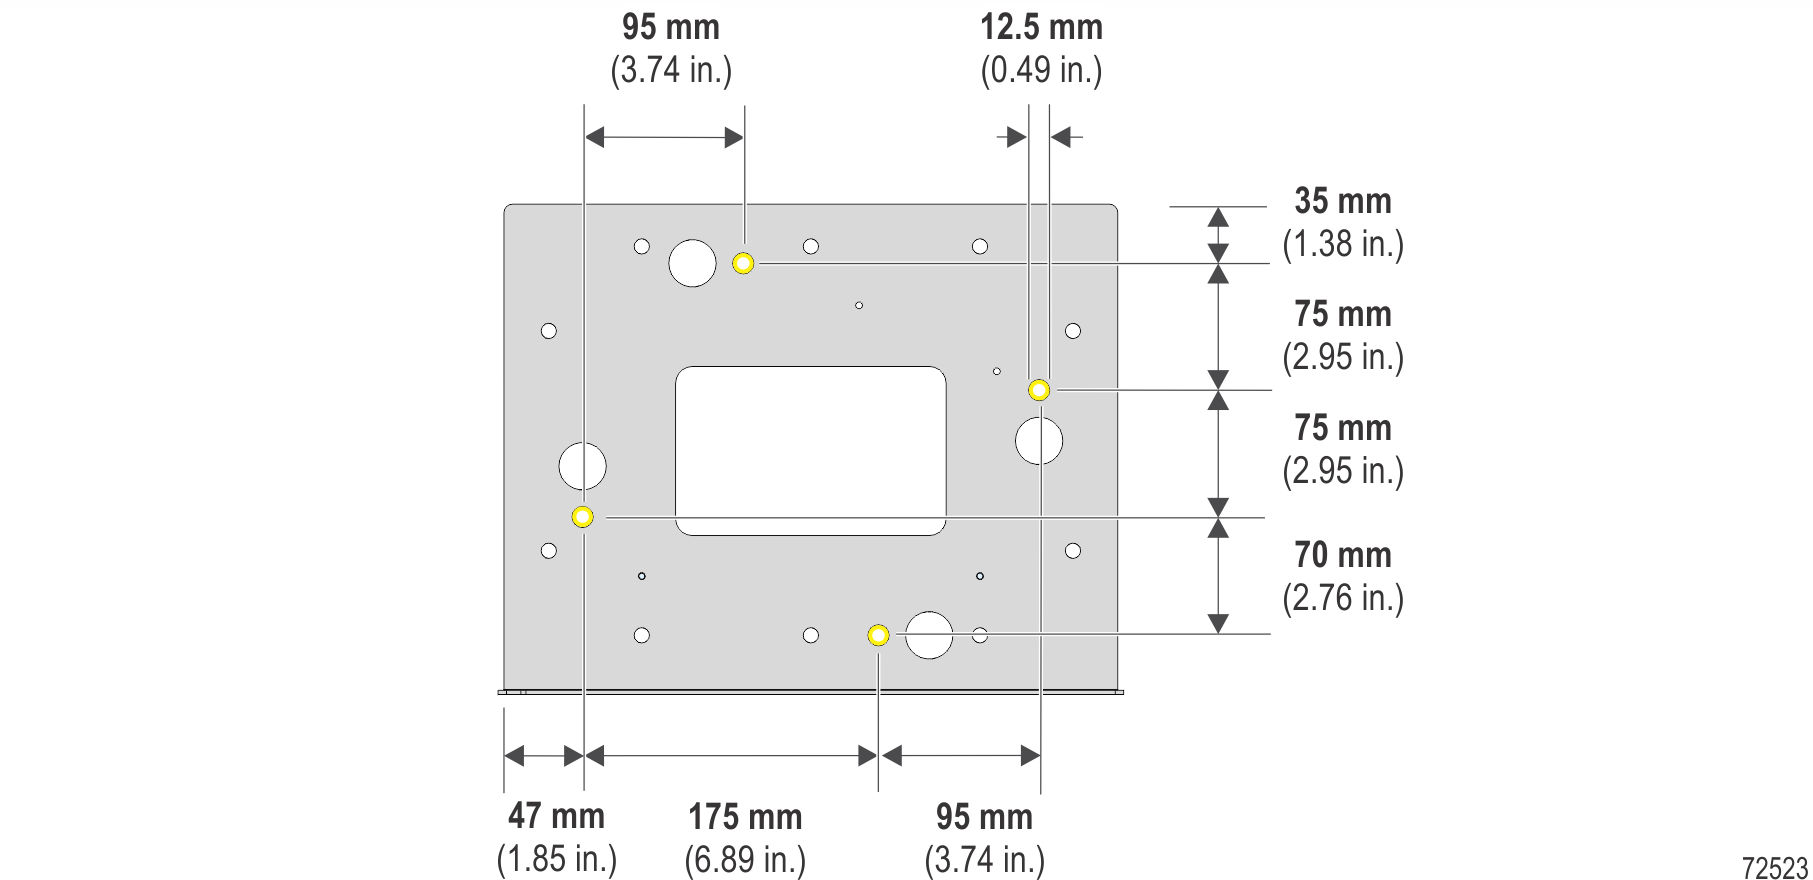
1.Mark the location of the anchor holes of the kiosk on the floor or use the dimensions below.
2.Remove the UPS.
a.Route the power cord into the kiosk through the cable entry hole.
b.Unplug the power cords or cables connected to the UPS.
c.Remove the two M4 hex nuts that secure the Top Support bracket. Remove the bracket.
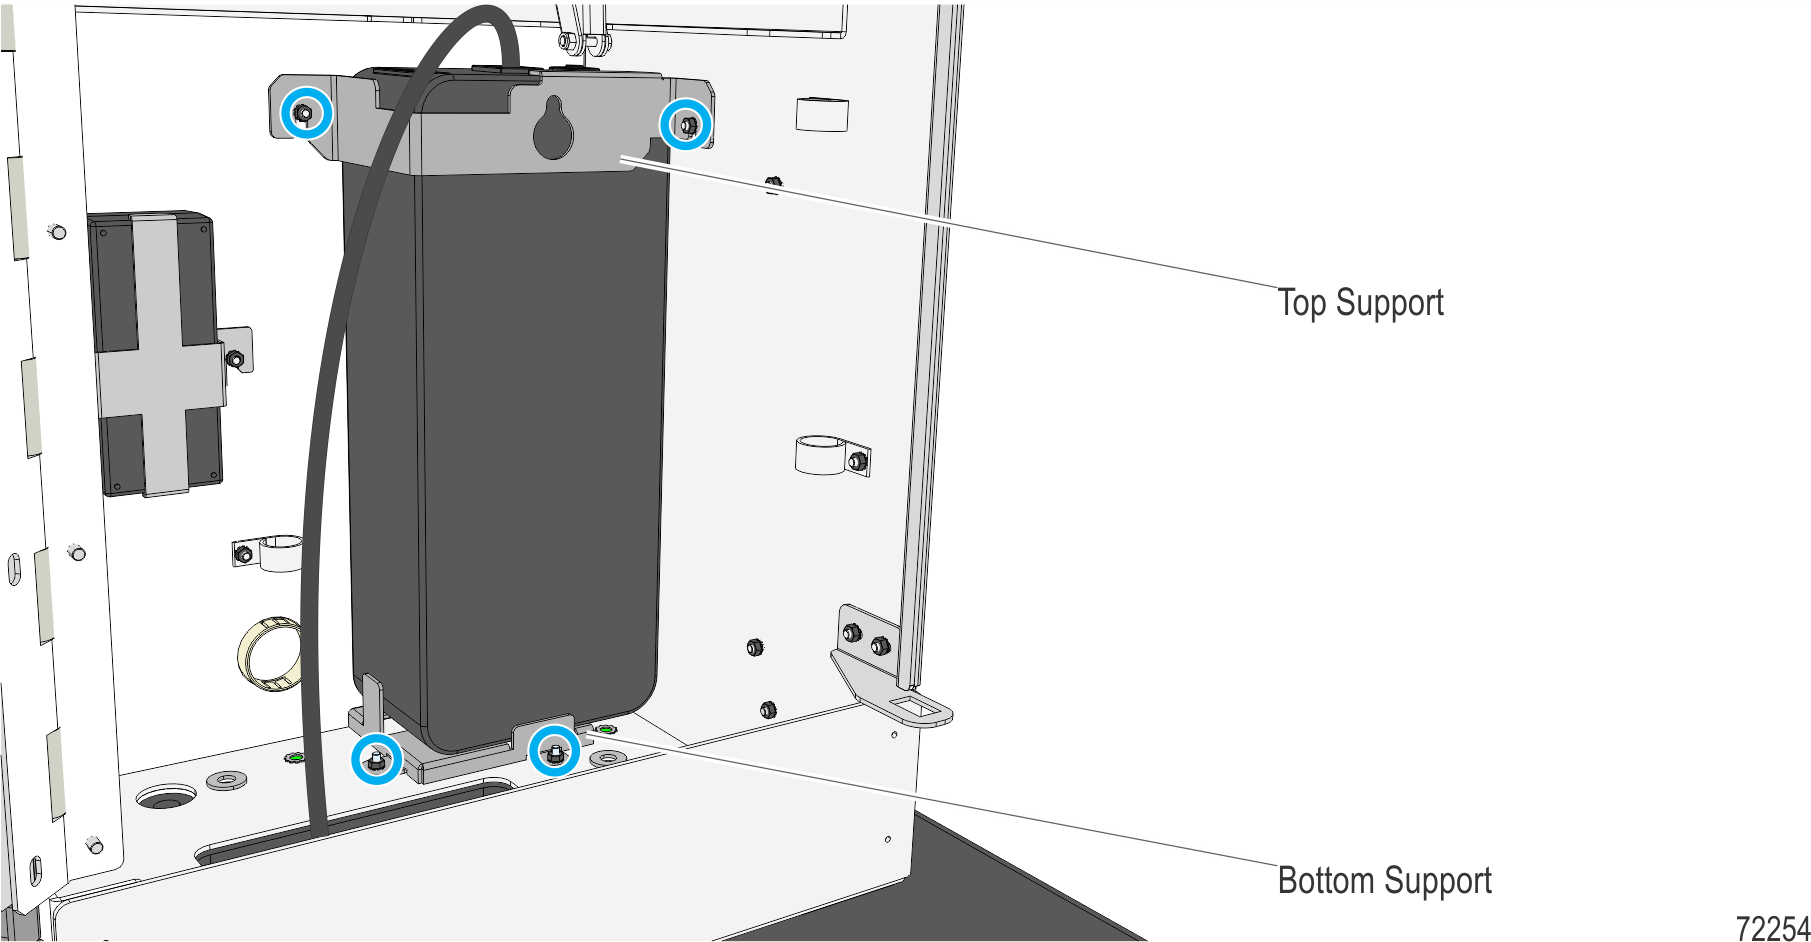
d.Remove the UPS.
e. Remove the two M4 hex nuts that secure the Bottom Support bracket. Remove the bracket.
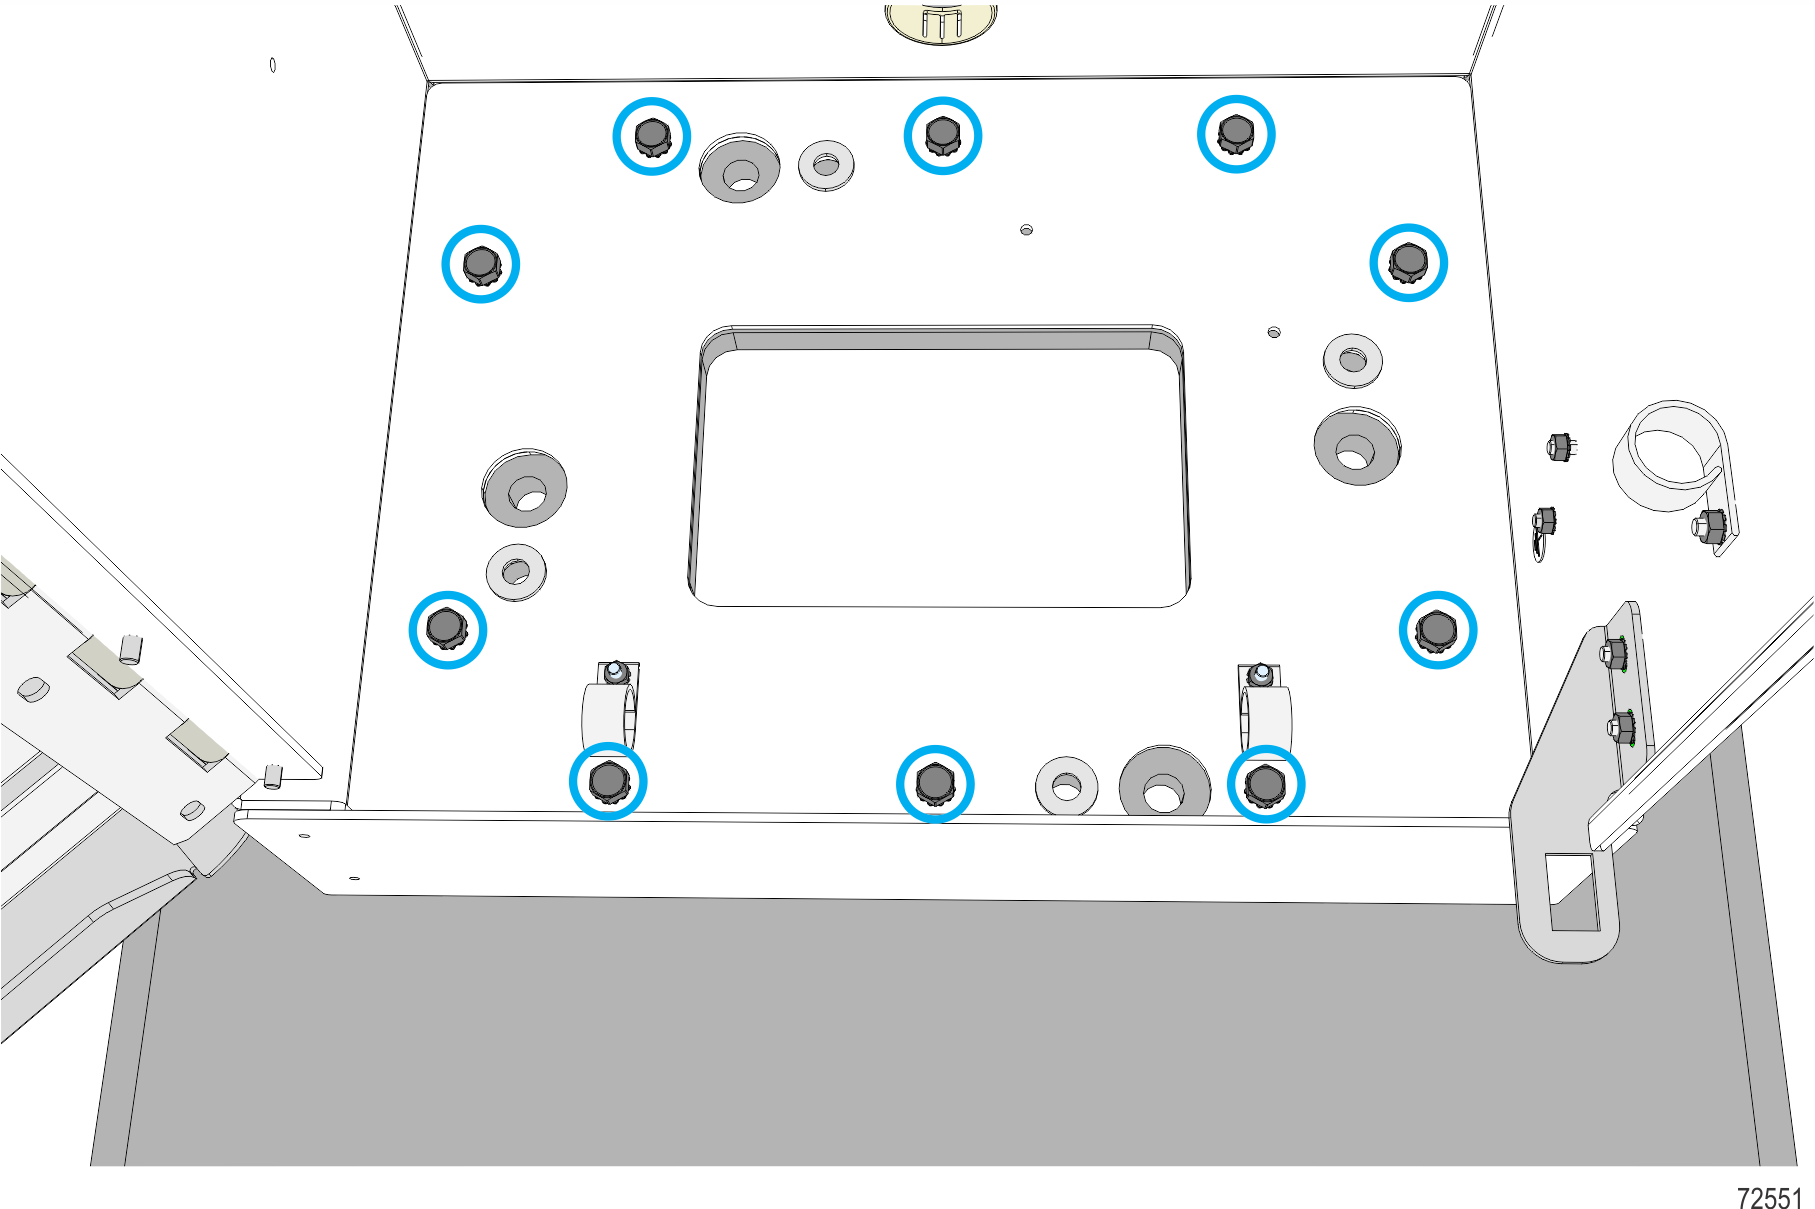
3.While holding the unit for support, remove the ten bolts that mount the pedestal to the temporary base plate.
Caution: Low headroom on bag tag printer tray and paper roll bracket area.
4.Carefully slide the kiosk to the installation location.
Note: Make sure all mounting holes on the pedestal are aligned with holes on the floor.
5.Mount and tighten the four anchors.
6.Re-install the UPS.
a.Mount the Bottom Support bracket and secure with two M4 hex nuts.
b.Place the UPS on top of the Bottom support.
c.Mount the Top Support bracket and secure with two M4 hex nuts.
d.Plug the power cords or cables to the UPS.
e.Route the UPS External cable out of the kiosk through the cable entry hole.