Configuring a Second HDD for RAID
Introduction
This chapter discusses how to add a second hard drive and configure a RAID system using the Intel® Rapid Storage Technology.
The Intel® Rapid Storage Technology provides new levels of protection, performance, and upgradeability for the 7702 platform. Whether using one or two hard drives you can take advantage of enhanced performance and lower power consumption. When using two drives you can have additional protection against data loss in the event of hard drive failure.
Valuable digital memories are protected against a hard drive failure when the system is configured for one of the fault-tolerant RAID levels: RAID 1 or RAID 5. By seamlessly storing copies of data on one or more additional hard drives, any hard drive can fail without data loss or system downtime. When the failed drive is removed and a replacement hard drive is installed, data fault tolerance is easily restored.
Configuring a RAID System
RAID systems can be installed on the NCR XR7 POS if the 7702-F262 Dual 2.5" HDDs or 7702-F242 Dual SSDs feature is present.
Installation Procedures
1.Install the primary HDD/SSD.
2.Load the NCR Gold Drive.
3.Install the second HDD/SSD in the terminal.
4.Run the Intel® Rapid Storage Technology Manager.
Start → All Programs → Intel → Intel® Rapid Storage Technology
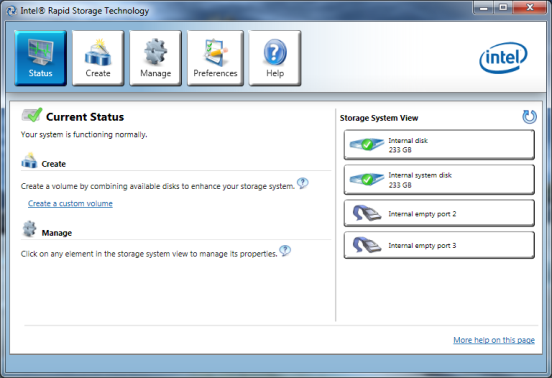
5.Both disks should be recognized in the Main Screen. Select the Create button.
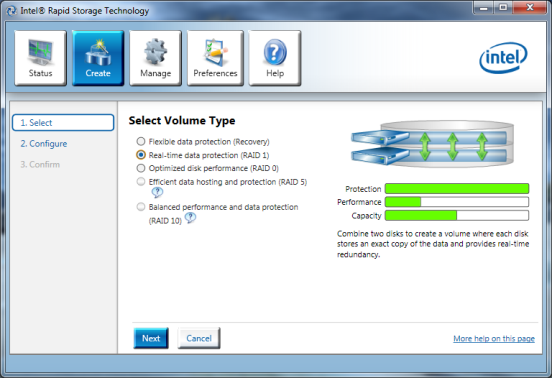
6.Select the type of RAID volume you want to install. NCR supports RAID 1 and RAID 0 volume types.
RAID 1: Combines two disks to create a volume where each disk stores an exact copy of the data and provides real-time redundancy.
RAID 0: Combines two disks to create a volume where data is broken down into strips that are distributed across both disks.
7. Select Next.
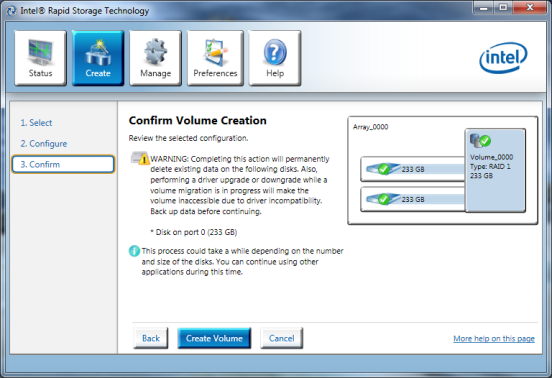
8.Enter a Volume Name (user preference).
9.Select the check boxes for both disks.
RAID 0 Only: Specify the amount of space to be used by the new RAID volume. Use the slider to enter a percentage.
Note: If you create a volume that uses less than 100% of the hard drive space, you may create a second RAID volume to use the remaining space.
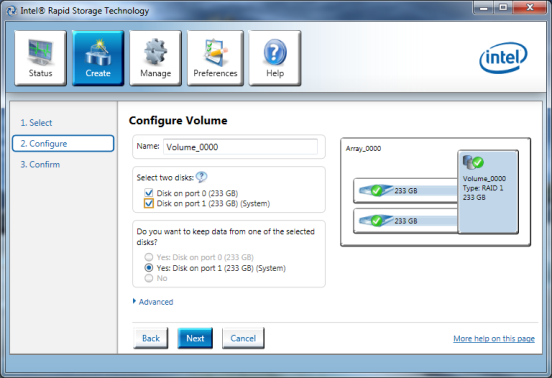
10.Select Next.
11.Select Create Volume to start the volume migration.
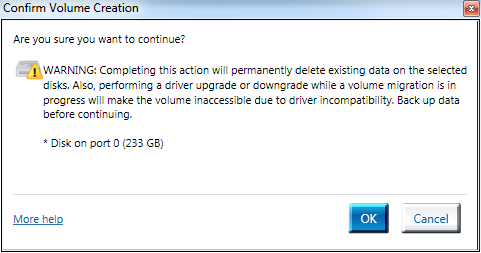
12.Select OK to confirm the action.
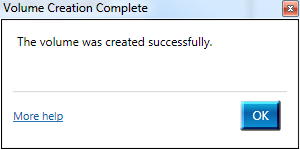
13.A window is displayed indicating the volume was created successfully. Select OK to close the window.
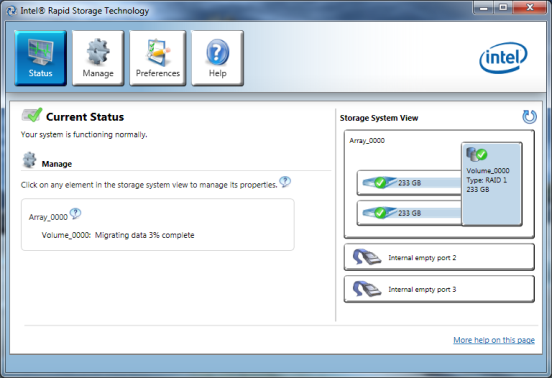
The status of the migration is displayed, showing the progress. This can take 1 - 3 hours to complete.