Replacing the Paper Roll in the Receipt Printer
Replenishment of the receipt paper should be carried out on a regular basis.
1.Open the kiosk fascia and slightly pull out the front panel.
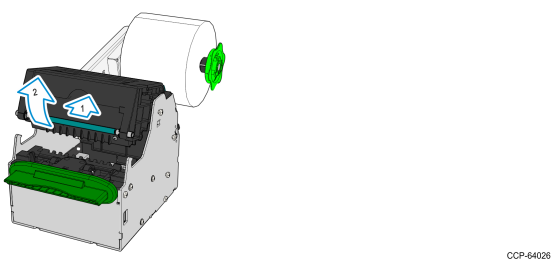
2.If there is still paper in the printer, open the printer by pressing and lifting the green bar.

3.Pull the paper out of the printer. Then close the printer, making sure it clicks shut.
4.Remove the green wheel from the end of the paper holder and remove the paper roll from the holder.
5.Remove enough paper from the new roll so that there are no traces of glue or tape and no tears or creases. Fold and tear off the end of the paper to leave a clean, straight edge.
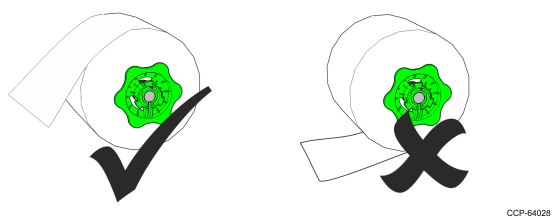
6.Place the new paper roll on the holder so that the paper feeds over the top of the roll.

7.Replace the green wheel on the paper holder, making sure that the inner edge of the wheel is inserted inside the paper core.
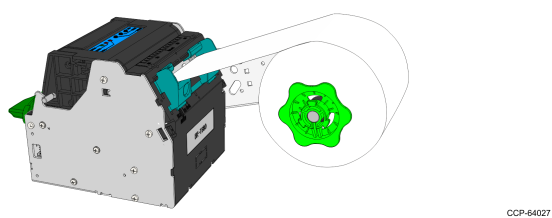
8.Feed the paper between the paper guides and into the print engine. Once the paper is gripped by the mechanism, it will feed automatically and produce a test print.

9.Remove the test print.
10.Follow your in-house procedures for indicating that the paper has been replenished.