Configuring AMT
This chapter explains how to configure an NCR CX7 All-in-One POS (7772) so it can be accessed remotely using Intel’s Active Management Technology (AMT).
Configuring the Terminal
- Boot the terminal.
- When the NCR logo appears, press [Del] several times to start the BIOS Setup Utility.
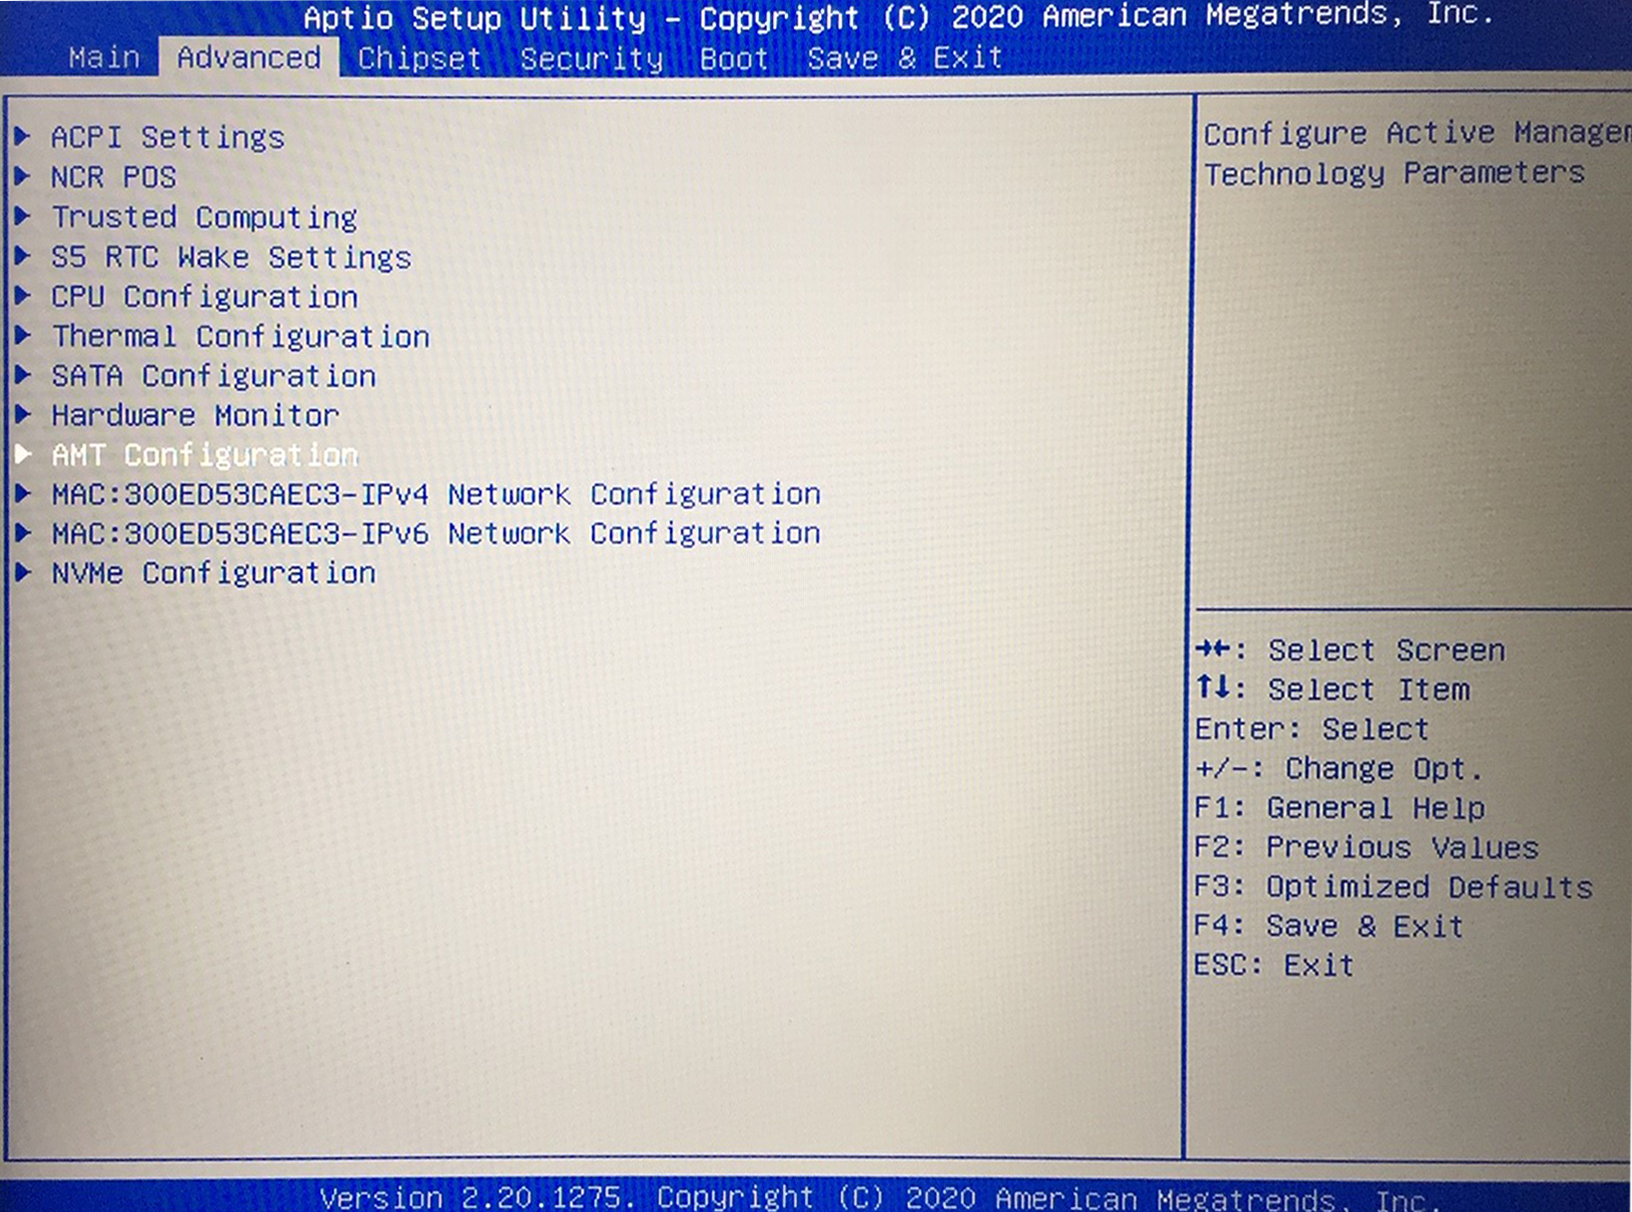
Under the Advanced tab, select AMT Configuration and press [Enter].
- Enable AMT Support.
- Highlight AMT Support and press [Enter].
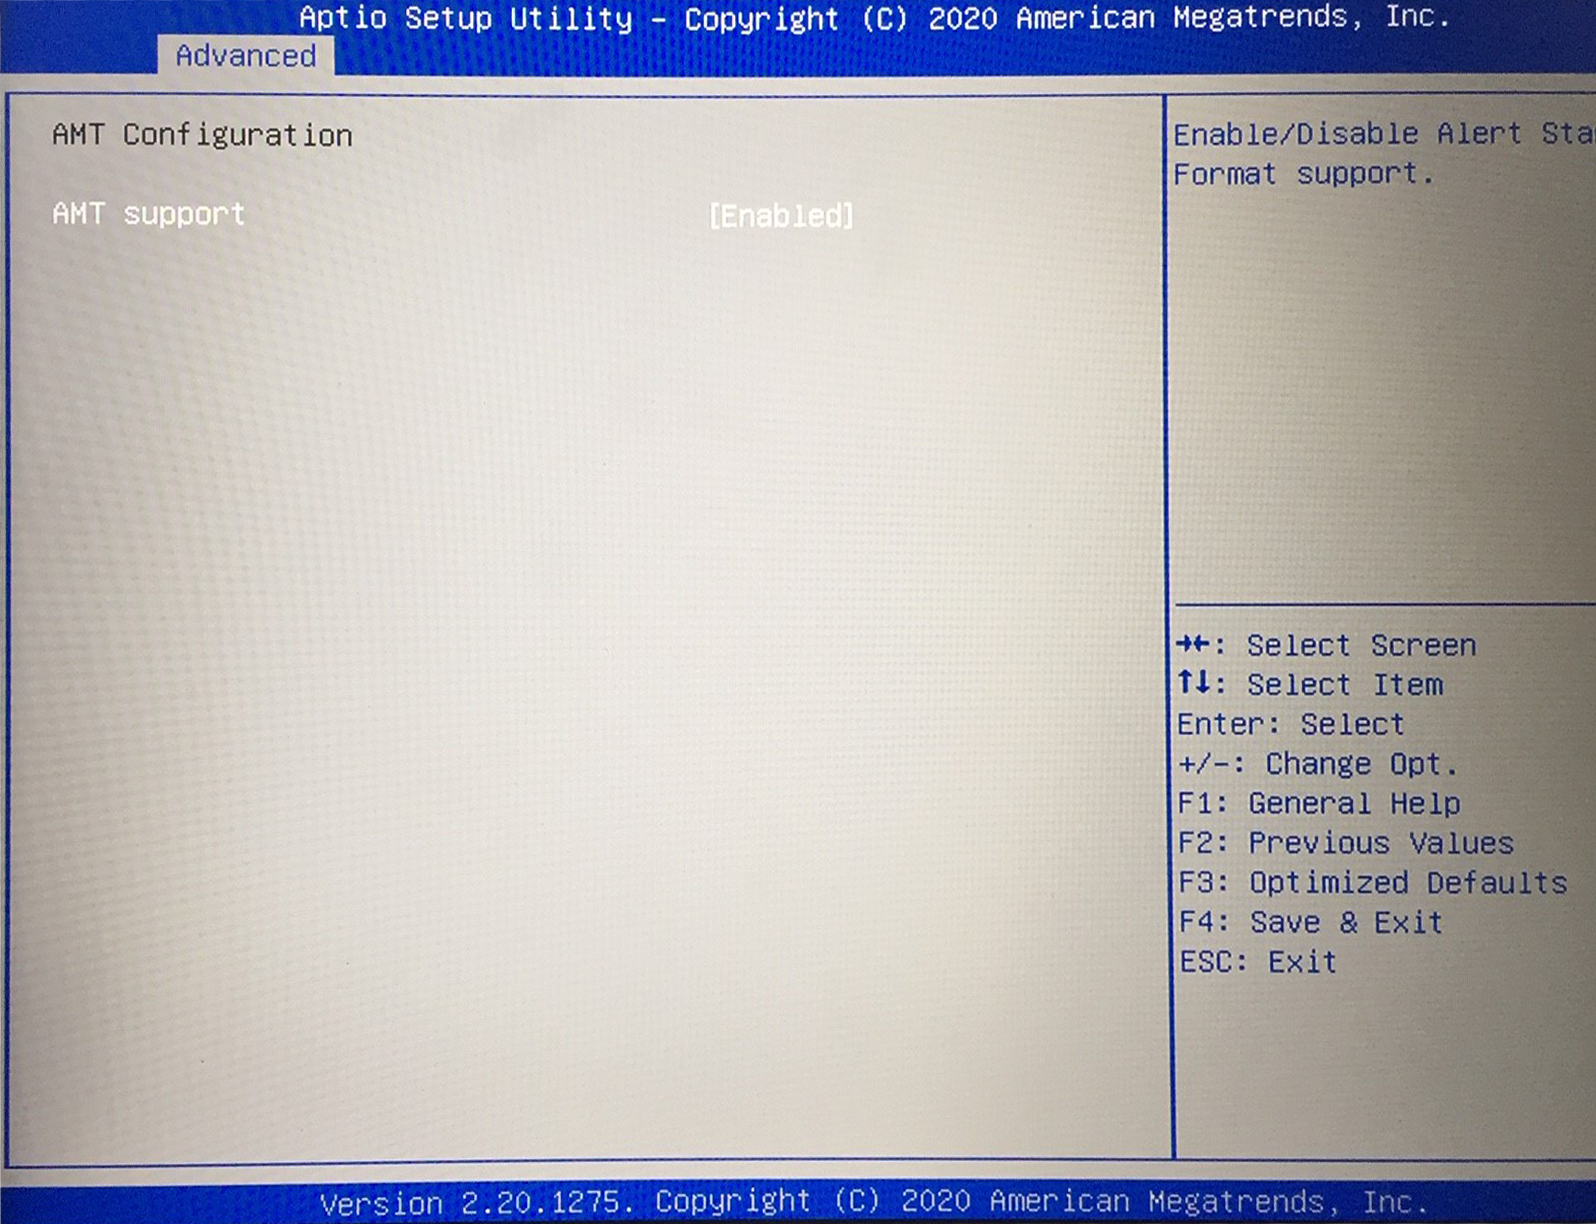
- Set to Enabled.
- Press [Enter].
- Highlight AMT Support and press [Enter].
- Press [F10] and [Enter] to Save and Exit.
- After the system reboots, press [Ctrl] + [P] to launch the Intel(R) Management Engine BIOS Extension Main Menu.
- Highlight MEBx Login and press [Enter].
- Enter the [password]>> [Enter].
 Note
NoteThe first time this program is run you must use the default password, admin (lower case). [admin]>> [Enter]
At the prompt, enter the new password (write it down to remember). The password must contain upper, lower, symbol, and numeric characters.
ExampleNcr@2011
You must enter the password a second time for verification.
- Highlight Intel(R) Standard Manageability Configuration and press [Enter].
- Highlight Activate Network Access and press [Enter].
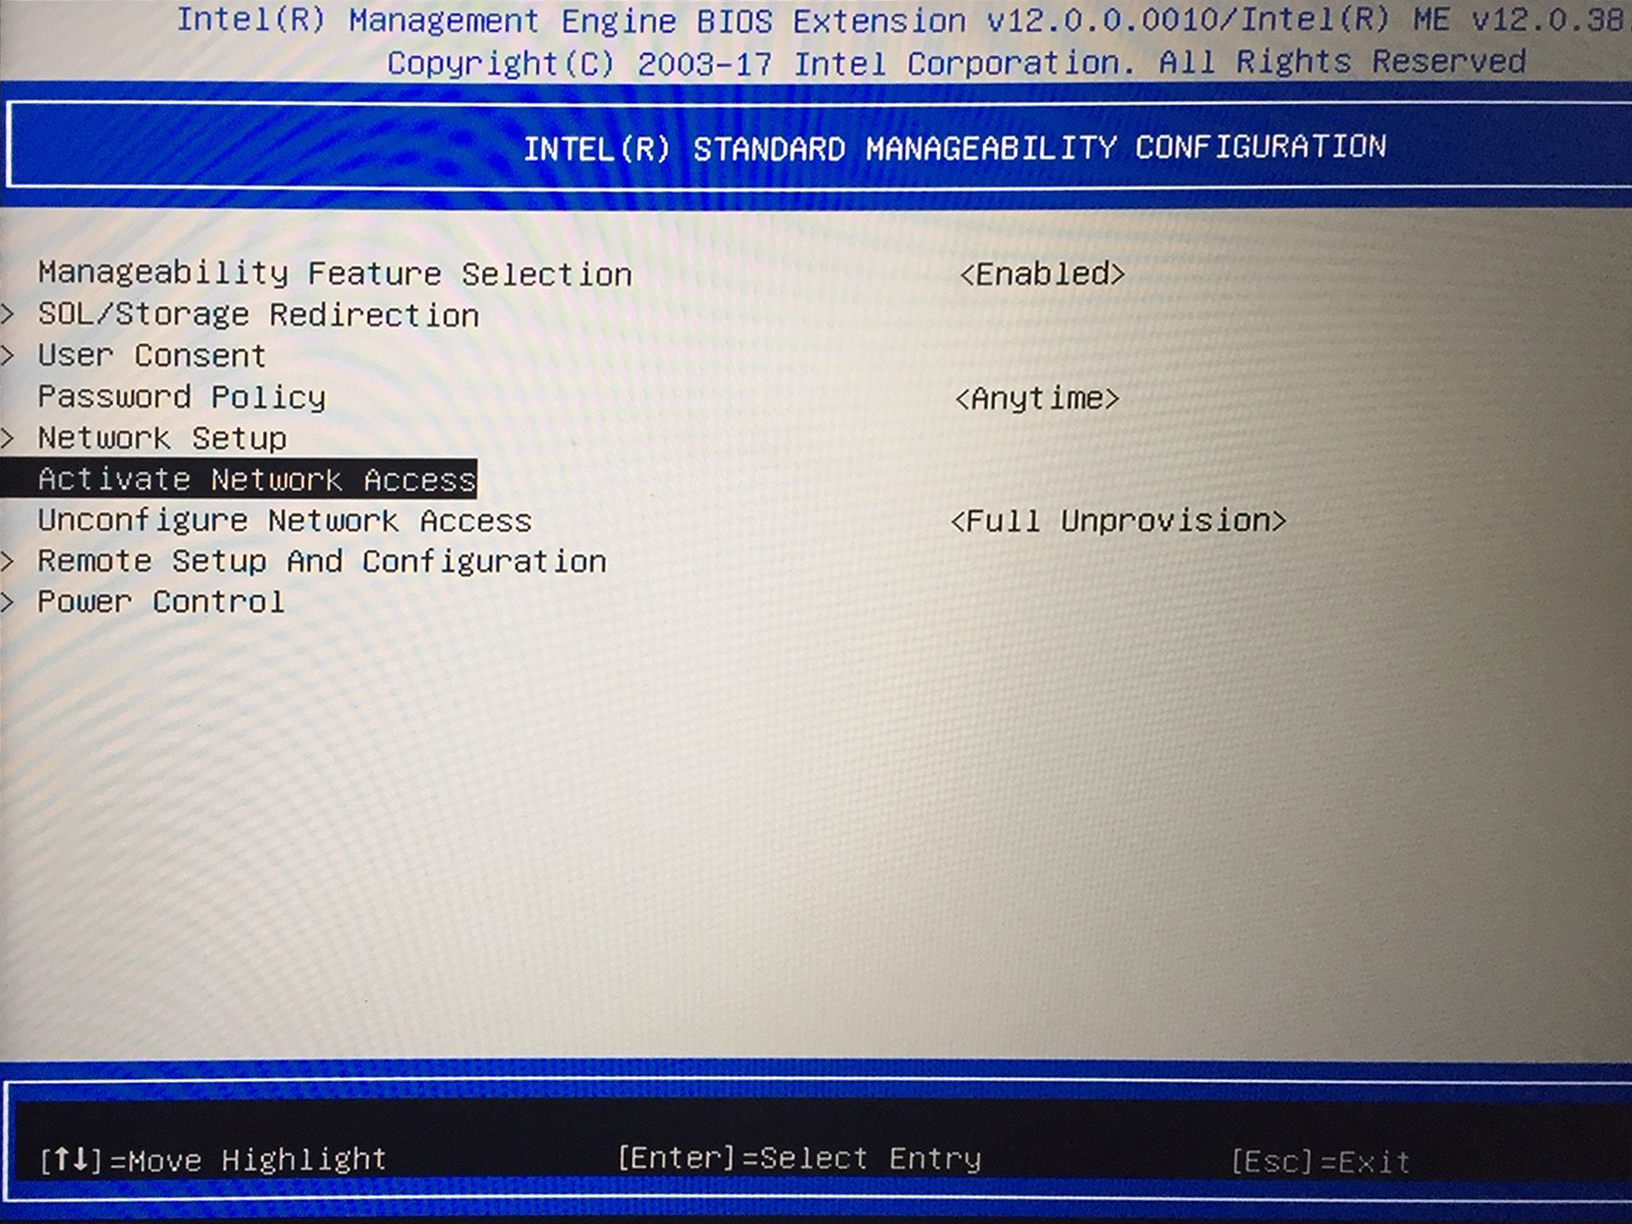
- Enter Yes to activate the network interface.
- Press [ESC]>>[ESC]>>[Y] to exit the Intel(R) Management Engine BIOS Extension and reboot the system.
- The terminal should now be accessible using its IP address.
