Configuring a RAID system in BIOS (CX7ii)
To configure a RAID system in BIOS, perform the following steps:
- Install the primary and secondary SSD in the terminal.
- Connect an alphanumeric USB keyboard to the terminal.
- Apply power to the terminal and reboot.
- When the NCR logo is displayed, press [Esc].
- Navigate to Device Management → Intel® Rapid Storage Technology.Note
If a RAID volume exists, delete the existing RAID volume. For more information, refer to Deleting a RAID volume in BIOS (CX7ii).
- Both disks should be recognized in the Intel(R) RST screen.
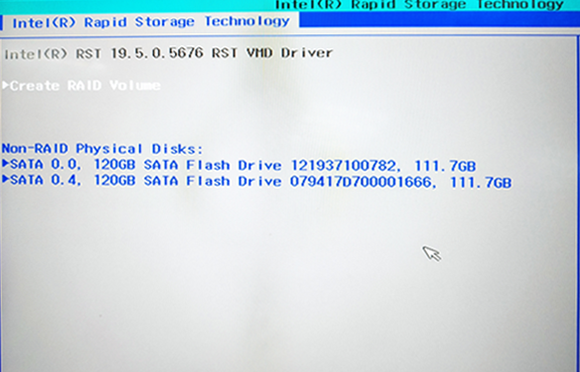
- Select Create RAID Volume. The Create RAID Volume screen is displayed.
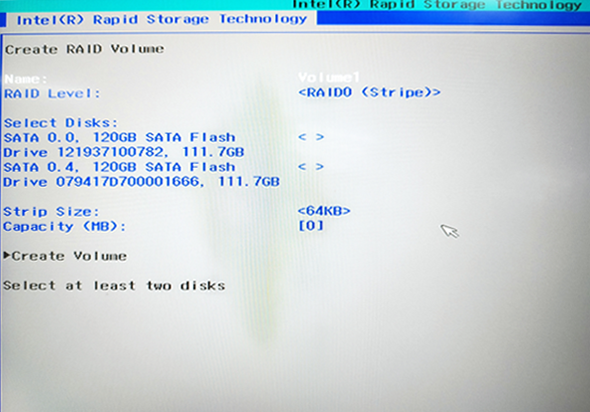
- Do the following:
- Select a RAID Level.
- RAID 0: Combines two disks to create a volume where data is broken down into strips that are distributed across both disks.
- RAID 1: Combines two disks to create a volume where each disk stores an exact copy of the data and provides real-time redundancy.
- For Select Disks, select the two disks. Selected disks are marked [X].
- Enter a Volume Name (user preference).
- Enter the following:
- Strip Size—This option is only available for RAID 0 (Stripe) RAID Level.
- Capacity (MB)—It is recommended to use the default value.
- Select a RAID Level.
- Select Create Volume.
- Once completed, the created RAID volume will be displayed in the Intel(R) RST screen.
- Press [F10] to save.
- Press [Esc] to exit.
- Press [Ctrl]+[Alt]+[Del] to reboot.
- Load the NCR Gold image.
