Installation Procedures
Step 1: Mounting the AT&T StarLAN Hub
Note: Note: Follow the manufacturer’s mounting instructions if you are using another type of hub.
At&T StarLAN:Hub
Decide where to mount the hub units.
|
•
|
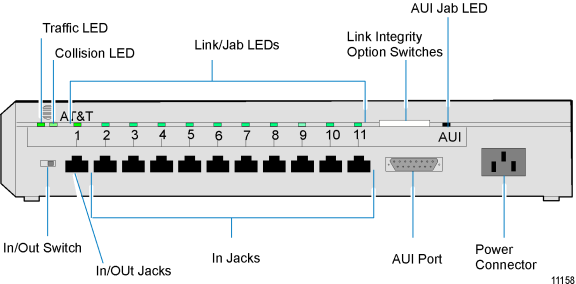
The hub (Figure 3-3) must be physically protected but accessible for maintenance. This is especially important to remember, since hubs may be positioned in a variety of locations within a store. Wall closets, shelves or under check stands are just a few of the more common locations. |
|
•
|
The distance from the hub to the AC power source cannot be more than: |
|
•
|
3.0 m (10 ft) (international) |
|
•
|
You can place a hub on a level surface or mount it on a wall. |
|
•
|
Provide 12 cm (5 in.) of clearance between the top of the hub and any object positioned above it. |
Mounting the Hub Unit on a Wall
The following hardware is included in the hub kit for mounting the hub to a wall:
|
•
|
Metal pan head screws suitable for holes drilled with either a 3.175 mm (0.125 in.) bit for mounting into wood or a 4.76 mm (0.1875 in.) bit for mounting into wallboard |
|
•
|
A UL/CSA listed SJT-type power cable for connecting the hub's internal power supply to commercial power |
|
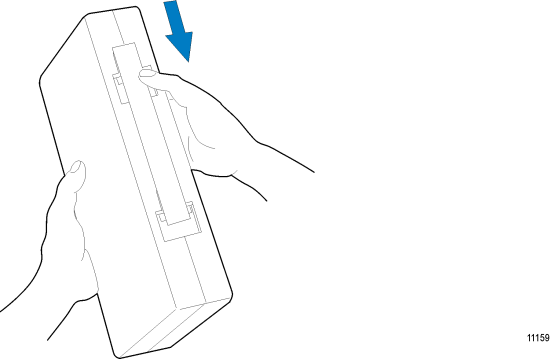
1.
|
Remove the mounting bracket from the hub |
|
2.
|
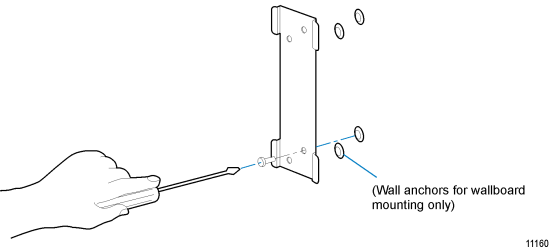
Position the bracket on the wall, and carefully mark the location for each screw hole. |
|
3.
|
Drill the holes with a 3.175 mm (0.125 in.) drill bit for mounting in wood, or a 4.76 mm (0.1875 in.) drill bit for mounting in wall board. If you are mounting the hub on wallboard, use wall anchors. |
|
4.
|
Position the bracket and insert the screws through the appropriate holes in the frame. Then screw the frame onto the wall. |
|
5.
|
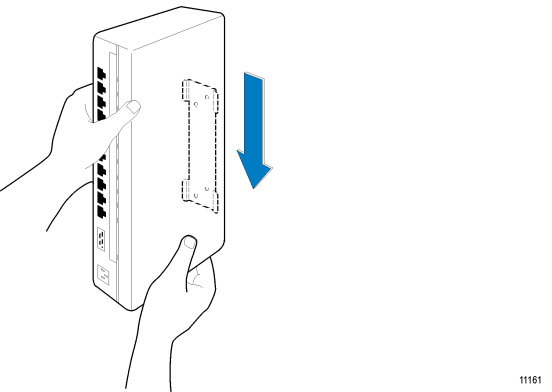
Place the hub firmly against the wall so that the mounting bracket fits into the slots on the back of the hub. |
|
6.
|
Slide the hub onto the bracket until it locks into place. |