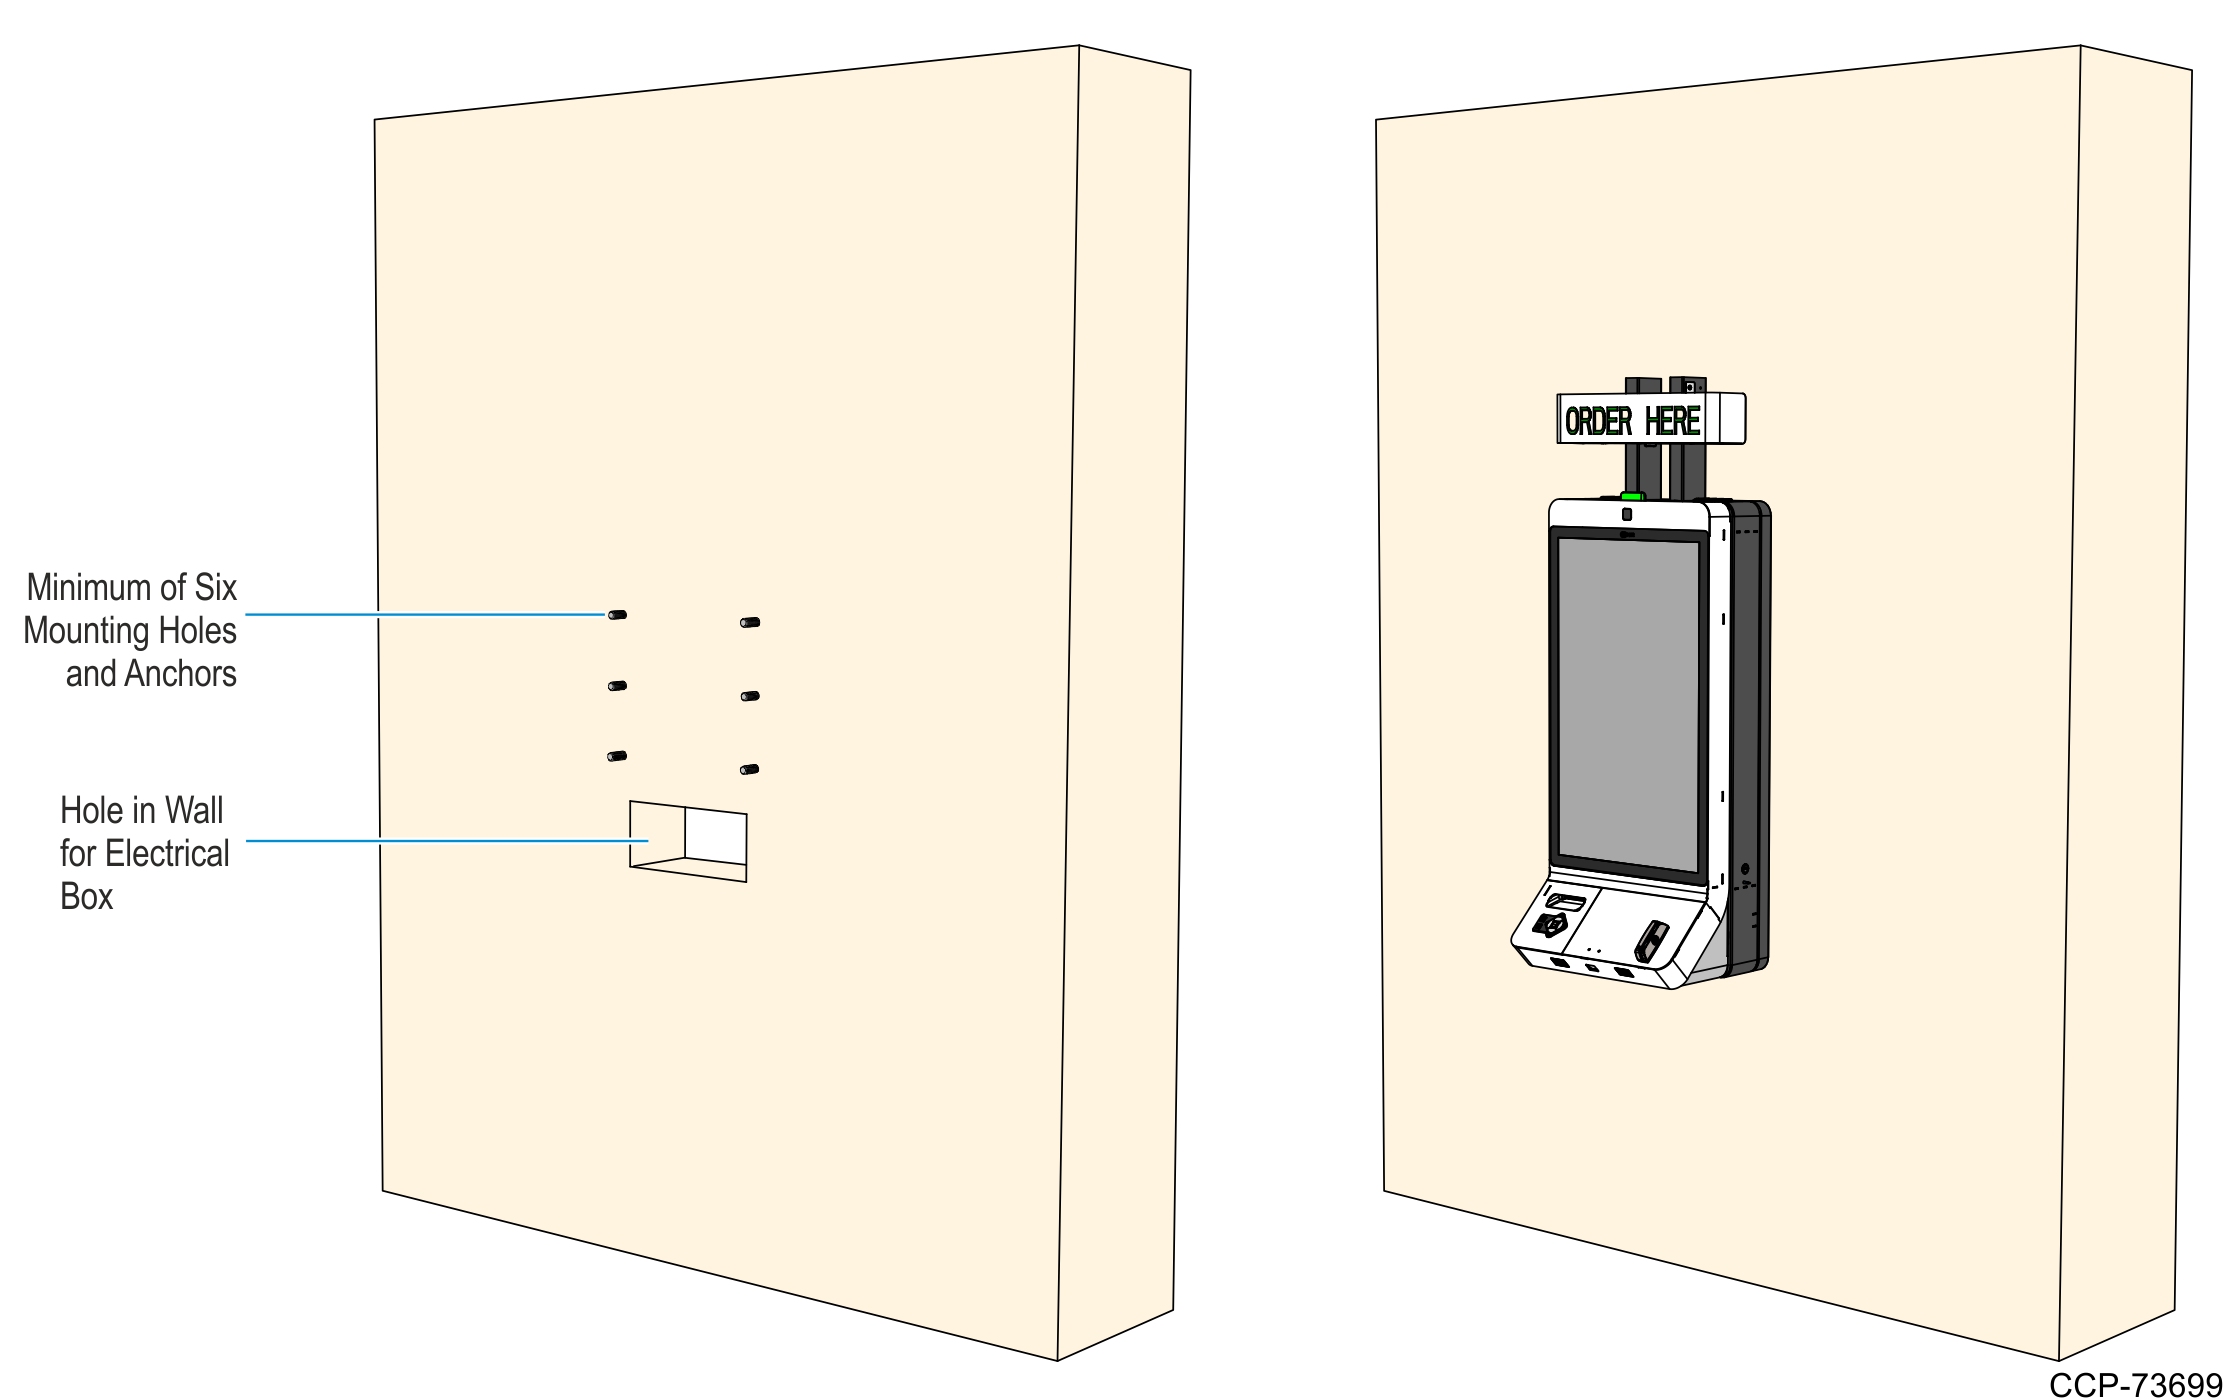
Concrete Wall Installation
For a concrete wall installation of the wall mount kiosk, NCR recommends to use a minimum of six M10 anchors and nuts to secure the kiosk to the wall.
The wall must be prepared, mounting holes drilled, and anchors installed before installation of the kiosk. It is the responsibility of the owning institution to provide the nuts and anchors for the kiosk.
To install the kiosk to a dry wall, perform the following steps:
1.Install the Wall Bracket to the wall, see To install the Wall Bracket, perform the following steps:.
2.Install the Main Frame, see Due to its weight, installation of the Main Frame requires at least two persons..
3.Install the Top Poles, see Installing the Top Poles.
4.Install the Signage, see Installing the Signage.
5.Install the Door Assembly, see Installing the Door Assembly.
6.Install the Display, see Installing the Display.
7.Install the Printer, see Installing the Printer.
8.If required, install the PIN Pad terminals, see Installing PIN Pad Terminals.
9.Route the Internal Cables, see Routing and Connecting Internal Cables.
10.Connect the External AC Power Cord and LAN Cable, see Routing the AC Power Cord and LAN Cable.
11.Verify if kiosk installation and cable routing are correct, see Verifying Kiosk Installation and Cable Routing.
12.Turn ON the kiosk, see Turning ON the Kiosk.
13.Load the printer with a Paper Roll, see Loading Printer Paper Roll.