Installing DIP Reader
To install the DIP Reader, follow these steps:
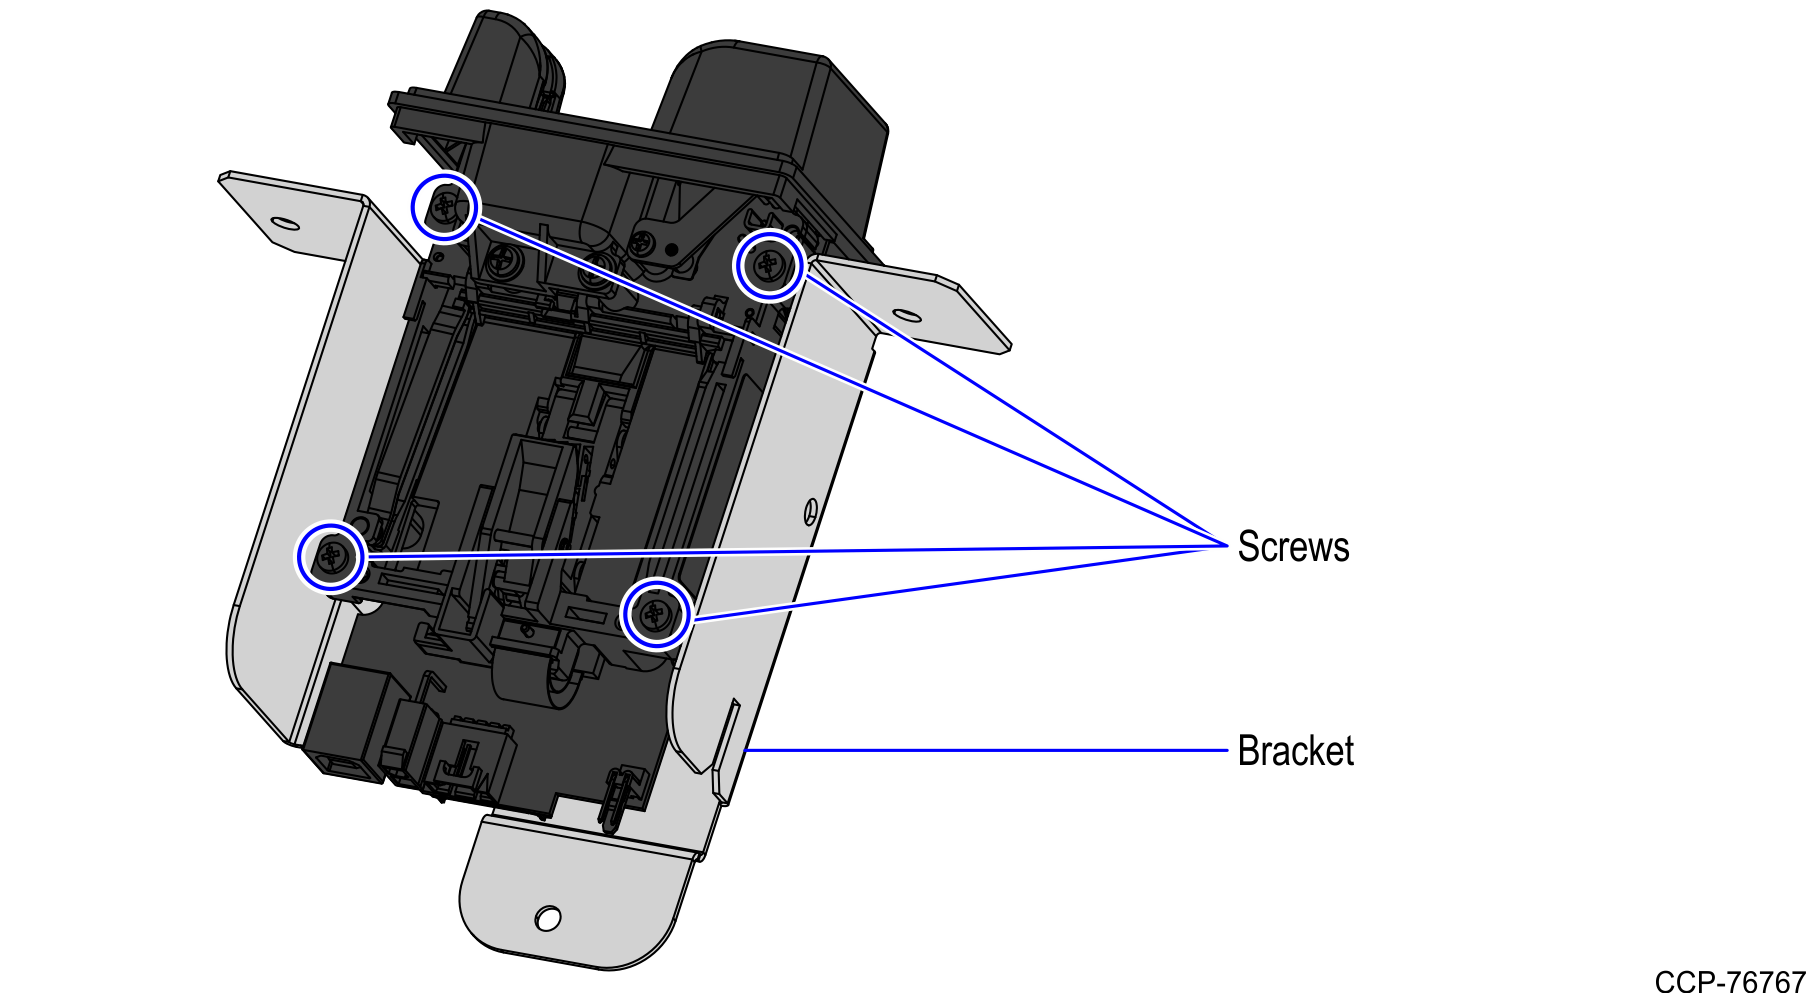
1.Secure the DIP Reader to the mounting bracket using four (4) screws, as shown in the image below.
Caution: To avoid causing damage to the device, do not overtighten the screws.
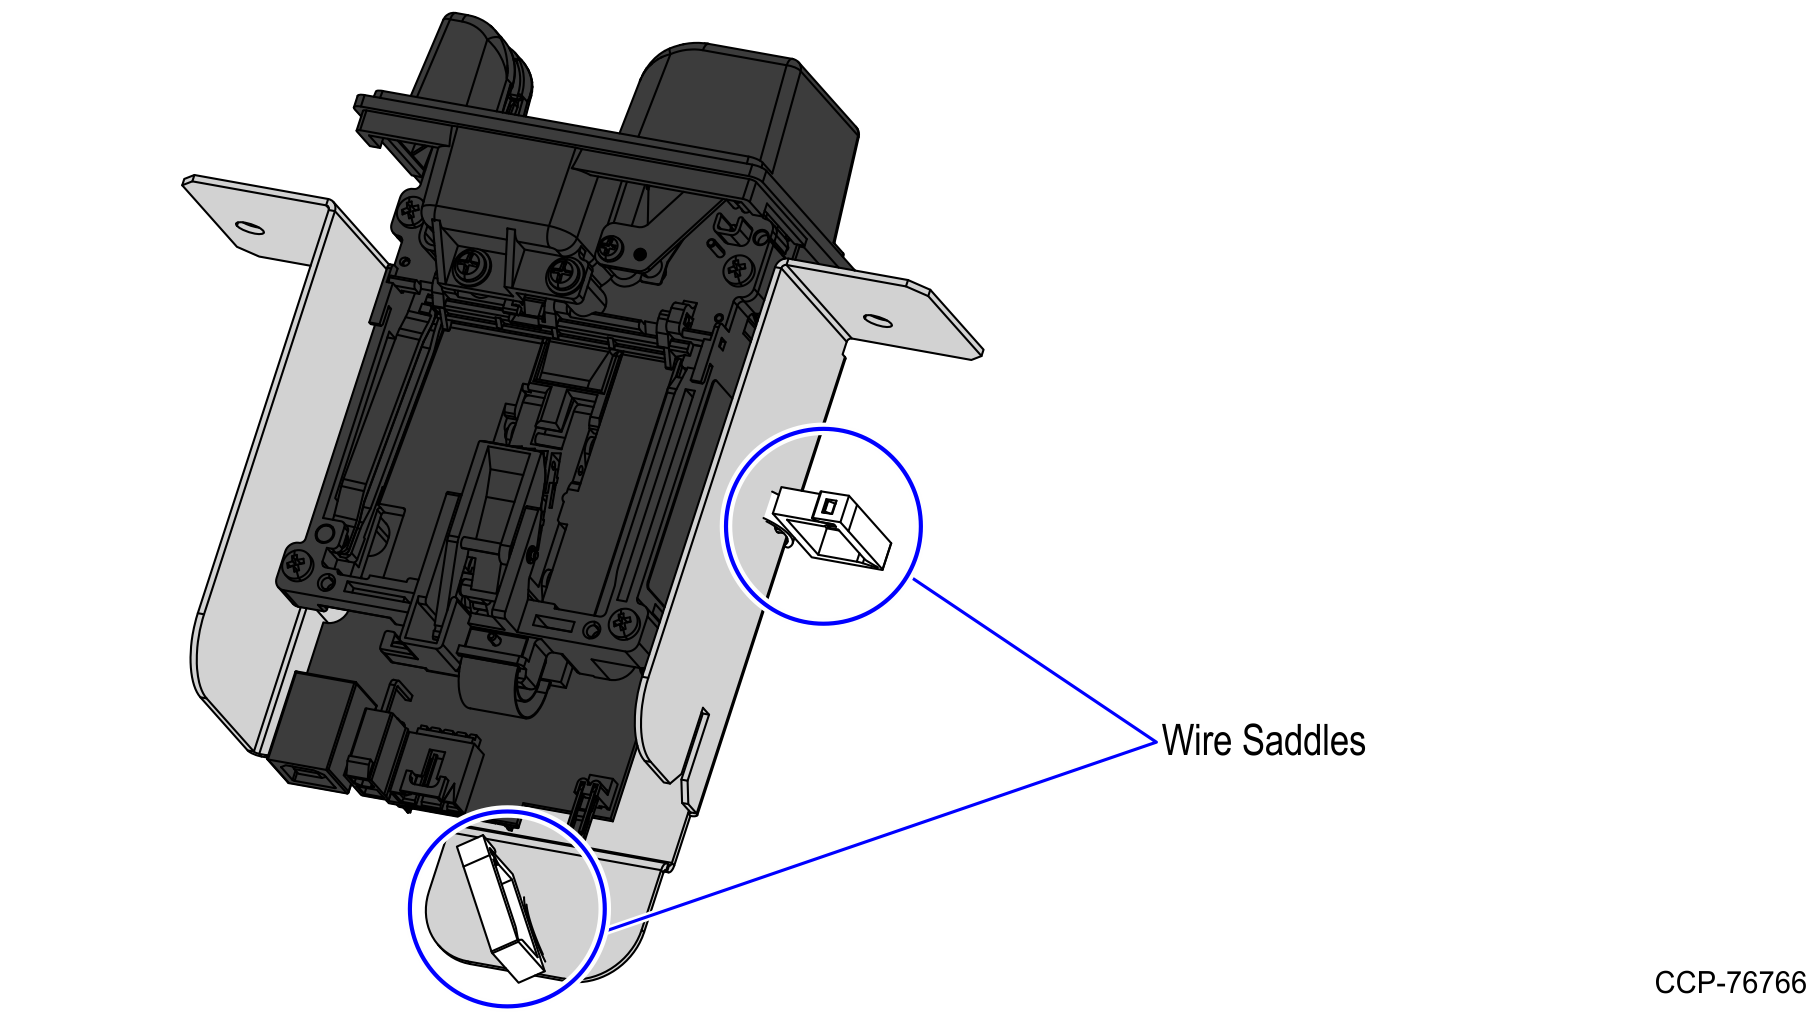
2.Insert the two (2) plastic wire saddles into the slots on the bracket, as shown in the image below.
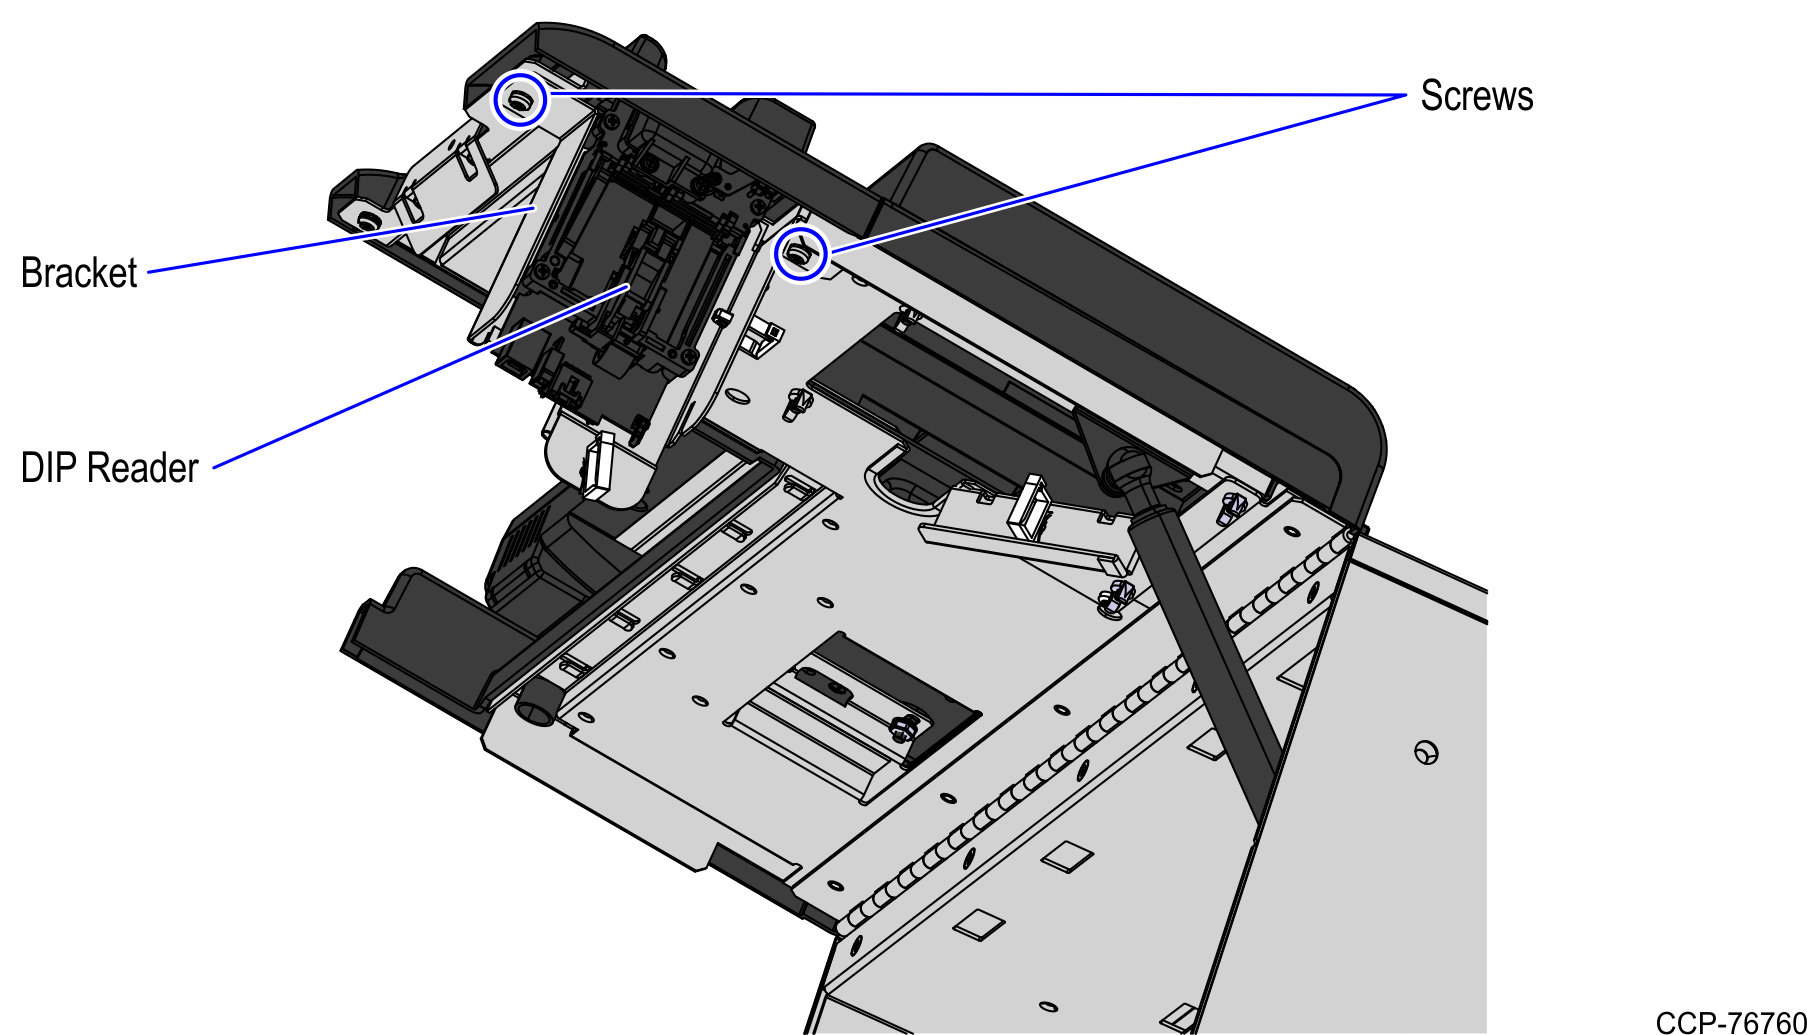
3. Position the DIP Reader on its proper orientation by ensuring that the LED Indicator is located on the upper part of the assembly, as shown in the image below.

4.Secure the DIP Reader assembly onto the Upper Cabinet Door cutout using two (2) screws.
Note: Reuse the remaining two (2) screws that were set aside during removal procedure.
Caution: To avoid shutter malfunction, do not overtighten the screws.
5.Verify that the shutter door moves freely and closes properly.
6.Route the cables. For more information, refer to Routing DIP Reader Cables.