Routing DIP Reader Cables
To route the DIP Reader cables, follow these steps:
Note: Ensure that the Scanner/Scale is removed before routing the DIP Reader cables. For more information, refer to Removing Scanner/Scale.
1.Install the DIP Reader, if necessary. For more information, refer to Installing DIP Reader.
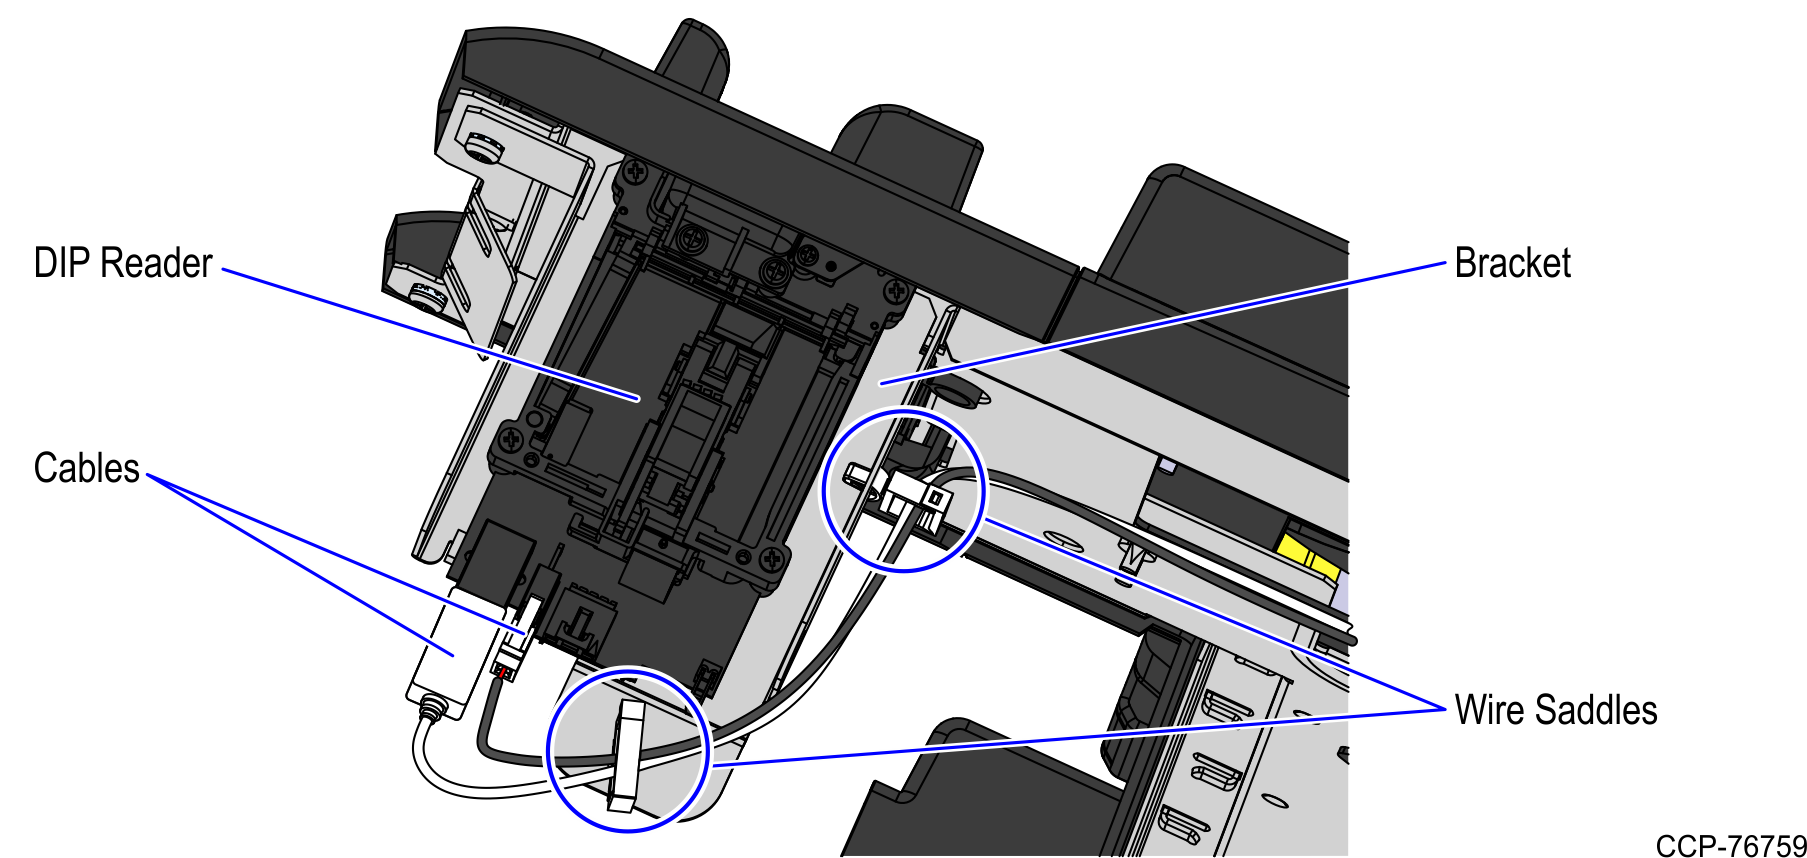
2.Secure the cables on the device by doing the following:
a.Connect the USB and power cables to the DIP Reader.
b.Route the cables through the plastic wire saddles on the bracket.
3.Tilt the E-Box Bracket forward to easily access the cables.
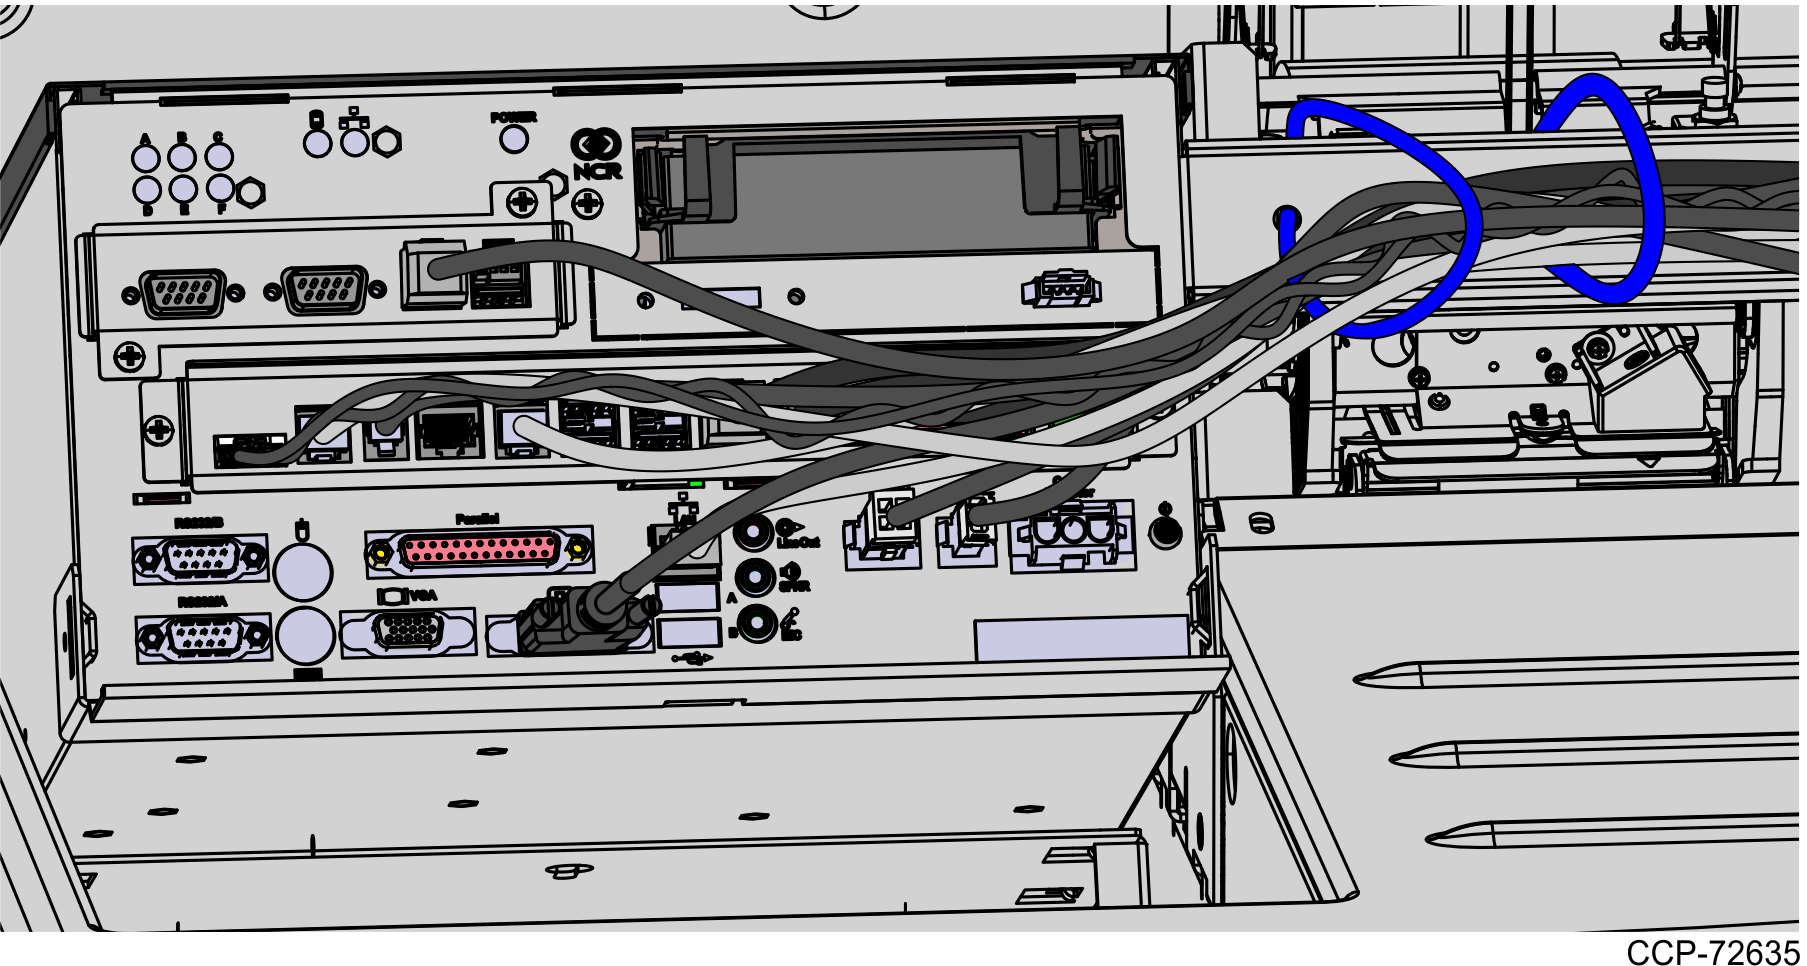
4.Secure the power cable to the main cable bundle using six (6) cable ties, as shown in the image below.
Note: Ensure that the cables are not caught by the rotation of the E-Box.
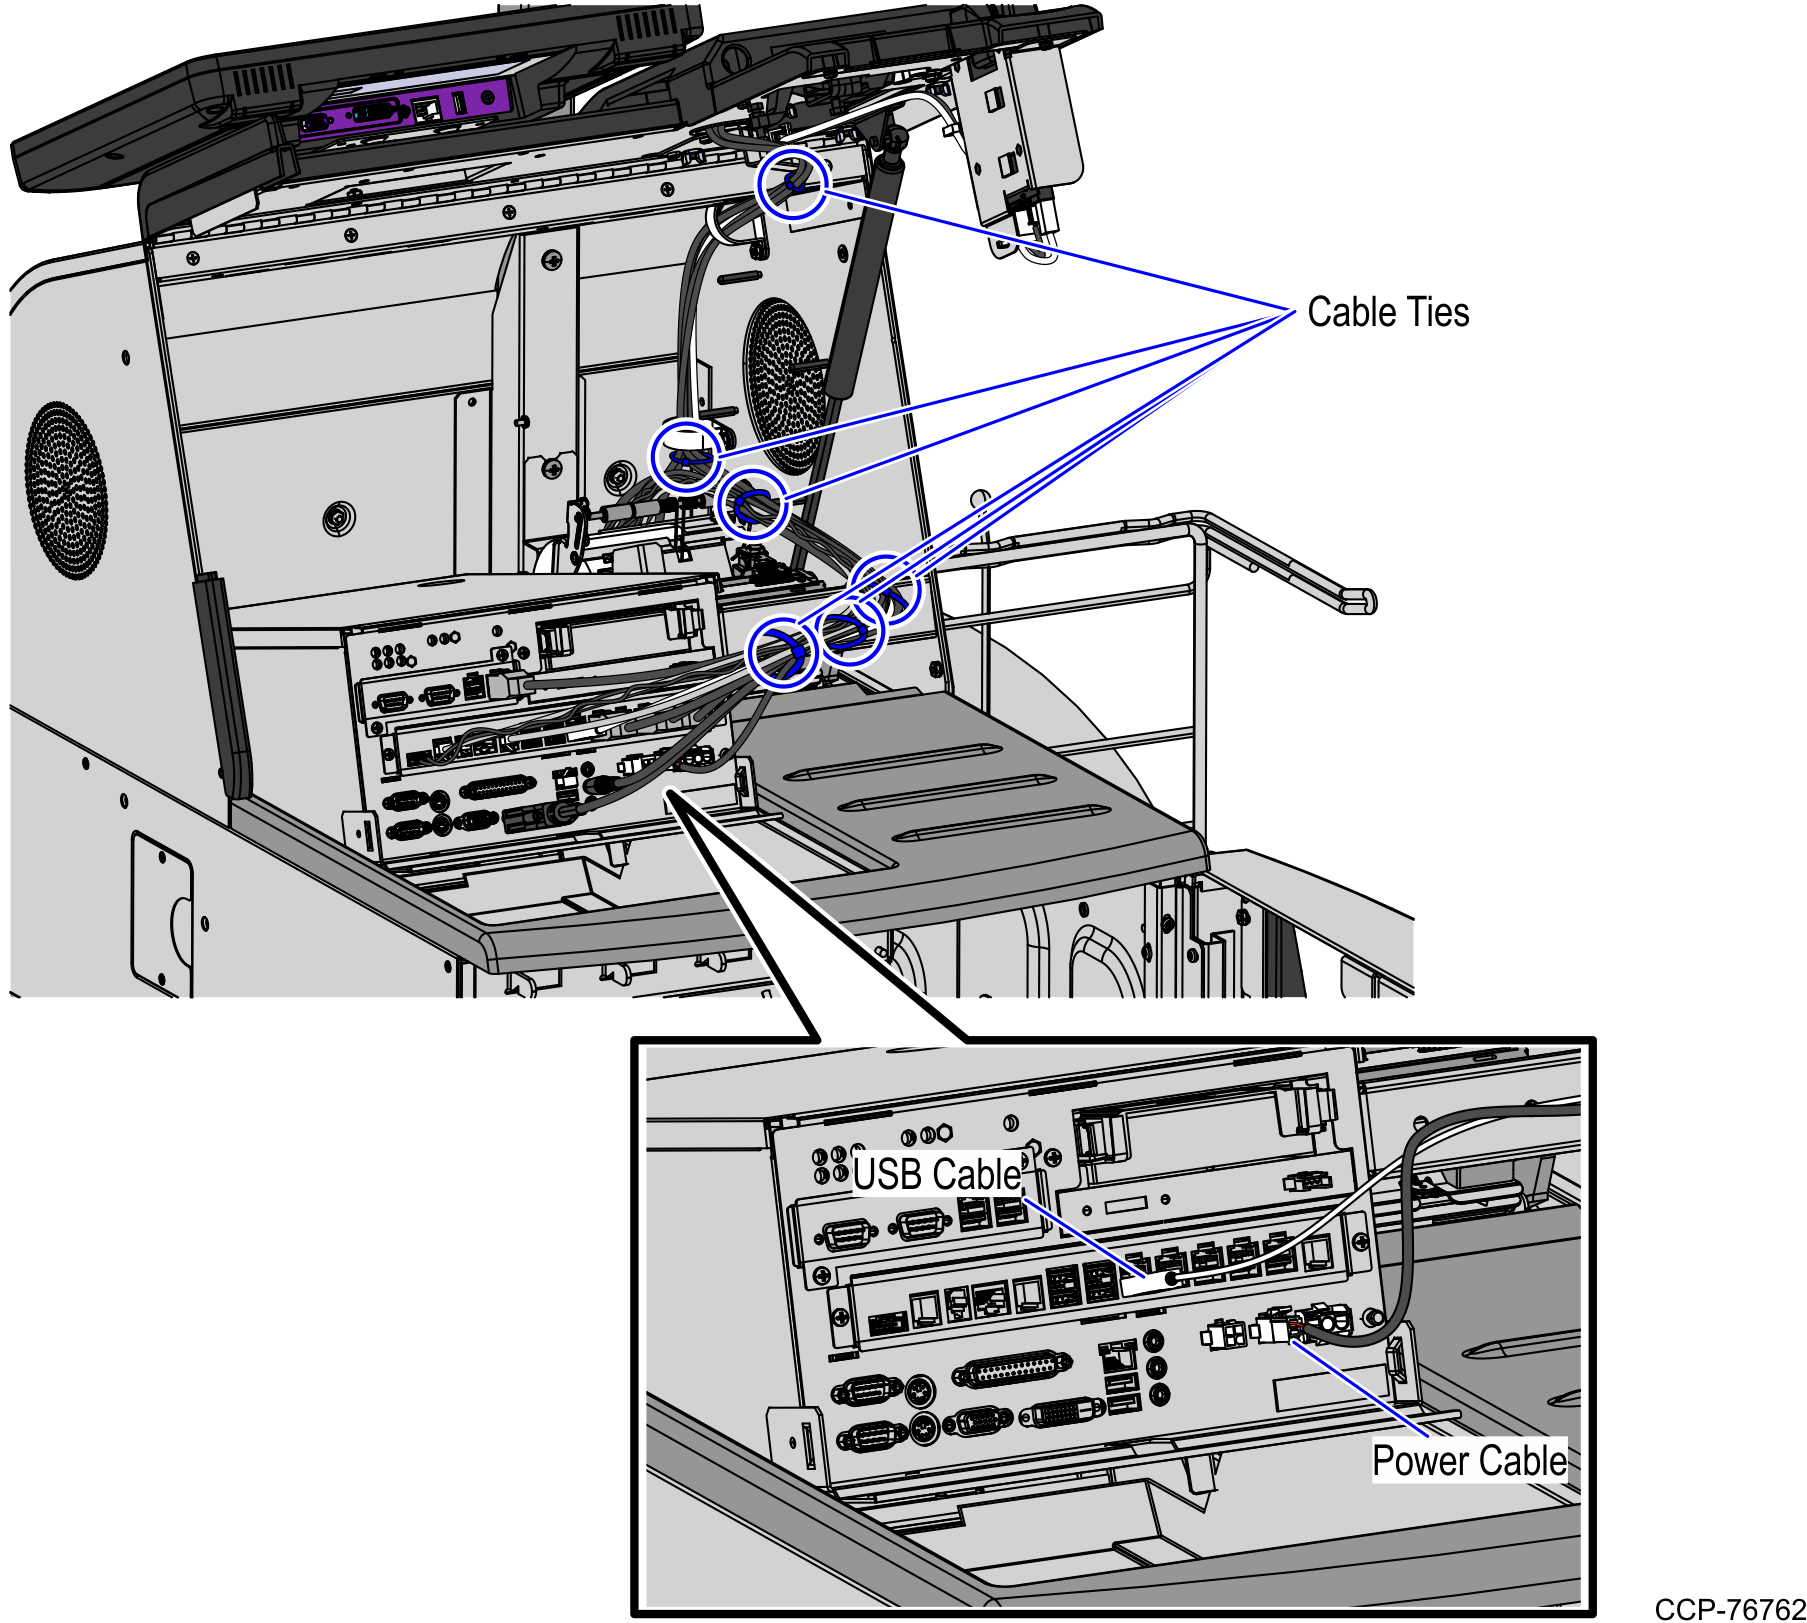
5.Connect the cables to the following destinations:
|
DIP Reader |
Destination |
|---|---|
|
USB Cable |
E-Box (USB G) |
|
Power Cable |
E-Box (2-pin +12 V port) |
Note: If the unit is equipped with a system fan, ensure that the Power connector is plugged into the free end of the Y-cable on the same port.