Installing the Scanner/Scale
To install the Scanner/Scale, follow these steps:
Note: For the purpose of illustration only, this procedure shows images using an NCR SelfServ™ Checkout (7350) R6 Lite unit. An NCR SelfServ™ Checkout (7350) R6 Lite unit uses RealScan 79e Scanner/Scale while an NCR SelfServ™ Checkout (7350) uses RealScan 78 Scanner/Scale. For more information on installing RealScan 78 Scanner/Scale, refer to
1.Turn off the NCR SelfServ Checkout software and hardware systems. For more information, refer to the following sections:
•Turning Off the Software System.
•Turning Off the Hardware System .
2.Open the Upper Cabinet Door. For more information, refer to Opening Upper Cabinet Door.
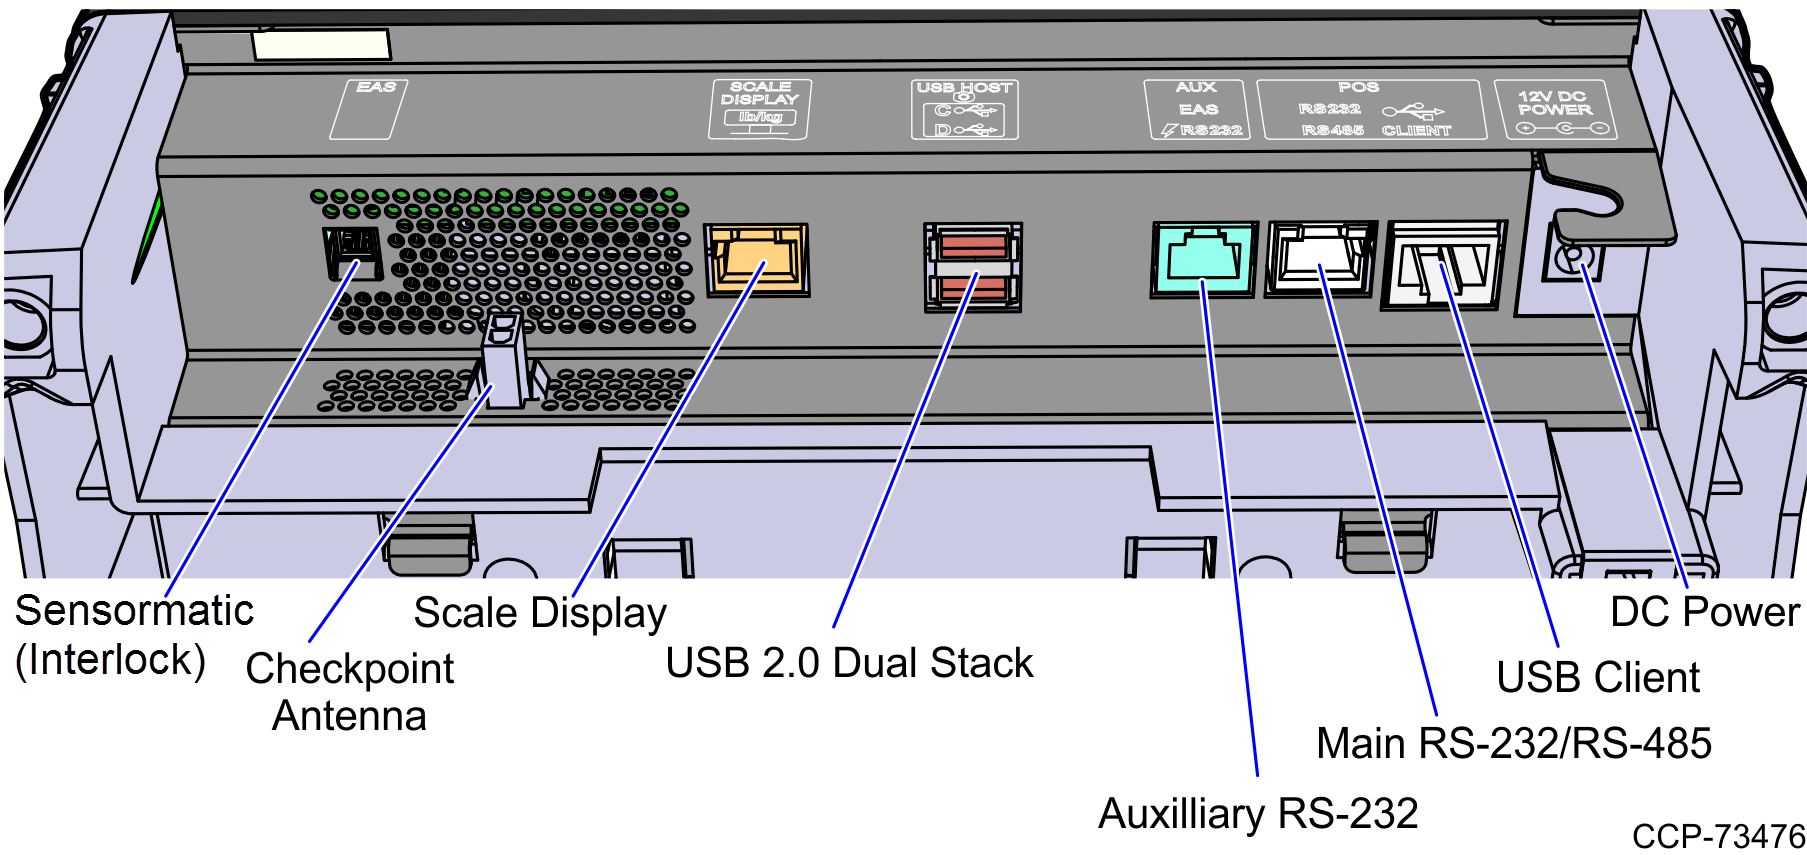
3.Connect the scanner cable to the "USB Client" port.
Note: To streamline the installation procedure, install the Sensormatic® components before installing the Scanner/Scale in the SelfServ Checkout unit.
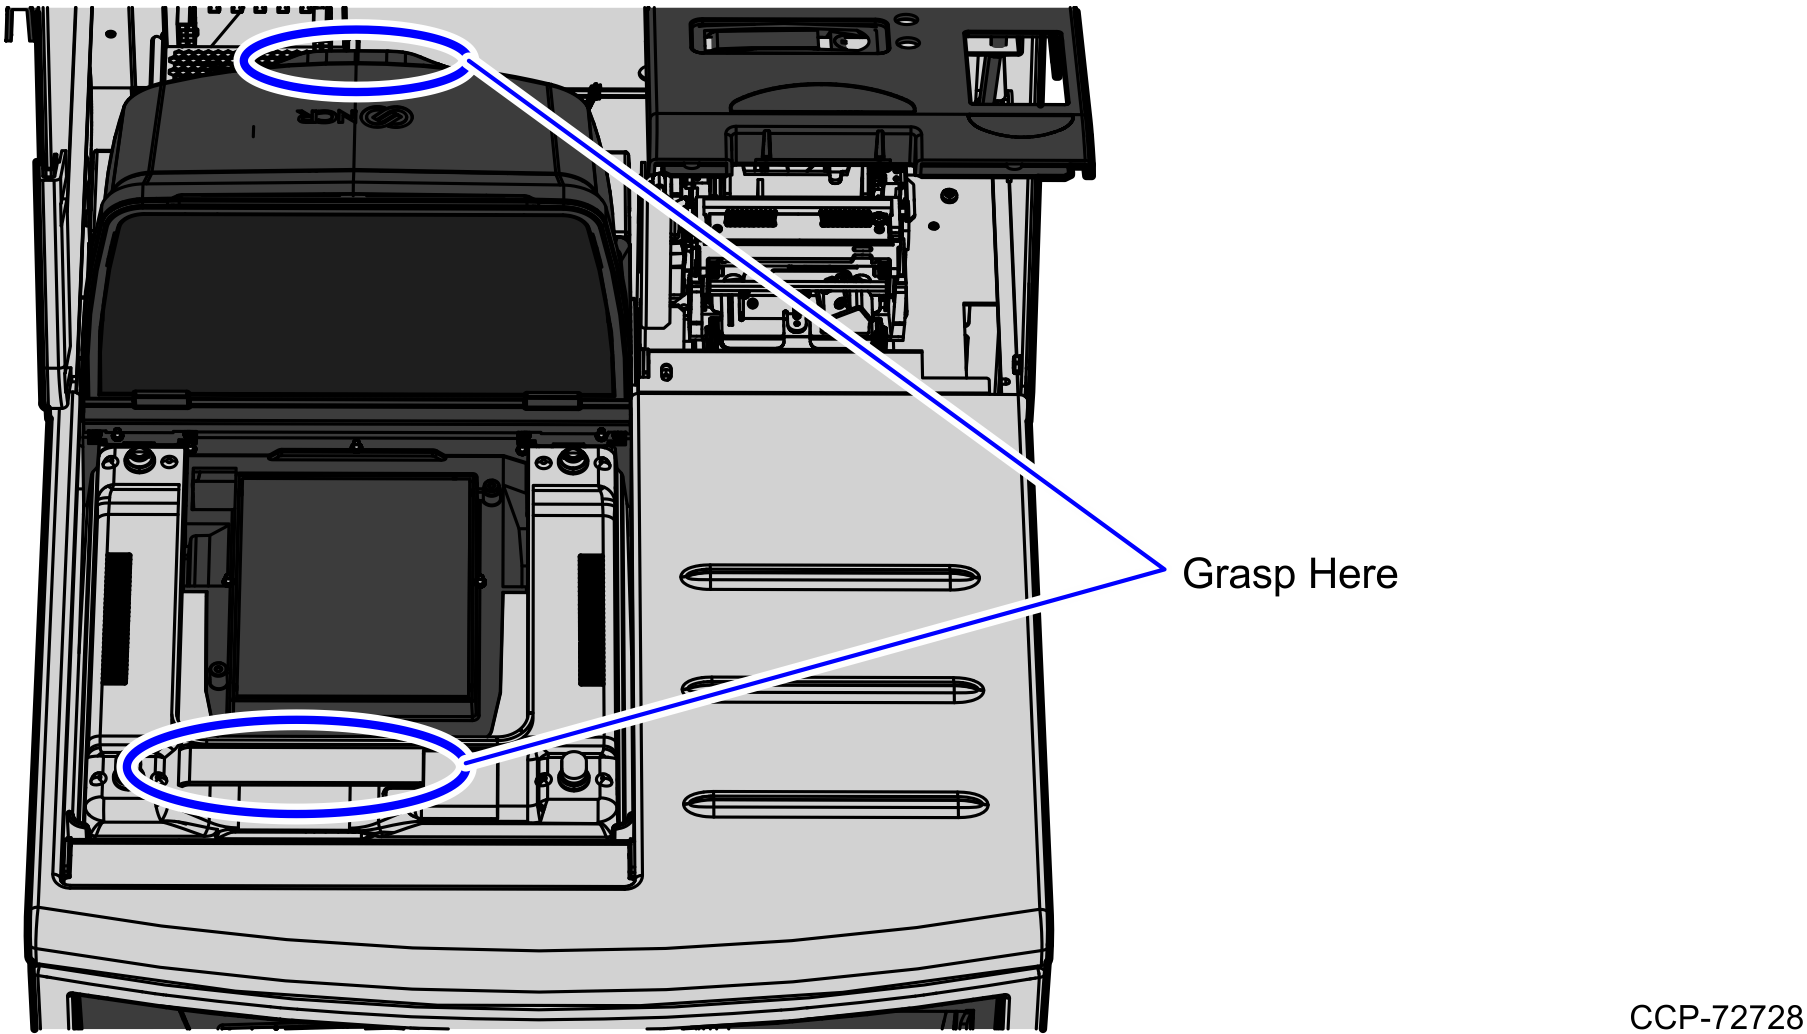
4.Place the Scanner/Scale on the scanner bucket.
5.Lower the Scale Plate.
6.Close the Upper Cabinet Door.
Note: The Scanner/Scale must be calibrated before the system goes live.