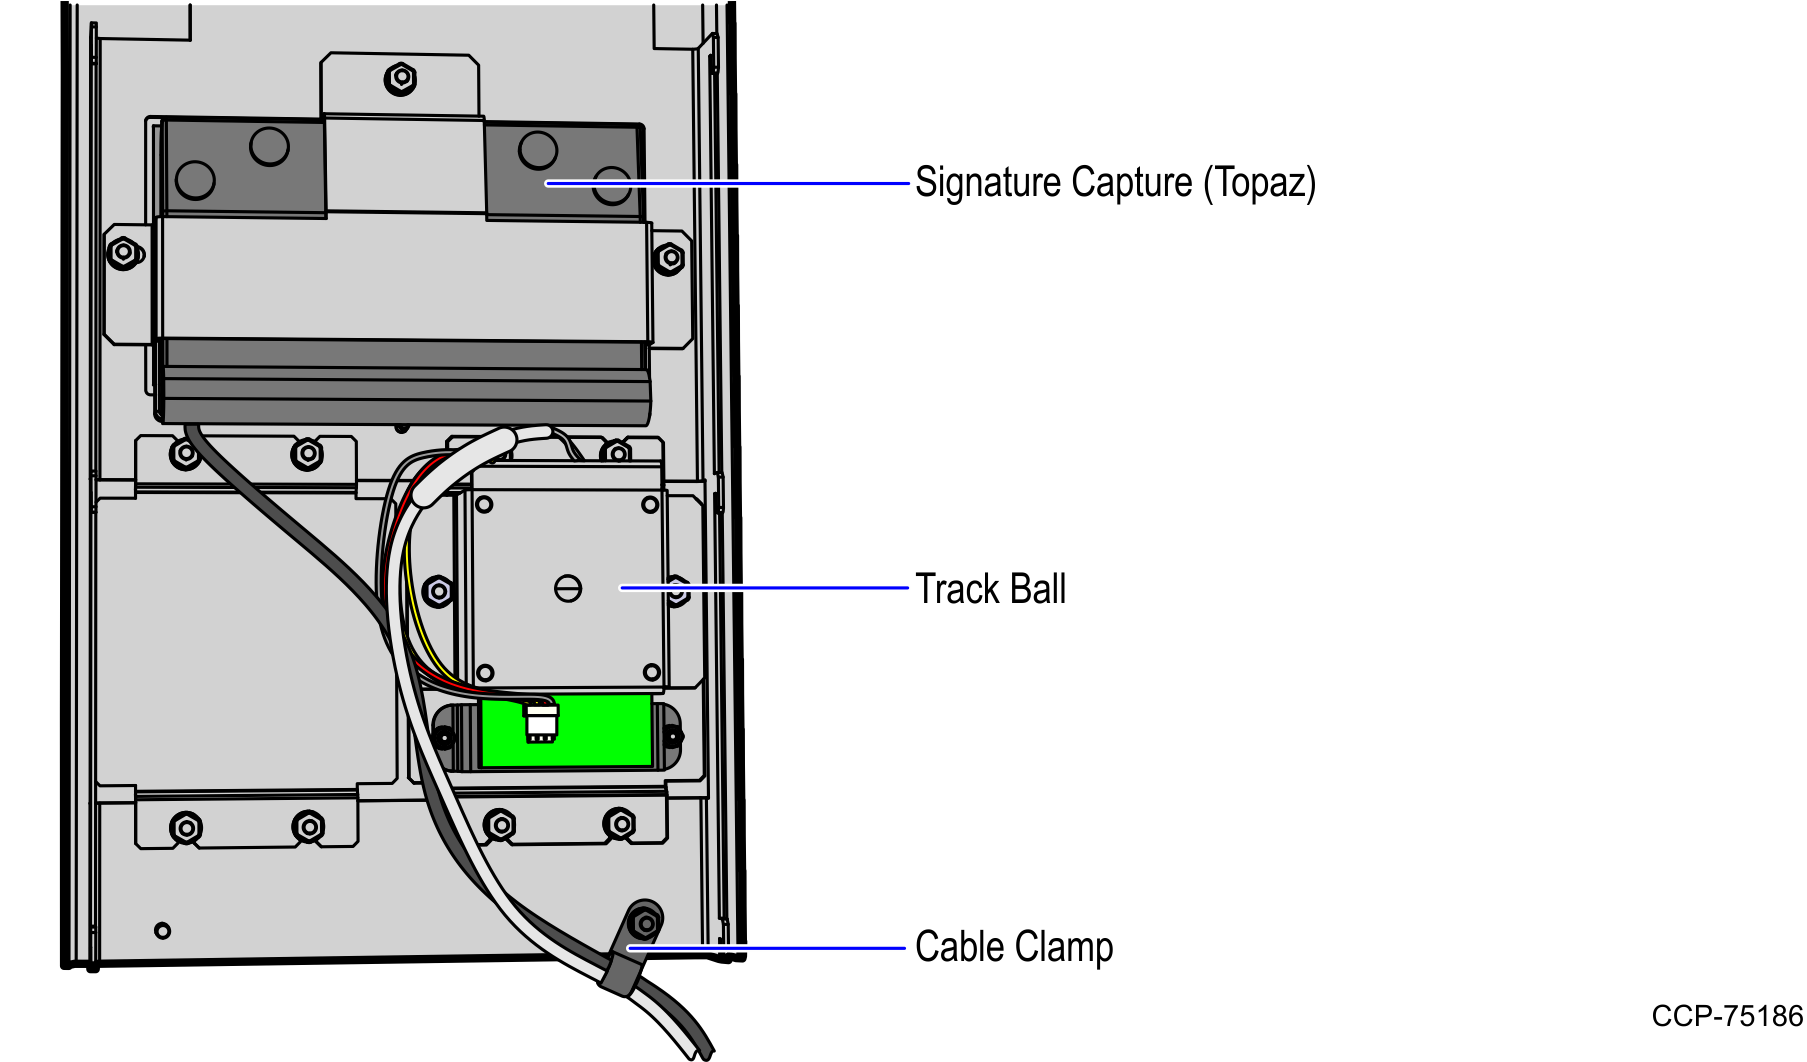
Installing Trackball Assembly
Installing Trackball
To install the Trackball Assembly, follow these steps:
1.Assemble the Trackball device. For more information, refer to Assembling Trackball.
2.Secure the Trackball and Button Assembly to the Top Plate using four (4) nuts.
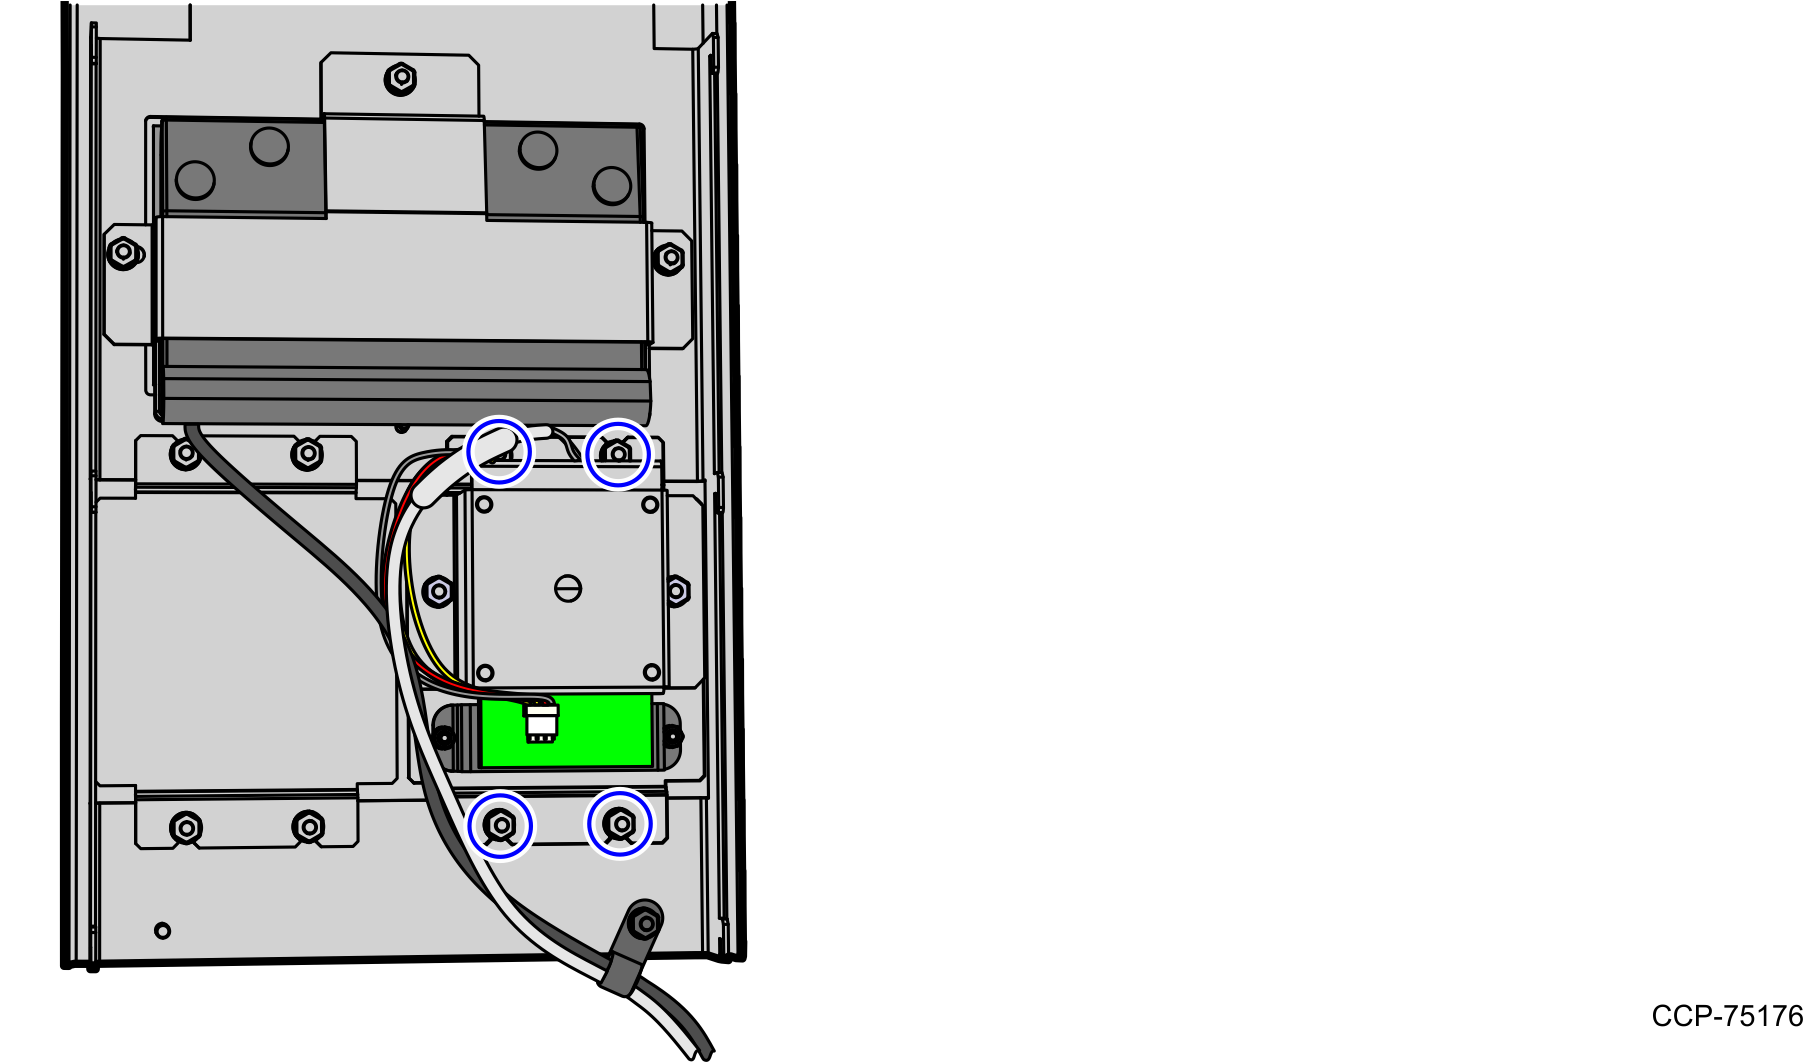
3. Attach the grounding lug (black wire) from USB cable to one of the rear most studs where the Trackball and Button Assembly is mounted, as shown in the image below.
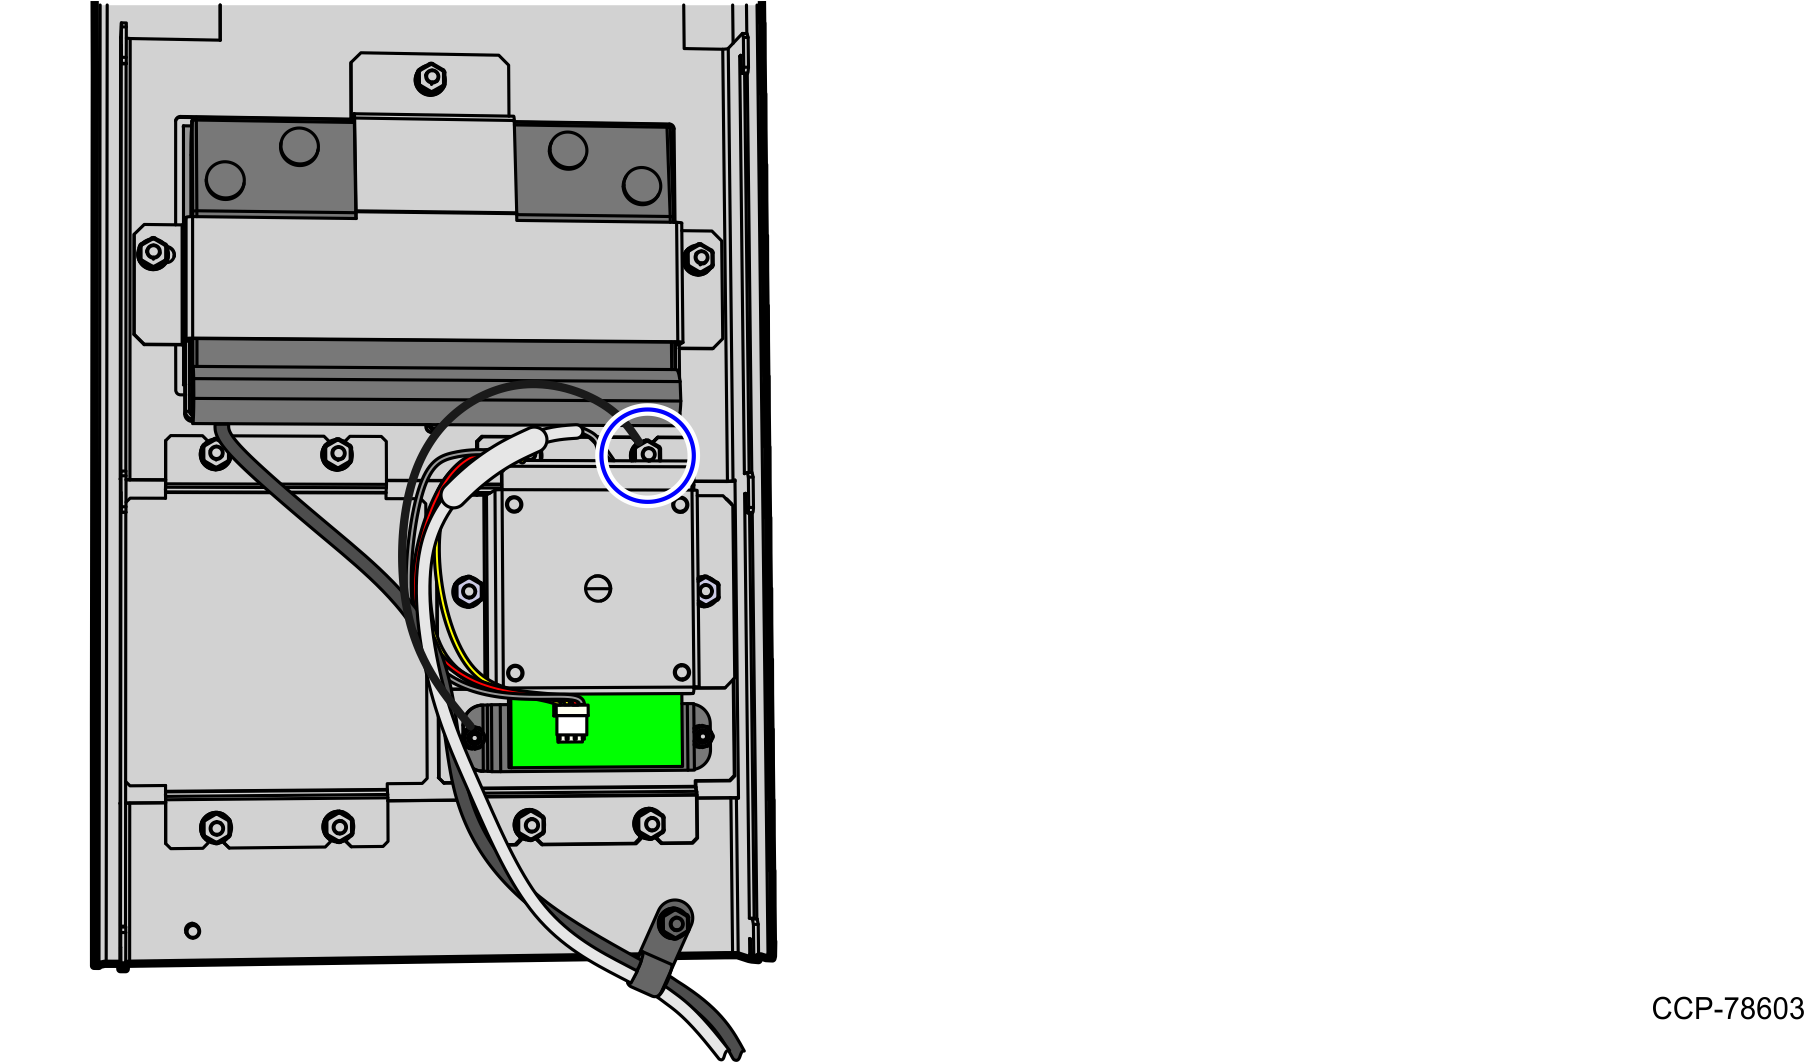
4.Route the cable to the bottom of the Top Plate using a small cable clamp and secure to the stud using one (1) nut as shown in the image below.
5.Install the Top Plate on the SelfServ Checkout core using four (4) nuts, as shown in the image below.

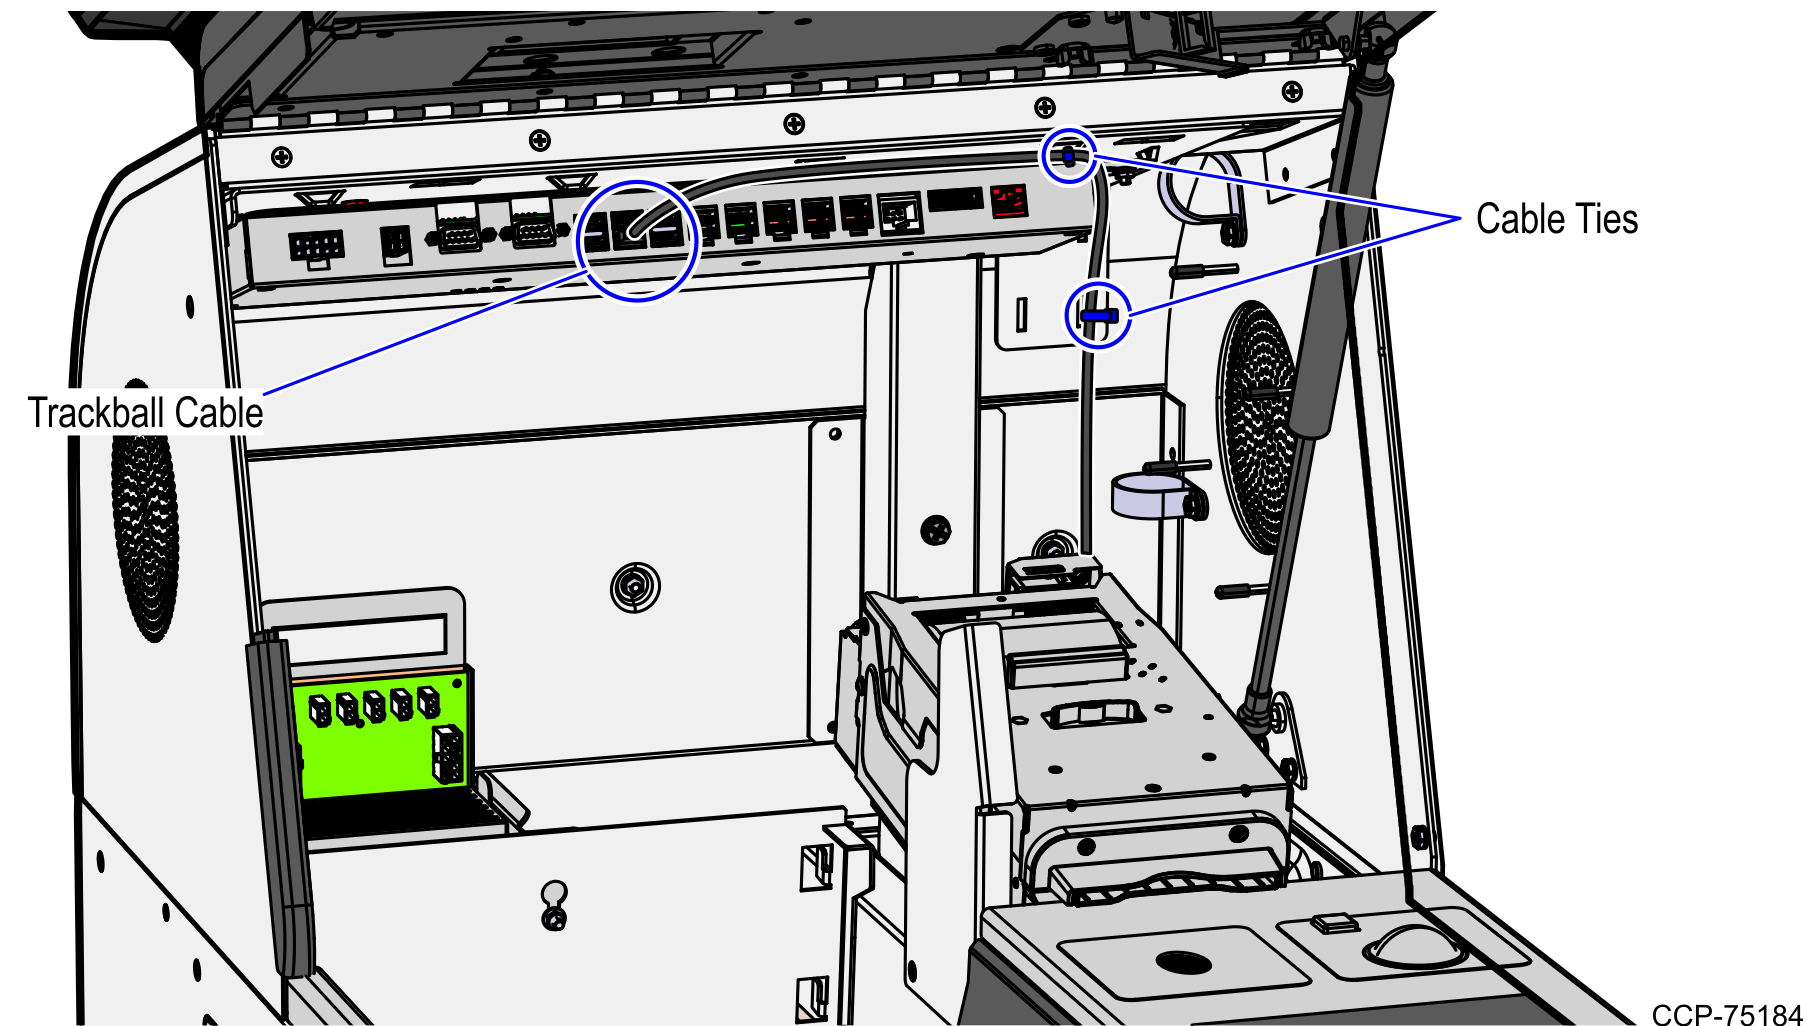
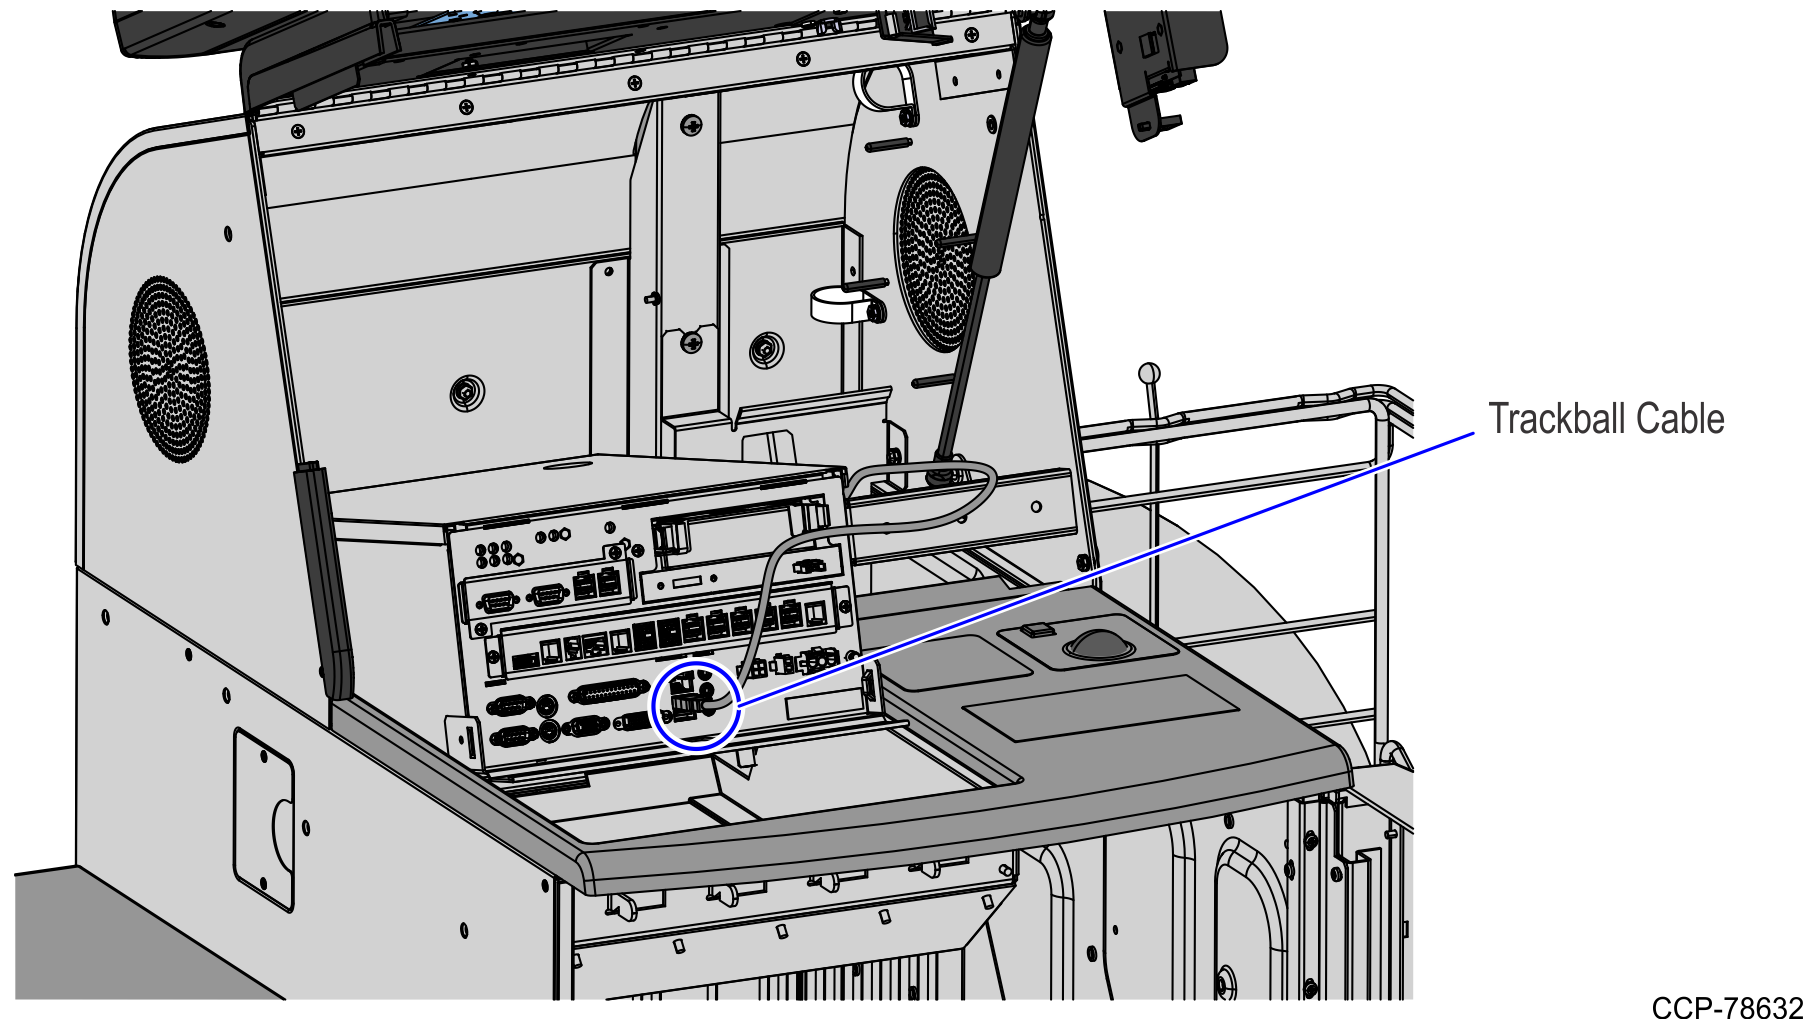
6.Depending on the SelfServ Checkout unit, route the Trackball cable up and over to the I/O Box
Note: Secure the cable using cable ties as shown in the image above. Ensure that there is enough cable slack to avoid cables from being stretched during installation or removal procedures.
7350 R6 Lite Unit (I/O Box Cable Connection)
7350 Unit (E-Box Cable Connection)
7.Close and lock the Security Door.
8.Turn on the SelfServ Checkout unit. The ADD/CADD window is displayed, showing available devices.
Note: The NCR FastLane SelfServ™ Checkout application automatically runs and installs all available devices. If the new or replaced device is not listed in the ADD/CADD window, an error message is displayed. Follow the instructions on how to fix the error and then, restart the SelfServ Checkout system.